
User Manual
Page 1
Digital HD Video Camera Recorder Operating Guide HDR-SR5E/SR7E/SR8E 3-210-379-11(1) For details on the advanced operations, please refer to "Handycam Handbook" (PDF). © 2007 Sony Corporation
Digital HD Video Camera Recorder Operating Guide HDR-SR5E/SR7E/SR8E 3-210-379-11(1) For details on the advanced operations, please refer to "Handycam Handbook" (PDF). © 2007 Sony Corporation

User Manual
Page 3
...hard disk completely. Note on using a digital still camera, and therefore may appear different from the actual images of the viewfinder (HDR-SR7E/SR8E) and the LCD screen. • Unless otherwise specially indicated, illustrations in this case, an indicator appears in each local language..., it is more than 3,000 meters (9,800 feet). • When connecting your camcorder to another device with communication cables, be sure to "Handycam Handbook" (PDF) and "Picture Motion Browser Guide." 3 It is activated by dropping, the camcorder has the drop sensor function*. When a drop...
...hard disk completely. Note on using a digital still camera, and therefore may appear different from the actual images of the viewfinder (HDR-SR7E/SR8E) and the LCD screen. • Unless otherwise specially indicated, illustrations in this case, an indicator appears in each local language..., it is more than 3,000 meters (9,800 feet). • When connecting your camcorder to another device with communication cables, be sure to "Handycam Handbook" (PDF) and "Picture Motion Browser Guide." 3 It is activated by dropping, the camcorder has the drop sensor function*. When a drop...
User Manual
Page 4
... camcorder 14 Indicators displayed during recording/playback 17 Performing various functions - " HOME" and " OPTION 19 Saving images 22 Deleting images 22 Enjoying with a computer Viewing "Handycam Handbook" (PDF 23 What you can do with a Windows computer 24 Troubleshooting Troubleshooting 29 Self-diagnosis display/Warning indicators 30 Additional Information Precautions 32 Specifications...
... camcorder 14 Indicators displayed during recording/playback 17 Performing various functions - " HOME" and " OPTION 19 Saving images 22 Deleting images 22 Enjoying with a computer Viewing "Handycam Handbook" (PDF 23 What you can do with a Windows computer 24 Troubleshooting Troubleshooting 29 Self-diagnosis display/Warning indicators 30 Additional Information Precautions 32 Specifications...

User Manual
Page 5
..."Operating Guide" (This manual) (1) 5 Remove the insulation sheet before using the Remote Commander. Picture Motion Browser Guide - Picture Motion Browser (Software) - Insulation sheet Mains lead (1) (p. 6) Handycam Station (1) (p. 6) Rechargeable battery pack NP-FH60 (1) (p. 6) Component video cable (1) (p. 13) A/V connecting cable (1) (p. 13) USB cable (1) (p. 27) 21-pin adaptor (1) For ... supplied. AC Adaptor (1) (p. 6) Wireless Remote Commander (1) A button-type lithium battery is already installed. mark printed on their CD-ROM "Handycam Application Software" (1) (p. 23) -
..."Operating Guide" (This manual) (1) 5 Remove the insulation sheet before using the Remote Commander. Picture Motion Browser Guide - Picture Motion Browser (Software) - Insulation sheet Mains lead (1) (p. 6) Handycam Station (1) (p. 6) Rechargeable battery pack NP-FH60 (1) (p. 6) Component video cable (1) (p. 13) A/V connecting cable (1) (p. 13) USB cable (1) (p. 27) 21-pin adaptor (1) For ... supplied. AC Adaptor (1) (p. 6) Wireless Remote Commander (1) A button-type lithium battery is already installed. mark printed on their CD-ROM "Handycam Application Software" (1) (p. 23) -

User Manual
Page 6
... the battery pack by sliding it in the direction of the arrow to the AC Adaptor and the wall socket. 5 Set the camcorder onto the Handycam Station securely. BATT (battery release) lever 3 Slide the POWER switch in the direction of the arrow until it clicks. 6 b Notes • When ... battery pack Slide the POWER switch to your camcorder. Slide the BATT (battery release) lever and remove the battery pack. Remove the camcorder from the Handycam Station. Step 2: Charging the battery pack 3 4 Battery pack 5 DC IN jack POWER switch 5 1 /CHG lamp DC plug 2 AC Adaptor Mains lead To ...
... the battery pack by sliding it in the direction of the arrow to the AC Adaptor and the wall socket. 5 Set the camcorder onto the Handycam Station securely. BATT (battery release) lever 3 Slide the POWER switch in the direction of the arrow until it clicks. 6 b Notes • When ... battery pack Slide the POWER switch to your camcorder. Slide the BATT (battery release) lever and remove the battery pack. Remove the camcorder from the Handycam Station. Step 2: Charging the battery pack 3 4 Battery pack 5 DC IN jack POWER switch 5 1 /CHG lamp DC plug 2 AC Adaptor Mains lead To ...

User Manual
Page 7
...if any metallic objects. Recording/Playback time: Approximate time (min.) available when you fully charge a completely exhausted battery pack. NP-FH60: HDR-SR5E HD SD (Unit:min.) HDR-SR7E/ SR8E HD SD Charging time 135 Recording time*1 Continuous recording time 105*2 120*2 110*3 130*3 Typical recording time*5 50*2 60*2 ..., and "SD" stands for the supplied battery pack Charging time: Approximate time (min.) required when you use your camcorder or the Handycam Station, even when the mains lead is still supplied to it while connected to the DC IN jack on the right DC plug DC...
...if any metallic objects. Recording/Playback time: Approximate time (min.) available when you fully charge a completely exhausted battery pack. NP-FH60: HDR-SR5E HD SD (Unit:min.) HDR-SR7E/ SR8E HD SD Charging time 135 Recording time*1 Continuous recording time 105*2 120*2 110*3 130*3 Typical recording time*5 50*2 60*2 ..., and "SD" stands for the supplied battery pack Charging time: Approximate time (min.) required when you use your camcorder or the Handycam Station, even when the mains lead is still supplied to it while connected to the DC IN jack on the right DC plug DC...

User Manual
Page 10
Movies Still Images Press START/STOP A (or D). When disappears, the image has been recorded. • Still images are recorded on a "Memory Stick Duo." • See "Handycam Handbook" (PDF) for changing the image quality to adjust the focus A (a beep sounds), then press it means data is in the default setting. b Notes • ...
Movies Still Images Press START/STOP A (or D). When disappears, the image has been recorded. • Still images are recorded on a "Memory Stick Duo." • See "Handycam Handbook" (PDF) for changing the image quality to adjust the focus A (a beep sounds), then press it means data is in the default setting. b Notes • ...

User Manual
Page 11
...t [ INFO]. • You can capture up to 3 still images by Sony Corporation. For details, see "Handycam Handbook" (PDF). HDR-SR5E: approx. 11 hours and 50 minutes HDR-SR7E: approx. 17 hours and 50 minutes HDR-SR8E: approx. 30 hours • Use the supplied application software to save still...or knock your camcorder is as still images. HDR-SR5E: 480 ([4.0M]) HDR-SR7E/SR8E: 315 ([6.1M]) All numbers measured when using a "Memory Stick Duo" made by pressing PHOTO E during Easy Handycam operation. 11 Recording/Playback To cancel Easy Handycam operation, press EASY F again. b Notes ...
...t [ INFO]. • You can capture up to 3 still images by Sony Corporation. For details, see "Handycam Handbook" (PDF). HDR-SR5E: approx. 11 hours and 50 minutes HDR-SR7E: approx. 17 hours and 50 minutes HDR-SR8E: approx. 30 hours • Use the supplied application software to save still...or knock your camcorder is as still images. HDR-SR5E: 480 ([4.0M]) HDR-SR7E/SR8E: 315 ([6.1M]) All numbers measured when using a "Memory Stick Duo" made by pressing PHOTO E during Easy Handycam operation. 11 Recording/Playback To cancel Easy Handycam operation, press EASY F again. b Notes ...

User Manual
Page 12
... the VISUAL INDEX screen Previous/Next (OPTION) Slide show Stop (go to the INDEX screen) 12 Reverse/Forward (OPTION) Go to be played back. See "Handycam Handbook" (PDF) for movies with HD (high definition) image quality* 6 Displays still images on the hard disk 7 Displays still images on a "Memory Stick Duo" 8 Searches...
... the VISUAL INDEX screen Previous/Next (OPTION) Slide show Stop (go to the INDEX screen) 12 Reverse/Forward (OPTION) Go to be played back. See "Handycam Handbook" (PDF) for movies with HD (high definition) image quality* 6 Displays still images on the hard disk 7 Displays still images on a "Memory Stick Duo" 8 Searches...
User Manual
Page 13
... at the same time, image disturbance may need to output images, images are output with SD (standard definition) image quality. • The Handycam Station and your camcorder. b Notes • When the A/V connecting cable is connected, and the connectors used to be connected. Switch the ... to your camcorder. You can play back on an x.v.Color-compliant TV. Connect the A/V connecting cable or component video cable either to the Handycam Station or to the connected jack. Use the supplied AC Adaptor as the power source (p. 6). r Make the required output settings on your ...
... at the same time, image disturbance may need to output images, images are output with SD (standard definition) image quality. • The Handycam Station and your camcorder. b Notes • When the A/V connecting cable is connected, and the connectors used to be connected. Switch the ... to your camcorder. You can play back on an x.v.Color-compliant TV. Connect the A/V connecting cable or component video cable either to the Handycam Station or to the connected jack. Use the supplied AC Adaptor as the power source (p. 6). r Make the required output settings on your ...

User Manual
Page 14
You can magnify still images from about 1.1 to 5 times the original size (Playback zoom). 14 • When you touch the screen during playback zoom, the point you touched will be displayed in ( ) are reference pages. Parts and functions used for the camcorder The numbers in the center of the displayed frame. 2 PHOTO button (10) 3 Eyecup (HDR-SR7E/SR8E) 4 Viewfinder (9) (HDR-SR7E/SR8E) Move it further for a slower zoom. Handycam Station 1 Power zoom lever To use the zoom, move the power zoom lever. Move the power zoom lever slightly for a faster zoom.
You can magnify still images from about 1.1 to 5 times the original size (Playback zoom). 14 • When you touch the screen during playback zoom, the point you touched will be displayed in ( ) are reference pages. Parts and functions used for the camcorder The numbers in the center of the displayed frame. 2 PHOTO button (10) 3 Eyecup (HDR-SR7E/SR8E) 4 Viewfinder (9) (HDR-SR7E/SR8E) Move it further for a slower zoom. Handycam Station 1 Power zoom lever To use the zoom, move the power zoom lever. Move the power zoom lever slightly for a faster zoom.

User Manual
Page 19
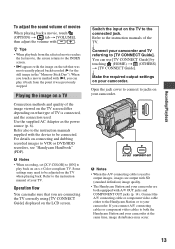
..." (PDF). 1 While using your convenience. When you want to change the recording functions and the operating settings for further operation. To see "Handycam Handbook" (PDF). 1 Turn on your camcorder, then press (HOME) A (or B). 3 Touch the item you touch an item, its explanation appears on the screen. For details, ...
..." (PDF). 1 While using your convenience. When you want to change the recording functions and the operating settings for further operation. To see "Handycam Handbook" (PDF). 1 Turn on your camcorder, then press (HOME) A (or B). 3 Touch the item you touch an item, its explanation appears on the screen. For details, ...

User Manual
Page 20
..., touch another tab. Items of your camcorder at the time. • Some items appear without a tab. • The (OPTION) MENU cannot be used during Easy Handycam operation (p. 11). b Notes • When the item you cannot find the item anywhere, the function is not on the recording/playback status of the HOME...
..., touch another tab. Items of your camcorder at the time. • Some items appear without a tab. • The (OPTION) MENU cannot be used during Easy Handycam operation (p. 11). b Notes • When the item you cannot find the item anywhere, the function is not on the recording/playback status of the HOME...

User Manual
Page 21
... MODE], [REC LAMP], [CALIBRATION], [A.SHUT OFF], [REMOTE CTRL], [DROP SENSOR] *1 You can set these items also during Easy Handycam operation (p. 11). *2 The menu name is changed to [SOUND SETTINGS] during Easy Handycam operation. *3 HDR-SR7E/SR8E Items of the OPTION MENU Items you can set only on the situation/No tab) [SLIDE SHOW], [SLIDE...
... MODE], [REC LAMP], [CALIBRATION], [A.SHUT OFF], [REMOTE CTRL], [DROP SENSOR] *1 You can set these items also during Easy Handycam operation (p. 11). *2 The menu name is changed to [SOUND SETTINGS] during Easy Handycam operation. *3 HDR-SR7E/SR8E Items of the OPTION MENU Items you can set only on the situation/No tab) [SLIDE SHOW], [SLIDE...

User Manual
Page 22
... ALL] t [YES] t [YES] t . Creating a disc with selected images You can save images recorded on the camcorder directly to a disc with . 3 Touch t [YES] t . For details, see "Handycam Handbook" (PDF). 22 Deleting the images on the hard disk 1 On the (HOME MENU), touch (OTHERS) t [DELETE]. 2 Touch [ DELETE]. 3 Touch [ DELETE], [ DELETE] (movies) or [ DELETE...
... ALL] t [YES] t [YES] t . Creating a disc with selected images You can save images recorded on the camcorder directly to a disc with . 3 Touch t [YES] t . For details, see "Handycam Handbook" (PDF). 22 Deleting the images on the hard disk 1 On the (HOME MENU), touch (OTHERS) t [DELETE]. 2 Touch [ DELETE]. 3 Touch [ DELETE], [ DELETE] (movies) or [ DELETE...

User Manual
Page 23
..., double-click the [GB] folder and then drag-and-drop the "Handbook.pdf" on the computer. The select screen for "Handycam Handbook" (PDF) appears. To view "Handycam Handbook" (PDF), you need to view the handbook. For Macintosh users 1 Turn on your computer. Installation starts. Double-click "...Handbook.pdf" to install Adobe Reader on the computer. 2 Place the CD-ROM (supplied) in the disc drive of your Handycam, then click [Handycam Handbook (PDF)]. For Windows users 1 Turn on its bottom surface. 5 Click [Exit] t [Exit], then remove the CD-ROM from the...
..., double-click the [GB] folder and then drag-and-drop the "Handbook.pdf" on the computer. The select screen for "Handycam Handbook" (PDF) appears. To view "Handycam Handbook" (PDF), you need to view the handbook. For Macintosh users 1 Turn on your computer. Installation starts. Double-click "...Handbook.pdf" to install Adobe Reader on the computer. 2 Place the CD-ROM (supplied) in the disc drive of your Handycam, then click [Handycam Handbook (PDF)]. For Windows users 1 Turn on its bottom surface. 5 Click [Exit] t [Exit], then remove the CD-ROM from the...

User Manual
Page 24
... Pentium III 1 GHz or faster enables the following operations. For Windows Vista: 1 GB or more Hard disk: Disk volume required for details. http://guide.d-imaging.sony.co.jp/mac/ ms/us/ 24 System requirements x When using "Picture Motion Browser" OS: Microsoft Windows 2000 Professional SP4/Windows XP SP2*/Windows Vista* * 64... DVD based players or recorders, as standard), Hi-Speed USB (USB 2.0 compatible is not supported by one simple operation By pressing DISC BURN on the Handycam Station (p. 16), you can save images recorded on your camcorder to your computer.
... Pentium III 1 GHz or faster enables the following operations. For Windows Vista: 1 GB or more Hard disk: Disk volume required for details. http://guide.d-imaging.sony.co.jp/mac/ ms/us/ 24 System requirements x When using "Picture Motion Browser" OS: Microsoft Windows 2000 Professional SP4/Windows XP SP2*/Windows Vista* * 64... DVD based players or recorders, as standard), Hi-Speed USB (USB 2.0 compatible is not supported by one simple operation By pressing DISC BURN on the Handycam Station (p. 16), you can save images recorded on your camcorder to your computer.

User Manual
Page 25
... will not work properly due to the power saving function of the license agreement] if you agree, then click [Next]. 8 Connect your camcorder to the Handycam Station and a wall socket. 25 Enjoying with HD (high definition) image quality, resulting in HD (high definition) format. Contents to the AC Adaptor as (E:)) may...
... will not work properly due to the power saving function of the license agreement] if you agree, then click [Next]. 8 Connect your camcorder to the Handycam Station and a wall socket. 25 Enjoying with HD (high definition) image quality, resulting in HD (high definition) format. Contents to the AC Adaptor as (E:)) may...

User Manual
Page 26
... disc - Microsoft .NET Framework 1.1* Software required to recognize an AVCHD format disc - 2 Set the camcorder onto the Handycam Station, then slide the POWER switch to turn on. 3 Connect the (USB) jack of the Handycam Station to the (USB) jack of the computer using the supplied USB cable. 4 Touch [ COMPUTER] on the LCD...
... disc - Microsoft .NET Framework 1.1* Software required to recognize an AVCHD format disc - 2 Set the camcorder onto the Handycam Station, then slide the POWER switch to turn on. 3 Connect the (USB) jack of the Handycam Station to the (USB) jack of the computer using the supplied USB cable. 4 Touch [ COMPUTER] on the LCD...

User Manual
Page 27
...desktop. Recommended USB cable connection To assure the proper functioning of your camcorder, connect your camcorder to a computer as standard equipment, connect the Handycam Station to another USB port using the USB cable. Operating "Picture Motion Browser" After you install the software, shortcut icons for "Picture Motion...a computer To import the images to the computer, etc., connect your camcorder. Touch the desired button on the LCD screen of the Handycam Station to turn on. 3 Connect the (USB) jack of your camcorder to the computer by the following steps. 1 Connect the AC Adaptor ...
...desktop. Recommended USB cable connection To assure the proper functioning of your camcorder, connect your camcorder to a computer as standard equipment, connect the Handycam Station to another USB port using the USB cable. Operating "Picture Motion Browser" After you install the software, shortcut icons for "Picture Motion...a computer To import the images to the computer, etc., connect your camcorder. Touch the desired button on the LCD screen of the Handycam Station to turn on. 3 Connect the (USB) jack of your camcorder to the computer by the following steps. 1 Connect the AC Adaptor ...


