User Guide
Page 6
... 4.1 Clearing Memory 4.1 Cleaning the OPC Drum 4.2 Adjusting Shading 4.2 Setting the Machine to be Checked by Phone --------- 4.3 Sending Toner Low Information to the Service Company 4.3 Cleaning the Machine 4.4 Managing the Toner Cartridge 4.7 Automatic Document Feeder Rubber Pad Replacement 4.10 5 Troubleshooting Clearing Paper Jams 5.1 LCD Error Messages 5.5 Fax Problems 5.7 General Printing Problems (MFP model...
... 4.1 Clearing Memory 4.1 Cleaning the OPC Drum 4.2 Adjusting Shading 4.2 Setting the Machine to be Checked by Phone --------- 4.3 Sending Toner Low Information to the Service Company 4.3 Cleaning the Machine 4.4 Managing the Toner Cartridge 4.7 Automatic Document Feeder Rubber Pad Replacement 4.10 5 Troubleshooting Clearing Paper Jams 5.1 LCD Error Messages 5.5 Fax Problems 5.7 General Printing Problems (MFP model...

User Guide
Page 101
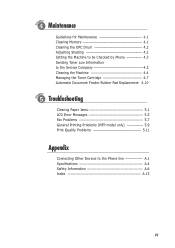
The topics included in this chapter are: N Guidelines for maintaining the toner cartridge and the machine. 4chapter This chapter provides suggestions for high-quality and economical operating and information for Maintenance N Clearing Memory N Cleaning the OPC Drum N Adjusting Shading N Setting the Machine to be Checked by Phone N Sending Toner Low Information to the Service Company N Cleaning the Machine N Managing the Toner Cartridge N Automatic Document Feeder Rubber Pad Replacement
The topics included in this chapter are: N Guidelines for maintaining the toner cartridge and the machine. 4chapter This chapter provides suggestions for high-quality and economical operating and information for Maintenance N Clearing Memory N Cleaning the OPC Drum N Adjusting Shading N Setting the Machine to be Checked by Phone N Sending Toner Low Information to the Service Company N Cleaning the Machine N Managing the Toner Cartridge N Automatic Document Feeder Rubber Pad Replacement
User Guide
Page 103
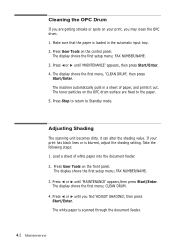
...Press Stop to return to the paper. 5. Press User Tools on the control panel. The display shows the first menu; Cleaning the OPC Drum If you are fixed to Standby mode. Adjusting Shading The scanning unit becomes dirty, it out. If your print, you find 'ADJUST SHADING...', then press Start/Enter. FAX NUMBER/NAME. 3. FAX NUMBER/NAME. 3. Press ➛ or ❿ until you may clean the OPC drum. 1. Make sure that the paper is scanned through the document feeder. 4.2 Maintenance
...Press Stop to return to the paper. 5. Press User Tools on the control panel. The display shows the first menu; Cleaning the OPC Drum If you are fixed to Standby mode. Adjusting Shading The scanning unit becomes dirty, it out. If your print, you find 'ADJUST SHADING...', then press Start/Enter. FAX NUMBER/NAME. 3. FAX NUMBER/NAME. 3. Press ➛ or ❿ until you may clean the OPC drum. 1. Make sure that the paper is scanned through the document feeder. 4.2 Maintenance
User Guide
Page 104
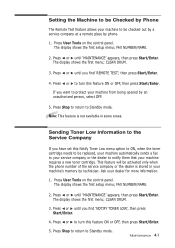
... This feature is stored in some areas. Press User Tools on the control panel. FAX NUMBER/NAME. 2. CLEAN DRUM. 3. Press ➛¤or ❿ until you find 'REMOTE TEST', then press Start/Enter. 4. CLEAN DRUM. 3. Ask your machine from being opened by an unauthorized person, select OFF. 5....number of the service company or the dealer is not available in your machine's memory by technician. The display shows the first setup menu; FAX NUMBER/NAME. 2. The display shows the first menu; Press ➛ or ❿ until you find 'NOTIFY TONER LOW', then press ...
... This feature is stored in some areas. Press User Tools on the control panel. FAX NUMBER/NAME. 2. CLEAN DRUM. 3. Press ➛¤or ❿ until you find 'REMOTE TEST', then press Start/Enter. 4. CLEAN DRUM. 3. Ask your machine from being opened by an unauthorized person, select OFF. 5....number of the service company or the dealer is not available in your machine's memory by technician. The display shows the first setup menu; FAX NUMBER/NAME. 2. The display shows the first menu; Press ➛ or ❿ until you find 'NOTIFY TONER LOW', then press ...

User Guide
Page 124
...faded area appears on the page: • The toner supply is light, Toner Save Mode may be on. See "Paper Type and Size" for faxing on page 1.15 and "Selecting Print Media" for example, the paper is too moist or too rough). AaBbCc • The paper may be dirty...." on page 4.5. See "Cleaning the Document Scanner" on page 4.5. See "Paper Type and Size" for faxing on page 1.15 and "Selecting Print Media" for PCAapBrinbtCincg on the page: • The photosensitive drum inside the machine may not meet paper specifications. See "Cleaning the Inside". • The surface of faded ...
...faded area appears on the page: • The toner supply is light, Toner Save Mode may be on. See "Paper Type and Size" for faxing on page 1.15 and "Selecting Print Media" for example, the paper is too moist or too rough). AaBbCc • The paper may be dirty...." on page 4.5. See "Cleaning the Document Scanner" on page 4.5. See "Paper Type and Size" for faxing on page 1.15 and "Selecting Print Media" for PCAapBrinbtCincg on the page: • The photosensitive drum inside the machine may not meet paper specifications. See "Cleaning the Inside". • The surface of faded ...

User Guide
Page 126
... your software application or the printer properties. Print a cleaning sheet several times by cleaning the OPC drum (see page 4.2). AAaBbCc AaBbCc AaBbCc AaBbCc AaBbCc • The paper may be damaged. See "Paper Type and Size" for faxing on page 1.15 and "Selecting Print Media" for PC printing on page 3.5. • If characters...
... your software application or the printer properties. Print a cleaning sheet several times by cleaning the OPC drum (see page 4.2). AAaBbCc AaBbCc AaBbCc AaBbCc AaBbCc • The paper may be damaged. See "Paper Type and Size" for faxing on page 1.15 and "Selecting Print Media" for PC printing on page 3.5. • If characters...
User Guide
Page 142
... source setting 3.14 B broadcasting transmission 2.25 C cancel print job 3.16 scheduled operation 2.31 cleaning document scanner 4.5 machine 4.4 OPC drum 4.2 connecting other devices A.1 parallel cable 1.12 phone line 1.11 power cord 1.13 contents 1.3 copying using advanced features 2.17 overview..., setting 2.8 document scanner, cleaning 4.5 driver, access 3.13 E entering, name 2.18 error messages 5.5 F fax problem, solving 5.7 fitting document to selected paper 3.21 forwarding received faxes 2.32 front panel, features 1.6 G group dialing 2.35 I install toner cartridge 1.16 Appendix A.13
... source setting 3.14 B broadcasting transmission 2.25 C cancel print job 3.16 scheduled operation 2.31 cleaning document scanner 4.5 machine 4.4 OPC drum 4.2 connecting other devices A.1 parallel cable 1.12 phone line 1.11 power cord 1.13 contents 1.3 copying using advanced features 2.17 overview..., setting 2.8 document scanner, cleaning 4.5 driver, access 3.13 E entering, name 2.18 error messages 5.5 F fax problem, solving 5.7 fitting document to selected paper 3.21 forwarding received faxes 2.32 front panel, features 1.6 G group dialing 2.35 I install toner cartridge 1.16 Appendix A.13

User Guide
Page 143
... one sheet, print 3.18 N network, setting 3.28 notifying toner low 4.3 number and name, setting 1.19 O one-touch dialing 2.20 one-touch label plate 2.22 OPC drum, cleaning 4.2 overlay, using 3.24 P paper in automatic input tray 1.13, 3.7 in the manual input tray 3.9 selecting 1.15, 3.7 setting 3.2, 3.14 paper jam, clear 5.1 document 5.1 inside the...
... one sheet, print 3.18 N network, setting 3.28 notifying toner low 4.3 number and name, setting 1.19 O one-touch dialing 2.20 one-touch label plate 2.22 OPC drum, cleaning 4.2 overlay, using 3.24 P paper in automatic input tray 1.13, 3.7 in the manual input tray 3.9 selecting 1.15, 3.7 setting 3.2, 3.14 paper jam, clear 5.1 document 5.1 inside the...


