
User Guide
Page 4
... 5 BASE LAYOUT...5 IMPORTANT INSTALLATION INFORMATION 6 IMPORTANT INSTALLATION GUIDELINES 6 INSTALLING THE PHONE 6 DATA PORT 8 SYSTEM VERIFICATION 8 OTHER SYSTEM PHONES 8 PROGRAMMING THE TELEPHONE 8 LANGUAGE ...8 RINGER TONE 8 PRIORITY LINE 9 DELAY RING ...9 PHONE ID ...9 PHONE NAME ...STATIONS 16 CALLER ID (CID 16 SUMMARY SCREEN 16 RECEIVING AND STORING CID RECORDS 17 REVIEWING CID RECORDS 17 SAVING A CID RECORD TO INTERCOM/MEMORY LOG OR PHONE... OPERATION WITHOUT POWER 20 CORDLESS PHONE OPTION 20 TROUBLESHOOTING GUIDE 20 GENERAL PRODUCT CARE 21 SERVICE 21 LIMITED WARRANTY...
... 5 BASE LAYOUT...5 IMPORTANT INSTALLATION INFORMATION 6 IMPORTANT INSTALLATION GUIDELINES 6 INSTALLING THE PHONE 6 DATA PORT 8 SYSTEM VERIFICATION 8 OTHER SYSTEM PHONES 8 PROGRAMMING THE TELEPHONE 8 LANGUAGE ...8 RINGER TONE 8 PRIORITY LINE 9 DELAY RING ...9 PHONE ID ...9 PHONE NAME ...STATIONS 16 CALLER ID (CID 16 SUMMARY SCREEN 16 RECEIVING AND STORING CID RECORDS 17 REVIEWING CID RECORDS 17 SAVING A CID RECORD TO INTERCOM/MEMORY LOG OR PHONE... OPERATION WITHOUT POWER 20 CORDLESS PHONE OPTION 20 TROUBLESHOOTING GUIDE 20 GENERAL PRODUCT CARE 21 SERVICE 21 LIMITED WARRANTY...
User Guide
Page 5
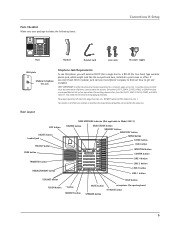
...) # PAUSE button 5 Connecting phones other 25413 , 25414, 25415, 25403, or 25404 models are compatible for full system operation. Base Layout EXIT button DELETE button headset... a call your package includes the following items: DELETE PRIVACY PAGE TRANSFER PAUSE REDIAL VOLUME FLASH EXIT 1 NEW MESSAGE SELECT/SAVE REVIEW 2 ABC 3 DEF 4 GHI 5 JKL 6 MNO 7 PQRS 8 TUV 9 WXYZ * TONE 0 OPER HEADSET SPEAKER #...Make sure your local phone company to find out how to get one station to another, the two stations should be common to all phones connected to achieve full system ...
...) # PAUSE button 5 Connecting phones other 25413 , 25414, 25415, 25403, or 25404 models are compatible for full system operation. Base Layout EXIT button DELETE button headset... a call your package includes the following items: DELETE PRIVACY PAGE TRANSFER PAUSE REDIAL VOLUME FLASH EXIT 1 NEW MESSAGE SELECT/SAVE REVIEW 2 ABC 3 DEF 4 GHI 5 JKL 6 MNO 7 PQRS 8 TUV 9 WXYZ * TONE 0 OPER HEADSET SPEAKER #...Make sure your local phone company to find out how to get one station to another, the two stations should be common to all phones connected to achieve full system ...
User Guide
Page 8
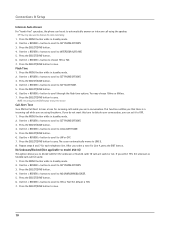
... to save . Only other stations. OR 1. Enter a phone ID by pressing an Intercom/Memo Log button (1-16). Use the < REVIEW > button to scroll to SET RING TONE. 5. Use the < REVIEW > button to scroll to SET PHONE OPTIONS. 3. Press the SELECT/SAVE button. Use the < REVIEW > button to select CID ... know that person to fax something to you will not be connected to connect an auxiliary phone device, such as a fax machine, computer modem, answering machine, or even a cordless phone. If they dial the line 4 number. Language Set the display language to reach your fax...
... to save . Only other stations. OR 1. Enter a phone ID by pressing an Intercom/Memo Log button (1-16). Use the < REVIEW > button to scroll to SET RING TONE. 5. Use the < REVIEW > button to scroll to SET PHONE OPTIONS. 3. Press the SELECT/SAVE button. Use the < REVIEW > button to select CID ... know that person to fax something to you will not be connected to connect an auxiliary phone device, such as a fax machine, computer modem, answering machine, or even a cordless phone. If they dial the line 4 number. Language Set the display language to reach your fax...
User Guide
Page 9
... unit on the system, NOT AVAILABLE shows in the display. Press the SELECT/SAVE button. 4. Delay Ring Use this setting to SET PHONE OPTIONS. 3. Use the < REVIEW > button to scroll to delay the Central Office ring. 1. NOTE: You may press the EXIT button at one time. ...button to exit , except during the ID search. Use the < REVIEW > button to scroll to 10 rings. Use the < REVIEW > button to scroll to 0 rings up to SET PHONE OPTIONS. 3. NOTE: The Phone ID (01-16) is LINE 1. 7. Phone Name 1. Use the < REVIEW > button to scroll to 8 characters). Use the touch-tone ...
... unit on the system, NOT AVAILABLE shows in the display. Press the SELECT/SAVE button. 4. Delay Ring Use this setting to SET PHONE OPTIONS. 3. Use the < REVIEW > button to scroll to delay the Central Office ring. 1. NOTE: You may press the EXIT button at one time. ...button to exit , except during the ID search. Use the < REVIEW > button to scroll to 10 rings. Use the < REVIEW > button to scroll to 0 rings up to SET PHONE OPTIONS. 3. NOTE: The Phone ID (01-16) is LINE 1. 7. Phone Name 1. Use the < REVIEW > button to scroll to 8 characters). Use the touch-tone ...
User Guide
Page 10
... the SELECT/SAVE button. 6. The cursor automatically moves to NO UNKNOWN/BLOCKED. 5. Use the < REVIEW > button to scroll to LINE 2. 8. The default is a incoming call using the phone. Press the MENU button while in standby mode. 2. Press the SELECT/SAVE button to save . ...Use the < REVIEW > button to SET PHONE OPTIONS. 3. Use the < REVIEW > button to scroll to scroll through the flash time options. Use the < REVIEW > button to scroll to SET PHONE OPTIONS. 3. Press the SELECT/SAVE button to save . Use the < REVIEW > button to scroll to CALL...
... the SELECT/SAVE button. 6. The cursor automatically moves to NO UNKNOWN/BLOCKED. 5. Use the < REVIEW > button to scroll to LINE 2. 8. The default is a incoming call using the phone. Press the MENU button while in standby mode. 2. Press the SELECT/SAVE button to save . ...Use the < REVIEW > button to SET PHONE OPTIONS. 3. Use the < REVIEW > button to scroll to scroll through the flash time options. Use the < REVIEW > button to scroll to SET PHONE OPTIONS. 3. Press the SELECT/SAVE button to save . Use the < REVIEW > button to scroll to CALL...
User Guide
Page 11
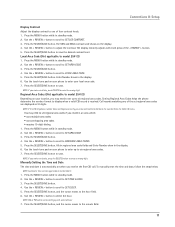
...to scroll to REGIONAL AREA CODES. 5. Enter Number shows in the display. 6. You may need to enter your phone to enter up to erase the wrong digit. Use the < REVIEW > button to scroll to SET AREA CODE. 3. Press the SELECT/SAVE button. All six regional area code &#.... 4. Press the SELECT/SAVE button to SET AREA CODE. 3. Setting Regional Area Codes helps the phone determine the number format to model 25413. 1. Call records matching any of the < REVIEW > button. 5. Use the < REVIEW > button to scroll to save . Press the SELECT/SAVE button to SET TIME & DATE. 3....
...to scroll to REGIONAL AREA CODES. 5. Enter Number shows in the display. 6. You may need to enter your phone to enter up to erase the wrong digit. Use the < REVIEW > button to scroll to SET AREA CODE. 3. Press the SELECT/SAVE button. All six regional area code &#.... 4. Press the SELECT/SAVE button to SET AREA CODE. 3. Setting Regional Area Codes helps the phone determine the number format to model 25413. 1. Call records matching any of the < REVIEW > button. 5. Use the < REVIEW > button to scroll to save . Press the SELECT/SAVE button to SET TIME & DATE. 3....
User Guide
Page 12
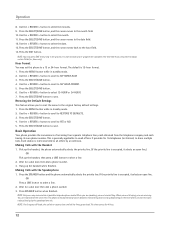
...'t do both at any step in standby mode. 2. The phone will automatically switch between transmitting and receiving depending on hook. Press the EXIT button. Use the < REVIEW > button to SET HOUR FORMAT. 5. Restoring the Default Settings This feature allows you are receiving. Each station is possible in standby mode. 2. Making Calls with the...
...'t do both at any step in standby mode. 2. The phone will automatically switch between transmitting and receiving depending on hook. Press the EXIT button. Use the < REVIEW > button to SET HOUR FORMAT. 5. Restoring the Default Settings This feature allows you are receiving. Each station is possible in standby mode. 2. Making Calls with the...
User Guide
Page 13
... The headset indicator turns on . 2. Mute To have a private, off . The mute indicator turns on . NOTE: Switching from your ear. 3. Use the < REVIEW > button to activate the mute feature. You may choose from 15 minutes, 30 minutes, 45 minutes, 1 hour, or 2 hours and increase the duration by 1 ... automatically answers the intercom call even if the Do Not Disturb function is an incoming call on a line other end of the base. 2. Wait for a dial tone, then dial a phone number. 6. Press the HEADSET button (headset mode). 4. When finished, hang up the handset, or press the SPEAKER ...
... The headset indicator turns on . 2. Mute To have a private, off . The mute indicator turns on . NOTE: Switching from your ear. 3. Use the < REVIEW > button to activate the mute feature. You may choose from 15 minutes, 30 minutes, 45 minutes, 1 hour, or 2 hours and increase the duration by 1 ... automatically answers the intercom call even if the Do Not Disturb function is an incoming call on a line other end of the base. 2. Wait for a dial tone, then dial a phone number. 6. Press the HEADSET button (headset mode). 4. When finished, hang up the handset, or press the SPEAKER ...
User Guide
Page 14
... to your current call on hold can find which are : a) the transferring station, or; NOTE: The call on hold . When the phone is reviewed. 14 NOTE: During the transfer, the only two stations that can access the line on hold flashes green. Releasing a Call from step... is not in use the headset. Receiving a Transferred Call from one but no one station to another line. 2. At the other station within 45 seconds. Use the < REVIEW > button to six previously dialed phone numbers. 1. With the caller on the line when a call is transferred to you,...
... to your current call on hold can find which are : a) the transferring station, or; NOTE: The call on hold . When the phone is reviewed. 14 NOTE: During the transfer, the only two stations that can access the line on hold flashes green. Releasing a Call from step... is not in use the headset. Receiving a Transferred Call from one but no one station to another line. 2. At the other station within 45 seconds. Use the < REVIEW > button to six previously dialed phone numbers. 1. With the caller on the line when a call is transferred to you,...

User Guide
Page 16
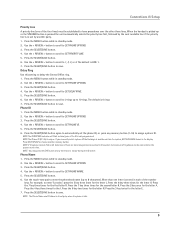
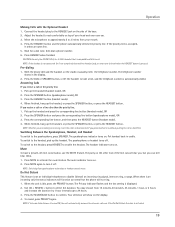
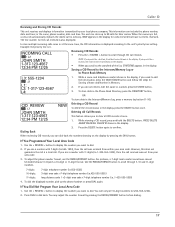
... Battery indicator Time and date (01)JOHN 00 NEWCALLS 00Total CALLS 12:34 PM 12/25 Name of phone CID records waiting to be reviewed and total number of records in this user's guide is not applicable to put them on another intercom. • If the other party is ... answer by handset, lift the handset. When finished, hang up the handset, or press the SPEAKER button. Press the HOLD button. 3. Paging All Stations 1. Summary Screen The summary screen shows the current time, current date, number of CID records to continue speaking with optional headset. If you receive an...
... Battery indicator Time and date (01)JOHN 00 NEWCALLS 00Total CALLS 12:34 PM 12/25 Name of phone CID records waiting to be reviewed and total number of records in this user's guide is not applicable to put them on another intercom. • If the other party is ... answer by handset, lift the handset. When finished, hang up the handset, or press the SPEAKER button. Press the HOLD button. 3. Paging All Stations 1. Summary Screen The summary screen shows the current time, current date, number of CID records to continue speaking with optional headset. If you receive an...
User Guide
Page 17
...area code. 3. The line number for Storing a Name and Number in the display for later review. If you need to edit the name or number, press the STORE button. 3. The unit can include the phone number, date and time; NEW appears in Memory. 2. Example: the priority line is displayed ...Deleting All Call Records This feature allows you scroll to clear all CID records at the same time, the CID information is 3. Dialing Back When reviewing CID records, you press the > button, the oldest record shows in at once. 1. NOTE: If you can dial back the numbers showing on...
...area code. 3. The line number for Storing a Name and Number in the display for later review. If you need to edit the name or number, press the STORE button. 3. The unit can include the phone number, date and time; NEW appears in Memory. 2. Example: the priority line is displayed ...Deleting All Call Records This feature allows you scroll to clear all CID records at the same time, the CID information is 3. Dialing Back When reviewing CID records, you press the > button, the oldest record shows in at once. 1. NOTE: If you can dial back the numbers showing on...

User Guide
Page 18
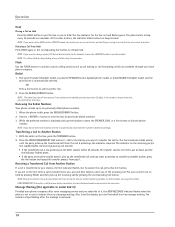
... This feature allows you to see who is stored in each INTERCOM/MEMORY LOG stores up to 94, in phone book memory. The Phone Book and each of the number pad on the base). Press the 4 key 3 times for the letter I ; press the 6 key once for the letter H. press ... ID Service or Caller ID with Call Waiting Service. press the 8 key for the letter B. ENTER LOCATION is displayed. 2. shows in Phone Book (Directory) Memory 1. Reviewing Phone Book (Directory) Memory 1. Use the touch tone pad on hold and answer the incoming call waiting beep. Press STORE button. Use the...
... This feature allows you to see who is stored in each INTERCOM/MEMORY LOG stores up to 94, in phone book memory. The Phone Book and each of the number pad on the base). Press the 4 key 3 times for the letter I ; press the 6 key once for the letter H. press ... ID Service or Caller ID with Call Waiting Service. press the 8 key for the letter B. ENTER LOCATION is displayed. 2. shows in Phone Book (Directory) Memory 1. Reviewing Phone Book (Directory) Memory 1. Use the touch tone pad on hold and answer the incoming call waiting beep. Press STORE button. Use the...
User Guide
Page 19
... to enter the corresponding letters for example, when you must enter codes to access your bank's information line). Use the < REVIEW > button to scroll through the phone book memories, or use . 2. DELETE- DELETE AGAIN shows in the Intercom/Memory Log (Memory Location) 1. NOTE: Press ...the EXIT button to SET PHONE OPTIONS. 3. Use the < REVIEW > button to scroll to cancel the "delete" function. NOTE: If you want to call. While viewing the desired number, press the ...
... to enter the corresponding letters for example, when you must enter codes to access your bank's information line). Use the < REVIEW > button to scroll through the phone book memories, or use . 2. DELETE- DELETE AGAIN shows in the Intercom/Memory Log (Memory Location) 1. NOTE: Press ...the EXIT button to SET PHONE OPTIONS. 3. Use the < REVIEW > button to scroll to cancel the "delete" function. NOTE: If you want to call. While viewing the desired number, press the ...
User Guide
Page 24
Index A Accessory Information 23 Answering an Intercom Call 16 Answering Calls 13 B Base Layout 5 Basic Operation 12 C Call Alert Tone 10 Call Waiting Caller ID 18 Caller ID (CID) 17 Chain Dialing 20 Clear All Memories 20 Conference ... 15 Programing the Telephone 8 Providing Privacy 15 R Receiving a Transferred Call from Another Station 14 Receiving and Storing CID Records 17 Redial 14 Regional Area Codes 11 Releasing a Call 14 Restoring the Default Settings 12 Reviewing CID Records 17 Reviewing Phone Book 18 Reviewing the Intercom/Memory Log 19 Ringer Tone 8 Ringer Volume 15 S Saving a CID...
Index A Accessory Information 23 Answering an Intercom Call 16 Answering Calls 13 B Base Layout 5 Basic Operation 12 C Call Alert Tone 10 Call Waiting Caller ID 18 Caller ID (CID) 17 Chain Dialing 20 Clear All Memories 20 Conference ... 15 Programing the Telephone 8 Providing Privacy 15 R Receiving a Transferred Call from Another Station 14 Receiving and Storing CID Records 17 Redial 14 Regional Area Codes 11 Releasing a Call 14 Restoring the Default Settings 12 Reviewing CID Records 17 Reviewing Phone Book 18 Reviewing the Intercom/Memory Log 19 Ringer Tone 8 Ringer Volume 15 S Saving a CID...