User Guide
Page 4
... TELEPHONE JACK REQUIREMENTS 5 BASE LAYOUT...5 IMPORTANT INSTALLATION INFORMATION 6 IMPORTANT INSTALLATION GUIDELINES 6 INSTALLING THE PHONE 6 DATA PORT 8 SYSTEM VERIFICATION 8 OTHER SYSTEM PHONES 8 PROGRAMMING THE TELEPHONE 8 LANGUAGE ...8 RINGER TONE 8 PRIORITY LINE 9 DELAY RING ...9 PHONE ID ...9 PHONE NAME...INTERCOM CALL 16 INTERCOM HOLD 16 INTERCOM CONFERENCE CALLS 16 PAGING ALL STATIONS 16 CALLER ID (CID 16 SUMMARY SCREEN 16 RECEIVING AND STORING ... WITHOUT POWER 20 CORDLESS PHONE OPTION 20 TROUBLESHOOTING GUIDE 20 GENERAL PRODUCT CARE 21 SERVICE 21 LIMITED ...
... TELEPHONE JACK REQUIREMENTS 5 BASE LAYOUT...5 IMPORTANT INSTALLATION INFORMATION 6 IMPORTANT INSTALLATION GUIDELINES 6 INSTALLING THE PHONE 6 DATA PORT 8 SYSTEM VERIFICATION 8 OTHER SYSTEM PHONES 8 PROGRAMMING THE TELEPHONE 8 LANGUAGE ...8 RINGER TONE 8 PRIORITY LINE 9 DELAY RING ...9 PHONE ID ...9 PHONE NAME...INTERCOM CALL 16 INTERCOM HOLD 16 INTERCOM CONFERENCE CALLS 16 PAGING ALL STATIONS 16 CALLER ID (CID 16 SUMMARY SCREEN 16 RECEIVING AND STORING ... WITHOUT POWER 20 CORDLESS PHONE OPTION 20 TROUBLESHOOTING GUIDE 20 GENERAL PRODUCT CARE 21 SERVICE 21 LIMITED ...
User Guide
Page 11
...press DELETE to SET AREA CODE. 3. Regional Area Codes (Not applicable to model 25413) Depending on your phone to enter up to one of four contrast levels. 1. Use the < REVIEW > button to scroll to ...digit. NOTE: If you make a mistake, press the DELETE button to SET AREA CODE. 3. To manually reset the time and date, follow the steps below. Press the SELECT/SAVE button, and the cursor moves...MENU button while in standby mode. 2. Press the SELECT/SAVE button. NOTE: If the CID telephone number does not display correctly, you may not be set when you reside in standby mode. ...
...press DELETE to SET AREA CODE. 3. Regional Area Codes (Not applicable to model 25413) Depending on your phone to enter up to one of four contrast levels. 1. Use the < REVIEW > button to scroll to ...digit. NOTE: If you make a mistake, press the DELETE button to SET AREA CODE. 3. To manually reset the time and date, follow the steps below. Press the SELECT/SAVE button, and the cursor moves...MENU button while in standby mode. 2. Press the SELECT/SAVE button. NOTE: If the CID telephone number does not display correctly, you may not be set when you reside in standby mode. ...
User Guide
Page 13
... lift the handset to rest comfortably on . 2. If you , but the phone will not ring. 1. NOTE: Whether you are making or receiving a call, the caller is an incoming call on a line other end of the base. 2. The speakerphone indicator turns on the display. 4. Press MUTE to select ... headset jack), an error tone is heard when the HEADSET button is set at individual telephones to handset or headset cancels mute. The headset indicator turns on the cradle, manually enter the telephone number. The speakerphone or headset turns off. Connect the headset plug to enable the headset...
... lift the handset to rest comfortably on . 2. If you , but the phone will not ring. 1. NOTE: Whether you are making or receiving a call, the caller is an incoming call on a line other end of the base. 2. The speakerphone indicator turns on the display. 4. Press MUTE to select ... headset jack), an error tone is heard when the HEADSET button is set at individual telephones to handset or headset cancels mute. The headset indicator turns on the cradle, manually enter the telephone number. The speakerphone or headset turns off. Connect the headset plug to enable the headset...
User Guide
Page 20
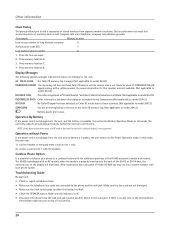
... information for use with cordless handset) is not supported. Operation without Power If the power cord is not plugged into the back of the 25413 or 25414 base, the antenna icon on...you want. 2. Cordless Phone Option It is possible to enhance your wiring or local service. 20 Press the line you may : 1) use your cordless handset with frequent calls via a telephone company long distance ...area is not linked to manually make a call on line 1 only, 2) answer a call on the display will illuminate. This is useful when you to a cordless feature with the handset. ...
... information for use with cordless handset) is not supported. Operation without Power If the power cord is not plugged into the back of the 25413 or 25414 base, the antenna icon on...you want. 2. Cordless Phone Option It is possible to enhance your wiring or local service. 20 Press the line you may : 1) use your cordless handset with frequent calls via a telephone company long distance ...area is not linked to manually make a call on line 1 only, 2) answer a call on the display will illuminate. This is useful when you to a cordless feature with the handset. ...
User Guide
Page 24
...Accessory Information 23 Answering an Intercom Call 16 Answering Calls 13 B Base Layout 5 Basic Operation 12 C Call Alert Tone 10 Call ...Calls with Optional Headset 13 Making Calls with the Speakerphone 12 Manually Setting the Time and Date 10 Memory Delete/Clear 19 Memory Log and Phone Book 18 Message Waiting 15 Mute 13 N No Unknown/Blocked... Phones 8 P Paging All Stations 16 Parts Checklist 5 Phone ID 9 Phonebook Name 8, 9, 11 Placing a Call on Hold 14 Pre-dialing 13 Priority Line 9 Privacy 15 Programing the Telephone 8 Providing Privacy 15 R Receiving a Transferred Call from Another Station ...
...Accessory Information 23 Answering an Intercom Call 16 Answering Calls 13 B Base Layout 5 Basic Operation 12 C Call Alert Tone 10 Call ...Calls with Optional Headset 13 Making Calls with the Speakerphone 12 Manually Setting the Time and Date 10 Memory Delete/Clear 19 Memory Log and Phone Book 18 Message Waiting 15 Mute 13 N No Unknown/Blocked... Phones 8 P Paging All Stations 16 Parts Checklist 5 Phone ID 9 Phonebook Name 8, 9, 11 Placing a Call on Hold 14 Pre-dialing 13 Priority Line 9 Privacy 15 Programing the Telephone 8 Providing Privacy 15 R Receiving a Transferred Call from Another Station ...


