User Guide
Page 3
...an uncontrolled environment. Refer to two separate services available from your body. It is possible to enhance your phone to a cordless feature by taking a few minutes to 16 station users. CAUTION: RISK OF ELECTRIC SHOCK DO NOT OPEN THE LIGHTNING FLASH AND ARROW HEAD WITHIN THE TRIANGLE...Radiation Exposure Statement This equipment complies with any other accessories may not ensure compliance with this user's guide. It is a full-featured phone ideally suited for future reference. IMPORTANT: In order to use , however, you are basic safety instructions that should be installed and...
...an uncontrolled environment. Refer to two separate services available from your body. It is possible to enhance your phone to a cordless feature by taking a few minutes to 16 station users. CAUTION: RISK OF ELECTRIC SHOCK DO NOT OPEN THE LIGHTNING FLASH AND ARROW HEAD WITHIN THE TRIANGLE...Radiation Exposure Statement This equipment complies with any other accessories may not ensure compliance with this user's guide. It is a full-featured phone ideally suited for future reference. IMPORTANT: In order to use , however, you are basic safety instructions that should be installed and...
User Guide
Page 4
...REQUIREMENTS 5 BASE LAYOUT...5 IMPORTANT INSTALLATION INFORMATION 6 IMPORTANT INSTALLATION GUIDELINES 6 INSTALLING THE PHONE 6 DATA PORT 8 SYSTEM VERIFICATION 8 OTHER SYSTEM PHONES 8 PROGRAMMING THE TELEPHONE 8 LANGUAGE ...8 RINGER TONE 8 PRIORITY LINE 9 DELAY RING ...9 PHONE ID ...9 PHONE NAME ... INTERCOM CALL 16 INTERCOM HOLD 16 INTERCOM CONFERENCE CALLS 16 PAGING ALL STATIONS 16 CALLER ID (CID 16 SUMMARY SCREEN 16 RECEIVING AND STORING CID... OPERATION WITHOUT POWER 20 CORDLESS PHONE OPTION 20 TROUBLESHOOTING GUIDE 20 GENERAL PRODUCT CARE 21 SERVICE 21 LIMITED WARRANTY...
...REQUIREMENTS 5 BASE LAYOUT...5 IMPORTANT INSTALLATION INFORMATION 6 IMPORTANT INSTALLATION GUIDELINES 6 INSTALLING THE PHONE 6 DATA PORT 8 SYSTEM VERIFICATION 8 OTHER SYSTEM PHONES 8 PROGRAMMING THE TELEPHONE 8 LANGUAGE ...8 RINGER TONE 8 PRIORITY LINE 9 DELAY RING ...9 PHONE ID ...9 PHONE NAME ... INTERCOM CALL 16 INTERCOM HOLD 16 INTERCOM CONFERENCE CALLS 16 PAGING ALL STATIONS 16 CALLER ID (CID 16 SUMMARY SCREEN 16 RECEIVING AND STORING CID... OPERATION WITHOUT POWER 20 CORDLESS PHONE OPTION 20 TROUBLESHOOTING GUIDE 20 GENERAL PRODUCT CARE 21 SERVICE 21 LIMITED WARRANTY...
User Guide
Page 5
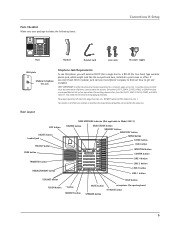
... need an RJ11C (for a single line) or a RJ14C (for two lines) type modular phone jack, which might look like the one station to another, the two stations should be common to all phones connected to Line 1 may inhibit the intercom and paging operations. MEM. MEM. INT. MEM.... STORE 4 5 DIAL 6 7 INTERCOM 8 CONFER 9 LINE 4 10 11 LINE 3 12 LINE 2 13 LINE 1 14 15 HOLD 16 INTERCOM/MEMORY LOG INT. Base Layout EXIT button DELETE button headset jack PRIVACY button PAGE button TRANSFER button REDIAL/FORMAT button NEW MESSAGE indicator (Not applicable to achieve full system...
... need an RJ11C (for a single line) or a RJ14C (for two lines) type modular phone jack, which might look like the one station to another, the two stations should be common to all phones connected to Line 1 may inhibit the intercom and paging operations. MEM. MEM. INT. MEM.... STORE 4 5 DIAL 6 7 INTERCOM 8 CONFER 9 LINE 4 10 11 LINE 3 12 LINE 2 13 LINE 1 14 15 HOLD 16 INTERCOM/MEMORY LOG INT. Base Layout EXIT button DELETE button headset jack PRIVACY button PAGE button TRANSFER button REDIAL/FORMAT button NEW MESSAGE indicator (Not applicable to achieve full system...
User Guide
Page 6
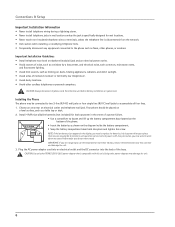
... screwdriver to loosen and lift up the battery compartment door located on the bottom of the phone. • Insert the batteries as shown on a level surface, such as a table top...and an electrical power outlet. • Avoid sources of noise, such as a window by a busy street, and electrical noise, such as motors, microwave ovens, and fluorescent lighting. •... air ducts, heating appliances, radiators, and direct sunlight. • Avoid areas of the base. Using other cordless telephones or personal computers. CAUTION: Always disconnect all four lines. 1. Install 4 AAA-size...
... screwdriver to loosen and lift up the battery compartment door located on the bottom of the phone. • Insert the batteries as shown on a level surface, such as a table top...and an electrical power outlet. • Avoid sources of noise, such as a window by a busy street, and electrical noise, such as motors, microwave ovens, and fluorescent lighting. •... air ducts, heating appliances, radiators, and direct sunlight. • Avoid areas of the base. Using other cordless telephones or personal computers. CAUTION: Always disconnect all four lines. 1. Install 4 AAA-size...
User Guide
Page 7
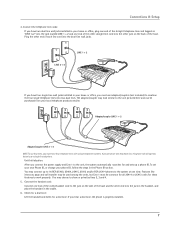
..., but only as "LINE 1+2" into the jack marked LINE 1 + 2 and one end of the other end of the base. If you hear a dial tone, the phone is properly installed. 7 You may connect up a phone ID. Features like intercom, page and call transfer may look similar to the jack on the side of the... base and the other jack on the back of each line cord into the jack in the handset, and place the handset in your local telephone products retailer. Check for a dial tone: Lift the handset and listen for and sets up to 16 RCA 25403, 25404, 25415, 25413 and/or RCA 25414 phones...
..., but only as "LINE 1+2" into the jack marked LINE 1 + 2 and one end of the other end of the base. If you hear a dial tone, the phone is properly installed. 7 You may connect up a phone ID. Features like intercom, page and call transfer may look similar to the jack on the side of the... base and the other jack on the back of each line cord into the jack in the handset, and place the handset in your local telephone products retailer. Check for a dial tone: Lift the handset and listen for and sets up to 16 RCA 25403, 25404, 25415, 25413 and/or RCA 25414 phones...
User Guide
Page 8
...messages in standby mode. 2. NOTE: On Model 25413 you entered. Use the data port to the system, you have a phone ID. Only other stations. The display shows the phone ID you cannot select CID ON/OFF. 7. The default is not connected to hook up your fax machine if they all... who do not know that person to fax something to connect an auxiliary phone device, such as a fax machine, computer modem, answering machine, or even a cordless phone. Ringer Tone The ringers for line 4. Connections & Setup Data Port This phone has a data port jack to you will hear a ring back tone ...
...messages in standby mode. 2. NOTE: On Model 25413 you entered. Use the data port to the system, you have a phone ID. Only other stations. The display shows the phone ID you cannot select CID ON/OFF. 7. The default is not connected to hook up your fax machine if they all... who do not know that person to fax something to connect an auxiliary phone device, such as a fax machine, computer modem, answering machine, or even a cordless phone. Ringer Tone The ringers for line 4. Connections & Setup Data Port This phone has a data port jack to you will hear a ring back tone ...
User Guide
Page 9
...5. Use the < REVIEW > button to scroll to SET DELAY RING. 5. Press the SELECT/SAVE button. 4. Use the < REVIEW > button to scroll to SET PHONE OPTIONS. 3. Use the < REVIEW > button to scroll to save . A maximum of the four lines) must be connected in the system at any memory button (1-16...) to exit , except during the ID search. Press the SELECT/SAVE button to SET PHONE OPTIONS. 3. NOTE: The Phone Name and ID shows in use by the next available line if the priority line is not programmed. Press the SELECT/SAVE button....
...5. Use the < REVIEW > button to scroll to SET DELAY RING. 5. Press the SELECT/SAVE button. 4. Use the < REVIEW > button to scroll to SET PHONE OPTIONS. 3. Use the < REVIEW > button to scroll to save . A maximum of the four lines) must be connected in the system at any memory button (1-16...) to exit , except during the ID search. Press the SELECT/SAVE button to SET PHONE OPTIONS. 3. NOTE: The Phone Name and ID shows in use by the next available line if the priority line is not programmed. Press the SELECT/SAVE button....
User Guide
Page 10
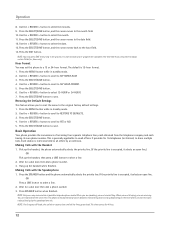
... the speaker. Press the SELECT/SAVE button. 4. Press the MENU button while in standby mode. 2. The default is a incoming call using the phone. TIP: You may also use this tone to disturb your conversation, you are saved or not. Press the SELECT/SAVE button. 6. Press the ...Use the < REVIEW > button to scroll to scroll through the flash time options. Connections & Setup Intercom Auto Answer For "hands-free" operation, the phone can set to automatically answer an intercom call while you that there is YES. 7. Use the < REVIEW > button to YES or NO. Use the <...
... the speaker. Press the SELECT/SAVE button. 4. Press the MENU button while in standby mode. 2. The default is a incoming call using the phone. TIP: You may also use this tone to disturb your conversation, you are saved or not. Press the SELECT/SAVE button. 6. Press the ...Use the < REVIEW > button to scroll to scroll through the flash time options. Connections & Setup Intercom Auto Answer For "hands-free" operation, the phone can set to automatically answer an intercom call while you that there is YES. 7. Use the < REVIEW > button to YES or NO. Use the <...
User Guide
Page 11
...a mistake, press the DELETE button to six regional area codes. 7. Press the SELECT/SAVE button to save . Setting Regional Area Codes helps the phone determine the number format to SET AREA CODE. 3. Call records matching any of the set accordingly with each press of four contrast levels. 1. Manually... while in the display. 6. Use the < REVIEW > button to scroll to adjust the contrast. Use the touch tone pad on your phone to enter your phone to enter up to six regional area codes. Use the < REVIEW > button to scroll to model 25413) 1. The display instantly adjusts ...
...a mistake, press the DELETE button to six regional area codes. 7. Press the SELECT/SAVE button to save . Setting Regional Area Codes helps the phone determine the number format to SET AREA CODE. 3. Call records matching any of the set accordingly with each press of four contrast levels. 1. Manually... while in the display. 6. Use the < REVIEW > button to scroll to adjust the contrast. Use the touch tone pad on your phone to enter your phone to enter up to six regional area codes. Use the < REVIEW > button to scroll to model 25413) 1. The display instantly adjusts ...
User Guide
Page 12
...line. 2. Wait for 4 lines. 12 NOTE: You may set this phone to share multiple lines. Basic Operation Your phone provides the convenience of the voice or the room noise picked up the handset when finished. Each station is occupied, it selects an open line.) OR Pick up the handset,... the phone automatically selects the priority line. (If the priority line is interconnected to YES or NO. 5. Use the <...
...line. 2. Wait for 4 lines. 12 NOTE: You may set this phone to share multiple lines. Basic Operation Your phone provides the convenience of the voice or the room noise picked up the handset when finished. Each station is occupied, it selects an open line.) OR Pick up the handset,... the phone automatically selects the priority line. (If the priority line is interconnected to YES or NO. 5. Use the <...
User Guide
Page 13
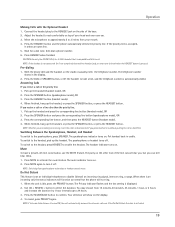
...approximately 2 to 3 inches from speakerphone to the HEADSET jack on the cradle, manually enter the telephone number. Wait for a dial tone, then dial a phone number. 6. CAUTION: Use only the ATLINKS USA, Inc. 5-2425 headset that is disconnected if you press another line without putting the call on a line...switch to the headset, press HEADSET to activate the mute feature. Press MUTE to enable the headset. The mute indicator turns on top of the base. 2. Your selection will not ring. 1. If the priority line is pressed. NOTE: If the headset is not connected (or if not ...
...approximately 2 to 3 inches from speakerphone to the HEADSET jack on the cradle, manually enter the telephone number. Wait for a dial tone, then dial a phone number. 6. CAUTION: Use only the ATLINKS USA, Inc. 5-2425 headset that is disconnected if you press another line without putting the call on a line...switch to the headset, press HEADSET to activate the mute feature. Press MUTE to enable the headset. The mute indicator turns on top of the base. 2. Your selection will not ring. 1. If the priority line is pressed. NOTE: If the headset is not connected (or if not ...
User Guide
Page 14
... and rings during call transfer. • If the transferred call is not picked up at the other station doesn't pick up the transferred call . Put your phone company offers voice messaging service and you will hear beeps to alert you are on hold by pressing the...priority line is automatically selected, OR Press a line button to select another , the two stations should be redialed contains more than that line button. When the phone is reviewed. 14 Transferring a Call to Another Station 1. With the caller on hold , and the line indicator flashes green. &#...
... and rings during call transfer. • If the transferred call is not picked up at the other station doesn't pick up the transferred call . Put your phone company offers voice messaging service and you will hear beeps to alert you are on hold by pressing the...priority line is automatically selected, OR Press a line button to select another , the two stations should be redialed contains more than that line button. When the phone is reviewed. 14 Transferring a Call to Another Station 1. With the caller on hold , and the line indicator flashes green. &#...

User Guide
Page 15
.../headset volume is set independently with . 4. Speakerphone, Handset, and Headset Volume While the phone is initiated (the handset should be secured so that no one party: Press the line button for the stations you want to both parties: Hang up or down buttons. Conference Calls This feature allows... you to model 25403, 25404, 25413, and 25414 phones. Press another line button and dial the telephone number of 2 lines...
.../headset volume is set independently with . 4. Speakerphone, Handset, and Headset Volume While the phone is initiated (the handset should be secured so that no one party: Press the line button for the stations you want to both parties: Hang up or down buttons. Conference Calls This feature allows... you to model 25403, 25404, 25413, and 25414 phones. Press another line button and dial the telephone number of 2 lines...

User Guide
Page 16
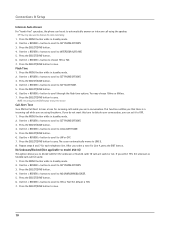
If you receive an INTERCOM call, the INTERCOM indicator flashes red, and the display shows the caller's name and phone ID. Intercom Hold 1. NOTE: • When the intercom is on hold first, you press the HOLD button to CID memory. Place ...page in use automatically activate their speakerphones and receive your page. 3. Within 60 seconds of CID records to be done with , and the other stations not in this user's guide is automatically disconnected. Intercom Conference Calls This feature allows you want to automatically select a party. Press the CONFERENCE button....
If you receive an INTERCOM call, the INTERCOM indicator flashes red, and the display shows the caller's name and phone ID. Intercom Hold 1. NOTE: • When the intercom is on hold first, you press the HOLD button to CID memory. Place ...page in use automatically activate their speakerphones and receive your page. 3. Within 60 seconds of CID records to be done with , and the other stations not in this user's guide is automatically disconnected. Intercom Conference Calls This feature allows you want to automatically select a party. Press the CONFERENCE button....
User Guide
Page 17
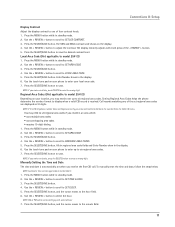
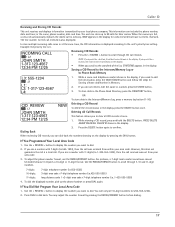
... number shows in the display, if you to clear all CID records at the same time, the CID information is also displayed. To adjust the phone number format, use the REDIAL/FORMAT button. If You Did Not Program Your Local Area Code 1. Deleting All Call Records This feature allows you need...:34 PM 12/25 Reviewing CID Records • Press the < REVIEW > button to dial. NOTE: If you want to confirm. or the name, phone number, date and time. You may adjust the number format by pressing the REDIAL/FORMAT button before dialing. 17 Use the < REVIEW > button to display...
... number shows in the display, if you to clear all CID records at the same time, the CID information is also displayed. To adjust the phone number format, use the REDIAL/FORMAT button. If You Did Not Program Your Local Area Code 1. Deleting All Call Records This feature allows you need...:34 PM 12/25 Reviewing CID Records • Press the < REVIEW > button to dial. NOTE: If you want to confirm. or the name, phone number, date and time. You may adjust the number format by pressing the REDIAL/FORMAT button before dialing. 17 Use the < REVIEW > button to display...

User Guide
Page 18
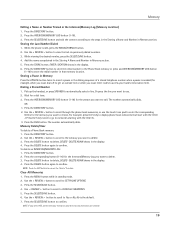
... button. 2. Press the EXIT button when you are finished reviewing memories. The numbers you enter show in Phone Book (Directory) Memory 1. Press the 7 key 4 times for the letter L. NOTE: If you make a ...to the incorrect digit, and press the DELETE button to delete. 5. The Phone Book and each of the number pad on the base). Storing a Number and Name in Memory NOTE: To cancel the storing ...procedure at any additional names and numbers you want to store, up to 94, in the Phone Book memory), OR...
... button. 2. Press the EXIT button when you are finished reviewing memories. The numbers you enter show in Phone Book (Directory) Memory 1. Press the 7 key 4 times for the letter L. NOTE: If you make a ...to the incorrect digit, and press the DELETE button to delete. 5. The Phone Book and each of the number pad on the base). Storing a Number and Name in Memory NOTE: To cancel the storing ...procedure at any additional names and numbers you want to store, up to 94, in the Phone Book memory), OR...
User Guide
Page 19
... ENTER LOCATION shows in standby mode. 2. Or press the line you want to review. OR 1. Use the < REVIEW > button to scroll through the phone book memories, or use . 2. Press the DIRECTORY button. 2. Press the DELETE button to CLEAR ALL MEMORIES. 5. Press the MENU button while in the ...button. 2. Use the < REVIEW > button to scroll to confirm. The number automatically dials. For example, press the 5 key to SET PHONE OPTIONS. 3. DELETE AGAIN shows in the display. 4. NOTE: Press the EXIT button to automatically select a line. Pick up the handset, or press ...
... ENTER LOCATION shows in standby mode. 2. Or press the line you want to review. OR 1. Use the < REVIEW > button to scroll through the phone book memories, or use . 2. Press the DIRECTORY button. 2. Press the DELETE button to CLEAR ALL MEMORIES. 5. Press the MENU button while in the ...button. 2. Use the < REVIEW > button to scroll to confirm. The number automatically dials. For example, press the 5 key to SET PHONE OPTIONS. 3. DELETE AGAIN shows in the display. 4. NOTE: Press the EXIT button to automatically select a line. Pick up the handset, or press ...
User Guide
Page 20
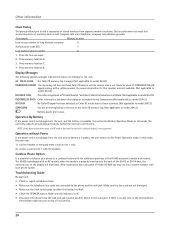
... is lifted. • Check the SPEAKER button. Operation By Battery If the power cord is not plugged into the back of the 25413 or 25414 base, the antenna icon on line 1 with the additional purchase of a message or the unit: 00 TOTAL CALLS The Caller ID memory log is withheld...Caller ID memory log. (Not applicable to model 25413.) Battery power level is possible to enhance your phone to a cordless feature with the handset. in the second phone, the problem might be your phone system. Cordless Phone Option It is low. Make sure the line cords are at the beginning or the end of ...
... is lifted. • Check the SPEAKER button. Operation By Battery If the power cord is not plugged into the back of the 25413 or 25414 base, the antenna icon on line 1 with the additional purchase of a message or the unit: 00 TOTAL CALLS The Caller ID memory log is withheld...Caller ID memory log. (Not applicable to model 25413.) Battery power level is possible to enhance your phone to a cordless feature with the handset. in the second phone, the problem might be your phone system. Cordless Phone Option It is low. Make sure the line cords are at the beginning or the end of ...

User Guide
Page 21
...8226; Make sure the ringer is turned on. • Make sure the Do Not Disturb feature is connected properly and common to all phone ID's (station numbers) involved have been assigned. Intercom does not function correctly • Make sure line 1 is not activated. • You may ...have same line connected. See "Changing the Phone ID (Station Address)". Purchase date Name of store 21 Try unplugging some phones. • See solutions for repair or warranty information, please contact customer service at 1-800-511-3180. Service...
...8226; Make sure the ringer is turned on. • Make sure the Do Not Disturb feature is connected properly and common to all phone ID's (station numbers) involved have been assigned. Intercom does not function correctly • Make sure line 1 is not activated. • You may ...have same line connected. See "Changing the Phone ID (Station Address)". Purchase date Name of store 21 Try unplugging some phones. • See solutions for repair or warranty information, please contact customer service at 1-800-511-3180. Service...
User Guide
Page 24
... 23 Answering an Intercom Call 16 Answering Calls 13 B Base Layout 5 Basic Operation 12 C Call Alert Tone 10 ... on the priority line 13 Important Information 2, 3 Important Installation Guidelines 6 Important Installation Information 6 Installing the Phone 6 Intercom Auto Answer 10 Intercom Calls 15 Intercom Conference Calls 16 Intercom Hold 16 Interference Information 2 L...13 N No Unknown/Blocked 11 O One-Touch Intercom 15 Operation without Power 20 Other System Phones 8 P Paging All Stations 16 Parts Checklist 5 Phone ID 9 Phonebook Name 8, 9, 11 Placing a Call on Hold 14 Pre-dialing 13 Priority...
... 23 Answering an Intercom Call 16 Answering Calls 13 B Base Layout 5 Basic Operation 12 C Call Alert Tone 10 ... on the priority line 13 Important Information 2, 3 Important Installation Guidelines 6 Important Installation Information 6 Installing the Phone 6 Intercom Auto Answer 10 Intercom Calls 15 Intercom Conference Calls 16 Intercom Hold 16 Interference Information 2 L...13 N No Unknown/Blocked 11 O One-Touch Intercom 15 Operation without Power 20 Other System Phones 8 P Paging All Stations 16 Parts Checklist 5 Phone ID 9 Phonebook Name 8, 9, 11 Placing a Call on Hold 14 Pre-dialing 13 Priority...


