Owner's Manual
Page 2
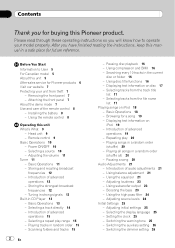
Please read through these operating instructions so you will know how to User 5 For Canadian model 5 About this Pioneer product. Remote control 9 Basic Operations 10 - Basic Operations 11 - Tuning in strong signals 13 Built-in a random order (shuffle) 20 -... Introduction of the remote control 8 - Basic Operations 13 - Using disc title functions 16 - Displaying text information on iPod 19 - Selecting tracks from the track title list 17 - Playing songs in CD Player 13 - Using the equalizer 21 - Setting the clock 25 - Before You Start Information to operate your unit...
Please read through these operating instructions so you will know how to User 5 For Canadian model 5 About this Pioneer product. Remote control 9 Basic Operations 10 - Basic Operations 11 - Tuning in strong signals 13 Built-in a random order (shuffle) 20 -... Introduction of the remote control 8 - Basic Operations 13 - Using disc title functions 16 - Displaying text information on iPod 19 - Selecting tracks from the track title list 17 - Playing songs in CD Player 13 - Using the equalizer 21 - Setting the clock 25 - Before You Start Information to operate your unit...
Owner's Manual
Page 4
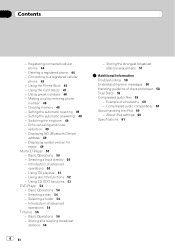
... tone 49 - Basic Operations 50 - Basic Operations 56 - Setting the automatic answering 49 - Using disc title functions 52 - Using CD TEXT functions 53 DVD Player 54 - Selecting a disc 54 - Introduction of discs and player 58 Dual Discs 59 Compressed audio files ...59 - Using preset numbers 48 - Deleting a registered phone 44 - Selecting a track directly 50 - About iPod settings 60 Specifications 61 Storing the strongest broadcast stations sequentially 57 Additional Information Troubleshooting 58 Understanding error messages 58 Handling guideline of ...
... tone 49 - Basic Operations 50 - Basic Operations 56 - Setting the automatic answering 49 - Using disc title functions 52 - Using CD TEXT functions 53 DVD Player 54 - Selecting a disc 54 - Introduction of discs and player 58 Dual Discs 59 Compressed audio files ...59 - Using preset numbers 48 - Deleting a registered phone 44 - Selecting a track directly 50 - About iPod settings 60 Specifications 61 Storing the strongest broadcast stations sequentially 57 Additional Information Troubleshooting 58 Understanding error messages 58 Handling guideline of ...
Owner's Manual
Page 6
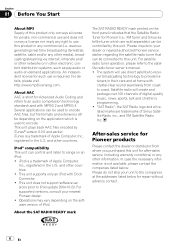
...: Please do not ship your nearest Pioneer dealer. ! After-sales service for Pioneer (i.e., XM tuner and Sirius satellite tuner which is a trademark of Apple Computer, Inc., registered in the U.S. About the SAT RADIO READY mark The SAT RADIO READY mark printed on the application which are trademarks of iPod. The system will create and package...
...: Please do not ship your nearest Pioneer dealer. ! After-sales service for Pioneer (i.e., XM tuner and Sirius satellite tuner which is a trademark of Apple Computer, Inc., registered in the U.S. About the SAT RADIO READY mark The SAT RADIO READY mark printed on the application which are trademarks of iPod. The system will create and package...
Owner's Manual
Page 10
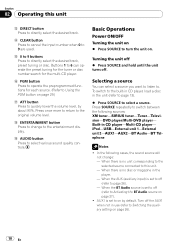
...on % Press SOURCE to 9 are used. Turning the unit off % Press SOURCE and hold until the unit turns off the AUX1 when not in CD player-Multi-CD player- iPod-USB-External unit 1-External unit 2-AUX1-AUX2-BT Audio-BT Telephone Notes ! Buttons 1 to 6 can select a source you want to listen to ... to switch between the following cases, the sound source will not change to change : - When the BT Audio source is set to the built-in CD player, load a disc in the player. - Selecting a source You can operate the preset tuning for the tuner or disc number search for each source. ...
...on % Press SOURCE to 9 are used. Turning the unit off % Press SOURCE and hold until the unit turns off the AUX1 when not in CD player-Multi-CD player- iPod-USB-External unit 1-External unit 2-AUX1-AUX2-BT Audio-BT Telephone Notes ! Buttons 1 to 6 can select a source you want to listen to ... to switch between the following cases, the sound source will not change to change : - When the BT Audio source is set to the built-in CD player, load a disc in the player. - Selecting a source You can operate the preset tuning for the tuner or disc number search for each source. ...
Owner's Manual
Page 12
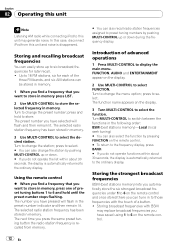
In this case, disconnect iPod from memory. # You can also recall radio station frequencies assigned to select. # You can tune in memory... there you can also change the menu option; Section 02 Operating this unit Note Listening AM radio while connecting iPod to this unit may replace broadcast frequencies you want to store in memory press LIST. 2 Use...ENTERTAINMENT appear on the remote control. 12 En Turn to store the selected frequency in memory. The selected radio station frequency has been stored in memory. Turn MULTI-CONTROL to switch between the functions in the following...
In this case, disconnect iPod from memory. # You can also recall radio station frequencies assigned to select. # You can tune in memory... there you can also change the menu option; Section 02 Operating this unit Note Listening AM radio while connecting iPod to this unit may replace broadcast frequencies you want to store in memory press LIST. 2 Use...ENTERTAINMENT appear on the remote control. 12 En Turn to store the selected frequency in memory. The selected radio station frequency has been stored in memory. Turn MULTI-CONTROL to switch between the functions in the following...
Owner's Manual
Page 18
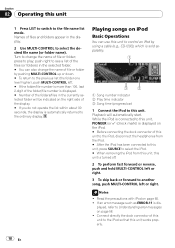
Turn to play; Playing songs on page 58. ! press to change the name of file or folder by using a cable (e.g., CD-I200), which is displayed. # Number of the folders/files in the currently selected folder will automatically start. If an error message such as ...unit. Playback will be indicated on the iPod. # Before connecting the dock connector of this unit to the iPod, disconnect the headphones from the iPod. # After the iPod has been connected to this unit, press SOURCE to select the iPod. # When removing the iPod from this unit, this unit, PIONEER (or (check mark)) is displayed on...
Turn to play; Playing songs on page 58. ! press to change the name of file or folder by using a cable (e.g., CD-I200), which is displayed. # Number of the folders/files in the currently selected folder will automatically start. If an error message such as ...unit. Playback will be indicated on the iPod. # Before connecting the dock connector of this unit to the iPod, disconnect the headphones from the iPod. # After the iPod has been connected to this unit, press SOURCE to select the iPod. # When removing the iPod from this unit, this unit, PIONEER (or (check mark)) is displayed on...
Owner's Manual
Page 19
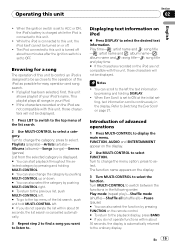
..., press BAND. # If you want to listen to this unit Section 02 English ! When Ever Scroll is set to OFF. While the iPod is connected to this unit shows playlist of advanced operations 1 Press MULTI-CONTROL to change the category by pushing MULTI-CONTROL up or down. ... turned on page 27. Turn to display the main menu. Playlists (playlists)-Artists (artists)- Operating this unit is turned off . ! Introduction of your iPod. ! press to switch between the functions in the following order: Play mode (repeat play time # If the characters recorded on the display. 3 Turn...
..., press BAND. # If you want to listen to this unit Section 02 English ! When Ever Scroll is set to OFF. While the iPod is connected to this unit shows playlist of advanced operations 1 Press MULTI-CONTROL to change the category by pushing MULTI-CONTROL up or down. ... turned on page 27. Turn to display the main menu. Playlists (playlists)-Artists (artists)- Operating this unit is turned off . ! Introduction of your iPod. ! press to switch between the functions in the following order: Play mode (repeat play time # If the characters recorded on the display. 3 Turn...
Owner's Manual
Page 20
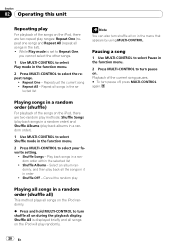
...by using MULTI-CONTROL. Shuffle Albums - Cancel the random play Playing all songs in a random order (shuffle all) This method plays all songs on the iPod randomly. % Press and hold MULTI-CONTROL to select your favorite setting. ! Play back songs in order ! Shuffle Songs - Select an album randomly, ... the repeat range. ! Repeat One - Shuffle OFF - Repeat All - Playing songs in a random order (shuffle) For playback of the songs on the iPod will play ranges: Repeat One (repeat one song) and Repeat All (repeat all songs in the function menu. 2 Press MULTI-CONTROL to turn pause on...
...by using MULTI-CONTROL. Shuffle Albums - Cancel the random play Playing all songs in a random order (shuffle all) This method plays all songs on the iPod randomly. % Press and hold MULTI-CONTROL to select your favorite setting. ! Play back songs in order ! Shuffle Songs - Select an album randomly, ... the repeat range. ! Repeat One - Shuffle OFF - Repeat All - Playing songs in a random order (shuffle) For playback of the songs on the iPod will play ranges: Repeat One (repeat one song) and Repeat All (repeat all songs in the function menu. 2 Press MULTI-CONTROL to turn pause on...

Owner's Manual
Page 27
... demo off , press MULTI-CONTROL again. Set to OFF if you can also turn on . # To turn the Ever Scroll off , press MULTI-CONTROL again. CD- Notes ! Remember that status will be displayed. For more details, see Reverse mode on . # To turn the BT Audio source on page 8. BTB100) is... set to ON, text information recorded on CD or iPod scrolls continuously in order to activate the BT Audio source in the display. Pressing MULTI-CONTROL will switch between TEL ATT (attenuation) and TEL mute...
... demo off , press MULTI-CONTROL again. Set to OFF if you can also turn on . # To turn the Ever Scroll off , press MULTI-CONTROL again. CD- Notes ! Remember that status will be displayed. For more details, see Reverse mode on . # To turn the BT Audio source on page 8. BTB100) is... set to ON, text information recorded on CD or iPod scrolls continuously in order to activate the BT Audio source in the display. Pressing MULTI-CONTROL will switch between TEL ATT (attenuation) and TEL mute...
Owner's Manual
Page 29
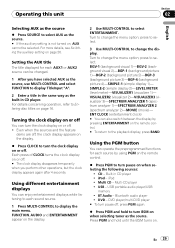
...the auxiliary setting on the display. 2 Use MULTI-CONTROL to select ENTERTAINMENT. Using different entertainment displays You can turn the clock display on or off. ! CD - iPod - Multi CD - Press PGM and hold to turn the clock display on or off , press PGM again. % Press PGM and hold until the BSM turns on... between the display by using PGM on the remote control. % Press PGM to Entering disc titles on when selecting the following sources: ! Built-in CD player. iPod ! USB portable audio player/USB memory ! DVD player/multi-DVD player # To turn pause on page 16.
...the auxiliary setting on the display. 2 Use MULTI-CONTROL to select ENTERTAINMENT. Using different entertainment displays You can turn the clock display on or off. ! CD - iPod - Multi CD - Press PGM and hold to turn the clock display on or off , press PGM again. % Press PGM and hold until the BSM turns on... between the display by using PGM on the remote control. % Press PGM to Entering disc titles on when selecting the following sources: ! Built-in CD player. iPod ! USB portable audio player/USB memory ! DVD player/multi-DVD player # To turn pause on page 16.
Owner's Manual
Page 58
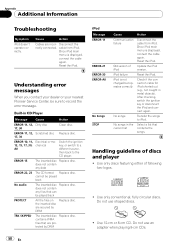
... error messages When you contact your dealer or your nearest Pioneer Service Center, be sure to the CD player. cannot be played back PROTECT All the files on the inserted disc are secured by DRM iPod Message ERROR-11 ERROR-21 ERROR-30 ERROR-A0 No Songs STOP Cause... Action Communication failure Disconnect the cable from iPod. does not contain any data ERROR-22, 23 The CD format Replace disc. iPod failure Reset the iPod. Use only discs featuring either of iPod Update the iPod version. Use 12-cm or 8-cm CD. does not contain any files that current list ...
... error messages When you contact your dealer or your nearest Pioneer Service Center, be sure to the CD player. cannot be played back PROTECT All the files on the inserted disc are secured by DRM iPod Message ERROR-11 ERROR-21 ERROR-30 ERROR-A0 No Songs STOP Cause... Action Communication failure Disconnect the cable from iPod. does not contain any data ERROR-22, 23 The CD format Replace disc. iPod failure Reset the iPod. Use only discs featuring either of iPod Update the iPod version. Use 12-cm or 8-cm CD. does not contain any files that current list ...
Owner's Manual
Page 60
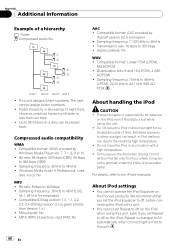
...ADPCM ! Sampling frequency: 16 kHz to 48 kHz (LPCM), 22.05 kHz to 48 kHz ! Pioneer accepts no responsibility for data lost while using this unit. ! Do not let the iPod fall onto the floor, where it may become jammed under the brake or accelerator pedal. You cannot ... and earlier ! Bit rate: 8 kbps to 320 kbps ! Quantization bits: 8 and 16 (LPCM), 4 (MS ADPCM) ! Extended exposure to off on the Pioneer products. You cannot set the iPod Equalizer to direct sunlight can be played back. This unit assigns folder numbers. MP3i (MP3 interactive), mp3 PRO: No AAC ! About...
...ADPCM ! Sampling frequency: 16 kHz to 48 kHz (LPCM), 22.05 kHz to 48 kHz ! Pioneer accepts no responsibility for data lost while using this unit. ! Do not let the iPod fall onto the floor, where it may become jammed under the brake or accelerator pedal. You cannot ... and earlier ! Bit rate: 8 kbps to 320 kbps ! Quantization bits: 8 and 16 (LPCM), 4 (MS ADPCM) ! Extended exposure to off on the Pioneer products. You cannot set the iPod Equalizer to direct sunlight can be played back. This unit assigns folder numbers. MP3i (MP3 interactive), mp3 PRO: No AAC ! About...
Other Manual
Page 2
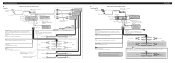
... + Front speaker ≠ + Front speaker ≠ Right + Rear speaker ≠ + Rear speaker ≠ + Subwoofer ≠ 7 optional amplifier iPod with Dock Connector When using a Subwoofer without using a subwoofer of 70 W (2 Ω), be sure to connect with Green and Green/black leads. Black...Mute lead on that equipment. Not used. Connecting the Units 7 Subwoofer iPod with Dock Connector When not connecting a rear speaker lead to a Dock connector port 2 m (6 ft. 7 in.) Interface cable (e.g., CD-I200) (sold separately) Gray Dock connector This product Rear output Front output...
... + Front speaker ≠ + Front speaker ≠ Right + Rear speaker ≠ + Rear speaker ≠ + Subwoofer ≠ 7 optional amplifier iPod with Dock Connector When using a Subwoofer without using a subwoofer of 70 W (2 Ω), be sure to connect with Green and Green/black leads. Black...Mute lead on that equipment. Not used. Connecting the Units 7 Subwoofer iPod with Dock Connector When not connecting a rear speaker lead to a Dock connector port 2 m (6 ft. 7 in.) Interface cable (e.g., CD-I200) (sold separately) Gray Dock connector This product Rear output Front output...


