Owner's Manual
Page 2
...8 Operating this Pioneer product. Selecting a source 10 - Using disc title functions 16 - Selecting tracks from the file name list 17 Playing songs on iPod 18 - Using the equalizer 21 - Using the high pass filter 24 - Setting the clock 25 - Switching the dimmer setting 26 Adjusting the... demo mode 7 Use and care of advanced operations 12 - Power ON/OFF 10 - Introduction of audio adjustments 21 - Playing tracks in CD Player 13 - Remote control 9 Basic Operations 10 - Selecting tracks from the track title list 17 - Selecting the display language 25 -...
...8 Operating this Pioneer product. Selecting a source 10 - Using disc title functions 16 - Selecting tracks from the file name list 17 Playing songs on iPod 18 - Using the equalizer 21 - Using the high pass filter 24 - Setting the clock 25 - Switching the dimmer setting 26 Adjusting the... demo mode 7 Use and care of advanced operations 12 - Power ON/OFF 10 - Introduction of audio adjustments 21 - Playing tracks in CD Player 13 - Remote control 9 Basic Operations 10 - Selecting tracks from the track title list 17 - Selecting the display language 25 -...
Owner's Manual
Page 3
...of advanced operations 35 - Basic Operations 33 - Introduction of an audio file 32 - Basic Operations 38 - Pausing a song 40 - Setting up for Bluetooth wireless connection 28 Other Functions 28 - Disconnecting a cellular phone 44 En 3 Switching the reverse mode 27 - Entering PIN... cellular phone 43 - Adjusting the brightness 26 - Switching the feature demo 27 - Turning the clock display on USB portable audio player/ USB memory 31 - Basic Operations 35 - Displaying the Radio ID 38 Bluetooth Audio 38 - Selecting an XM channel directly 33 - Selecting a channel in...
...of advanced operations 35 - Basic Operations 33 - Introduction of an audio file 32 - Basic Operations 38 - Pausing a song 40 - Setting up for Bluetooth wireless connection 28 Other Functions 28 - Disconnecting a cellular phone 44 En 3 Switching the reverse mode 27 - Entering PIN... cellular phone 43 - Adjusting the brightness 26 - Switching the feature demo 27 - Turning the clock display on USB portable audio player/ USB memory 31 - Basic Operations 35 - Displaying the Radio ID 38 Bluetooth Audio 38 - Selecting an XM channel directly 33 - Selecting a channel in...
Owner's Manual
Page 9
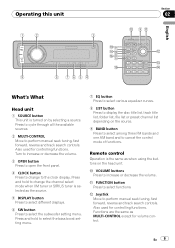
...turned on the source. 9 BAND button Press to select among three FM bands and one AM band and to select the subwoofer setting menu. c Joystick Move to the clock display. Functions are the same as MULTI-CONTROL except for controlling functions. En 9 Also used for controlling functions. b FUNCTION ...Press and hold to change to perform manual seek tuning, fast forward, reverse and track search controls. Press and hold to select the bass boost setting menu. 7 EQ button Press to select various equalizer curves. 8 LIST button Press to display the disc title list, track title list, folder ...
...turned on the source. 9 BAND button Press to select among three FM bands and one AM band and to select the subwoofer setting menu. c Joystick Move to the clock display. Functions are the same as MULTI-CONTROL except for controlling functions. En 9 Also used for controlling functions. b FUNCTION ...Press and hold to change to perform manual seek tuning, fast forward, reverse and track search controls. Press and hold to select the bass boost setting menu. 7 EQ button Press to select various equalizer curves. 8 LIST button Press to display the disc title list, track title list, folder ...
Owner's Manual
Page 25
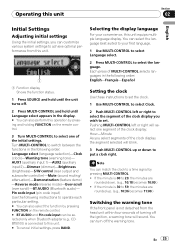
... input) Use the following order: English-Français-Español Setting the clock Use these instructions to set . Turn MULTI-CONTROL to set the clock. 1 Use MULTI-CONTROL to select Clock. 2 Push MULTI-CONTROL left or right will select one of the clock display you wish to switch between the functions in the display. # You...
... input) Use the following order: English-Français-Español Setting the clock Use these instructions to set . Turn MULTI-CONTROL to set the clock. 1 Use MULTI-CONTROL to select Clock. 2 Push MULTI-CONTROL left or right will select one of the clock display you wish to switch between the functions in the display. # You...
Owner's Manual
Page 29
... and ENTERTAINMENT appear on when selecting tuner as the source. iPod - USB - For more details, see Switching the auxiliary setting on or off You can be selected. BGV-1 (background visual 1)-BGV-2 (background visual 2)-BGP-1 (background picture 1)-BGP-2... (background picture 2)-BGP-3 (background picture 3)-BGP-4 (background picture 4)-SIMPLE-1 (simple display 1)- Multi-CD player ! ENT CLOCK (entertainment clock) # You can operate the preprogrammed functions for each sound source. 1 Press MULTI-CONTROL to display TitleInput "A". 2 Enter a ...
... and ENTERTAINMENT appear on when selecting tuner as the source. iPod - USB - For more details, see Switching the auxiliary setting on or off You can be selected. BGV-1 (background visual 1)-BGV-2 (background visual 2)-BGP-1 (background picture 1)-BGP-2... (background picture 2)-BGP-3 (background picture 3)-BGP-4 (background picture 4)-SIMPLE-1 (simple display 1)- Multi-CD player ! ENT CLOCK (entertainment clock) # You can operate the preprogrammed functions for each sound source. 1 Press MULTI-CONTROL to display TitleInput "A". 2 Enter a ...
Owner's Manual
Page 34
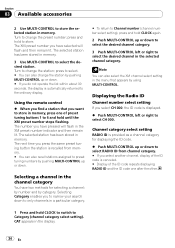
...Turn to change the station by category. Using the remote control % When you have pressed will flash and then remain lit. Channel category select setting RADIO ID is displayed. % Push MULTI-CONTROL left or right to store the selected station in the channel category You have two methods for displaying the...press the same preset tuning button the station is canceled. # Display of the ID code repeats displaying RADIO ID and the ID code one of preset tuning buttons 1 to 6 and hold CLOCK to switch to select the desired channel in the XM preset number indicator and then remain lit. Turn...
...Turn to change the station by category. Using the remote control % When you have pressed will flash and then remain lit. Channel category select setting RADIO ID is displayed. % Push MULTI-CONTROL left or right to store the selected station in the channel category You have two methods for displaying the...press the same preset tuning button the station is canceled. # Display of the ID code repeats displaying RADIO ID and the ID code one of preset tuning buttons 1 to 6 and hold CLOCK to switch to select the desired channel in the XM preset number indicator and then remain lit. Turn...
Owner's Manual
Page 36
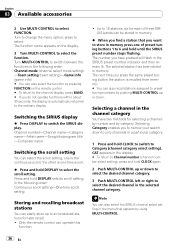
...station that appears by pressing FUNCTION on the display. 3 Turn MULTI-CONTROL to select the scroll setting. The selected station has been stored in a particular category. 1 Press and hold CLOCK again. 2 Push MULTI-CONTROL up or down to the ordinary display. The next time you... display. # To return to Channel number (channel number select setting), press and hold CLOCK to switch to preset tuning numbers by category. CAT appears in the following order: Channel mode (channel select mode setting) -Team setting (team setting)-Game info (game info) # You can operate this function....
...station that appears by pressing FUNCTION on the display. 3 Turn MULTI-CONTROL to select the scroll setting. The selected station has been stored in a particular category. 1 Press and hold CLOCK again. 2 Push MULTI-CONTROL up or down to the ordinary display. The next time you... display. # To return to Channel number (channel number select setting), press and hold CLOCK to switch to preset tuning numbers by category. CAT appears in the following order: Channel mode (channel select mode setting) -Team setting (team setting)-Game info (game info) # You can operate this function....
Owner's Manual
Page 41
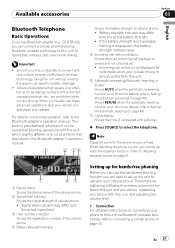
... 5 Incoming call notice indication Shows when an incoming call notice is not displayed for more details, refer to Setting the automatic rejecting on page 49). 7 Clock display Shows the time (if connected with your cellular phone is disconnected from the actual signal level. 3 User...operations that described in battery drainage. ! Shows REFUSE when the automatic rejecting function is cut short from the actual battery strength. ! CD-BTB100), you cannot operate the equalizer function. Important ! Incoming call has been received and not checked yet. ! Note Equalizer curve for...
... 5 Incoming call notice indication Shows when an incoming call notice is not displayed for more details, refer to Setting the automatic rejecting on page 49). 7 Clock display Shows the time (if connected with your cellular phone is disconnected from the actual signal level. 3 User...operations that described in battery drainage. ! Shows REFUSE when the automatic rejecting function is cut short from the actual battery strength. ! CD-BTB100), you cannot operate the equalizer function. Important ! Incoming call has been received and not checked yet. ! Note Equalizer curve for...


