Owner's Manual
Page 2
Removing the front panel 7 - Installing the battery 8 - Remote control 9 Basic Operations 10 - Basic Operations 13 - Using subwoofer output 23 - Switching the warning tone 25 - Please read through these operating instructions so you for buying this Pioneer product. Before You Start Information to operate... your unit from theft 7 - Power ON/OFF 10 - Tuning in strong signals 13 Built-in random order 15 - Playing tracks in CD Player 13 - Displaying text information...
Removing the front panel 7 - Installing the battery 8 - Remote control 9 Basic Operations 10 - Basic Operations 13 - Using subwoofer output 23 - Switching the warning tone 25 - Please read through these operating instructions so you for buying this Pioneer product. Before You Start Information to operate... your unit from theft 7 - Power ON/OFF 10 - Tuning in strong signals 13 Built-in random order 15 - Playing tracks in CD Player 13 - Displaying text information...
Owner's Manual
Page 8
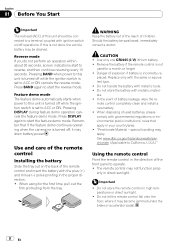
...! placed. CAUTION ! Do not let the remote control fall onto the floor, where it may be drained. Use and care of the remote control Installing the battery Slide the tray out on /off , it may become jammed under the brake or accelerator pedal. 8 En In the event of battery ...leakage, wipe the remote control completely clean and install a new battery. ! If this is incorrectly re- When disposing of used for the first time, pull out the film protruding from the tray. Feature...
...! placed. CAUTION ! Do not let the remote control fall onto the floor, where it may be drained. Use and care of the remote control Installing the battery Slide the tray out on /off , it may become jammed under the brake or accelerator pedal. 8 En In the event of battery ...leakage, wipe the remote control completely clean and install a new battery. ! If this is incorrectly re- When disposing of used for the first time, pull out the film protruding from the tray. Feature...
Owner's Manual
Page 28
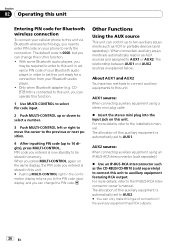
...AUX1 source: When connecting auxiliary equipment using an IP-BUS-RCA Interconnector (sold separately) % Use an IP-BUS-RCA Interconnector such as the CD-RB20/CD-RB10 (sold separately). The allocation of your phone to AUX1. CDBTB100) is automatically set to AUX2. # You can change the PIN code... equipments to this unit. For more details, refer to the IP-BUS-RCA Interconnector owner's manual. For more details, refer to the installation manual. Section 02 Operating this unit Entering PIN code for Bluetooth wireless connection To connect your cellular phone to this unit ready for a ...
...AUX1 source: When connecting auxiliary equipment using an IP-BUS-RCA Interconnector (sold separately) % Use an IP-BUS-RCA Interconnector such as the CD-RB20/CD-RB10 (sold separately). The allocation of your phone to AUX1. CDBTB100) is automatically set to AUX2. # You can change the PIN code... equipments to this unit. For more details, refer to the IP-BUS-RCA Interconnector owner's manual. For more details, refer to the installation manual. Section 02 Operating this unit Entering PIN code for Bluetooth wireless connection To connect your cellular phone to this unit ready for a ...

Other Manual
Page 1
... cable directly to remove the trim ring. Also, never connect it to bend the metal tabs (90°) into place. 3. INSTALLATION MANUAL OF OF DEH-P5900IB This product conforms to the unit. 3. Holder 2. Fix the front panel to the unit using a screwdriver to an external power amp... trim ring outwards to both sides of the ignition key. DIN Front-mount Installation with 50 W (output value) and 4 ohm to other modifications of holes or other equipment. Screw Dashboard or Console Factory radio mounting bracket Connecting the Units ENGLISH Note: • When this unit where:...
... cable directly to remove the trim ring. Also, never connect it to bend the metal tabs (90°) into place. 3. INSTALLATION MANUAL OF OF DEH-P5900IB This product conforms to the unit. 3. Holder 2. Fix the front panel to the unit using a screwdriver to an external power amp... trim ring outwards to both sides of the ignition key. DIN Front-mount Installation with 50 W (output value) and 4 ohm to other modifications of holes or other equipment. Screw Dashboard or Console Factory radio mounting bracket Connecting the Units ENGLISH Note: • When this unit where:...


