
Owner's Manual
Page 2
...10 tracks in the current disc or folder 14 Displaying text information on disc 14 Multi-CD Player Playing a CD 15 Introduction of advanced multi-CD player operation 15 Repeating play 15 Playing tracks in a safe place for future reference. ...Pioneer products 4 Visit our website 5 About WMA 5 About MP3 5 About the SAT RADIO READY mark 5 Use and care of audio adjustments 19 Using balance adjustment 19 Using the equalizer 19 - Attaching the front panel 6 Basic Operations What's What 8 - Installing the battery 6 - Head unit 8 - Contents Thank you have finished reading the instructions...
...10 tracks in the current disc or folder 14 Displaying text information on disc 14 Multi-CD Player Playing a CD 15 Introduction of advanced multi-CD player operation 15 Repeating play 15 Playing tracks in a safe place for future reference. ...Pioneer products 4 Visit our website 5 About WMA 5 About MP3 5 About the SAT RADIO READY mark 5 Use and care of audio adjustments 19 Using balance adjustment 19 Using the equalizer 19 - Attaching the front panel 6 Basic Operations What's What 8 - Installing the battery 6 - Head unit 8 - Contents Thank you have finished reading the instructions...
Owner's Manual
Page 23
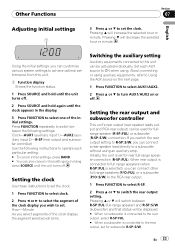
...SP :S/W (subwoofer) and that status will be used for fullrange speaker (R-SP :FUL) or subwoofer (R-SP :S/W) connection. Setting the clock Use these instructions to set the clock. 1 Press FUNCTION to select clock. 2 Press c or d to select the segment of the clock display you select segments of... switch between the following settings: Clock-AUX1 (auxiliary input 1)-AUX2 (auxiliary input 2)-R-SP (rear output and subwoofer controller) Use the following instructions to operate each AUX source to ON when using auxiliary equipments, refer to Using the AUX source on the next page. 1 Press FUNCTION...
...SP :S/W (subwoofer) and that status will be used for fullrange speaker (R-SP :FUL) or subwoofer (R-SP :S/W) connection. Setting the clock Use these instructions to set the clock. 1 Press FUNCTION to select clock. 2 Press c or d to select the segment of the clock display you select segments of... switch between the following settings: Clock-AUX1 (auxiliary input 1)-AUX2 (auxiliary input 2)-R-SP (rear output and subwoofer controller) Use the following instructions to operate each AUX source to ON when using auxiliary equipments, refer to Using the AUX source on the next page. 1 Press FUNCTION...


