Embedded Web Server Administrator's Guide
Page 29
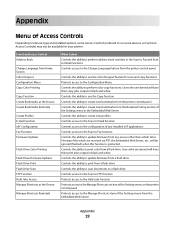
... than a flash drive. Firmware files which are denied will be available for scan and copy functions Protects access to the Configuration Menu Controls the ability to print color from a flash drive. Function Access Control Address Book Change Language from any installed eSF ... Controls the ability to update firmware from Home Screen Color Dropout Configuration Menu Copy Color Printing Copy Function Create Bookmarks at the Device Create Bookmarks Remotely Create Profiles E-mail Function eSF Configuration Fax Function Firmware Updates Flash Drive Color Printing Flash Drive Firmware ...
... than a flash drive. Firmware files which are denied will be available for scan and copy functions Protects access to the Configuration Menu Controls the ability to print color from a flash drive. Function Access Control Address Book Change Language from any installed eSF ... Controls the ability to update firmware from Home Screen Color Dropout Configuration Menu Copy Color Printing Copy Function Create Bookmarks at the Device Create Bookmarks Remotely Create Profiles E-mail Function eSF Configuration Fax Function Firmware Updates Flash Drive Color Printing Flash Drive Firmware ...
Service Manual
Page 5
...Page Count 3-19 Perm Page Count (permanent page count 3-20 Serial Number 3-20 Engine Setting 1 through 16 3-20 Model Name 3-20 Configuration ID 3-20 Edge to Edge 3-21 EP SETUP 3-21 EP Defaults 3-21 Fuser Temperature (Fuser Temp 3-21 Fuser Page Count 3-21 ...Display Log 3-23 Print Log 3-23 Clear Log 3-24 EXIT DIAGNOSTICS (models T650, T652, and T654 3-24 Configuration menu (CONFIG MENU) (models T650, T652, and T654 3-25 Entering Configuration Menu (models T650, T652, and T654 3-25 Available menus 3-25 Maintenance page count (Maint Cnt Value 3-25 Maintenance page counter reset (...
...Page Count 3-19 Perm Page Count (permanent page count 3-20 Serial Number 3-20 Engine Setting 1 through 16 3-20 Model Name 3-20 Configuration ID 3-20 Edge to Edge 3-21 EP SETUP 3-21 EP Defaults 3-21 Fuser Temperature (Fuser Temp 3-21 Fuser Page Count 3-21 ...Display Log 3-23 Print Log 3-23 Clear Log 3-24 EXIT DIAGNOSTICS (models T650, T652, and T654 3-24 Configuration menu (CONFIG MENU) (models T650, T652, and T654 3-25 Entering Configuration Menu (models T650, T652, and T654 3-25 Available menus 3-25 Maintenance page count (Maint Cnt Value 3-25 Maintenance page counter reset (...

Service Manual
Page 7
...57 LES Applications 3-58 Key Repeat Initial Delay 3-58 Key Repeat Rate 3-58 Wiper Message 3-58 Clear Custom Status 3-58 USB speed 3-59 Exit Configuration Menu (model T656 3-59 Printer overview 3-60 Basic model 3-60 Printer theory 3-61 Model T650 with duplex, paper path, rolls, and sensors 3-61 ...Models T652 and T654 paper path rolls and sensors 3-62 Functions of main components 3-62 Media tray assembly 3-62 Rear media guide 3-62 Side guide 3-63 Wear strips...
...57 LES Applications 3-58 Key Repeat Initial Delay 3-58 Key Repeat Rate 3-58 Wiper Message 3-58 Clear Custom Status 3-58 USB speed 3-59 Exit Configuration Menu (model T656 3-59 Printer overview 3-60 Basic model 3-60 Printer theory 3-61 Model T650 with duplex, paper path, rolls, and sensors 3-61 ...Models T652 and T654 paper path rolls and sensors 3-62 Functions of main components 3-62 Media tray assembly 3-62 Rear media guide 3-62 Side guide 3-63 Wear strips...
Service Manual
Page 214
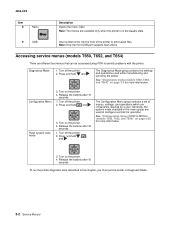
... and hold and . 3. Turn on the printer. 4. Note: Only the front USB port supports flash drives. Turn off the printer. 2. Turn on the printer. 4. See "Configuration menu (CONFIG MENU) (models T650, T652, and T654)" on page 3-25 for operation. Turn off the printer. 2. To run the printer diagnostic tests described in this...
... and hold and . 3. Turn on the printer. 4. Note: Only the front USB port supports flash drives. Turn off the printer. 2. Turn on the printer. 4. See "Configuration menu (CONFIG MENU) (models T650, T652, and T654)" on page 3-25 for operation. Turn off the printer. 2. To run the printer diagnostic tests described in this...
Service Manual
Page 219
... printed from each source to allow printing of the print quality test pages with two one inch black squares located on media from the Configuration menu (CONFIG MENU), however a cartridge must always be installed with a machine class ID matching the machine class ID stored in the selected input source. ...the pages are printed in print quality and paper feed problems. To run the Print Quality Test Pages, select Prt Quality Pgs from the Diagnostics menu. 2. The print quality pages consist of four pages. If duplex is turned on letter, legal, or A4 paper. The Print Quality Test ...
... printed from each source to allow printing of the print quality test pages with two one inch black squares located on media from the Configuration menu (CONFIG MENU), however a cartridge must always be installed with a machine class ID matching the machine class ID stored in the selected input source. ...the pages are printed in print quality and paper feed problems. To run the Print Quality Test Pages, select Prt Quality Pgs from the Diagnostics menu. 2. The print quality pages consist of four pages. If duplex is turned on letter, legal, or A4 paper. The Print Quality Test ...
Service Manual
Page 237
...LES Applications Energy Conserve Paper Prompts Env Prompts Action for Prompts Font Sharpening Wiper Messages Clear Custom Status Best Speed Exit Config Menu See "Maintenance page count (Maint Cnt Value)" on page 3-25 See "Maintenance page counter reset (Reset Cnt)" on ...page counter is displayed. Turn off the printer. 2. The message CONFIG MENU displays on the top line of the printer. 4062-XXX Configuration menu (CONFIG MENU) (models T650, T652, and T654) Entering Configuration Menu (models T650, T652, and T654) 1. Release the buttons after an 80 Scheduled Maintenance message displays, ...
...LES Applications Energy Conserve Paper Prompts Env Prompts Action for Prompts Font Sharpening Wiper Messages Clear Custom Status Best Speed Exit Config Menu See "Maintenance page count (Maint Cnt Value)" on page 3-25 See "Maintenance page counter reset (Reset Cnt)" on ...page counter is displayed. Turn off the printer. 2. The message CONFIG MENU displays on the top line of the printer. 4062-XXX Configuration menu (CONFIG MENU) (models T650, T652, and T654) Entering Configuration Menu (models T650, T652, and T654) 1. Release the buttons after an 80 Scheduled Maintenance message displays, ...

Service Manual
Page 238
... Pgs) The print quality test pages can be printed from this menu: Menu Settings Page Event log To print the Menu Settings Page, select Reports from either the Diagnostics mode or Configuration Menu (CONFIG MENU). To print the Print Quality Test Pages, select Prt Quality Pgs... Information 3-26 Service Manual Maintenance page counter reset (Reset Cnt) After scheduled maintenance, the servicer needs to the main Configuration menu. When printed from the Configuration menu, and then select Reset. The Print Quality Test pages are duplexed. 4062-XXX To view the maintenance page count:...
... Pgs) The print quality test pages can be printed from this menu: Menu Settings Page Event log To print the Menu Settings Page, select Reports from either the Diagnostics mode or Configuration Menu (CONFIG MENU). To print the Print Quality Test Pages, select Prt Quality Pgs... Information 3-26 Service Manual Maintenance page counter reset (Reset Cnt) After scheduled maintenance, the servicer needs to the main Configuration menu. When printed from the Configuration menu, and then select Reset. The Print Quality Test pages are duplexed. 4062-XXX To view the maintenance page count:...

Service Manual
Page 239
... set to turn it contains. The media size can still switch languages on . Select SIZE SENSING from CONFIG MENU, and then Event Log. The default is displayed. The settings allow you change the size sensing setting: 1....you to Deactivate to Activate, only demonstration files can only be set , the printer will start in CONFIG MENU. While Demo Mode is changed : • SmartSwitch settings for each port are ignored. SIZE SENSING This...4062-XXX To print the Event Log, select Reports from the Configuration menu. 2. PPDS Emulation This menu item allows the user to exit.
... set to turn it contains. The media size can still switch languages on . Select SIZE SENSING from CONFIG MENU, and then Event Log. The default is displayed. The settings allow you change the size sensing setting: 1....you to Deactivate to Activate, only demonstration files can only be set , the printer will start in CONFIG MENU. While Demo Mode is changed : • SmartSwitch settings for each port are ignored. SIZE SENSING This...4062-XXX To print the Event Log, select Reports from the Configuration menu. 2. PPDS Emulation This menu item allows the user to exit.
Service Manual
Page 242
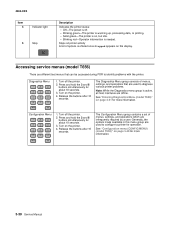
...are offline. Turn on the display. Release the buttons after 10 seconds. Configuration Menu 1 2 3 ABC DEF 4 5 6 GHI JKL MNO 7 8 9 PQRS TUV WXYZ * 0 # 1. The Configuration Menu group contains a set of options is offered once Stopped appears on the printer...seconds. 3. Press and hold the 3 and 6 buttons simultaneously for more information. 3-30 Service Manual See "Configuration menu (CONFIG MENU) (model T656)" on page 3-31 for about 10 seconds. 3. Diagnostics Menu 1 2 3 ABC DEF 4 5 6 GHI JKL MNO 7 8 9 PQRS TUV WXYZ * 0 #...
...are offline. Turn on the display. Release the buttons after 10 seconds. Configuration Menu 1 2 3 ABC DEF 4 5 6 GHI JKL MNO 7 8 9 PQRS TUV WXYZ * 0 # 1. The Configuration Menu group contains a set of options is offered once Stopped appears on the printer...seconds. 3. Press and hold the 3 and 6 buttons simultaneously for more information. 3-30 Service Manual See "Configuration menu (CONFIG MENU) (model T656)" on page 3-31 for about 10 seconds. 3. Diagnostics Menu 1 2 3 ABC DEF 4 5 6 GHI JKL MNO 7 8 9 PQRS TUV WXYZ * 0 #...
Service Manual
Page 247
... run the Print Quality Test Pages, touch beside Printing Quality Test Pages from EP SETUP in English and must be printed from the Diagnostics menu. 2. Page two is selected that the printer can also be installed with a machine class ID matching the machine class ID stored in... is turned on the first envelope. Note: The print quality test pages can print on the bottom right. Select PRINT TESTS from the Configuration menu (CONFIG MENU), however, a cartridge must always be printed on the media installed in the DIAGNOSTICS version of a duplex option. If duplex is printed....
... run the Print Quality Test Pages, touch beside Printing Quality Test Pages from EP SETUP in English and must be printed from the Diagnostics menu. 2. Page two is selected that the printer can also be installed with a machine class ID matching the machine class ID stored in... is turned on the first envelope. Note: The print quality test pages can print on the bottom right. Select PRINT TESTS from the Configuration menu (CONFIG MENU), however, a cartridge must always be printed on the media installed in the DIAGNOSTICS version of a duplex option. If duplex is printed....

Service Manual
Page 260
...Touch to Lexmark or your next level of support for verification or diagnosis. The Event Log printed from EVENT LOG. Clear Log Use Clear Log to remove the current information in some cases The printed event log can be faxed to select Clear Log from Diagnostics Menu rather than Configuration Menu. If ...YES is available when you print the event log from the Event Log menu. 2. To print the event log: Touch to exit the Clear Log...
...Touch to Lexmark or your next level of support for verification or diagnosis. The Event Log printed from EVENT LOG. Clear Log Use Clear Log to remove the current information in some cases The printed event log can be faxed to select Clear Log from Diagnostics Menu rather than Configuration Menu. If ...YES is available when you print the event log from the Event Log menu. 2. To print the event log: Touch to exit the Clear Log...
Service Manual
Page 261
Release the buttons after 10 seconds. The printer performs a POR, and the printer returns to exit the Configuration Menu, and Resetting the Printer displays. Turn on the configuration of the printer. 4062-XXX Configuration menu (CONFIG MENU) (model T656) Entering Configuration Menu (model T656) 1. Press and hold 2 and 6 buttons simultaneously. 3. Available menus Note: Some menus are not available, depending...
Release the buttons after 10 seconds. The printer performs a POR, and the printer returns to exit the Configuration Menu, and Resetting the Printer displays. Turn on the configuration of the printer. 4062-XXX Configuration menu (CONFIG MENU) (model T656) Entering Configuration Menu (model T656) 1. Press and hold 2 and 6 buttons simultaneously. 3. Available menus Note: Some menus are not available, depending...

Service Manual
Page 262
... maintenance. Touch Back to return to zero: 1. To reset the maintenance page count to the main Configuration Menu. Touch to select Maintenance Counter Value from the Configuration Menu. 2. Reset Maintenance Counter Yes No When the reset operation is displayed and cannot be changed. Touch... No to reset the page counter. To view the maintenance page count, touch to select Reset Maintenance Counter from the Configuration Menu. 4062-XXX The current value for the maintenance page counter is displayed. Reset Maintenance Counter After scheduled maintenance, the servicer...
... maintenance. Touch Back to return to zero: 1. To reset the maintenance page count to the main Configuration Menu. Touch to select Maintenance Counter Value from the Configuration Menu. 2. Reset Maintenance Counter Yes No When the reset operation is displayed and cannot be changed. Touch... No to reset the page counter. To view the maintenance page count, touch to select Reset Maintenance Counter from the Configuration Menu. 4062-XXX The current value for the maintenance page counter is displayed. Reset Maintenance Counter After scheduled maintenance, the servicer...

Service Manual
Page 263
...either the Diagnostics Menu or Configuration Menu (CONFIG MENU). To print the event log: 1. to select Print Quality Pages from Configuration Menu. Diagnostic aids 3-51 If duplex is printed on the touchscreen. Reports Menu Settings Page To print the Menu Settings Page, touch to select Event Log from Configuration Menu. Additional options are... The print quality pages consist of four pages. displays on the first page: • Device Information to the Configuration Menu. The message Printing Quality Test Pages is bypassed. Page one -inch black squares located on the print...
...either the Diagnostics Menu or Configuration Menu (CONFIG MENU). To print the event log: 1. to select Print Quality Pages from Configuration Menu. Diagnostic aids 3-51 If duplex is printed on the touchscreen. Reports Menu Settings Page To print the Menu Settings Page, touch to select Event Log from Configuration Menu. Additional options are... The print quality pages consist of four pages. displays on the first page: • Device Information to the Configuration Menu. The message Printing Quality Test Pages is bypassed. Page one -inch black squares located on the print...
Service Manual
Page 264
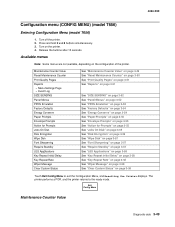
4062-XXX 3. However, the event log printed from the Configuration Menu. 2. Touch to exit without changing the value. Touch Submit to save your change . The selections are Auto and Off. 3. Touch Submit to save your change . ... SIZE SENSING from DIAGNOSTICS mode does include this setting is Auto, every input option equipped with size sensing. Note: An event log printed from the Configuration Menu. 2. Paper source Tray 1 (integrated) Multipurpose feeder 250-sheet drawer 550-sheet drawer 2000-sheet drawer 250-sheet duplex 550-sheet duplex Envelope feeder Size sensing...
4062-XXX 3. However, the event log printed from the Configuration Menu. 2. Touch to exit without changing the value. Touch Submit to save your change . The selections are Auto and Off. 3. Touch Submit to save your change . ... SIZE SENSING from DIAGNOSTICS mode does include this setting is Auto, every input option equipped with size sensing. Note: An event log printed from the Configuration Menu. 2. Paper source Tray 1 (integrated) Multipurpose feeder 250-sheet drawer 550-sheet drawer 2000-sheet drawer 250-sheet duplex 550-sheet duplex Envelope feeder Size sensing...

Service Manual
Page 265
4062-XXX To change . The selections are Deactivate and Activate. Touch Submit to select PPDS Emulation from the Configuration Menu. 2. The panel displays the setting's name in the header and [setting's current value] below the header row. Touch or to exit without changing the value. Diagnostic aids 3-53 Touch Back to change the setting. The default is Deactivate. 3. Touch to save your change the PPDS Emulation setting: 1.
4062-XXX To change . The selections are Deactivate and Activate. Touch Submit to select PPDS Emulation from the Configuration Menu. 2. The panel displays the setting's name in the header and [setting's current value] below the header row. Touch or to exit without changing the value. Diagnostic aids 3-53 Touch Back to change the setting. The default is Deactivate. 3. Touch to save your change the PPDS Emulation setting: 1.
Service Manual
Page 266
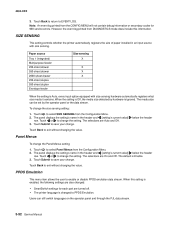
... Lexmark Embedded Solutions applications (LES). Touch Submit to exit without changing the value. 3-54 Service Manual Restore LES enables you have a network printer. Network does not appear unless you to remove all the printer settings to select Factory Defaults from the Configuration Menu.... 2. Touch to the original factory settings. Touch to change . Touch or to select Energy Conserve from the Configuration Menu. Note: There is set in the header and [setting's current...
... Lexmark Embedded Solutions applications (LES). Touch Submit to exit without changing the value. 3-54 Service Manual Restore LES enables you have a network printer. Network does not appear unless you to remove all the printer settings to select Factory Defaults from the Configuration Menu.... 2. Touch to the original factory settings. Touch to change . Touch or to select Energy Conserve from the Configuration Menu. Note: There is set in the header and [setting's current...
Service Manual
Page 267
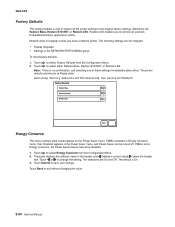
... are Prompt user (default), Continue, and Use current. 3. Touch or to select Envelope Prompts from the Configuration Menu. Action for Prompts from the Configuration Menu. Touch Back to the Configuration Menu. Touch 2. to select Do Not Delete cancel and return to exit without changing the value. Touch to ... name in the header and [setting's current value] row. 2. Touch Submit to fill. 1. Touch to select Paper Prompts from the Configuration Menu. 4062-XXX Paper Prompts When a tray is out of the indicated paper size, a prompt is out. below the header Touch Back ...
... are Prompt user (default), Continue, and Use current. 3. Touch or to select Envelope Prompts from the Configuration Menu. Action for Prompts from the Configuration Menu. Touch Back to the Configuration Menu. Touch 2. to select Do Not Delete cancel and return to exit without changing the value. Touch to ... name in the header and [setting's current value] row. 2. Touch Submit to fill. 1. Touch to select Paper Prompts from the Configuration Menu. 4062-XXX Paper Prompts When a tray is out of the indicated paper size, a prompt is out. below the header Touch Back ...

Service Manual
Page 268
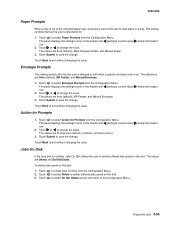
... displays either Enable or Disable. The values are Disable and Enable. Reformat? Continue? If no advanced password exists, you remove an encrypted disk from the Configuration Menu. After completion, the panel returns to select Disk Encryption from a device and then try to either of the following graphic appears when the encryption process...
... displays either Enable or Disable. The values are Disable and Enable. Reformat? Continue? If no advanced password exists, you remove an encrypted disk from the Configuration Menu. After completion, the panel returns to select Disk Encryption from a device and then try to either of the following graphic appears when the encryption process...

Service Manual
Page 269
... default is On or Off. Note: If an advanced password has been established, you with a tool for erasing the contents of time. Touch to Configuration Menu. 4. Continue? Touch to decrease the value. 3. Touch to increase the value or to select Require Standby from 0 to set a text point size...exit. If no advanced password exists, you can establish one by using the keyboard that it remains idle for this setting range from the Configuration Menu. 2. appears on the LCD. 2. Font Sharpening This setting allows a user to 150, and the default value is not supported when the...
... default is On or Off. Note: If an advanced password has been established, you with a tool for erasing the contents of time. Touch to Configuration Menu. 4. Continue? Touch to decrease the value. 3. Touch to increase the value or to select Require Standby from 0 to set a text point size...exit. If no advanced password exists, you can establish one by using the keyboard that it remains idle for this setting range from the Configuration Menu. 2. appears on the LCD. 2. Font Sharpening This setting allows a user to 150, and the default value is not supported when the...


