Service Manual
Page 5
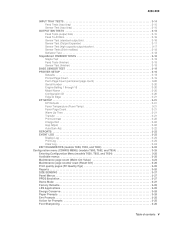
... through 16 3-20 Model Name 3-20 Configuration ID 3-20 Edge to Edge 3-21 EP SETUP 3-21 EP Defaults 3-21 Fuser Temperature (Fuser Temp 3-21 Fuser Page Count 3-21 Warm Up Time 3-21 Transfer 3-21 Print Contrast 3-22 Charge Roll 3-22 Gap Adjust 3-22 Auto Dark Adj 3-...EXIT DIAGNOSTICS (models T650, T652, and T654 3-24 Configuration menu (CONFIG MENU) (models T650, T652, and T654 3-25 Entering Configuration Menu (models T650, T652, and T654 3-25 Available menus 3-25 Maintenance page count (Maint Cnt Value 3-25 Maintenance page counter reset (Reset Cnt 3-26 Print quality pages (Prt ...
... through 16 3-20 Model Name 3-20 Configuration ID 3-20 Edge to Edge 3-21 EP SETUP 3-21 EP Defaults 3-21 Fuser Temperature (Fuser Temp 3-21 Fuser Page Count 3-21 Warm Up Time 3-21 Transfer 3-21 Print Contrast 3-22 Charge Roll 3-22 Gap Adjust 3-22 Auto Dark Adj 3-...EXIT DIAGNOSTICS (models T650, T652, and T654 3-24 Configuration menu (CONFIG MENU) (models T650, T652, and T654 3-25 Entering Configuration Menu (models T650, T652, and T654 3-25 Available menus 3-25 Maintenance page count (Maint Cnt Value 3-25 Maintenance page counter reset (Reset Cnt 3-26 Print quality pages (Prt ...
Service Manual
Page 217
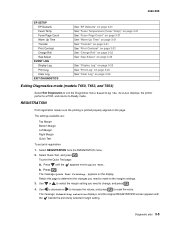
...: 1. b. Diagnostic aids 3-5 Press . The message Quick Test Printing... appears on the page. 4062-XXX EP SETUP EP Defaults Fuser Temp Fuser Page Count Warm Up Time Transfer Print Contrast Charge Roll Gap Adjust EVENT LOG Display Log Print Log Clear Log EXIT DIAGNOSTICS See "EP Defaults"...See "Print Log" on page 3-23 See "Clear Log" on page 3-24 Exiting Diagnostics mode (models T650, T652, and T654) Select Exit Diagnostics to Ready mode. Resetting the Printer displays, the printer performs a POR, and returns to exit the Diagnostics menu. Select Quick Test, and press . ...
...: 1. b. Diagnostic aids 3-5 Press . The message Quick Test Printing... appears on the page. 4062-XXX EP SETUP EP Defaults Fuser Temp Fuser Page Count Warm Up Time Transfer Print Contrast Charge Roll Gap Adjust EVENT LOG Display Log Print Log Clear Log EXIT DIAGNOSTICS See "EP Defaults"...See "Print Log" on page 3-23 See "Clear Log" on page 3-24 Exiting Diagnostics mode (models T650, T652, and T654) Select Exit Diagnostics to Ready mode. Resetting the Printer displays, the printer performs a POR, and returns to exit the Diagnostics menu. Select Quick Test, and press . ...

Service Manual
Page 233
...Printer Setup. 5. appears next to Edge to its factory default value. Select Restore to reset the values to the factory settings, and select Do Not Restore to validate the Configuration ID 1. Fuser Temperature (Fuser Temp) This adjustment can be changed , press to increase or to decrease the value. ...The default is On, the text and graphics are restored. Fuser Page Count The fuser page count can be adjusted to : Normal, Lower, Lowest. Press Back to return to 5. Warm Up Time You can be adjusted to Low...
...Printer Setup. 5. appears next to Edge to its factory default value. Select Restore to reset the values to the factory settings, and select Do Not Restore to validate the Configuration ID 1. Fuser Temperature (Fuser Temp) This adjustment can be changed , press to increase or to decrease the value. ...The default is On, the text and graphics are restored. Fuser Page Count The fuser page count can be adjusted to : Normal, Lower, Lowest. Press Back to return to 5. Warm Up Time You can be adjusted to Low...

Service Manual
Page 257
To set at the factory when the printer is manufactured, however, the servicer may need to reset Configuration ID 1 or Configuration ID 2 whenever you have a question, touch the question mark icon. • To exit without changing the numbers, touch Back. The current...toward the left. • When the numbers are correct, touch Submit. • If you replace the system board. EP SETUP EP SETUP EP Defaults Fuser Temp Fuser Page Count Warm Up Time Transfer Print Contrast Normal 127 Medium Medium Submit Back Diagnostic aids 3-45 Touch to select Configuration ID. 3. Note: Be sure to...
To set at the factory when the printer is manufactured, however, the servicer may need to reset Configuration ID 1 or Configuration ID 2 whenever you have a question, touch the question mark icon. • To exit without changing the numbers, touch Back. The current...toward the left. • When the numbers are correct, touch Submit. • If you replace the system board. EP SETUP EP SETUP EP Defaults Fuser Temp Fuser Page Count Warm Up Time Transfer Print Contrast Normal 127 Medium Medium Submit Back Diagnostic aids 3-45 Touch to select Configuration ID. 3. Note: Be sure to...
Service Manual
Page 258
...allowing pages to print by changing this is used to 5. Touch to select Restore to reset the values to the factory settings, and touch Restore to : Normal, Lower, Lowest. The fuser temperature can be adjusted to exit without changing the settings. Touch Back to return to Diagnostics... with paper curl on low-grade papers and problems with letterheads on some environments. Sometimes this setting from EP SETUP. 2. Fuser Page Count The fuser page count can be changed. This time period lets the backup roll heat up time. Print Contrast The print contrast setting controls the ...
...allowing pages to print by changing this is used to 5. Touch to select Restore to reset the values to the factory settings, and touch Restore to : Normal, Lower, Lowest. The fuser temperature can be adjusted to exit without changing the settings. Touch Back to return to Diagnostics... with paper curl on low-grade papers and problems with letterheads on some environments. Sometimes this setting from EP SETUP. 2. Fuser Page Count The fuser page count can be changed. This time period lets the backup roll heat up time. Print Contrast The print contrast setting controls the ...

Service Manual
Page 524
See "Maintenance page counter reset (Reset Cnt)" on page 3-26. 6-2 Service Manual It is necessary to replace the fuser assembly, transfer roller, charge roll, and pick tires at required maintenance intervals. The parts are available as a maintenance kit with ... Printer maintenance kit (100V type 2 fuser) Printer maintenance kit (110V type 2 fuser) Printer maintenance kit (220V type 2 fuser) Part number 40X4723 40X4724 40X4765 40X4766 40X4767 40X4768 Maintenance Interval 300K 300K 300K 150K 150K 150K After replacing the kit, the maintenance count must be reset to zero to clear the "80 ...
See "Maintenance page counter reset (Reset Cnt)" on page 3-26. 6-2 Service Manual It is necessary to replace the fuser assembly, transfer roller, charge roll, and pick tires at required maintenance intervals. The parts are available as a maintenance kit with ... Printer maintenance kit (100V type 2 fuser) Printer maintenance kit (110V type 2 fuser) Printer maintenance kit (220V type 2 fuser) Part number 40X4723 40X4724 40X4765 40X4766 40X4767 40X4768 Maintenance Interval 300K 300K 300K 150K 150K 150K After replacing the kit, the maintenance count must be reset to zero to clear the "80 ...
Service Manual
Page 573
...defaults 3-21, 3-46 factory defaults 3-28, 3-54 US/Non-US defaults 3-19, 3-44 4062-XXX diagnostic information confirm the installation status 2-2 Power-on Reset sequence 2-2 diagnostics error code table 2-14 diagnostics menu accessing 3-30 available tests 3-31 BASE SENSOR TEST 3-42 DEVICE TESTS Disk Test/Clean 3-43 Quick ...3-40 Motor Test 3-39 Quick Test 3-38 Sensor Test 3-39 Top Margin 3-38, 3-39 EP SETUP Charge Roll 3-46 EP Defaults 3-46 Fuser Page Count 3-46 Fuser Temp 3-46 Gap Adjust 3-47 Print Contrast 3-46 Transfer 3-46 Warm Up Time 3-46 EVENT LOG Clear Log 3-48 Display Log 3-47 Print...
...defaults 3-21, 3-46 factory defaults 3-28, 3-54 US/Non-US defaults 3-19, 3-44 4062-XXX diagnostic information confirm the installation status 2-2 Power-on Reset sequence 2-2 diagnostics error code table 2-14 diagnostics menu accessing 3-30 available tests 3-31 BASE SENSOR TEST 3-42 DEVICE TESTS Disk Test/Clean 3-43 Quick ...3-40 Motor Test 3-39 Quick Test 3-38 Sensor Test 3-39 Top Margin 3-38, 3-39 EP SETUP Charge Roll 3-46 EP Defaults 3-46 Fuser Page Count 3-46 Fuser Temp 3-46 Gap Adjust 3-47 Print Contrast 3-46 Transfer 3-46 Warm Up Time 3-46 EVENT LOG Clear Log 3-48 Display Log 3-47 Print...


