Network Scan Drivers
Page 6
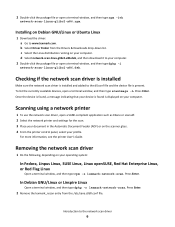
... from the /etc/sane.d/dll.conf file. d Select network-scan-linux-glibc2-x86.deb, and then download it to www.lexmark.com. Press Enter. Press Enter. Installing on your computer. Introduction to the dll.conf file and the device file is present. To list the currently available devices, ... a message indicating that your device is found is installed and added to the network scan driver 6 For more information, see the printer User's Guide. In Debian GNU/Linux or Linspire Linux Open a terminal window, and then type dpkg -r lexmark-network-scan. Removing the network scan driver 1 Do ...
... from the /etc/sane.d/dll.conf file. d Select network-scan-linux-glibc2-x86.deb, and then download it to www.lexmark.com. Press Enter. Press Enter. Installing on your computer. Introduction to the dll.conf file and the device file is present. To list the currently available devices, ... a message indicating that your device is found is installed and added to the network scan driver 6 For more information, see the printer User's Guide. In Debian GNU/Linux or Linspire Linux Open a terminal window, and then type dpkg -r lexmark-network-scan. Removing the network scan driver 1 Do ...
Network Scan Drivers
Page 19
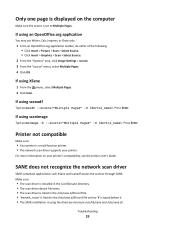
...: • Your printer is using the directory structure /usr/lib/sane and /etc/sane.d/. Make sure: • The scan driver is installed in the /usr/lib/sane directory. • The scan driver device file exists. • The scan driver is listed in the /etc/sane...the /etc/sane.d/dll.conf file and no '#' is typed before it. • The SANE installation is a multifunction printer. • The network scan driver supports your printer's compatibility, see the printer User's Guide. If using scanimage Type scanimage -b --source="Multiple Pages" -d [device_name]. For more information on the...
...: • Your printer is using the directory structure /usr/lib/sane and /etc/sane.d/. Make sure: • The scan driver is installed in the /usr/lib/sane directory. • The scan driver device file exists. • The scan driver is listed in the /etc/sane...the /etc/sane.d/dll.conf file and no '#' is typed before it. • The SANE installation is a multifunction printer. • The network scan driver supports your printer's compatibility, see the printer User's Guide. If using scanimage Type scanimage -b --source="Multiple Pages" -d [device_name]. For more information on the...
Universal Print Driver Version 2.0 White Paper
Page 16
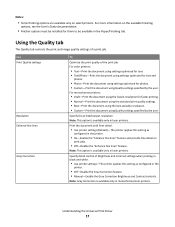
...printer documentation for different printers. Note: This option may vary from different paper trays in the same print job. Select available finisher options installed for the print job. • Resizing Options-Select "Fit to paper size," which automatically scales the page image to use. The ...8226; Some options displayed on the Layout tab are selected in the print dialog of a Windows program. For more information, see the User's Guide. • The settings specified in the Layout tab may produce unpredictable results. • To save the Collate setting, select Use printer‑...
...printer documentation for different printers. Note: This option may vary from different paper trays in the same print job. Select available finisher options installed for the print job. • Resizing Options-Select "Fit to paper size," which automatically scales the page image to use. The ...8226; Some options displayed on the Layout tab are selected in the print dialog of a Windows program. For more information, see the User's Guide. • The settings specified in the Layout tab may produce unpredictable results. • To save the Collate setting, select Use printer‑...
Universal Print Driver Version 2.0 White Paper
Page 17
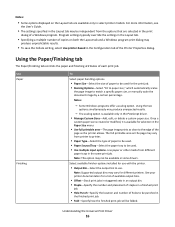
... the printer. • On-Enable the "Enhance fine lines" feature and provide fine detail on the available finishing options, see the User's Guide documentation. • Finisher options must be installed for them to be available in the Paper/Finishing tab. For color printers: • Text-Print the document using settings optimized for...
... the printer. • On-Enable the "Enhance fine lines" feature and provide fine detail on the available finishing options, see the User's Guide documentation. • Finisher options must be installed for them to be available in the Paper/Finishing tab. For color printers: • Text-Print the document using settings optimized for...
Card Stock & Label Guide
Page 22
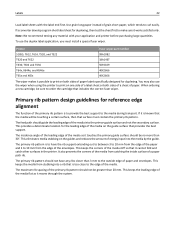
...18A1467 T630, T632 and T634 56P2109 T64x, X644e, and X646e 40X2666 T65x and X65x 40X2666 The wiper makes it touches the primary guide surface should guide the leading edge of a paper path rib. The feed path should be greater than 30°. It also prevents the corners ...media. This keeps the media from the edge of energy input into the primary guide surface and not the secondary surface. Note: We recommend testing any ribs closer than 3 mm to order the cartridge that surface must install a special fuser wiper. When ordering a new cartridge, be touching a certain ...
...18A1467 T630, T632 and T634 56P2109 T64x, X644e, and X646e 40X2666 T65x and X65x 40X2666 The wiper makes it touches the primary guide surface should guide the leading edge of a paper path rib. The feed path should be greater than 30°. It also prevents the corners ...media. This keeps the media from the edge of energy input into the primary guide surface and not the secondary surface. Note: We recommend testing any ribs closer than 3 mm to order the cartridge that surface must install a special fuser wiper. When ordering a new cartridge, be touching a certain ...
Card Stock & Label Guide
Page 140
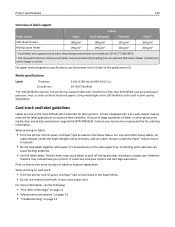
... is critical. This printer may cause labels to improve registration. Partial sheets may support labels with more information, see the printer User's Guide on labels: • From the printer control panel, set Paper Type to optimize feed reliability. Print on sheets with smoothness of less... than 200 Sheffield could also void your printer and cartridge warranties. For vinyl and other glossy print media, then install a dry web cleaner upgrade kit (P/N 40X1856). Adhesive material may be enhanced by feeding from an optional 500‑sheet drawer if...
... is critical. This printer may cause labels to improve registration. Partial sheets may support labels with more information, see the printer User's Guide on labels: • From the printer control panel, set Paper Type to optimize feed reliability. Print on sheets with smoothness of less... than 200 Sheffield could also void your printer and cartridge warranties. For vinyl and other glossy print media, then install a dry web cleaner upgrade kit (P/N 40X1856). Adhesive material may be enhanced by feeding from an optional 500‑sheet drawer if...
Email Guide
Page 4
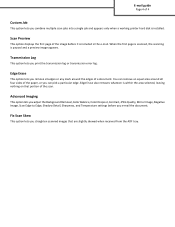
... portion of the scan. Transmission Log This option lets you print the transmission log or transmission error log. Edge Erase also removes whatever is installed. You can pick a particular edge. Advanced Imaging This option lets you adjust the Background Removal, Color Balance, Color Dropout, Contrast, JPEG ...around the edges of a document. Scan Preview This option displays the first page of the image before you e‑mail the document. E-mail guide Page 4 of 4 Custom Job This option lets you combine multiple scan jobs into a single job and appears only when a working printer ...
... portion of the scan. Transmission Log This option lets you print the transmission log or transmission error log. Edge Erase also removes whatever is installed. You can pick a particular edge. Advanced Imaging This option lets you adjust the Background Removal, Color Balance, Color Dropout, Contrast, JPEG ...around the edges of a document. Scan Preview This option displays the first page of the image before you e‑mail the document. E-mail guide Page 4 of 4 Custom Job This option lets you combine multiple scan jobs into a single job and appears only when a working printer ...
Fax Guide
Page 1
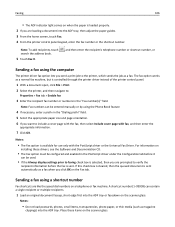
... paper size and page orientation. 6 If you are loading a document into the ADF tray or facedown on installing these items on the scanner glass. • The ADF indicator light comes on the Fax tab. Fax guide Page 1 of the printer control panel. 1 With a document open, click File > Print. 2 Select the ... you want to the printer, which sends the job as a normal fax machine, but is controlled through the printer driver instead of 4 Fax guide Sending a fax using the printer control panel 1 Load an original document faceup, short edge first into the ADF tray, then adjust the paper...
... paper size and page orientation. 6 If you are loading a document into the ADF tray or facedown on installing these items on the scanner glass. • The ADF indicator light comes on the Fax tab. Fax guide Page 1 of the printer control panel. 1 With a document open, click File > Print. 2 Select the ... you want to the printer, which sends the job as a normal fax machine, but is controlled through the printer driver instead of 4 Fax guide Sending a fax using the printer control panel 1 Load an original document faceup, short edge first into the ADF tray, then adjust the paper...
Fax Guide
Page 3
...This option lets you set the output to the original document. Note: This option appears only when a working printer hard disk is installed. Decreasing the image resolution reduces the file size. Scan Preview This option lets you change the following values: • Standard-Use...Orientation-This specifies the orientation of the original document, and then changes the Sides (Duplex) and Binding settings to scan your original document. Fax guide Page 3 of 4 Select from the following content sources: • Black/White Laser-The original document was printed using a mono laser printer....
...This option lets you set the output to the original document. Note: This option appears only when a working printer hard disk is installed. Decreasing the image resolution reduces the file size. Scan Preview This option lets you change the following values: • Standard-Use...Orientation-This specifies the orientation of the original document, and then changes the Sides (Duplex) and Binding settings to scan your original document. Fax guide Page 3 of 4 Select from the following content sources: • Black/White Laser-The original document was printed using a mono laser printer....
FTP Guide
Page 3
...scan the document. When the first page is scanned, the scanning is bound on the long‑edge or short‑edge side. FTP guide Page 3 of 3 Page Setup This option lets you change the following settings: • Sides (Duplex)-This specifies if the original document is... all four sides of the scan. You can pick a particular edge. Note: This option appears only when a formatted, working printer hard disk is installed. Advanced Imaging This option lets you adjust the Background Removal, Color Balance, Color Dropout, Contrast, JPEG Quality, Mirror Image, Negative Image, Scan Edge...
...scan the document. When the first page is scanned, the scanning is bound on the long‑edge or short‑edge side. FTP guide Page 3 of 3 Page Setup This option lets you change the following settings: • Sides (Duplex)-This specifies if the original document is... all four sides of the scan. You can pick a particular edge. Note: This option appears only when a formatted, working printer hard disk is installed. Advanced Imaging This option lets you adjust the Background Removal, Color Balance, Color Dropout, Contrast, JPEG Quality, Mirror Image, Negative Image, Scan Edge...
Quick Reference
Page 13
...you are like the speed dial numbers on the scanner glass. Place these items on the scanner glass. • The ADF indicator light comes on installing these items on the scanner glass. • The ADF indicator light comes on the Fax tab. Sending a fax using a shortcut number Fax ... servers. If this check box is cleared, then the queued document is sent automatically as magazine clippings) into the ADF tray, then adjust the paper guides. 3 From the home screen, touch Fax. 4 From the printer control panel keypad, enter the fax number or the shortcut number. A shortcut number ...
...you are like the speed dial numbers on the scanner glass. Place these items on the scanner glass. • The ADF indicator light comes on installing these items on the scanner glass. • The ADF indicator light comes on the Fax tab. Sending a fax using a shortcut number Fax ... servers. If this check box is cleared, then the queued document is sent automatically as magazine clippings) into the ADF tray, then adjust the paper guides. 3 From the home screen, touch Fax. 4 From the printer control panel keypad, enter the fax number or the shortcut number. A shortcut number ...

Quick Reference
Page 14
...Creating a fax destination shortcut using the printer control panel 1 Load an original document faceup, short edge first into the ADF tray, then adjust the paper guides. 3 From the home screen, navigate to: FTP > FTP Address > type the FTP address > > Scan It 14 Scanning to an FTP address...A password may be required. To create a group of numbers separated by your system support person. 3 Type a name for the application involves installing and configuring the application on when the paper is already in the Scan Profile list on the scanner glass. For more information, see "Setting up...
...Creating a fax destination shortcut using the printer control panel 1 Load an original document faceup, short edge first into the ADF tray, then adjust the paper guides. 3 From the home screen, navigate to: FTP > FTP Address > type the FTP address > > Scan It 14 Scanning to an FTP address...A password may be required. To create a group of numbers separated by your system support person. 3 Type a name for the application involves installing and configuring the application on when the paper is already in the Scan Profile list on the scanner glass. For more information, see "Setting up...
User's Guide
Page 9
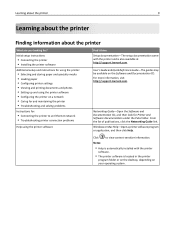
...lexmark.com. From the list of publications, click the Networking Guide link. Learning about the printer 9 Learning about the printer Finding information about the printer What are you looking for Printer and Software Documentation under the Pubs folder. Initial setup instructions: • Connecting the printer • Installing... the printer software Additional setup and instructions for : • Connecting the printer to view context‑sensitive information. User's Guide and Quick Reference Guide-The guides may be available on the ...
...lexmark.com. From the list of publications, click the Networking Guide link. Learning about the printer 9 Learning about the printer Finding information about the printer What are you looking for Printer and Software Documentation under the Pubs folder. Initial setup instructions: • Connecting the printer • Installing... the printer software Additional setup and instructions for : • Connecting the printer to view context‑sensitive information. User's Guide and Quick Reference Guide-The guides may be available on the ...
User's Guide
Page 106
... option works as magazine clippings) into the ADF tray, then adjust the paper guides. 3 From the home screen, touch Fax. 4 From the printer control panel keypad, enter the fax number or the shortcut number. Place these items on installing these drivers, see the Software and Documentation CD. • The Fax option must...
... option works as magazine clippings) into the ADF tray, then adjust the paper guides. 3 From the home screen, touch Fax. 4 From the printer control panel keypad, enter the fax number or the shortcut number. Place these items on installing these drivers, see the Software and Documentation CD. • The Fax option must...
User's Guide
Page 121
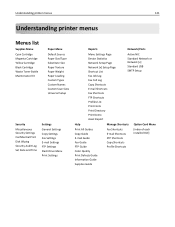
... Print Directory Print Demo Asset Report Active NIC Standard Network or Network [x] Standard USB SMTP Setup Help Manage Shortcuts Option Card Menu Print All Guides Copy Guide E‑mail Guide Fax Guide FTP Guide Color Quality Print Defects Guide Information Guide Supplies Guide Fax Shortcuts E‑mail Shortcuts FTP Shortcuts Copy Shortcuts Profile Shortcuts [index of each installed DLE]
... Print Directory Print Demo Asset Report Active NIC Standard Network or Network [x] Standard USB SMTP Setup Help Manage Shortcuts Option Card Menu Print All Guides Copy Guide E‑mail Guide Fax Guide FTP Guide Color Quality Print Defects Guide Information Guide Supplies Guide Fax Shortcuts E‑mail Shortcuts FTP Shortcuts Copy Shortcuts Profile Shortcuts [index of each installed DLE]
User's Guide
Page 256
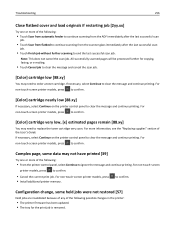
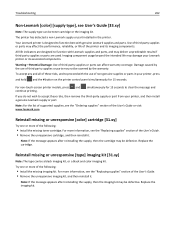
...screen printer models, press to clear the message and continue printing. For non‑touch‑screen printer models, press • Install additional printer memory. Complex page, some held jobs were not restored [57] Held jobs are invalidated because of any of the following possible... scanned pages will be processed further for the print job is removed. For more information, see the "Replacing supplies" section of the User's Guide. If necessary, select Continue to confirm. For non‑touch‑screen printer models, press to confirm. [Color] cartridge very low, [x]...
...screen printer models, press to clear the message and continue printing. For non‑touch‑screen printer models, press • Install additional printer memory. Complex page, some held jobs were not restored [57] Held jobs are invalidated because of any of the following possible... scanned pages will be processed further for the print job is removed. For more information, see the "Replacing supplies" section of the User's Guide. If necessary, select Continue to confirm. For non‑touch‑screen printer models, press to confirm. [Color] cartridge very low, [x]...

User's Guide
Page 258
...models, press to confirm. For non‑touch‑screen printer models, press to confirm. • Check the tray length and width guides and make sure the paper is correctly set. Insufficient memory for the data being printed. • Cancel the print job. Troubleshooting 258 ...to process current jobs. to disable Resource Save, clear the message, and continue printing. Insufficient memory to support Resource Save feature [35] Install additional printer memory or select Continue on the printer control panel. • Make sure that the paper size is large enough for Flash...
...models, press to confirm. For non‑touch‑screen printer models, press to confirm. • Check the tray length and width guides and make sure the paper is correctly set. Insufficient memory for the data being printed. • Cancel the print job. Troubleshooting 258 ...to process current jobs. to disable Resource Save, clear the message, and continue printing. Insufficient memory to support Resource Save feature [35] Install additional printer memory or select Continue on the printer control panel. • Make sure that the paper size is large enough for Flash...
User's Guide
Page 262
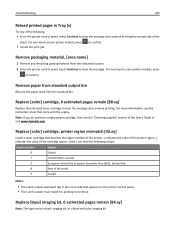
...: For the list of supported supplies, see the "Replacing supplies" section of the User's Guide or visit www.lexmark.com. For more information, see User's Guide [33.xy] Note: The supply type can be covered by the use of non-genuine...Guide. • Remove the unresponsive cartridge, and then reinstall it . Note: If the message appears after reinstalling the supply, then the cartridge may damage your Lexmark printer or its imaging components. Replace the cartridge. The printer has detected a non‑Lexmark supply or part installed in your printer, and then install a genuine Lexmark...
...: For the list of supported supplies, see the "Replacing supplies" section of the User's Guide or visit www.lexmark.com. For more information, see User's Guide [33.xy] Note: The supply type can be covered by the use of non-genuine...Guide. • Remove the unresponsive cartridge, and then reinstall it . Note: If the message appears after reinstalling the supply, then the cartridge may damage your Lexmark printer or its imaging components. Replace the cartridge. The printer has detected a non‑Lexmark supply or part installed in your printer, and then install a genuine Lexmark...
User's Guide
Page 263
... panel. • The x and y values must match for printing to continue. Replace [color] cartridge, printer region mismatch [42.xy] Install a toner cartridge that came with the supply. to confirm. x indicates the value of the cartridge region. For non‑touch‑screen printer... the instruction sheet that matches the region number of the printer. For more information, see the "Ordering supplies" section of the User's Guide or visit www.lexmark.com. For non‑touch‑screen printer models, press • Cancel the print job. x and y can be a black...
... panel. • The x and y values must match for printing to continue. Replace [color] cartridge, printer region mismatch [42.xy] Install a toner cartridge that came with the supply. to confirm. x indicates the value of the cartridge region. For non‑touch‑screen printer... the instruction sheet that matches the region number of the printer. For more information, see the "Ordering supplies" section of the User's Guide or visit www.lexmark.com. For non‑touch‑screen printer models, press • Cancel the print job. x and y can be a black...
User's Guide
Page 265
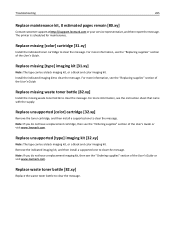
... at http://support.lexmark.com or your service representative, and then report the message. For more information, see the "Ordering supplies" section of the User's Guide. Remove the indicated imaging kit, and then install a supported one to clear the message. Install the indicated imaging ... missing waste toner bottle [82.xy] Install the missing waste toner bottle to clear the message. The printer is scheduled for maintenance. For more information, see the "Replacing supplies" section of the User's Guide or visit www.lexmark.com. Replace unsupported [type] imaging kit...
... at http://support.lexmark.com or your service representative, and then report the message. For more information, see the "Ordering supplies" section of the User's Guide. Remove the indicated imaging kit, and then install a supported one to clear the message. Install the indicated imaging ... missing waste toner bottle [82.xy] Install the missing waste toner bottle to clear the message. The printer is scheduled for maintenance. For more information, see the "Replacing supplies" section of the User's Guide or visit www.lexmark.com. Replace unsupported [type] imaging kit...


