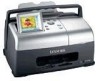

User's Guide for Windows
Page 2
... easily accessible. Other trademarks are the user's responsibility. Safety information Use only the power supply provided with other products, programs, or services, except those described in later editions. Do not use or distribute any of their respective owners. © 2003 Lexmark International, Inc. Copyright advisory It may be illegal to copy certain materials without incurring any electrical or cabling connections, such...
... easily accessible. Other trademarks are the user's responsibility. Safety information Use only the power supply provided with other products, programs, or services, except those described in later editions. Do not use or distribute any of their respective owners. © 2003 Lexmark International, Inc. Copyright advisory It may be illegal to copy certain materials without incurring any electrical or cabling connections, such...
User's Guide for Windows
Page 6
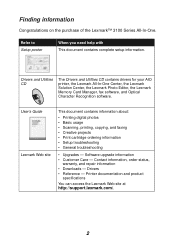
... Solution Center, the Lexmark Photo Editor, the Lexmark Memory Card Manager, fax software, and Optical Character Recognition software. Software upgrade information • Customer Care - Drivers • Reference - Contact information, order status, warranty, and repair information • Downloads - Printer documentation and product specifications You can access the Lexmark Web site at http://support.lexmark.com/. 2 User's Guide Lexmark Web site This document contains information about: • Printing digital photos • Basic usage • Scanning, printing, copying, and...
... Solution Center, the Lexmark Photo Editor, the Lexmark Memory Card Manager, fax software, and Optical Character Recognition software. Software upgrade information • Customer Care - Drivers • Reference - Contact information, order status, warranty, and repair information • Downloads - Printer documentation and product specifications You can access the Lexmark Web site at http://support.lexmark.com/. 2 User's Guide Lexmark Web site This document contains information about: • Printing digital photos • Basic usage • Scanning, printing, copying, and...
User's Guide for Windows
Page 13
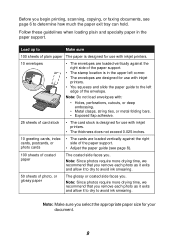
... for use with inkjet printers. • You squeeze and slide the paper guide to avoid ink smearing. Note: Make sure you select the appropriate paper size for use with inkjet printers. 10 envelopes • The envelopes are loaded vertically against the right side of the paper support. • The stamp location is designed for your document. 9 Before you begin printing, scanning, copying, or faxing documents, see page 8). 100 sheets of coated paper The coated side faces...
... for use with inkjet printers. • You squeeze and slide the paper guide to avoid ink smearing. Note: Make sure you select the appropriate paper size for use with inkjet printers. 10 envelopes • The envelopes are loaded vertically against the right side of the paper support. • The stamp location is designed for your document. 9 Before you begin printing, scanning, copying, or faxing documents, see page 8). 100 sheets of coated paper The coated side faces...
User's Guide for Windows
Page 14
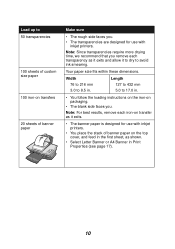
... follow the loading instructions on the iron-on packaging. • The blank side faces you . • The transparencies are designed for use with inkjet printers. • You place the stack of banner paper Make sure • The rough side faces you . Note: For best results, remove each transparency as it exits and allow it to dry to 50 transparencies 100 sheets of custom size paper 100...
... follow the loading instructions on the iron-on packaging. • The blank side faces you . • The transparencies are designed for use with inkjet printers. • You place the stack of banner paper Make sure • The rough side faces you . Note: For best results, remove each transparency as it exits and allow it to dry to 50 transparencies 100 sheets of custom size paper 100...
User's Guide for Windows
Page 17
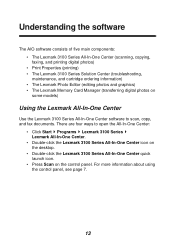
... Center (scanning, copying, faxing, and printing digital photos) • Print Properties (printing) • The Lexmark 3100 Series Solution Center (troubleshooting, maintenance, and cartridge ordering information) • The Lexmark Photo Editor (editing photos and graphics) • The Lexmark Memory Card Manager (transferring digital photos on some models) Using the Lexmark All-In-One Center Use the Lexmark 3100 Series All-In-One Center software to open the All-In-One Center: • Click Start Programs Lexmark 3100 Series Lexmark All...
... Center (scanning, copying, faxing, and printing digital photos) • Print Properties (printing) • The Lexmark 3100 Series Solution Center (troubleshooting, maintenance, and cartridge ordering information) • The Lexmark Photo Editor (editing photos and graphics) • The Lexmark Memory Card Manager (transferring digital photos on some models) Using the Lexmark All-In-One Center Use the Lexmark 3100 Series All-In-One Center software to open the All-In-One Center: • Click Start Programs Lexmark 3100 Series Lexmark All...
User's Guide for Windows
Page 22
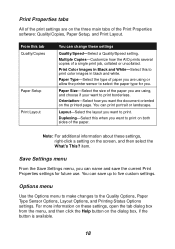
... about these settings, open the tab dialog box from the menu, and then click the Help button on the printed page. Save Settings menu From the Save Settings menu, you want to five custom settings. From this when you can change these settings Quality/Speed-Select a Quality/Speed setting. item. Options menu Use the Options menu to make changes to print color images in Black and White-Select this to the Quality Options, Paper Type Sensor Options, Layout Options, and Printing Status Options settings. Orientation...
... about these settings, open the tab dialog box from the menu, and then click the Help button on the printed page. Save Settings menu From the Save Settings menu, you want to five custom settings. From this when you can change these settings Quality/Speed-Select a Quality/Speed setting. item. Options menu Use the Options menu to make changes to print color images in Black and White-Select this to the Quality Options, Paper Type Sensor Options, Layout Options, and Printing Status Options settings. Orientation...
User's Guide for Windows
Page 23
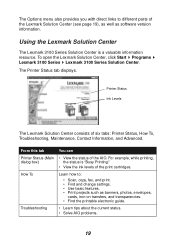
Printer Status Ink Levels The Lexmark Solution Center consists of the AIO. Troubleshooting • Learn tips about the current status. • Solve AIO problems. 19 The Printer Status tab displays. How To Learn how to different parts of the Lexmark Solution Center (see page 19), as well as banners, photos, envelopes, cards, iron-on transfers, and transparencies. • Find the printable electronic guide. To open the Lexmark Solution Center, click Start Programs Lexmark 3100...
Printer Status Ink Levels The Lexmark Solution Center consists of the AIO. Troubleshooting • Learn tips about the current status. • Solve AIO problems. 19 The Printer Status tab displays. How To Learn how to different parts of the Lexmark Solution Center (see page 19), as well as banners, photos, envelopes, cards, iron-on transfers, and transparencies. • Find the printable electronic guide. To open the Lexmark Solution Center, click Start Programs Lexmark 3100...
User's Guide for Windows
Page 24
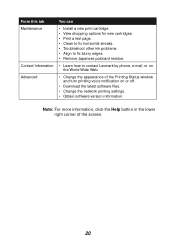
... for new cartridges. • Print a test page. • Clean to fix horizontal streaks. • Troubleshoot other ink problems. • Align to fix blurry edges. • Remove Japanese postcard residue. • Learn how to contact Lexmark by phone, e-mail, or on the World Wide Web. • Change the appearance of the screen. 20 Note: For more information, click the Help button in the lower right corner of the Printing Status window and turn printing...
... for new cartridges. • Print a test page. • Clean to fix horizontal streaks. • Troubleshoot other ink problems. • Align to fix blurry edges. • Remove Japanese postcard residue. • Learn how to contact Lexmark by phone, e-mail, or on the World Wide Web. • Change the appearance of the screen. 20 Note: For more information, click the Help button in the lower right corner of the Printing Status window and turn printing...
User's Guide for Windows
Page 42
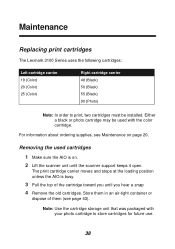
... the scanner unit until you hear a snap. 4 Remove the old cartridges. The print cartridge carrier moves and stops at the loading position unless the AIO is on page 20. Maintenance Replacing print cartridges The Lexmark 3100 Series uses the following cartridges: Left cartridge carrier 19 (Color) 20 (Color) 25 (Color) Right cartridge carrier 48 (Black) 50 (Black) 55 (Black) 90 (Photo) Note: In order to store cartridges for future use. 38 Either a black or photo cartridge may be installed.
... the scanner unit until you hear a snap. 4 Remove the old cartridges. The print cartridge carrier moves and stops at the loading position unless the AIO is on page 20. Maintenance Replacing print cartridges The Lexmark 3100 Series uses the following cartridges: Left cartridge carrier 19 (Color) 20 (Color) 25 (Color) Right cartridge carrier 48 (Black) 50 (Black) 55 (Black) 90 (Photo) Note: In order to store cartridges for future use. 38 Either a black or photo cartridge may be installed.

User's Guide for Windows
Page 45
... print cartridge nozzles, dried ink may need to fix horizontal streaks. 4 Click Print. A nozzle page prints, forcing ink through the nozzles to clean the clogged nozzles. 5 Print your print quality has improved. If you may be on print jobs are not satisfied with water. 41 To clean the nozzles: 1 Load plain paper (see page 8). 2 Open the Lexmark Solution Center (see page 38). 2 Dampen a clean, lint-free cloth with the print quality, follow the instructions for wiping the print cartridge nozzles and contacts. To wipe the print cartridge nozzles...
... print cartridge nozzles, dried ink may need to fix horizontal streaks. 4 Click Print. A nozzle page prints, forcing ink through the nozzles to clean the clogged nozzles. 5 Print your print quality has improved. If you may be on print jobs are not satisfied with water. 41 To clean the nozzles: 1 Load plain paper (see page 8). 2 Open the Lexmark Solution Center (see page 38). 2 Dampen a clean, lint-free cloth with the print quality, follow the instructions for wiping the print cartridge nozzles and contacts. To wipe the print cartridge nozzles...
User's Guide for Windows
Page 47
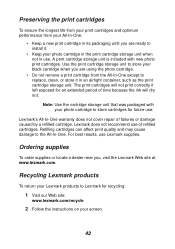
... of failures or damage caused by a refilled cartridge. Lexmark does not recommend use Lexmark supplies. For best results, use of refilled cartridges. The print cartridges will dry out. Lexmark's All-In-One warranty does not cover repair of time because the ink will not print correctly if left exposed for future use . Refilling cartridges can affect print quality and may cause damage to install it in its packaging until you , visit...
... of failures or damage caused by a refilled cartridge. Lexmark does not recommend use Lexmark supplies. For best results, use of refilled cartridges. The print cartridges will dry out. Lexmark's All-In-One warranty does not cover repair of time because the ink will not print correctly if left exposed for future use . Refilling cartridges can affect print quality and may cause damage to install it in its packaging until you , visit...
User's Guide for Windows
Page 48
... the setup documentation. Are both print cartridges? Is your operating system supported? Did you have with the AIO. Make sure you install the AIO software correctly? Did you do not force the paper into the AIO. Troubleshooting This section helps you solve problems you try to solve the problem, check the following: Is the power supply inserted correctly (arrows up) and firmly attached to install the software on ? For help accessing the Lexmark...
... the setup documentation. Are both print cartridges? Is your operating system supported? Did you have with the AIO. Make sure you install the AIO software correctly? Did you do not force the paper into the AIO. Troubleshooting This section helps you solve problems you try to solve the problem, check the following: Is the power supply inserted correctly (arrows up) and firmly attached to install the software on ? For help accessing the Lexmark...
User's Guide for Windows
Page 49
... not recognized by the card reader 52 Error messages 52 Removing and reinstalling the software 53 Setting the AIO as the default printer 54 Other help sources 55 45 If you are not smooth 49 White lines appear in graphics or solid black areas 49 AIO has a paper jam 49 Scanning or using a scanned image with the computer 47 Installation appears incomplete 47 A blank page prints 48 AIO prints slowly 48 Print is too dark...
... not recognized by the card reader 52 Error messages 52 Removing and reinstalling the software 53 Setting the AIO as the default printer 54 Other help sources 55 45 If you are not smooth 49 White lines appear in graphics or solid black areas 49 AIO has a paper jam 49 Scanning or using a scanned image with the computer 47 Installation appears incomplete 47 A blank page prints 48 AIO prints slowly 48 Print is too dark...
User's Guide for Windows
Page 50
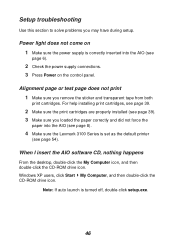
... loaded the paper correctly and did not force the paper into the AIO (see page 54). Note: If auto launch is set as the default printer (see page 6). 2 Check the power supply connections. 3 Press Power on the control panel. Power light does not come on 1 Make sure the power supply is correctly inserted into the AIO (see page 8). 4 Make sure the Lexmark 3100 Series is turned off, double-click setup.exe. 46 Alignment page or test page does not print 1 Make sure you may have during setup. Setup troubleshooting Use...
... loaded the paper correctly and did not force the paper into the AIO (see page 54). Note: If auto launch is set as the default printer (see page 6). 2 Check the power supply connections. 3 Press Power on the control panel. Power light does not come on 1 Make sure the power supply is correctly inserted into the AIO (see page 8). 4 Make sure the Lexmark 3100 Series is turned off, double-click setup.exe. 46 Alignment page or test page does not print 1 Make sure you may have during setup. Setup troubleshooting Use...
User's Guide for Windows
Page 52
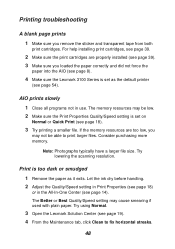
... 1 Remove the paper as the default printer (see page 19). 4 From the Maintenance tab, click Clean to print larger files. Let the ink dry before handling. 2 Adjust the Quality/Speed setting in Print Properties (see page 18) or in use. Printing troubleshooting A blank page prints 1 Make sure you may not be low. 2 Make sure the Print Properties Quality/Speed setting is set as it exits. Note: Photographs typically have a larger file size. Try using Normal. 3 Open the Lexmark Solution Center (see page 54). For help installing print cartridges...
... 1 Remove the paper as the default printer (see page 19). 4 From the Maintenance tab, click Clean to print larger files. Let the ink dry before handling. 2 Adjust the Quality/Speed setting in Print Properties (see page 18) or in use. Printing troubleshooting A blank page prints 1 Make sure you may not be low. 2 Make sure the Print Properties Quality/Speed setting is set as it exits. Note: Photographs typically have a larger file size. Try using Normal. 3 Open the Lexmark Solution Center (see page 54). For help installing print cartridges...
User's Guide for Windows
Page 53
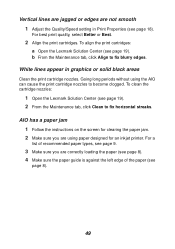
... Maintenance tab, click Align to fix horizontal streaks. Going long periods without using paper designed for clearing the paper jam. 2 Make sure you are correctly loading the paper (see page 8). 4 Make sure the paper guide is against the left edge of recommended paper types, see page 9. 3 Make sure you are not smooth 1 Adjust the Quality/Speed setting in graphics or solid black areas Clean the print cartridge nozzles. For best print quality, select Better or Best. 2 Align the print cartridges. To align the print cartridges: a Open the Lexmark...
... Maintenance tab, click Align to fix horizontal streaks. Going long periods without using paper designed for clearing the paper jam. 2 Make sure you are correctly loading the paper (see page 8). 4 Make sure the paper guide is against the left edge of recommended paper types, see page 9. 3 Make sure you are not smooth 1 Adjust the Quality/Speed setting in graphics or solid black areas Clean the print cartridge nozzles. For best print quality, select Better or Best. 2 Align the print cartridges. To align the print cartridges: a Open the Lexmark...
User's Guide for Windows
Page 56
...-One Center (see page 13). 2 Click Advanced Scan Settings. 3 Click Fax. Error messages If you are having trouble sending or receiving faxes, make sure: • The computer and the AIO are not supported. Fax function does not work If you receive any of the following error messages, follow the instructions that appear on your computer screen. • Paper jam • Cover open • Ink Low • Paper out • Cartridge error 52
...-One Center (see page 13). 2 Click Advanced Scan Settings. 3 Click Fax. Error messages If you are having trouble sending or receiving faxes, make sure: • The computer and the AIO are not supported. Fax function does not work If you receive any of the following error messages, follow the instructions that appear on your computer screen. • Paper jam • Cover open • Ink Low • Paper out • Cartridge error 52

User's Guide for Windows
Page 62
... status 19 B banner paper loading 10 banners, printing 17 black and white, printing in 18 black cartridge part number 38 Black Copy button 7 blank page prints 48 borderless photos printing 27 both sides, printing on, see duplexing C card stock loading 9 cartridges aligning 40 cleaning nozzles 41 part numbers 38 viewing ink levels of 19 wiping 41 cartridges, print aligning 40 cleaning contacts 41 cleaning nozzles 41 installing 39 part numbers 38 preserving 43 removing 38 replacing 38 choosing layout for photos 26 cleaning, print cartridge nozzles 41 coated paper loading 9 color cartridge part...
... status 19 B banner paper loading 10 banners, printing 17 black and white, printing in 18 black cartridge part number 38 Black Copy button 7 blank page prints 48 borderless photos printing 27 both sides, printing on, see duplexing C card stock loading 9 cartridges aligning 40 cleaning nozzles 41 part numbers 38 viewing ink levels of 19 wiping 41 cartridges, print aligning 40 cleaning contacts 41 cleaning nozzles 41 installing 39 part numbers 38 preserving 43 removing 38 replacing 38 choosing layout for photos 26 cleaning, print cartridge nozzles 41 coated paper loading 9 color cartridge part...
User's Guide for Windows
Page 63
...Memory Card Manager using 22 memory cards inserting 11 multiple copies 18 multiple images 15 N nozzles, print wiping 41 O ordering supplies 43 orientation selecting 18 P page layouts, selecting borderless 26 greeting card 26 picture package 26 purchased 26 scrapbook page 26 paper acceptable types of 31 loading 31 Paper Feed button 7 Paper Setup tab 18 paper size selecting 18 paper type selecting 18 part numbers black cartridge 38 color cartridge 38 photo cartridge 38 parts control panel 5 memory card slots 5 paper support 5 scanner unit 6 parts of your All-In-One 5 photo cards loading 9 photo...
...Memory Card Manager using 22 memory cards inserting 11 multiple copies 18 multiple images 15 N nozzles, print wiping 41 O ordering supplies 43 orientation selecting 18 P page layouts, selecting borderless 26 greeting card 26 picture package 26 purchased 26 scrapbook page 26 paper acceptable types of 31 loading 31 Paper Feed button 7 Paper Setup tab 18 paper size selecting 18 paper type selecting 18 part numbers black cartridge 38 color cartridge 38 photo cartridge 38 parts control panel 5 memory card slots 5 paper support 5 scanner unit 6 parts of your All-In-One 5 photo cards loading 9 photo...
User's Guide for Windows
Page 64
...26 borderless 27 digital photos 26 envelopes 9, 17 photos 17 posters 15, 17 without margins 27 printing problems 48 blank page prints 48 Printing Status window changing appearance of 20 Q Quality/Copies tab 18 R recycling Lexmark products 43 reinstalling software 53 removing print cartridges 38 removing software 53 repeat images 15 replacing print cartridges 38 S Safety information ii Save Settings menu 18 Saved Images page Open with... section 15 Print a Copy...section 16 Scan button 7 scan settings 14 scanning 34 scrapbook pages 30 settings, saving for future use 18 setup troubleshooting 46...
...26 borderless 27 digital photos 26 envelopes 9, 17 photos 17 posters 15, 17 without margins 27 printing problems 48 blank page prints 48 Printing Status window changing appearance of 20 Q Quality/Copies tab 18 R recycling Lexmark products 43 reinstalling software 53 removing print cartridges 38 removing software 53 repeat images 15 replacing print cartridges 38 S Safety information ii Save Settings menu 18 Saved Images page Open with... section 15 Print a Copy...section 16 Scan button 7 scan settings 14 scanning 34 scrapbook pages 30 settings, saving for future use 18 setup troubleshooting 46...


