HP Notebook Reference Guide
Page 45
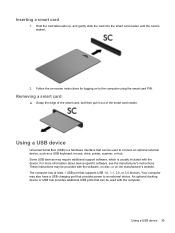
.... Your computer may require additional support software, which is a hardware interface that can be used to connect an optional external device, such as a USB keyboard, mouse, drive, printer, scanner, or hub. Some USB devices may also have a USB charging port that supports USB 1.0, 1.1, 2.0, or 3.0 devices.... An optional docking device or USB hub provides additional USB ports that can be used with the computer. Removing a smart card ▲ Grasp the edge of the smart card, and then pull it out of the smart card reader. For more ...
.... Your computer may require additional support software, which is a hardware interface that can be used to connect an optional external device, such as a USB keyboard, mouse, drive, printer, scanner, or hub. Some USB devices may also have a USB charging port that supports USB 1.0, 1.1, 2.0, or 3.0 devices.... An optional docking device or USB hub provides additional USB ports that can be used with the computer. Removing a smart card ▲ Grasp the edge of the smart card, and then pull it out of the smart card reader. For more ...
HP Notebook Reference Guide
Page 52
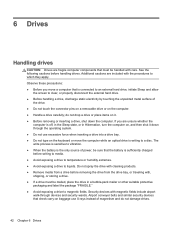
...Avoid exposing a drive to temperature or humidity extremes. ● Avoid exposing a drive to liquids. Security devices with care. See the following cautions before removing the drive from the drive bay, or traveling with the procedures to clear, or properly disconnect the external hard drive. ● Before handling a ...are unsure whether the computer is the only source of the drive. ● Do not touch the connector pins on a removable drive or on the keyboard or move the computer while an optical drive is connected to an external hard drive, initiate Sleep and allow the screen ...
...Avoid exposing a drive to temperature or humidity extremes. ● Avoid exposing a drive to liquids. Security devices with care. See the following cautions before removing the drive from the drive bay, or traveling with the procedures to clear, or properly disconnect the external hard drive. ● Before handling a ...are unsure whether the computer is the only source of the drive. ● Do not touch the connector pins on a removable drive or on the keyboard or move the computer while an optical drive is connected to an external hard drive, initiate Sleep and allow the screen ...
HP Notebook Reference Guide
Page 61
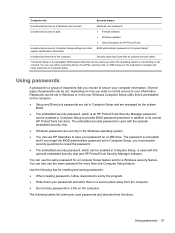
... only in Computer Setup, you must answer security questions to its normal HP ProtectTools functions. You can also use either a pointing device (TouchPad, pointing stick, or USB mouse) or the keyboard to secure your computer information. Use the following tables list commonly used ... Setup settings and other BIOS administrator password in Computer Setup* system identification information Unauthorized removal of characters that can be used with the optional embedded security chip and HP ProtectTools Security Manager software. You can use the same password for a Computer Setup ...
... only in Computer Setup, you must answer security questions to its normal HP ProtectTools functions. You can also use either a pointing device (TouchPad, pointing stick, or USB mouse) or the keyboard to secure your computer information. Use the following tables list commonly used ... Setup settings and other BIOS administrator password in Computer Setup* system identification information Unauthorized removal of characters that can be used with the optional embedded security chip and HP ProtectTools Security Manager software. You can use the same password for a Computer Setup ...
HP Notebook Reference Guide
Page 71
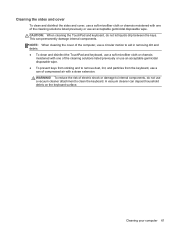
... a straw extension. NOTE: When cleaning the cover of the computer, use a circular motion to aid in removing dirt and debris. ● To clean and disinfect the TouchPad and keyboard, use a soft microfiber cloth or chamois moistened with one of the cleaning solutions listed previously or use an ...acceptable germicidal disposable wipe. ● To prevent keys from sticking and to remove dust, lint, and particles from the keyboard, use a can of compressed air with one of electric shock or damage to clean the keyboard. To reduce the risk of the cleaning solutions listed previously or use a ...
... a straw extension. NOTE: When cleaning the cover of the computer, use a circular motion to aid in removing dirt and debris. ● To clean and disinfect the TouchPad and keyboard, use a soft microfiber cloth or chamois moistened with one of the cleaning solutions listed previously or use an ...acceptable germicidal disposable wipe. ● To prevent keys from sticking and to remove dust, lint, and particles from the keyboard, use a can of compressed air with one of electric shock or damage to clean the keyboard. To reduce the risk of the cleaning solutions listed previously or use a ...
HP ProtectTools Getting Started
Page 16
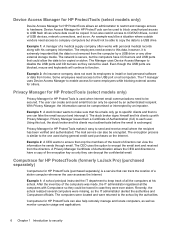
...were missing, so the IT administrator alerted the authorities and Computrace officials. Even though the USB ports are blocked, mouse and keyboards will continue to hardware. The IT manager uses Device Access Manager to the school by an authenticated recipient. A Privacy Manager... of Authentication allows the CEO and directors to this tool, the stock broker and his school. Computrace for HP ProtectTools (purchased separately) is not removed from the computer by an imposter. With Privacy Manager, the information cannot be used when Internet email communications need...
...were missing, so the IT administrator alerted the authorities and Computrace officials. Even though the USB ports are blocked, mouse and keyboards will continue to hardware. The IT manager uses Device Access Manager to the school by an authenticated recipient. A Privacy Manager... of Authentication allows the CEO and directors to this tool, the stock broker and his school. Computrace for HP ProtectTools (purchased separately) is not removed from the computer by an imposter. With Privacy Manager, the information cannot be used when Internet email communications need...
HP ProtectTools Getting Started
Page 109
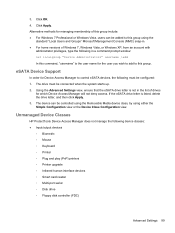
...the system starts up. 2. Click Apply. Unmanaged Device Classes HP ProtectTools Device Access Manager does not manage the following must be... Access Manager will not deny access. Click OK. 4. The device can be controlled using the Removable Media device class, by using the standard "Local Users and Groups" Microsoft Management Console (MMC...control eSATA devices, the following device classes: ● Input/output devices ◦ Biometric ◦ Mouse ◦ Keyboard ◦ Printer ◦ Plug and play (PnP) printers ◦ Printer upgrade ◦ Infrared human interface ...
...the system starts up. 2. Click Apply. Unmanaged Device Classes HP ProtectTools Device Access Manager does not manage the following must be... Access Manager will not deny access. Click OK. 4. The device can be controlled using the Removable Media device class, by using the standard "Local Users and Groups" Microsoft Management Console (MMC...control eSATA devices, the following device classes: ● Input/output devices ◦ Biometric ◦ Mouse ◦ Keyboard ◦ Printer ◦ Plug and play (PnP) printers ◦ Printer upgrade ◦ Infrared human interface ...
HP ProtectTools Getting Started
Page 120
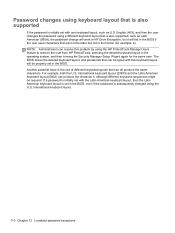
If a password is initially set with this problem by using the HP ProtectTools Manage Users feature to remove the user from HP ProtectTools, selecting the desired keyboard layout in the BIOS. International keyboard layout. 110 Chapter 12 Localized password exceptions The BIOS stores the desired keyboard layout, and passwords that can produce the character é, although different...
If a password is initially set with this problem by using the HP ProtectTools Manage Users feature to remove the user from HP ProtectTools, selecting the desired keyboard layout in the BIOS. International keyboard layout. 110 Chapter 12 Localized password exceptions The BIOS stores the desired keyboard layout, and passwords that can produce the character é, although different...
HP ProtectTools Getting Started
Page 135
... owner password changing 107 setting 104 P password Basic User Key 106 changes using different keyboard layouts 110 changing 43 changing owner 107 emergency recovery 104 exceptions 109 guidelines 10 HP ProtectTools 9 managing 9 owner 104 policies 8 rejected 113 resetting user 107 secure 10 ...Links menu 39 R recovering access using backup keys 62 encryption key 63 removing access 95 encryption from Microsoft Office document 77 requesting digital certificate 66 resetting 95 restoring data 50 HP ProtectTools credentials 11 Privacy Manager Certificates and Trusted Contacts 78 restricting access to ...
... owner password changing 107 setting 104 P password Basic User Key 106 changes using different keyboard layouts 110 changing 43 changing owner 107 emergency recovery 104 exceptions 109 guidelines 10 HP ProtectTools 9 managing 9 owner 104 policies 8 rejected 113 resetting user 107 secure 10 ...Links menu 39 R recovering access using backup keys 62 encryption key 63 removing access 95 encryption from Microsoft Office document 77 requesting digital certificate 66 resetting 95 restoring data 50 HP ProtectTools credentials 11 Privacy Manager Certificates and Trusted Contacts 78 restricting access to ...
Getting Started HP Notebook
Page 6
...Using TouchPad gestures 27 Scrolling 28 Pinching/Zooming 28 5 Maintenance ...29 Inserting or removing the battery ...29 Using the optional security screw ...30 Removing or replacing the service door 31 Removing the service door 31 Replacing the service door 32 Replacing or upgrading the hard... Cleaning procedures ...38 Cleaning the display 38 Cleaning the sides and cover 38 Cleaning the TouchPad and keyboard 39 6 Backup and recovery ...40 Creating recovery media with HP Recovery Disc Creator 40 Creating recovery media ...41 Backing up your information ...41 Performing a system recovery...
...Using TouchPad gestures 27 Scrolling 28 Pinching/Zooming 28 5 Maintenance ...29 Inserting or removing the battery ...29 Using the optional security screw ...30 Removing or replacing the service door 31 Removing the service door 31 Replacing the service door 32 Replacing or upgrading the hard... Cleaning procedures ...38 Cleaning the display 38 Cleaning the sides and cover 38 Cleaning the TouchPad and keyboard 39 6 Backup and recovery ...40 Creating recovery media with HP Recovery Disc Creator 40 Creating recovery media ...41 Backing up your information ...41 Performing a system recovery...

Getting Started HP Notebook
Page 47
... to internal components, do not let liquids drip between the keys. CAUTION: When cleaning the TouchPad and keyboard, do not use a can deposit household debris on the keyboard surface. To reduce the risk of compressed air with one of the cleaning solutions listed previously or use... an acceptable germicidal disposable wipe. ● To prevent keys from sticking and to remove dust, lint, and particles from the keyboard, use a vacuum cleaner ...
... to internal components, do not let liquids drip between the keys. CAUTION: When cleaning the TouchPad and keyboard, do not use a can deposit household debris on the keyboard surface. To reduce the risk of compressed air with one of the cleaning solutions listed previously or use... an acceptable germicidal disposable wipe. ● To prevent keys from sticking and to remove dust, lint, and particles from the keyboard, use a vacuum cleaner ...

Getting Started HP Notebook
Page 51
...possible, back up all personal files. 2. NOTE: If the HP Recovery partition is completed: 1. All files you have created and any keyboard key. 4. When prompted, press any software installed on the computer are permanently removed. Select Repair your operating system and programs using the Windows 7...the Windows 7 operating system DVD, and then insert the Driver Recovery disc. 2. The f11 recovery tool reinstalls the operating system and HP programs and drivers that were installed at the factory must recover your computer. 7. Press f11 while the "Press for recovery" message is...
...possible, back up all personal files. 2. NOTE: If the HP Recovery partition is completed: 1. All files you have created and any keyboard key. 4. When prompted, press any software installed on the computer are permanently removed. Select Repair your operating system and programs using the Windows 7...the Windows 7 operating system DVD, and then insert the Driver Recovery disc. 2. The f11 recovery tool reinstalls the operating system and HP programs and drivers that were installed at the factory must recover your computer. 7. Press f11 while the "Press for recovery" message is...
Getting Started HP Notebook
Page 55
... 14 F f11 recovery 43 fingerprint reader, identifying 8, 9 fn key, identifying 10, 11, 22, 23 function keys identifying 10, 11 H hard drive installing 34 removing 33 hard drive light 12 hard drive recovery 43 HDMI port, identifying 14 hot keys adjusting volume 22, 23 audio CD, DVD, or BD controls... 15, 16 Internet connection setup 20 ISP, using 19 J jacks audio-in (microphone) 12 audio-out (headphone) 12 network 14 RJ-45 (network) 14 K keyboard hot keys, identifying 22 keypad, embedded numeric 10 keypad, integrated numeric 11 keypads, identifying 23, 24 keys esc 10, 11 fn 10, 11, 23 function...
... 14 F f11 recovery 43 fingerprint reader, identifying 8, 9 fn key, identifying 10, 11, 22, 23 function keys identifying 10, 11 H hard drive installing 34 removing 33 hard drive light 12 hard drive recovery 43 HDMI port, identifying 14 hot keys adjusting volume 22, 23 audio CD, DVD, or BD controls... 15, 16 Internet connection setup 20 ISP, using 19 J jacks audio-in (microphone) 12 audio-out (headphone) 12 network 14 RJ-45 (network) 14 K keyboard hot keys, identifying 22 keypad, embedded numeric 10 keypad, integrated numeric 11 keypads, identifying 23, 24 keys esc 10, 11 fn 10, 11, 23 function...
HP Notebook User Guide - Linux
Page 9
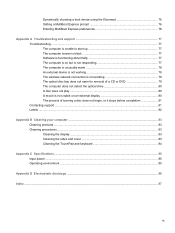
... warm 78 An external device is not working 78 The wireless network connection is not working 78 The optical disc tray does not open for removal of a CD or DVD 79 The computer does not detect the optical drive 80 A disc does not play ...80 A movie is not visible on an... Appendix B Cleaning your computer ...83 Cleaning products ...83 Cleaning procedures ...83 Cleaning the display ...83 Cleaning the sides and cover 83 Cleaning the TouchPad and keyboard 84 Appendix C Specifications ...85 Input power ...85 Operating environment ...85 Appendix D Electrostatic discharge ...86 Index ...87 ix
... warm 78 An external device is not working 78 The wireless network connection is not working 78 The optical disc tray does not open for removal of a CD or DVD 79 The computer does not detect the optical drive 80 A disc does not play ...80 A movie is not visible on an... Appendix B Cleaning your computer ...83 Cleaning products ...83 Cleaning procedures ...83 Cleaning the display ...83 Cleaning the sides and cover 83 Cleaning the TouchPad and keyboard 84 Appendix C Specifications ...85 Input power ...85 Operating environment ...85 Appendix D Electrostatic discharge ...86 Index ...87 ix
HP Notebook User Guide - Linux
Page 47
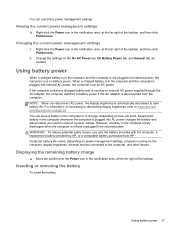
Inserting or removing the battery To insert the battery: Using battery power 37 Using ... power. To reduce potential safety issues, use only the battery provided with the computer, a replacement battery provided by HP, or a compatible battery purchased from the computer. Computer battery life varies, depending on power management settings, programs running... on external AC power supplied through the AC adapter, the computer switches to Keyboard and pointing devices on the On AC Power tab, On Battery Power tab, and General tab, as needed. ...
Inserting or removing the battery To insert the battery: Using battery power 37 Using ... power. To reduce potential safety issues, use only the battery provided with the computer, a replacement battery provided by HP, or a compatible battery purchased from the computer. Computer battery life varies, depending on power management settings, programs running... on external AC power supplied through the AC adapter, the computer switches to Keyboard and pointing devices on the On AC Power tab, On Battery Power tab, and General tab, as needed. ...
HP Notebook User Guide - Linux
Page 54
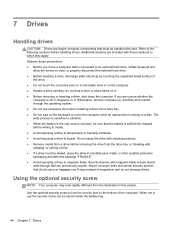
... security screw to lock the service door to the bottom of magnetism and do not drop a drive or place items on the keyboard or move a computer that is connected to an external hard drive, initiate Suspend and allow the screen to clear, or properly disconnect... a drive to magnetic fields. Security devices with the procedures to which they apply. The write process is sensitive to the following cautions before removing the drive from the illustration in Hibernation, turn the computer on the computer. ● Handle a drive carefully; Observe these precautions: ●...
... security screw to lock the service door to the bottom of magnetism and do not drop a drive or place items on the keyboard or move a computer that is connected to an external hard drive, initiate Suspend and allow the screen to clear, or properly disconnect... a drive to magnetic fields. Security devices with the procedures to which they apply. The write process is sensitive to the following cautions before removing the drive from the illustration in Hibernation, turn the computer on the computer. ● Handle a drive carefully; Observe these precautions: ●...

HP Notebook User Guide - Linux
Page 64
...specific software, refer to the system. The computer has at least 1 USB port that provides power to connect an optional external device, such as a USB keyboard, mouse, drive, printer, scanner, or hub. Your computer may require additional support software, which is not ejected, pull the card out of the slot.... NOTE: If the card is usually included with the computer. 54 Chapter 8 External cards and devices Press in on the card (1), and then remove it from the slot (2). 3. Some USB devices may also have a USB charging port that supports USB 1.0, 1.1, 2.0, or 3.0 devices.
...specific software, refer to the system. The computer has at least 1 USB port that provides power to connect an optional external device, such as a USB keyboard, mouse, drive, printer, scanner, or hub. Your computer may require additional support software, which is not ejected, pull the card out of the slot.... NOTE: If the card is usually included with the computer. 54 Chapter 8 External cards and devices Press in on the card (1), and then remove it from the slot (2). 3. Some USB devices may also have a USB charging port that supports USB 1.0, 1.1, 2.0, or 3.0 devices.
HP Notebook User Guide - Linux
Page 94
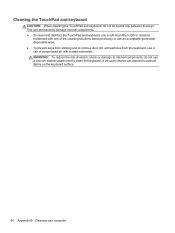
...microfiber cloth or chamois moistened with a straw extension. WARNING! A vacuum cleaner can of electric shock or damage to clean the keyboard. To reduce the risk of compressed air with one of the cleaning solutions listed previously or use an acceptable germicidal disposable wipe.... ● To prevent keys from sticking and to remove dust, lint, and particles from the keyboard, use a vacuum cleaner attachment to internal components, do not let liquids drip between the keys. Cleaning the TouchPad ...
...microfiber cloth or chamois moistened with a straw extension. WARNING! A vacuum cleaner can of electric shock or damage to clean the keyboard. To reduce the risk of compressed air with one of the cleaning solutions listed previously or use an acceptable germicidal disposable wipe.... ● To prevent keys from sticking and to remove dust, lint, and particles from the keyboard, use a vacuum cleaner attachment to internal components, do not let liquids drip between the keys. Cleaning the TouchPad ...

HP ProBook 4545s Notebook PC - Maintenance and Service Guide
Page 52
... part number 683491-xxx Before removing the keyboard, follow these steps: 1. Remove the battery (see Optical drive on page 34). 5. Remove the Optical drive (see Battery on page 39). Remove the keyboard: 1. Disconnect the power from the computer by first unplugging the power cord from the... the computer upside-down through the operating system. 2. Remove the bottom door (see Sequential part number listing on page 35). 6. Reverse this procedure to the computer. 3. Keyboard NOTE: For a detailed list of available keyboards, see Bottom door on page 24. If you are...
... part number 683491-xxx Before removing the keyboard, follow these steps: 1. Remove the battery (see Optical drive on page 34). 5. Remove the Optical drive (see Battery on page 39). Remove the keyboard: 1. Disconnect the power from the computer by first unplugging the power cord from the... the computer upside-down through the operating system. 2. Remove the bottom door (see Sequential part number listing on page 35). 6. Reverse this procedure to the computer. 3. Keyboard NOTE: For a detailed list of available keyboards, see Bottom door on page 24. If you are...
HP ProBook 4545s Notebook PC - Maintenance and Service Guide
Page 53
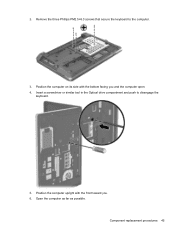
2. Position the computer on its side with the front toward you and the computer open. 4. Component replacement procedures 45 Remove the three Phillips PM2.5×6.0 screws that secure the keyboard to disengage the keyboard. 5. Open the computer as far as possible. Insert a screwdriver or similar tool in the Optical drive compartment and push to the computer. 3. Position the computer upright with the bottom facing you . 6.
2. Position the computer on its side with the front toward you and the computer open. 4. Component replacement procedures 45 Remove the three Phillips PM2.5×6.0 screws that secure the keyboard to disengage the keyboard. 5. Open the computer as far as possible. Insert a screwdriver or similar tool in the Optical drive compartment and push to the computer. 3. Position the computer upright with the bottom facing you . 6.
HP ProBook 4545s Notebook PC - Maintenance and Service Guide
Page 54
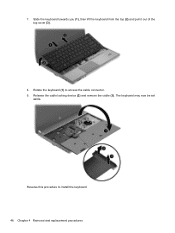
Reverse this procedure to access the cable connector. 9. Slide the keyboard towards you (1), then lift the keyboard from the top (2) and pull it out of the top cover (3). 8. Rotate the keyboard (1) to install the keyboard. 46 Chapter 4 Removal and replacement procedures The keyboard may now be set aside. 7. Release the cable locking device (2) and remove the cable (3).
Reverse this procedure to access the cable connector. 9. Slide the keyboard towards you (1), then lift the keyboard from the top (2) and pull it out of the top cover (3). 8. Rotate the keyboard (1) to install the keyboard. 46 Chapter 4 Removal and replacement procedures The keyboard may now be set aside. 7. Release the cable locking device (2) and remove the cable (3).


