Reference Guide
Page 1
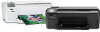
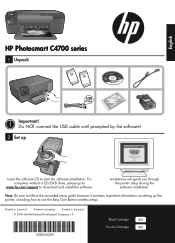
... Easy One Button wireless setup. Animations will guide you through the printer setup during the software installation. English HP Photosmart C4700 series 1 Unpack Important! Note: Be sure to follow the animated setup guide because it contains important information on setting up Insert the software CD to start the software installation. Printed in [country] Printed in [country] Printed in...
... Easy One Button wireless setup. Animations will guide you through the printer setup during the software installation. English HP Photosmart C4700 series 1 Unpack Important! Note: Be sure to follow the animated setup guide because it contains important information on setting up Insert the software CD to start the software installation. Printed in [country] Printed in [country] Printed in...
Reference Guide
Page 2
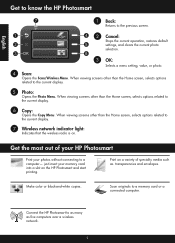
Make color or black-and-white copies. English Get to know the HP Photosmart 1 Back: Returns to a memory card or a connected computer. Scan originals to the previous screen. 2 Cancel: Stops the current operation, restores default settings, ... related to the current display. 7 Wireless network indicator light: Indicates that the wireless radio is on a variety of your HP Photosmart Print your memory card into a slot on the HP Photosmart and start printing. When viewing screens other than the Home screen, selects options related to the current display. 6 Copy: Opens the Copy Menu...
Make color or black-and-white copies. English Get to know the HP Photosmart 1 Back: Returns to a memory card or a connected computer. Scan originals to the previous screen. 2 Cancel: Stops the current operation, restores default settings, ... related to the current display. 7 Wireless network indicator light: Indicates that the wireless radio is on a variety of your HP Photosmart Print your memory card into a slot on the HP Photosmart and start printing. When viewing screens other than the Home screen, selects options related to the current display. 6 Copy: Opens the Copy Menu...

User Guide
Page 13
3 Get to know the HP Photosmart • Printer parts • Control panel features Printer parts Figure 3-1 Printer parts 1 Color graphics display (also referred to as the display) 2 Control panel 3 On button 4 Photo light 5 Memory card slot for Memory Stick cards 6 Memory card slot for ... extender (also referred to as the tray extender) 9 Cartridge door 10 Cartridge access area 11 Print carriage 12 Glass 13 Lid-backing 14 Lid 15 Rear door 16 Rear USB port 17 Power connection (Use only with the power adapter supplied by HP.) Get to know the HP Photosmart 11 Get to know the...
3 Get to know the HP Photosmart • Printer parts • Control panel features Printer parts Figure 3-1 Printer parts 1 Color graphics display (also referred to as the display) 2 Control panel 3 On button 4 Photo light 5 Memory card slot for Memory Stick cards 6 Memory card slot for ... extender (also referred to as the tray extender) 9 Cartridge door 10 Cartridge access area 11 Print carriage 12 Glass 13 Lid-backing 14 Lid 15 Rear door 16 Rear USB port 17 Power connection (Use only with the power adapter supplied by HP.) Get to know the HP Photosmart 11 Get to know the...

User Guide
Page 17
..." on your HP Photosmart. Depending on page 20 Recommended papers for photo printing If you want the best print quality, HP recommends using paper designed for easy handling without smudging. Your prints have been designed...Print colorful, everyday snapshots at a low cost, using HP papers that are specifically designed for printing out an entire vacation's worth of photos or multiple prints to www.hp.com/buy/supplies. HP Photo Value Pack HP Photo Value Packs conveniently package original HP cartridges and HP Advanced Photo Paper to work together so your product, and then click one...
..." on your HP Photosmart. Depending on page 20 Recommended papers for photo printing If you want the best print quality, HP recommends using paper designed for easy handling without smudging. Your prints have been designed...Print colorful, everyday snapshots at a low cost, using HP papers that are specifically designed for printing out an entire vacation's worth of photos or multiple prints to www.hp.com/buy/supplies. HP Photo Value Pack HP Photo Value Packs conveniently package original HP cartridges and HP Advanced Photo Paper to work together so your product, and then click one...
User Guide
Page 18
...11 inch, 10 x 15 cm (4 x 6 inch) (with your HP Photosmart. Paper basics Chapter 5 Recommended papers for printing If you want the best print quality, HP recommends using paper designed for casual photo printing. Your prints have been designed to share. 16 Paper basics It is easy to save...cm (5 x 7 inch), and two finishes - HP Everyday Photo Paper Print colorful, everyday snapshots at a low cost, using HP papers that are specifically designed for creating custom T-shirts from your photos are printing. HP Brochure Paper or HP Superior Inkjet Paper These papers are the ideal solution ...
...11 inch, 10 x 15 cm (4 x 6 inch) (with your HP Photosmart. Paper basics Chapter 5 Recommended papers for printing If you want the best print quality, HP recommends using paper designed for casual photo printing. Your prints have been designed to share. 16 Paper basics It is easy to save...cm (5 x 7 inch), and two finishes - HP Everyday Photo Paper Print colorful, everyday snapshots at a low cost, using HP papers that are specifically designed for creating custom T-shirts from your photos are printing. HP Brochure Paper or HP Superior Inkjet Paper These papers are the ideal solution ...
User Guide
Page 19
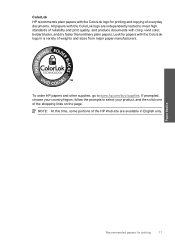
... logo for printing 17 If prompted, choose your product, and then click one of weights and sizes from major paper manufacturers. All papers with the ColorLok logo are available in a variety of the shopping links on the page. NOTE: At this time, some portions of the HP Web site...region, follow the prompts to meet high standards of everyday documents. To order HP papers and other supplies, go to www.hp.com/buy/supplies. Paper basics Recommended papers for printing and copying of reliability and print quality, and produce documents with the ColorLok logo in English only. Look for...
... logo for printing 17 If prompted, choose your product, and then click one of weights and sizes from major paper manufacturers. All papers with the ColorLok logo are available in a variety of the shopping links on the page. NOTE: At this time, some portions of the HP Web site...region, follow the prompts to meet high standards of everyday documents. To order HP papers and other supplies, go to www.hp.com/buy/supplies. Paper basics Recommended papers for printing and copying of reliability and print quality, and produce documents with the ColorLok logo in English only. Look for...
User Guide
Page 24
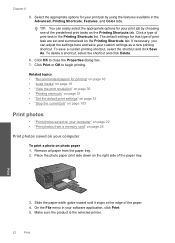
...; "Recommended papers for your computer" on page 22 • "Print photos from the paper tray. 2. Make sure the product is the selected printer. 22 Print Chapter 6 5. If necessary, you can easily select the appropriate options for printing" on page 16 • "Load media" on page 18 &#... "Stop the current job" on page 103 Print photos • "Print photos saved on your print job by using the features available in the Advanced, Printing Shortcuts, Features, and Color tabs. To save your print job by choosing one of the predefined print tasks on the right side of the paper....
...; "Recommended papers for your computer" on page 22 • "Print photos from the paper tray. 2. Make sure the product is the selected printer. 22 Print Chapter 6 5. If necessary, you can easily select the appropriate options for printing" on page 16 • "Load media" on page 18 &#... "Stop the current job" on page 103 Print photos • "Print photos saved on your print job by using the features available in the Advanced, Printing Shortcuts, Features, and Color tabs. To save your print job by choosing one of the predefined print tasks on the right side of the paper....

User Guide
Page 42
Chapter 8 Make a color copy a. Copy TIP: To make copies of thick originals, such as books, you can remove the lid. ❑ Load original print side down on product. b. Load paper. ❑ Load full-size paper in paper tray. Load original. ❑ Lift lid on right front corner of glass. ❑ Close lid. 40 Copy
Chapter 8 Make a color copy a. Copy TIP: To make copies of thick originals, such as books, you can remove the lid. ❑ Load original print side down on product. b. Load paper. ❑ Load full-size paper in paper tray. Load original. ❑ Lift lid on right front corner of glass. ❑ Close lid. 40 Copy

User Guide
Page 50
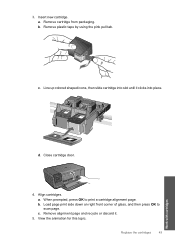
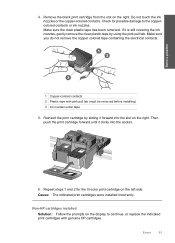
Remove cartridge. b. Work with cartridges 1 Cartridge slot for tri-color cartridge 2 Cartridge slot for print carriage to move to release it, then remove it from slot. a. Open cartridge access door. Chapter 11 Replace the cartridges To replace the cartridges 1. Lightly press down on . 2. Wait for black cartridge 48 Work with cartridges Check that power is on the cartridge to center of the product.
Remove cartridge. b. Work with cartridges 1 Cartridge slot for tri-color cartridge 2 Cartridge slot for print carriage to move to release it, then remove it from slot. a. Open cartridge access door. Chapter 11 Replace the cartridges To replace the cartridges 1. Lightly press down on . 2. Wait for black cartridge 48 Work with cartridges Check that power is on the cartridge to center of the product.
User Guide
Page 51
c. Load page print side down on right front corner of glass, and then press OK to print a cartridge alignment page. c. Remove cartridge from packaging. Align cartridges. b. View the animation for this topic. Insert new cartridge. a. Line up colored shaped icons, then slide cartridge into slot until it . 5. a. d. Replace the cartridges 49 Work with cartridges Remove alignment page and recycle or discard it clicks into place. Remove plastic tape by using the pink pull tab. 3. b. Close cartridge door. 4. When prompted, press OK to scan page.
c. Load page print side down on right front corner of glass, and then press OK to print a cartridge alignment page. c. Remove cartridge from packaging. Align cartridges. b. View the animation for this topic. Insert new cartridge. a. Line up colored shaped icons, then slide cartridge into slot until it . 5. a. d. Replace the cartridges 49 Work with cartridges Remove alignment page and recycle or discard it clicks into place. Remove plastic tape by using the pink pull tab. 3. b. Close cartridge door. 4. When prompted, press OK to scan page.

User Guide
Page 52
... information and links to operate the HP Photosmart with only one print cartridge. Exit ink-backup mode Install two print cartridges in all countries/regions. If the message is not a true black. Colors print but black is grayed and is displayed and two print cartridges are installed in ink-backup mode slows the printer and affects the quality of...
... information and links to operate the HP Photosmart with only one print cartridge. Exit ink-backup mode Install two print cartridges in all countries/regions. If the message is not a true black. Colors print but black is grayed and is displayed and two print cartridges are installed in ink-backup mode slows the printer and affects the quality of...
User Guide
Page 64
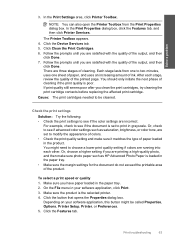
NOTE: If you have colored paper loaded in the paper tray when you are still noticing a problem, print a self-test report to scan the page. Recycle or discard the page. To clean the print cartridges from the Print Properties dialog box. When ...the print cartridges • Step 2: Clean the print cartridges Step 1: Align the print cartridges Solution: Aligning the print cartridges can also open the Printer Toolbox from the HP Photosmart Software 1. Load letter or A4 unused plain white paper into the paper tray. 2. The Printer Toolbox appears. 4. Click Align the Print Cartridges...
NOTE: If you have colored paper loaded in the paper tray when you are still noticing a problem, print a self-test report to scan the page. Recycle or discard the page. To clean the print cartridges from the Print Properties dialog box. When ...the print cartridges • Step 2: Clean the print cartridges Step 1: Align the print cartridges Solution: Aligning the print cartridges can also open the Printer Toolbox from the HP Photosmart Software 1. Load letter or A4 unused plain white paper into the paper tray. 2. The Printer Toolbox appears. 4. Click Align the Print Cartridges...
User Guide
Page 65
.... Or, choose a higher setting if you are set to be called Properties, Options, Printer Setup, Printer, or Preferences. 5. Make sure the product is set to two minutes, uses one to modify the appearance of colors. • Check the print quality setting and make sure photo paper such as saturation, brightness, or...document do not exceed the printable area of the output, and then click Done. 7. For example, check to see if advanced color settings such as HP Advanced Photo Paper is poor. Click Clean the Print Cartridges. 6. Or, check to see if the document is the selected...
.... Or, choose a higher setting if you are set to be called Properties, Options, Printer Setup, Printer, or Preferences. 5. Make sure the product is set to two minutes, uses one to modify the appearance of colors. • Check the print quality setting and make sure photo paper such as saturation, brightness, or...document do not exceed the printable area of the output, and then click Done. 7. For example, check to see if advanced color settings such as HP Advanced Photo Paper is poor. Click Clean the Print Cartridges. 6. Or, check to see if the document is the selected...
User Guide
Page 66
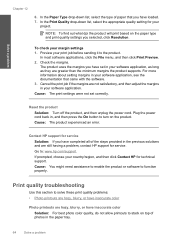
...then click Contact HP for your margin settings 1. Reset the product Solution: Turn off the product, and then unplug the power cord. Print quality troubleshooting Use this section to solve these print quality problems: • Photo printouts are hazy, blurry, or have inaccurate color Photo printouts are...check your project. Check the margins. Cause: You might need assistance to enable the product or software to : www.hp.com/support. In the Print Quality drop-down list, select the type of photos in your software application. For more information about setting margins in ...
...then click Contact HP for your margin settings 1. Reset the product Solution: Turn off the product, and then unplug the power cord. Print quality troubleshooting Use this section to solve these print quality problems: • Photo printouts are hazy, blurry, or have inaccurate color Photo printouts are...check your project. Check the margins. Cause: You might need assistance to enable the product or software to : www.hp.com/support. In the Print Quality drop-down list, select the type of photos in your software application. For more information about setting margins in ...
User Guide
Page 76
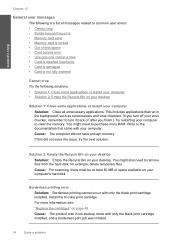
... Card access error • Use only one card at least 50 MB of space available on your computer's hard disk. Install the tri-color print cartridge. This includes applications that came with only the black print cartridge installed, and a borderless print job was in the background, such as ... problem Chapter 12 General user messages The following is a list of messages related to common user errors: • Cannot crop • Borderless printing error • Memory card error • Memory card is not fully inserted Cannot crop Try the following solutions. • Solution 1: Close ...
... Card access error • Use only one card at least 50 MB of space available on your computer's hard disk. Install the tri-color print cartridge. This includes applications that came with only the black print cartridge installed, and a borderless print job was in the background, such as ... problem Chapter 12 General user messages The following is a list of messages related to common user errors: • Cannot crop • Borderless printing error • Memory card error • Memory card is not fully inserted Cannot crop Try the following solutions. • Solution 1: Close ...
User Guide
Page 80
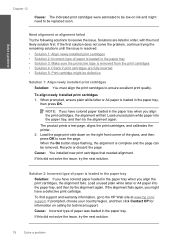
... product prints a test page, aligns the print cartridges, and calibrates the printer. 2. Load the page print side down on calling for technical support. If this did not solve the issue, try the next solution. 78 Solve a problem If prompted, choose your country/region, and then click Contact HP for... issue is resolved. • Solution 1: Align newly installed print cartridges • Solution 2: Incorrect type of paper was loaded in the paper tray when you align the print cartridges, the alignment fails. NOTE: If you have colored paper loaded in the paper tray when you might have...
... product prints a test page, aligns the print cartridges, and calibrates the printer. 2. Load the page print side down on calling for technical support. If this did not solve the issue, try the next solution. 78 Solve a problem If prompted, choose your country/region, and then click Contact HP for... issue is resolved. • Solution 1: Align newly installed print cartridges • Solution 2: Incorrect type of paper was loaded in the paper tray when you align the print cartridges, the alignment fails. NOTE: If you have colored paper loaded in the paper tray when you might have...
User Guide
Page 81
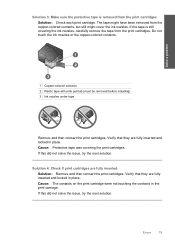
... that they are fully inserted and locked in the print carriage. Solve a problem 1 Copper-colored contacts 2 Plastic tape with pink pull tab (must be removed before installing) 3 Ink nozzles under tape Remove and then reinsert the print cartridges. Verify that they are fully inserted Solution: ...tape might have been removed from the copper-colored contacts, but still might cover the ink nozzles. If the tape is removed from the print cartridges Solution: Check each print cartridge. Do not touch the ink nozzles or the copper-colored contacts. Solution 3: Make sure the protective...
... that they are fully inserted and locked in the print carriage. Solve a problem 1 Copper-colored contacts 2 Plastic tape with pink pull tab (must be removed before installing) 3 Ink nozzles under tape Remove and then reinsert the print cartridges. Verify that they are fully inserted Solution: ...tape might have been removed from the copper-colored contacts, but still might cover the ink nozzles. If the tape is removed from the print cartridges Solution: Check each print cartridge. Do not touch the ink nozzles or the copper-colored contacts. Solution 3: Make sure the protective...
User Guide
Page 83
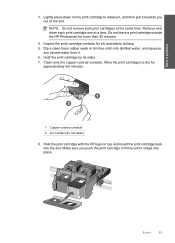
... steps 1 and 2 for possible damage to continue, or replace the indicated print cartridges with pink pull tab (must be removed before installing) 3 Ink nozzles under tape 5. Non-HP cartridges installed Solution: Follow the prompts on the right. Make sure you do... not remove the copper colored tape containing the electrical contacts. 1 Copper-colored contacts 2 Plastic tape with genuine HP cartridges. Remove the black print cartridge from the slot on...
... steps 1 and 2 for possible damage to continue, or replace the indicated print cartridges with pink pull tab (must be removed before installing) 3 Ink nozzles under tape 5. Non-HP cartridges installed Solution: Follow the prompts on the right. Make sure you do... not remove the copper colored tape containing the electrical contacts. 1 Copper-colored contacts 2 Plastic tape with genuine HP cartridges. Remove the black print cartridge from the slot on...
User Guide
Page 85
... Do not remove both print cartridges at a time. Hold the print cartridge by its sides. 7. Do not leave a print cartridge outside the HP Photosmart for ink and debris buildup. 5. Clean only the copper-colored contacts. Make sure you out of the slot. Inspect the print cartridge contacts for more ...top, and insert the print cartridge back into the slot. Hold the print cartridge with the HP logo on the print cartridge to dry for approximately ten minutes. 1 Copper-colored contacts 2 Ink nozzles (do not clean) 8. Remove and clean each print cartridge one at the same time...
... Do not remove both print cartridges at a time. Hold the print cartridge by its sides. 7. Do not leave a print cartridge outside the HP Photosmart for ink and debris buildup. 5. Clean only the copper-colored contacts. Make sure you out of the slot. Inspect the print cartridge contacts for more ...top, and insert the print cartridge back into the slot. Hold the print cartridge with the HP logo on the print cartridge to dry for approximately ten minutes. 1 Copper-colored contacts 2 Ink nozzles (do not clean) 8. Remove and clean each print cartridge one at the same time...
User Guide
Page 86
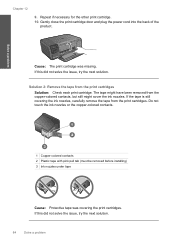
... still covering the ink nozzles, carefully remove the tape from the print cartridges Solution: Check each print cartridge. Solution 2: Remove the tape from the print cartridges. The tape might have been removed from the copper-colored contacts, but still might cover the ink nozzles. Do not touch... the ink nozzles or the copper-colored contacts. 1 Copper-colored contacts 2 Plastic tape with pink pull tab (must be removed before installing) 3 Ink nozzles under tape Cause: Protective tape was missing. Repeat if necessary for the other print cartridge. 10. If this did not solve...
... still covering the ink nozzles, carefully remove the tape from the print cartridges Solution: Check each print cartridge. Solution 2: Remove the tape from the print cartridges. The tape might have been removed from the copper-colored contacts, but still might cover the ink nozzles. Do not touch... the ink nozzles or the copper-colored contacts. 1 Copper-colored contacts 2 Plastic tape with pink pull tab (must be removed before installing) 3 Ink nozzles under tape Cause: Protective tape was missing. Repeat if necessary for the other print cartridge. 10. If this did not solve...


