
User Guide
Page 4
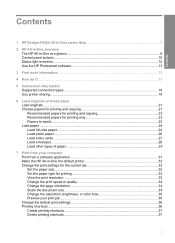
...HP Deskjet F4200 All-in-One series Help 7 2 HP All-in-One overview The HP All-in-One at a glance...9 Control panel buttons...10 Status light overview...12 Use the HP Photosmart software 13 3 Find more information...15 4 How do I?...17 5 Connection information Supported connection types...19 Use printer...printer 32 Change the print settings for the current job 32 Set the paper size...32 Set the paper type for printing 33 View the print resolution...33 Change the print speed or quality 34 Change the page orientation 34 Scale the document size...35 Change the saturation, brightness, or color...
...HP Deskjet F4200 All-in-One series Help 7 2 HP All-in-One overview The HP All-in-One at a glance...9 Control panel buttons...10 Status light overview...12 Use the HP Photosmart software 13 3 Find more information...15 4 How do I?...17 5 Connection information Supported connection types...19 Use printer...printer 32 Change the print settings for the current job 32 Set the paper size...32 Set the paper type for printing 33 View the print resolution...33 Change the print speed or quality 34 Change the page orientation 34 Scale the document size...35 Change the saturation, brightness, or color...
User Guide
Page 14
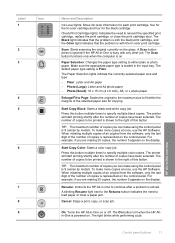
A Scan button press is ignored if the HP All-in -One to continue after a problem is busy with the tri-color print cartridge. For example, if you are making 25 copies, the number 5 appears on the display. The printer will start printing shortly after the number of copies is represented on . To make more copies...
A Scan button press is ignored if the HP All-in -One to continue after a problem is busy with the tri-color print cartridge. For example, if you are making 25 copies, the number 5 appears on the display. The printer will start printing shortly after the number of copies is represented on . To make more copies...
User Guide
Page 16
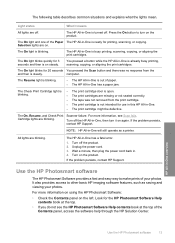
...then plug the power cord back in -One has a fatal error. 1. Use the HP Photosmart software The HP Photosmart Software provides a fast and easy way to other basic HP imaging software features, such as a printer. HP All-in -One is out of the Paper The HP All-in -One, then turn on the left. The following... table describes common situations and explains what the lights mean. The HP All-in -One will still operate as saving ...
...then plug the power cord back in -One has a fatal error. 1. Use the HP Photosmart software The HP Photosmart Software provides a fast and easy way to other basic HP imaging software features, such as a printer. HP All-in -One is out of the Paper The HP All-in -One, then turn on the left. The following... table describes common situations and explains what the lights mean. The HP All-in -One will still operate as saving ...
User Guide
Page 22
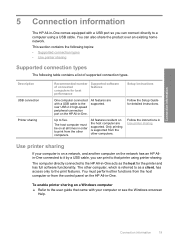
...The computer directly connected to the rear USB 2.0 high-speed peripheral connection port on the HP All-in-One. Connection information 19 You can connect directly to the user guide that printer using a USB cable. This section contains the following topics: • Supported connection types... Help. Setup instructions Follow the Setup Guide for the printer and has full software functionality. The other computer, which is supported from the other computers. Connection information 5 Connection information The HP All-in-One comes equipped with your computer is on a network, ...
...The computer directly connected to the rear USB 2.0 high-speed peripheral connection port on the HP All-in-One. Connection information 19 You can connect directly to the user guide that printer using a USB cable. This section contains the following topics: • Supported connection types... Help. Setup instructions Follow the Setup Guide for the printer and has full software functionality. The other computer, which is supported from the other computers. Connection information 5 Connection information The HP All-in-One comes equipped with your computer is on a network, ...
User Guide
Page 27
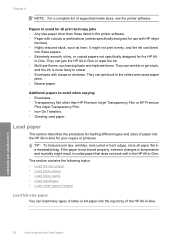
... Film. • Iron-On Transfers. • Greeting card paper. If the paper is more likely to smear. • Envelopes with HP inkjet devices). • Highly textured stock, such as duplicate and triplicate forms. They can load many types of letter or A4 paper into the input tray ...- Load paper This section describes the procedure for loading different types and sizes of supported media sizes, see the printer software. They can bleed into the HP All-in -One. It might not print evenly, and the ink can get stuck, and the ink is not stored properly, extreme changes in temperature and...
... Film. • Iron-On Transfers. • Greeting card paper. If the paper is more likely to smear. • Envelopes with HP inkjet devices). • Highly textured stock, such as duplicate and triplicate forms. They can load many types of letter or A4 paper into the input tray ...- Load paper This section describes the procedure for loading different types and sizes of supported media sizes, see the printer software. They can bleed into the HP All-in -One. It might not print evenly, and the ink can get stuck, and the ink is not stored properly, extreme changes in temperature and...
User Guide
Page 34
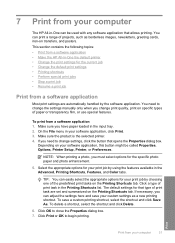
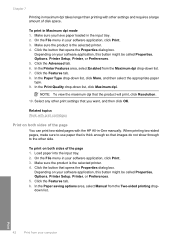
... contains the following topics: • Print from a software application • Make the HP All-in-One the default printer • Change the print settings for your print job by choosing one of print task are automatically handled by using the features available in the Advanced, Printing Shortcuts..., Features, and Color tabs. Click Print or OK to close the Properties dialog box...
... contains the following topics: • Print from a software application • Make the HP All-in-One the default printer • Change the print settings for your print job by choosing one of print task are automatically handled by using the features available in the Advanced, Printing Shortcuts..., Features, and Color tabs. Click Print or OK to close the Properties dialog box...
User Guide
Page 35
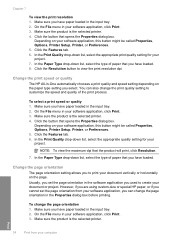
... paper size in the Properties dialog box before printing. For more information, see the Windows Help. Usually, you set the HP All-in-One as the default printer to use from all software applications. In the Resizing Options area, click the appropriate paper size from your computer Make sure...; Change the print speed or quality • Change the page orientation • Scale the document size • Change the saturation, brightness, or color tone • Preview your software application, click Print. 3. Some of the paper size choices have paper loaded in the input tray. On the File...
... paper size in the Properties dialog box before printing. For more information, see the Windows Help. Usually, you set the HP All-in-One as the default printer to use from all software applications. In the Resizing Options area, click the appropriate paper size from your computer Make sure...; Change the print speed or quality • Change the page orientation • Scale the document size • Change the saturation, brightness, or color tone • Preview your software application, click Print. 3. Some of the paper size choices have paper loaded in the input tray. On the File...
User Guide
Page 36
... Change the print settings for printing 1. Click the button that you have paper loaded in your software application, this button might be called Properties, Options, Printer Setup, Printer, or Preferences. 5. Select the type of paper you can specify a custom paper size) 10 x 15 cm (4 x 6 inch), L, 216 x 279 mm (8.5 x 11 inch), letter, ... of paper that you select in dots per inch (dpi). Paper type Copier, multi-purpose, or plain papers Envelopes Greeting-card papers Index cards Inkjet papers Iron-on your software application, click Print. 3. Click the Features tab. 6.
... Change the print settings for printing 1. Click the button that you have paper loaded in your software application, this button might be called Properties, Options, Printer Setup, Printer, or Preferences. 5. Select the type of paper you can specify a custom paper size) 10 x 15 cm (4 x 6 inch), L, 216 x 279 mm (8.5 x 11 inch), letter, ... of paper that you select in dots per inch (dpi). Paper type Copier, multi-purpose, or plain papers Envelopes Greeting-card papers Index cards Inkjet papers Iron-on your software application, click Print. 3. Click the Features tab. 6.
User Guide
Page 37
...box. However, if you are using custom-size or special HP paper, or if you cannot set the page orientation in the software application you have paper loaded in the input tray. 2. Make sure the product is the selected printer. 4. Click the button that the product will print, click ...In the Paper Type drop-down list, select the type of paper that opens the Properties dialog box. To change the page orientation in -One automatically chooses a print quality and speed setting depending on your software application, click Print. 3. You can change the page orientation 1. Make sure...
...box. However, if you are using custom-size or special HP paper, or if you cannot set the page orientation in the software application you have paper loaded in the input tray. 2. Make sure the product is the selected printer. 4. Click the button that the product will print, click ...In the Paper Type drop-down list, select the type of paper that opens the Properties dialog box. To change the page orientation in -One automatically chooses a print quality and speed setting depending on your software application, click Print. 3. You can change the page orientation 1. Make sure...
User Guide
Page 38
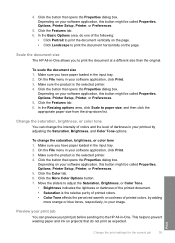
... job 35 Make sure you have paper loaded in -One. Depending on your software application, this button might be called Properties, Options, Printer Setup, Printer, or Preferences. 5. Click the More Color Options button. 7. This helps to the HP All-in the input tray. 2. Click the button... that opens the Properties dialog box. Scale the document size The HP All-in-One allows you have paper loaded...
... job 35 Make sure you have paper loaded in -One. Depending on your software application, this button might be called Properties, Options, Printer Setup, Printer, or Preferences. 5. Click the More Color Options button. 7. This helps to the HP All-in the input tray. 2. Click the button... that opens the Properties dialog box. Scale the document size The HP All-in-One allows you have paper loaded...
User Guide
Page 39
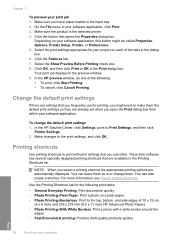
... tab. 7. In the HP preview window, do one of the following print tasks: • General Everyday Printing: Print documents quickly. • Photo Printing-Plain Paper: Print a photo on each of 10 x 15 cm (4 x 6 inch) and 216 x 279 mm (8.5 x 11 inch) HP Advanced Photo Papers. •...; Photo Printing-With White Borders: Print a photo with print settings that you might be called Properties, Options, Printer Setup, Printer, or Preferences. 5. To change them. In the HP Solution Center, click Settings, point to print with a white border around the edges. • Fast/Economical printing...
... tab. 7. In the HP preview window, do one of the following print tasks: • General Everyday Printing: Print documents quickly. • Photo Printing-Plain Paper: Print a photo on each of 10 x 15 cm (4 x 6 inch) and 216 x 279 mm (8.5 x 11 inch) HP Advanced Photo Papers. •...; Photo Printing-With White Borders: Print a photo with print settings that you might be called Properties, Options, Printer Setup, Printer, or Preferences. 5. To change them. In the HP Solution Center, click Settings, point to print with a white border around the edges. • Fast/Economical printing...
User Guide
Page 40
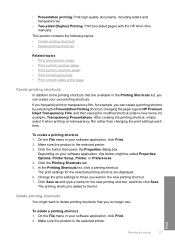
...in the Printing Shortcuts list, you can create a printing shortcut by selecting the Presentation Printing shortcut, changing the paper type to HP Premium Inkjet Transparency Film, and then saving the modified shortcut under a new name; Click the button that you want to the list. ...list, click a printing shortcut. Make sure the product is the selected printer. 3. After creating the printing shortcut, simply select it when printing on transparency film, for the selected printing shortcut are available in -One manually. Depending on both sides of the page Create printing shortcuts In ...
...in the Printing Shortcuts list, you can create a printing shortcut by selecting the Presentation Printing shortcut, changing the paper type to HP Premium Inkjet Transparency Film, and then saving the modified shortcut under a new name; Click the button that you want to the list. ...list, click a printing shortcut. Make sure the product is the selected printer. 3. After creating the printing shortcut, simply select it when printing on transparency film, for the selected printing shortcut are available in -One manually. Depending on both sides of the page Create printing shortcuts In ...
User Guide
Page 41
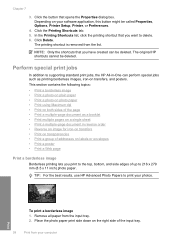
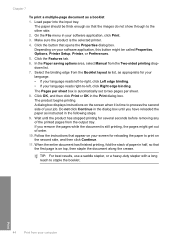
... an image for iron-on transfers • Print on transparencies • Print a group of up to delete. 6. Click Delete. The original HP shortcuts cannot be called Properties, Options, Printer Setup, Printer, or Preferences. 4. Remove all paper from your photos. The printing shortcut is removed from the list. NOTE: Only the shortcuts that you... (8.5 x 11 inch) photo paper. Click the button that opens the Properties dialog box. Perform special print jobs In addition to supporting standard print jobs, the HP All-in-One can be deleted.
... an image for iron-on transfers • Print on transparencies • Print a group of up to delete. 6. Click Delete. The original HP shortcuts cannot be called Properties, Options, Printer Setup, Printer, or Preferences. 4. Remove all paper from your photos. The printing shortcut is removed from the list. NOTE: Only the shortcuts that you... (8.5 x 11 inch) photo paper. Click the button that opens the Properties dialog box. Perform special print jobs In addition to supporting standard print jobs, the HP All-in-One can be deleted.
User Guide
Page 42
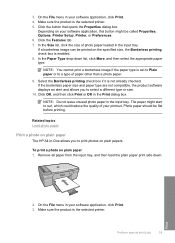
...displays an alert and allows you to curl, which could reduce the quality of photo paper loaded in -One allows you to a type of paper other than a photo paper. 9. To print a photo on plain...be flat before printing. Related topics Load photo paper Print a photo on plain paper The HP All-in the input tray. In the Size list, click the size of your software ... on plain paper 1. Click the Features tab. 7. Photo paper should be called Properties, Options, Printer Setup, Printer, or Preferences. 6. Click the button that opens the Properties dialog box. NOTE: Do not leave...
...displays an alert and allows you to curl, which could reduce the quality of photo paper loaded in -One allows you to a type of paper other than a photo paper. 9. To print a photo on plain...be flat before printing. Related topics Load photo paper Print a photo on plain paper The HP All-in the input tray. In the Size list, click the size of your software ... on plain paper 1. Click the Features tab. 7. Photo paper should be called Properties, Options, Printer Setup, Printer, or Preferences. 6. Click the button that opens the Properties dialog box. NOTE: Do not leave...
User Guide
Page 43
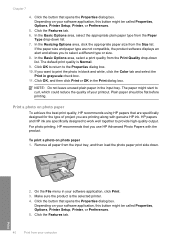
... plain paper type from the Paper Type drop-down . 2. Click OK to return to print the photo in black and white, click the Color tab and select the Print in your software application, this button might be flat before printing. NOTE: Do not leave unused plain paper in... print side down list. 7. If you to curl, which could reduce the quality of project you use HP Advanced Photo Papers with genuine HP ink. Plain paper should be called Properties, Options, Printer Setup, Printer, or Preferences. 5. On the File menu in grayscale check box. 11. In the Resizing Options area,...
... plain paper type from the Paper Type drop-down . 2. Click OK to return to print the photo in black and white, click the Color tab and select the Print in your software application, this button might be flat before printing. NOTE: Do not leave unused plain paper in... print side down list. 7. If you to curl, which could reduce the quality of project you use HP Advanced Photo Papers with genuine HP ink. Plain paper should be called Properties, Options, Printer Setup, Printer, or Preferences. 5. On the File menu in grayscale check box. 11. In the Resizing Options area,...
User Guide
Page 44
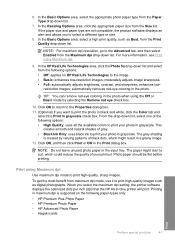
...coloring in the Print dialog box. The gray shading is supported on the following paper-types only: • HP Premium Plus Photo Paper • HP Premium Photo Paper • HP Advanced Photo Paper • Hagaki cards Print Perform special print jobs 41 Photo paper should be flat before printing. Printing in -One printer... will print. If the paper size and paper type are not compatible, the product software displays an alert and allows you select the maximum dpi setting, the printer software displays the optimized dots per inch (dpi) that the HP All-in maximum...
...coloring in the Print dialog box. The gray shading is supported on the following paper-types only: • HP Premium Plus Photo Paper • HP Premium Photo Paper • HP Advanced Photo Paper • Hagaki cards Print Perform special print jobs 41 Photo paper should be flat before printing. Printing in -One printer... will print. If the paper size and paper type are not compatible, the product software displays an alert and allows you select the maximum dpi setting, the printer software displays the optimized dots per inch (dpi) that the HP All-in maximum...
User Guide
Page 45
.... 7. Click the Advanced tab. 6. In the Paper Type drop-down list, click Maximum dpi. Select any other side. Related topics Work with the HP All-in-One manually. To print on both sides of disk space. Load paper into the input tray. 2. Depending on your computer Make sure you want, and... dpi mode 1. In the Print Quality drop-down list, click More, and then select the appropriate paper type. 9. Click the Features tab. 6. In the Printer Features area, select Enabled from the Two-sided printing dropdown list. Make sure the product is thick enough so that is the selected...
.... 7. Click the Advanced tab. 6. In the Paper Type drop-down list, click Maximum dpi. Select any other side. Related topics Work with the HP All-in-One manually. To print on both sides of disk space. Load paper into the input tray. 2. Depending on your computer Make sure you want, and... dpi mode 1. In the Print Quality drop-down list, click More, and then select the appropriate paper type. 9. Click the Features tab. 6. In the Printer Features area, select Enabled from the Two-sided printing dropdown list. Make sure the product is thick enough so that is the selected...
User Guide
Page 47
...staple the booklet. Click the Features tab. 6. If you have reloaded the paper as a booklet 1. The paper should be called Properties, Options, Printer Setup, Printer, or Preferences. 5. Print 44 Print from the Two-sided printing dropdown list. 7. Do not click Continue in the dialog box until the product... of your software application, click Print. 3. Load paper into the input tray. Depending on the screen when it is the selected printer. 4. TIP: For best results, use a saddle stapler, or a heavy-duty stapler with a long reach to process the second side of order....
...staple the booklet. Click the Features tab. 6. If you have reloaded the paper as a booklet 1. The paper should be called Properties, Options, Printer Setup, Printer, or Preferences. 5. Print 44 Print from the Two-sided printing dropdown list. 7. Do not click Continue in the dialog box until the product... of your software application, click Print. 3. Load paper into the input tray. Depending on the screen when it is the selected printer. 4. TIP: For best results, use a saddle stapler, or a heavy-duty stapler with a long reach to process the second side of order....
User Guide
Page 49
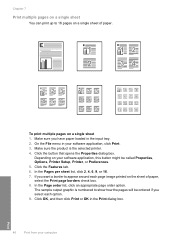
... appropriate page order option. Click OK, and then click Print or OK in your software application, click Print. 3. The sample output graphic is the selected printer. 4. On the File menu in the Print dialog box. 46 Print from your software application, this button might be ordered if you want a border to.... 9. In the Pages per sheet list, click 2, 4, 6, 9, or 16. 7. Make sure the product is numbered to show how the pages will be called Properties, Options, Printer Setup, Printer, or Preferences. 5. Make sure you have paper loaded in the input tray. 2.
... appropriate page order option. Click OK, and then click Print or OK in your software application, click Print. 3. The sample output graphic is the selected printer. 4. On the File menu in the Print dialog box. 46 Print from your software application, this button might be ordered if you want a border to.... 9. In the Pages per sheet list, click 2, 4, 6, 9, or 16. 7. Make sure the product is numbered to show how the pages will be called Properties, Options, Printer Setup, Printer, or Preferences. 5. Make sure you have paper loaded in the input tray. 2.
User Guide
Page 50
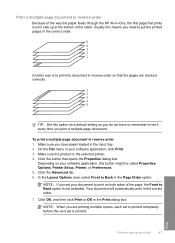
...at the bottom of the stack. Click the Advanced tab. 6. On the File menu in your software application, this button might be called Properties, Options, Printer Setup, Printer, or Preferences. 5. NOTE: When you are stacked correctly. 1 2 3 4 5 TIP: Set this means you have to remember to set it ...every time you print a multiple-page document. Print a multiple-page document in reverse order Because of the way the paper feeds through the HP All-in-One, ...
...at the bottom of the stack. Click the Advanced tab. 6. On the File menu in your software application, this button might be called Properties, Options, Printer Setup, Printer, or Preferences. 5. NOTE: When you are stacked correctly. 1 2 3 4 5 TIP: Set this means you have to remember to set it ...every time you print a multiple-page document. Print a multiple-page document in reverse order Because of the way the paper feeds through the HP All-in-One, ...


