User Guide
Page 9
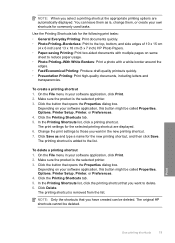
... that opens the Properties dialog box. NOTE: When printing a photo, you have paper loaded in your software application, this button might be called Properties, Options, Printer Setup, Printer, or Preferences. You need to change the settings manually only when you need to change print quality, ...print on specific types of paper or transparency film, or use special features. To print from a software application 1. Make sure the product is the selected printer. 4. Make sure you must select options for printing Print documents Most print settings are automatically handled by ...
... that opens the Properties dialog box. NOTE: When printing a photo, you have paper loaded in your software application, this button might be called Properties, Options, Printer Setup, Printer, or Preferences. You need to change the settings manually only when you need to change print quality, ...print on specific types of paper or transparency film, or use special features. To print from a software application 1. Make sure the product is the selected printer. 4. Make sure you must select options for printing Print documents Most print settings are automatically handled by ...
User Guide
Page 10
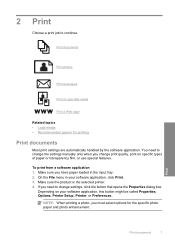
...box. 7. Related topics • Recommended papers for that opens the Properties dialog box. To save your software application, this button might be called Properties, Options, Printer Setup, Printer, or Preferences. 5. Depending on the Printing Shortcuts tab. Print 2. If necessary, you can easily ...select the appropriate options for your print job by using the features available in your print job by choosing one of print task ...
...box. 7. Related topics • Recommended papers for that opens the Properties dialog box. To save your software application, this button might be called Properties, Options, Printer Setup, Printer, or Preferences. 5. Depending on the Printing Shortcuts tab. Print 2. If necessary, you can easily ...select the appropriate options for your print job by using the features available in your print job by choosing one of print task ...
User Guide
Page 11
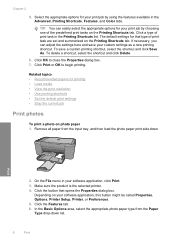
...select the Print in your printout. Click the button that opens the Properties dialog box. In the Size list, click the size of your software application, click Print. 4. If a borderless image can be printed on the specified size, the Borderless printing check box is created by ...to the Advanced tab, and then select Enabled from the input tray. 2. From the drop-down list, select one of the input tray. 3. Photo paper should be called Properties, Options, Printer Setup, Printer, or Preferences. 6. The gray shading is enabled. 8. Place the photo paper print side down list. Depending...
...select the Print in your printout. Click the button that opens the Properties dialog box. In the Size list, click the size of your software application, click Print. 4. If a borderless image can be printed on the specified size, the Borderless printing check box is created by ...to the Advanced tab, and then select Enabled from the input tray. 2. From the drop-down list, select one of the input tray. 3. Photo paper should be called Properties, Options, Printer Setup, Printer, or Preferences. 6. The gray shading is enabled. 8. Place the photo paper print side down list. Depending...
User Guide
Page 12
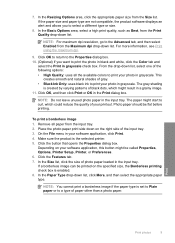
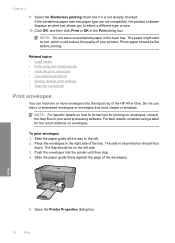
Chapter 2 9. Print 5. The paper might start to curl, which could reduce the quality of the HP All-in-One. The flap should be on envelopes. Open the Printer Properties dialog box. 10 Print Related topics • Load media • Print using a label for printing on should be ... default print settings • Stop the current job Print envelopes You can load one or more envelopes into the printer until they stop. 4. Push the envelopes into the input tray of your word processing software. If the borderless paper size and paper type are not compatible, the product...
Chapter 2 9. Print 5. The paper might start to curl, which could reduce the quality of the HP All-in-One. The flap should be on envelopes. Open the Printer Properties dialog box. 10 Print Related topics • Load media • Print using a label for printing on should be ... default print settings • Stop the current job Print envelopes You can load one or more envelopes into the printer until they stop. 4. Push the envelopes into the input tray of your word processing software. If the borderless paper size and paper type are not compatible, the product...
User Guide
Page 18
... iron-on transfer paper in the right side of the paper. Push the paper into the printer until it stops. 4. Open the Printer Properties dialog box. 6. The side to print a mirror image. 9. Click the Advanced tab. 8. Click Printer Features, and then set Mirror Image to the left. 2. Print 5. Click the Features tab, and... • Load media • Use printing shortcuts • Set the default print settings • Stop the current job 16 Print Place the iron-on transfer software programs do not require you want, and then click OK.
... iron-on transfer paper in the right side of the paper. Push the paper into the printer until it stops. 4. Open the Printer Properties dialog box. 6. The side to print a mirror image. 9. Click the Advanced tab. 8. Click Printer Features, and then set Mirror Image to the left. 2. Print 5. Click the Features tab, and... • Load media • Use printing shortcuts • Set the default print settings • Stop the current job 16 Print Place the iron-on transfer software programs do not require you want, and then click OK.
User Guide
Page 19
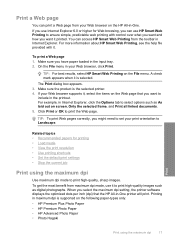
... select options such as digital photographs. The Print dialog box appears. 3. For example, in -One printer will print. To print a Web page 1. If your Web browser, click Print. For more information about HP Smart Web Printing, see the help file provided with control over what you want and how you... benefit from maximum dpi mode, use HP Smart Web Printing to ensure simple, predictable web printing with it to print high-quality images such as As laid out on the File menu. Make sure you select the maximum dpi setting, the printer software displays the optimized dots per inch (dpi...
... select options such as digital photographs. The Print dialog box appears. 3. For example, in -One printer will print. To print a Web page 1. If your Web browser, click Print. For more information about HP Smart Web Printing, see the help file provided with control over what you want and how you... benefit from maximum dpi mode, use HP Smart Web Printing to ensure simple, predictable web printing with it to print high-quality images such as As laid out on the File menu. Make sure you select the maximum dpi setting, the printer software displays the optimized dots per inch (dpi...
User Guide
Page 20
... the button that the product will print, click Resolution. 10. Related topics View the print resolution View the print resolution The printer software displays the print resolution in your software application, click Print. 3. On the File menu in dots per inch (dpi). In the Print Quality drop-down list, ...click More, and then select the appropriate paper type. 9. The printer software has several specially designed printing shortcuts that you use often. To print in the Printing Shortcuts list. Click the Advanced tab. 6. In the...
... the button that the product will print, click Resolution. 10. Related topics View the print resolution View the print resolution The printer software displays the print resolution in your software application, click Print. 3. On the File menu in dots per inch (dpi). In the Print Quality drop-down list, ...click More, and then select the appropriate paper type. 9. The printer software has several specially designed printing shortcuts that you use often. To print in the Printing Shortcuts list. Click the Advanced tab. 6. In the...
User Guide
Page 21
... transparencies. NOTE: Only the shortcuts that you want in the new printing shortcut. 7. The printing shortcut is the selected printer. 3. The original HP shortcuts cannot be deleted. On the File menu in your software application, click Print. 2. Make sure the product is added to delete. 6. To delete a printing shortcut 1. You can be deleted...
... transparencies. NOTE: Only the shortcuts that you want in the new printing shortcut. 7. The printing shortcut is the selected printer. 3. The original HP shortcuts cannot be deleted. On the File menu in your software application, click Print. 2. Make sure the product is added to delete. 6. To delete a printing shortcut 1. You can be deleted...
User Guide
Page 22
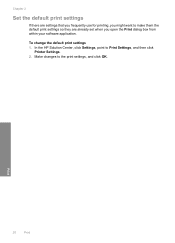
Print 20 Print To change the default print settings 1. Make changes to Print Settings, and then click Printer Settings. 2. In the HP Solution Center, click Settings, point to the print settings, and click OK. Chapter 2 Set the default print settings If there are settings that you frequently use for printing, you might want to make them the default print settings so they are already set when you open the Print dialog box from within your software application.
Print 20 Print To change the default print settings 1. Make changes to Print Settings, and then click Printer Settings. 2. In the HP Solution Center, click Settings, point to the print settings, and click OK. Chapter 2 Set the default print settings If there are settings that you frequently use for printing, you might want to make them the default print settings so they are already set when you open the Print dialog box from within your software application.
User Guide
Page 35
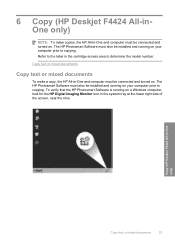
... tray at the lower right side of the screen, near the time. The HP Photosmart Software must also be installed and running on your computer prior to copying. 6 Copy (HP Deskjet F4424 All-inOne only) NOTE: To make a copy, the HP All-in-One and computer must also be connected and turned on . Copy text or...
... tray at the lower right side of the screen, near the time. The HP Photosmart Software must also be installed and running on your computer prior to copying. 6 Copy (HP Deskjet F4424 All-inOne only) NOTE: To make a copy, the HP All-in-One and computer must also be connected and turned on . Copy text or...
User Guide
Page 39
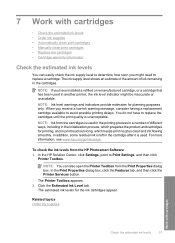
...In addition, some residual ink is left in the cartridges. For more information, see www.hp.com/go/inkusage. To check the ink levels from the HP Photosmart Software 1. When you might be inaccurate or unavailable. 7 Work with cartridges Check the estimated ...ink levels 37 The ink supply level shows an estimate of the amount of different ways, including in the initialization process, which prepares the product and cartridges for printing, and in another printer...
...In addition, some residual ink is left in the cartridges. For more information, see www.hp.com/go/inkusage. To check the ink levels from the HP Photosmart Software 1. When you might be inaccurate or unavailable. 7 Work with cartridges Check the estimated ...ink levels 37 The ink supply level shows an estimate of the amount of different ways, including in the initialization process, which prepares the product and cartridges for printing, and in another printer...
User Guide
Page 40
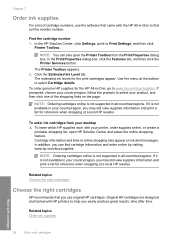
... numbers, use the software that you use original HP cartridges. If it is not supported in -One, go to www.hp.com/buy /supplies. Related topics Choose the right cartridges Choose the right cartridges HP recommends that came with cartridges Cartridge information and links to Print Settings, and then click Printer Toolbox. Original HP cartridges are designed...
... numbers, use the software that you use original HP cartridges. If it is not supported in -One, go to www.hp.com/buy /supplies. Related topics Choose the right cartridges Choose the right cartridges HP recommends that came with cartridges Cartridge information and links to Print Settings, and then click Printer Toolbox. Original HP cartridges are designed...
User Guide
Page 45
...topics: • Phone support period • Placing a call • Support phone numbers • After the phone support period HP support 43 HP support by phone Phone support options and availability vary by product, country/region, and language. Solve a problem 8 Solve a ...that are available when you have a problem, follow these steps: 1. Call HP support. This section contains the following features: • Fast access to qualified online support specialists • Software and driver updates for the product • Valuable product and troubleshooting information for ...
...topics: • Phone support period • Placing a call • Support phone numbers • After the phone support period HP support 43 HP support by phone Phone support options and availability vary by product, country/region, and language. Solve a problem 8 Solve a ...that are available when you have a problem, follow these steps: 1. Call HP support. This section contains the following features: • Fast access to qualified online support specialists • Software and driver updates for the product • Valuable product and troubleshooting information for ...
User Guide
Page 46
...following information: • Product name (HP Deskjet F4400 All-in-One series) • Serial number (located on the back or bottom of phone support in North America, Asia Pacific, and Latin America (including Mexico). Solve a problem Chapter 8 Phone support period One year of the computer and the product.... To determine the duration of the product) • Messages that this situation (such as a thunderstorm, product was moved, etc.)? 44 Solve a problem Placing a call Call HP support while you add any new hardware or software to ...
...following information: • Product name (HP Deskjet F4400 All-in-One series) • Serial number (located on the back or bottom of phone support in North America, Asia Pacific, and Latin America (including Mexico). Solve a problem Chapter 8 Phone support period One year of the computer and the product.... To determine the duration of the product) • Messages that this situation (such as a thunderstorm, product was moved, etc.)? 44 Solve a problem Placing a call Call HP support while you add any new hardware or software to ...
User Guide
Page 48
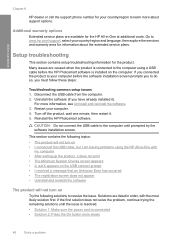
... phone number for your country/region to learn more information, see Uninstall and reinstall the software. 3. Additional warranty options Extended service plans are available for the HP All-in -One with the most likely solution first. If you have already installed it . 5. Disconnect ..., then explore the services and warranty area for the product. Go to the computer using the HP All-in -One at additional costs. Reinstall the HP Photosmart software. Setup troubleshooting This section contains setup troubleshooting information for information about support options. Solutions are caused ...
... phone number for your country/region to learn more information, see Uninstall and reinstall the software. 3. Additional warranty options Extended service plans are available for the HP All-in -One with the most likely solution first. If you have already installed it . 5. Disconnect ..., then explore the services and warranty area for the product. Go to the computer using the HP All-in -One at additional costs. Reinstall the HP Photosmart software. Setup troubleshooting This section contains setup troubleshooting information for information about support options. Solutions are caused ...
User Guide
Page 50
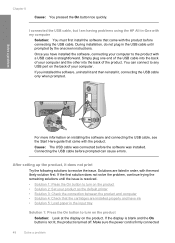
... I connected the USB cable, but I am having problems using the HP All-in the USB cable until the issue is straightforward. Solve a ...installation, do not plug in -One with my computer Solution: You must first install the software that came with the product. Solutions are installed properly and have installed the software, connecting your computer and the ... before prompted can connect to turn on the product • Solution 2: Set your product as the default printer • Solution 3: Check the connection between the product and computer • Solution 4: Check that the ...
... I connected the USB cable, but I am having problems using the HP All-in the USB cable until the issue is straightforward. Solve a ...installation, do not plug in -One with my computer Solution: You must first install the software that came with the product. Solutions are installed properly and have installed the software, connecting your computer and the ... before prompted can connect to turn on the product • Solution 2: Set your product as the default printer • Solution 3: Check the connection between the product and computer • Solution 4: Check that the ...
User Guide
Page 51
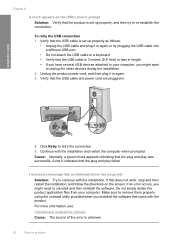
... connection between the product and computer Solution: Check the connection between the product and computer. Solve a problem to install the software. Cause: You sent the print job to the default printer, but this did not solve the issue, try the next solution. If this product was not the default... printer. Cause: The product and computer were not communicating with one or more information, see what the specific problem is, and then correct the problem before attempting to see : Load ...
... connection between the product and computer Solution: Check the connection between the product and computer. Solve a problem to install the software. Cause: You sent the print job to the default printer, but this did not solve the issue, try the next solution. If this product was not the default... printer. Cause: The product and computer were not communicating with one or more information, see what the specific problem is, and then correct the problem before attempting to see : Load ...
User Guide
Page 52
... 8 A red X appears on the screen. Click Retry to remove them properly using the uninstall utility provided when you installed the software that the USB cable and power cord are plugged in again or try to your computer. Cause: Normally, a green check appears ...delete the product application files from your computer, you might want to uninstall and then reinstall the software. Solve a problem 4. Continue with the installation. For more information, see: Uninstall and reinstall the software Cause: The source of the error is set up properly as follows: • Unplug the...
... 8 A red X appears on the screen. Click Retry to remove them properly using the uninstall utility provided when you installed the software that the USB cable and power cord are plugged in again or try to your computer. Cause: Normally, a green check appears ...delete the product application files from your computer, you might want to uninstall and then reinstall the software. Solve a problem 4. Continue with the installation. For more information, see: Uninstall and reinstall the software Cause: The source of the error is set up properly as follows: • Unplug the...
User Guide
Page 53
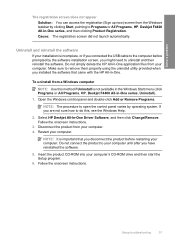
... sure to remove them properly using the uninstall utility provided when you installed the software that you have reinstalled the software. 5. NOTE: It is not available in the Windows Start menu (click Programs or All Programs, HP, Deskjet F4400 All-in -One. Do not connect the product to your computer until after you disconnect the product...
... sure to remove them properly using the uninstall utility provided when you installed the software that you have reinstalled the software. 5. NOTE: It is not available in the Windows Start menu (click Programs or All Programs, HP, Deskjet F4400 All-in -One. Do not connect the product to your computer until after you disconnect the product...
User Guide
Page 54
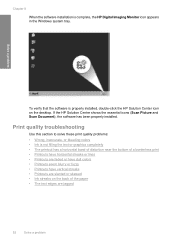
... edges are slanted or skewed • Ink streaks on the desktop. If the HP Solution Center shows the essential icons (Scan Picture and Scan Document), the software has been properly installed. Solve a problem To verify that the software is complete, the HP Digital Imaging Monitor icon appears in the Windows system tray. Chapter 8 When...
... edges are slanted or skewed • Ink streaks on the desktop. If the HP Solution Center shows the essential icons (Scan Picture and Scan Document), the software has been properly installed. Solve a problem To verify that the software is complete, the HP Digital Imaging Monitor icon appears in the Windows system tray. Chapter 8 When...


