Setup Guide
Page 5
... (Optional 12 Enable or Disable Wireless (Optional 14 Set Up Wireless Display (Optional 16 Connect to the Internet (Optional 17 Using Your Inspiron Laptop 20 Right View Features 20 Left View Features 22 Back View Features 26 Front View Features 28 Status Lights and Indicators...and Keyboard Features 32 Touch Pad Gestures 36 Multimedia Control Keys 38 Using the Optical Drive 40 Display Features 42 Touch Screen Gestures (Optional 44 Removing and Replacing the Top Cover (Optional 46 Removing and Replacing the Battery 50 Software Features 52 Dell DataSafe Online Backup 53...
... (Optional 12 Enable or Disable Wireless (Optional 14 Set Up Wireless Display (Optional 16 Connect to the Internet (Optional 17 Using Your Inspiron Laptop 20 Right View Features 20 Left View Features 22 Back View Features 26 Front View Features 28 Status Lights and Indicators...and Keyboard Features 32 Touch Pad Gestures 36 Multimedia Control Keys 38 Using the Optical Drive 40 Display Features 42 Touch Screen Gestures (Optional 44 Removing and Replacing the Top Cover (Optional 46 Removing and Replacing the Battery 50 Software Features 52 Dell DataSafe Online Backup 53...
Service Manual
Page 44
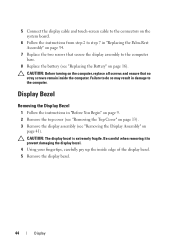
... extremely fragile. CAUTION: Before turning on the computer, replace all screws and ensure that secure the display assembly to the computer base. 8 Replace the battery (see "Removing the Display Assembly" on page 41). 5 Connect the display cable and touch-screen cable to the connectors on the system board. 6... Follow the instructions from step 2 to step 7 in "Replacing the Palm-Rest Assembly" on page 34. 7 Replace the two screws that no stray screws remain inside edge of the ...
... extremely fragile. CAUTION: Before turning on the computer, replace all screws and ensure that secure the display assembly to the computer base. 8 Replace the battery (see "Removing the Display Assembly" on page 41). 5 Connect the display cable and touch-screen cable to the connectors on the system board. 6... Follow the instructions from step 2 to step 7 in "Replacing the Palm-Rest Assembly" on page 34. 7 Replace the two screws that no stray screws remain inside edge of the ...

Service Manual
Page 89
...as the downloaded BIOS update file. Click BIOS. 5 Click Download Now to save the file on the screen. The File Download window appears. 6 Click Save to download the latest BIOS file. If you have your...Line list. The file downloads to step 4. If you have selected a different model and want to support.dell.com/support/downloads. 3 Locate the BIOS update file for your computer: NOTE: The Service Tag for your...The BIOS may require flashing when an update is available or when replacing the system board. Flashing the BIOS 89 c Select the product brand in the Select Your Product Model ...
...as the downloaded BIOS update file. Click BIOS. 5 Click Download Now to save the file on the screen. The File Download window appears. 6 Click Save to download the latest BIOS file. If you have your...Line list. The file downloads to step 4. If you have selected a different model and want to support.dell.com/support/downloads. 3 Locate the BIOS update file for your computer: NOTE: The Service Tag for your...The BIOS may require flashing when an update is available or when replacing the system board. Flashing the BIOS 89 c Select the product brand in the Select Your Product Model ...


