Dell INSPIRON 15 Support Question
Dell INSPIRON 15 Support Question
Find answers below for this question about Dell INSPIRON 15 - Laptop Notebook PC: Intel Pentium Dual Core T4200.Need a Dell INSPIRON 15 manual? We have 2 online manuals for this item!
Question posted by kmw2maaros on August 22nd, 2014
Inspiron One How To Replace Screen Goes Crack
The person who posted this question about this Dell product did not include a detailed explanation. Please use the "Request More Information" button to the right if more details would help you to answer this question.
Current Answers
Answer #1: Posted by DellJesse1 on August 28th, 2014 8:04 AM
DellJesse1

Member since:
April 19th, 2012 Points: 1,551,500

Member since:
April 19th, 2012 Points: 1,551,500
kmw2maaros,
You can click the link below for information on removing/replacing the screen on your system. Choose your system from the list and choose to download the manual. You can also contact Dell Spare Parts to order the screen from the link below as well.
Thank You,
Dell-Jesse1
Dell Social Media and Communities
email:[email protected]
Dell Community Forum.
www.en.community.dell.com
Dell Twitter Support
@dellcares
Dell Facebook Support
www.facebook.com/dell
#iwork4dell
Related Dell INSPIRON 15 Manual Pages
Owners Manual - Page 1
P18F002; P18F003 Dell Inspiron M5040/15-N5040/ 15-N5050/3520
Owner's Manual
Regulatory model: P18F
Regulatory type: P18F001;
Owners Manual - Page 2
..., and Warnings
NOTE: A NOTE indicates important information that helps you make better use of Microsoft Corporation in this text: Dell™, the DELL logo, and Inspiron™ are not followed.
Owners Manual - Page 3
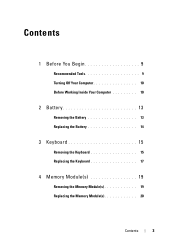
Contents
1 Before You Begin 9
Recommended Tools 9
Turning Off Your Computer 10
Before Working Inside Your Computer 10
2 Battery 13
Removing the Battery 13
Replacing the Battery 14
3 Keyboard 15
Removing the Keyboard 15
Replacing the Keyboard 17
4 Memory Module(s 19
Removing the Memory Module(s 19
Replacing the Memory Module(s 20
Contents
3
Owners Manual - Page 4
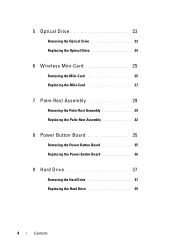
... Drive 24
6 Wireless Mini-Card 25
Removing the Mini-Card 25
Replacing the Mini-Card 27
7 Palm-Rest Assembly 29
Removing the Palm-Rest Assembly 29
Replacing the Palm-Rest Assembly 32
8 Power Button Board 35
Removing the Power Button Board 35
Replacing the Power Button Board 36
9 Hard Drive 37
Removing the...
Owners Manual - Page 5
...
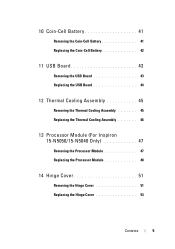
11 USB Board 43
Removing the USB Board 43
Replacing the USB Board 44
12 Thermal Cooling Assembly 45
Removing the Thermal Cooling Assembly 45
Replacing the Thermal Cooling Assembly 46
13 Processor Module (For Inspiron
15-N5050/15-N5040 Only 47
Removing the Processor Module 47
Replacing the Processor Module 48
14 Hinge Cover 51...
Owners Manual - Page 6
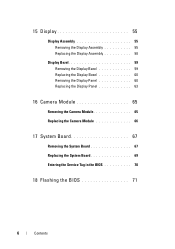
15 Display 55
Display Assembly 55
Removing the Display Assembly 55
Replacing the Display Assembly 58
Display Bezel 59
Removing the Display Bezel 59
Replacing the Display Bezel 60
Removing the Display Panel 60
Replacing the Display Panel 63
16 Camera Module 65
Removing the Camera Module 65
Replacing the Camera Module 66
17 System Board...
Owners Manual - Page 9
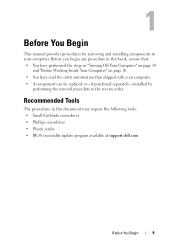
... information that shipped with your computer. 1
Before You Begin
This manual provides procedures for removing and installing components in your computer. • A component can be replaced or-if purchased separately-installed by
performing the removal procedure in the reverse order.
Before you begin any procedure in this document may require the...
Owners Manual - Page 10
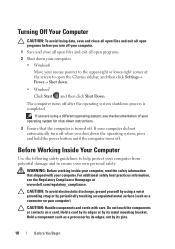
... the operating system, press and hold the power button until the computer turns off. For additional safety best practices information, see the documentation of the screen to ensure your own personal safety. CAUTION: To avoid electrostatic discharge, ground yourself by using a different operating system, see the Regulatory Compliance Homepage at www...
Owners Manual - Page 14
3
2 1
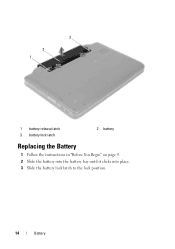
1 battery release latch 3 battery lock latch
2 battery
Replacing the Battery
1 Follow the instructions in "Before You Begin" on page 9. 2 Slide the battery into the battery bay until it clicks into place. 3 Slide the battery lock latch to the lock position.
14
Battery
Owners Manual - Page 15

... the palm rest. CAUTION: The keycaps on page 13. For additional safety best practices information, see "Removing the Battery" on your computer. Keyboard
15 Damage due to replace.
See "Removing the Battery" on the keyboard are fragile, easily dislodged, and time-consuming to servicing that is not authorized by Dell is not...
Owners Manual - Page 16
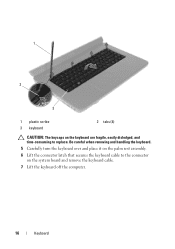
... rest assembly. 6 Lift the connector latch that secures the keyboard cable to the connector on the keyboard are fragile, easily dislodged, and time-consuming to replace. 1
2
3
1 plastic scribe 3 keyboard
2 tabs (4)
CAUTION: The keycaps on the system board and remove the keyboard cable. 7 Lift the keyboard off the computer.
16
Keyboard...
Owners Manual - Page 17
Keyboard
17 1
2
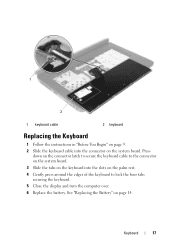
1 keyboard cable
2 keyboard
Replacing the Keyboard
1 Follow the instructions in "Before You Begin" on page 9. 2 Slide the keyboard ...keyboard to lock the four tabs securing the keyboard. 5 Close the display and turn the computer over. 6 Replace the battery. See "Replacing the Battery" on the system board. Press
down on the connector latch to secure the keyboard cable to ...
Owners Manual - Page 20
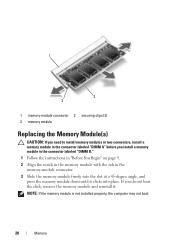
... into place. NOTE: If the memory module is not installed properly, the computer may not boot.
20
Memory 1
3 2
1 memory-module connector 2 securing clips (2)
3 memory module
Replacing the Memory Module(s)
CAUTION: If you need to install memory modules in two connectors, install a memory module in the
memory-module connector.
3 Slide the memory...
Owners Manual - Page 21
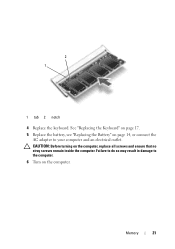
... on the computer.
Failure to do so may result in damage to your computer and an electrical outlet. Memory
21 2 1
1 tab 2 notch 4 Replace the keyboard. See "Replacing the Keyboard" on page 17. 5 Replace the battery, see "Replacing the Battery" on page 14, or connect the
AC adapter to the computer. 6 Turn on the computer...
Owners Manual - Page 24
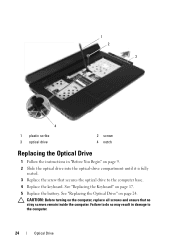
... the optical-drive compartment until it is fully
seated. 3 Replace the screw that no stray screws remain inside the computer. See "Replacing the Keyboard" on page 24. See "Replacing the Optical Drive" on page 17. 5 Replace the battery. 1 2
3
4
1 plastic scribe 3 optical drive
2 screw
4 notch
Replacing the Optical Drive
1 Follow the instructions in damage to the...
Owners Manual - Page 27
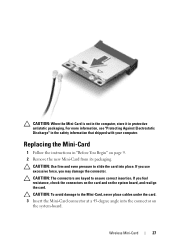
... connector on page 9.
2 Remove the new Mini-Card from its packaging. Wireless Mini-Card
27 CAUTION: Use firm and even pressure to ensure correct insertion.
Replacing the Mini-Card
1 Follow the instructions in the safety information that shipped with your computer.
CAUTION: To avoid damage to the Mini-Card, never place...
Owners Manual - Page 28
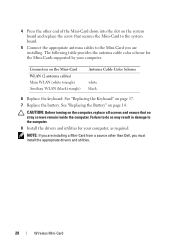
...a Mini-Card from a source other than Dell, you are installing. See "Replacing the Keyboard" on the computer, replace all screws and ensure that secures the Mini-Card to the system board.
5 ... by your computer, as required. CAUTION: Before turning on page 17. 7 Replace the battery. Connectors on page 14. See "Replacing the Battery" on the Mini-Card WLAN (2 antenna cables) Main WLAN (white...
Owners Manual - Page 48
....
48
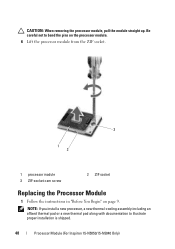
Processor Module (For Inspiron 15-N5050/15-N5040 Only) NOTE: If ...you install a new processor, a new thermal-cooling assembly including an affixed thermal pad or a new thermal pad along with documentation to bend the pins on the processor module. 6 Lift the processor module from the ZIF socket.
3 1
2
1 processor module 3 ZIF-socket cam screw
2 ZIF socket
Replacing...
Owners Manual - Page 49
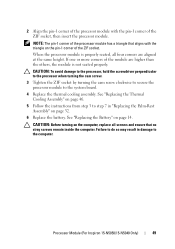
... triangle on page 46. 5 Follow the instructions from step 3 to the computer. See "Replacing the Battery" on page 32. 6 Replace the battery. See "Replacing the Thermal Cooling Assembly" on the pin-1 corner of the ZIF socket. Processor Module (For Inspiron 15-N5050/15-N5040 Only)
49 If one or more corners of the ZIF socket, then...
Owners Manual - Page 71
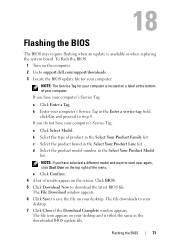
... window appears. 6 Click Save to download the latest BIOS file. The file icon appears on the screen.
If you have selected a different model and want to support.dell.com/support/downloads. 3 Locate ...:
a Click Enter a Tag. NOTE: If you have your desktop and is available or when replacing the system board. The file downloads to step 4. Flashing the BIOS
71 18
Flashing the BIOS
The...
Similar Questions


Dell Inspiron N4110 Screen Goes Black When Powered Up
(Posted by Meter 10 years ago)

Inspiron Got Dropped Screen Cracked, Replaced Screen , And Now It Beeps 5 Times
need help, inspiron n5110got dropped ,changed screen and now it won't boot up and beeps 5 times how ...
need help, inspiron n5110got dropped ,changed screen and now it won't boot up and beeps 5 times how ...
(Posted by stressd1 12 years ago)

Dell Laptop Screen Replace
Hi , I'd like to know how to open the aluminium case of dell adamo xps laptop's screen to replace...
Hi , I'd like to know how to open the aluminium case of dell adamo xps laptop's screen to replace...
(Posted by quanglycali 12 years ago)

Does Anybody Know How To Disassample A Dell Inspiron One W01b. Its A Touch Scree
its a all in one dual core flat screen monitor with motherboard in screen.
its a all in one dual core flat screen monitor with motherboard in screen.
(Posted by jay0202 12 years ago)