
Owners Manual
Page 21
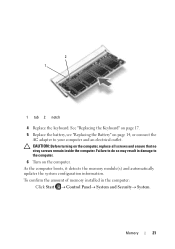
.... To confirm the amount of memory installed in damage to the computer. 6 Turn on the computer. CAUTION: Before turning on page 14, or connect the AC adapter to do so may result in the computer: Click Start Control PanelSystem and SecuritySystem. Memory 21 As...
.... To confirm the amount of memory installed in damage to the computer. 6 Turn on the computer. CAUTION: Before turning on page 14, or connect the AC adapter to do so may result in the computer: Click Start Control PanelSystem and SecuritySystem. Memory 21 As...
Owners Manual
Page 68
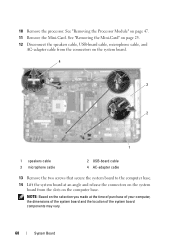
... the Mini-Card" on page 25. 12 Disconnect the speakers cable, USB-board cable, microphone cable, and AC-adapter cable from the connectors on the system board. 4 3 2 1 1 speakers cable 3 microphone cable 2 USB-board cable 4 AC-adapter cable 13 Remove the two screws that secure the system board to the computer base. 14 Lift the...
... the Mini-Card" on page 25. 12 Disconnect the speakers cable, USB-board cable, microphone cable, and AC-adapter cable from the connectors on the system board. 4 3 2 1 1 speakers cable 3 microphone cable 2 USB-board cable 4 AC-adapter cable 13 Remove the two screws that secure the system board to the computer base. 14 Lift the...

Owners Manual
Page 69
... computer base. 3 Replace the two screws that secure the system board to the computer base. 4 Connect the speakers cable, USB-board cable, microphone cable, and AC-adapter cable to step 4 in "Replacing the Hard Drive" on page 39. See "Replacing the Thermal Cooling Assembly" on page 46. 8 Follow the instructions from step...
... computer base. 3 Replace the two screws that secure the system board to the computer base. 4 Connect the speakers cable, USB-board cable, microphone cable, and AC-adapter cable to step 4 in "Replacing the Hard Drive" on page 39. See "Replacing the Thermal Cooling Assembly" on page 46. 8 Follow the instructions from step...
Owners Manual
Page 70
... Service Tag into the BIOS of the replacement system board. 16 Enter the service tag. Entering the Service Tag in the BIOS 1 Ensure that the AC adapter is plugged in and that no stray screws remain inside the computer. 9 Follow the instructions from step 3 to step 7 in "Replacing the Palm-Rest Assembly...
... Service Tag into the BIOS of the replacement system board. 16 Enter the service tag. Entering the Service Tag in the BIOS 1 Ensure that the AC adapter is plugged in and that no stray screws remain inside the computer. 9 Follow the instructions from step 3 to step 7 in "Replacing the Palm-Rest Assembly...


