

User Guide
Page 1
Dell™ Color Laser Printer 5110cn User's Guide Notes, Notices, and Cautions Click the links to the left for information on other documentation included with your printer, see "Finding Information." 1 Optional 500-sheet tray module 2 Optional 1000-sheet tray module NOTE: Your printer allows for a maximum of your printer. For information on the features, options, and operation of 4 trays (standard 500-sheet tray, optional 500-sheet tray module, and optional 1000-sheet tray module). 3 Standard 500-sheet tray 4 Multipurpose feeder 5 Front latch 6 Operator panel 7 Side button
Dell™ Color Laser Printer 5110cn User's Guide Notes, Notices, and Cautions Click the links to the left for information on other documentation included with your printer, see "Finding Information." 1 Optional 500-sheet tray module 2 Optional 1000-sheet tray module NOTE: Your printer allows for a maximum of your printer. For information on the features, options, and operation of 4 trays (standard 500-sheet tray, optional 500-sheet tray module, and optional 1000-sheet tray module). 3 Standard 500-sheet tray 4 Multipurpose feeder 5 Front latch 6 Operator panel 7 Side button
User Guide
Page 16
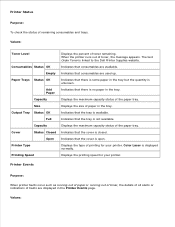
... Tray Status OK Indicates that there is available. Capacity Displays the maximum capacity status of the paper tray. Color Laser is linked to the Dell Printer Supplies website. Printing Speed Displays the printing speed for your printer. Add Paper Indicates that the tray is no paper in the tray but the quantity is open. Values...
... Tray Status OK Indicates that there is available. Capacity Displays the maximum capacity status of the paper tray. Color Laser is linked to the Dell Printer Supplies website. Printing Speed Displays the printing speed for your printer. Add Paper Indicates that the tray is no paper in the tray but the quantity is open. Values...
User Guide
Page 56
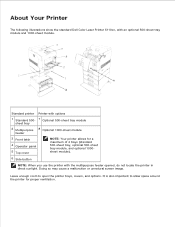
... an optional 500-sheet tray module and 1000-sheet module. About Your Printer The following illustrations show the standard Dell Color Laser Printer 5110cn, with the multipurpose feeder opened, do not locate the printer in direct sunlight. It is also important to open the printer trays, covers, and options. Doing so may cause a malfunction or unnatural screen image...
... an optional 500-sheet tray module and 1000-sheet module. About Your Printer The following illustrations show the standard Dell Color Laser Printer 5110cn, with the multipurpose feeder opened, do not locate the printer in direct sunlight. It is also important to open the printer trays, covers, and options. Doing so may cause a malfunction or unnatural screen image...

User Guide
Page 63
Connecting Your Printer Choosing the Right Cable Connecting the Printer Locally Connecting the Printer to the Network Choosing the Right Cable Your Dell Color Laser Printer 5110cn interconnection cable must meet the following requirements: Connection Cable certification Parallel Parallel IEEE 1284 USB USB 2.0 10/100Base-TX Ethernet CAT-5E Wireless IEEE802.11b/802.11g
Connecting Your Printer Choosing the Right Cable Connecting the Printer Locally Connecting the Printer to the Network Choosing the Right Cable Your Dell Color Laser Printer 5110cn interconnection cable must meet the following requirements: Connection Cable certification Parallel Parallel IEEE 1284 USB USB 2.0 10/100Base-TX Ethernet CAT-5E Wireless IEEE802.11b/802.11g
User Guide
Page 177
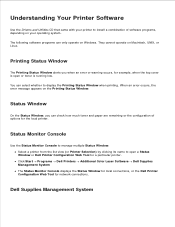
... its name to open or toner is open a Status Window or Dell Printer Configuration Web Tool for the local printer. When an error occurs, the error message appears on your printer to install a combination of options for a particular printer. Click Start Programs Dell Printers Additional Color Laser Software Dell Supplies Management System The Status Monitor Console displays the Status Window...
... its name to open or toner is open a Status Window or Dell Printer Configuration Web Tool for the local printer. When an error occurs, the error message appears on your printer to install a combination of options for a particular printer. Click Start Programs Dell Printers Additional Color Laser Software Dell Supplies Management System The Status Monitor Console displays the Status Window...
User Guide
Page 178
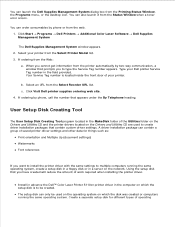
... a server on the Drivers and Utilities CD are used to multiple computers running the same operating system. Install in advance the Dell™ Color Laser Printer 5110cn printer driver in the field provided. When you cannot get information from the printer automatically by two-way communication, a window that you have created will reduce the amount of your...
... a server on the Drivers and Utilities CD are used to multiple computers running the same operating system. Install in advance the Dell™ Color Laser Printer 5110cn printer driver in the field provided. When you cannot get information from the printer automatically by two-way communication, a window that you have created will reduce the amount of your...
User Guide
Page 234
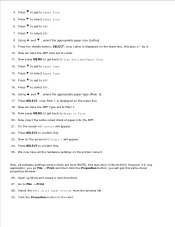
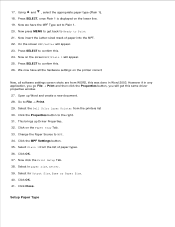
...the appropriate paper type (Plain 1). 17. Now insert the Letter-sized stack of paper into the MPF. 21. However if in Word 2003. Select the Dell Color Laser Printer from WORD, this was done in any application, you go File Print and then click the Properties button, you will get this puts a * by .... 26. Press to get to Letter. 11. We now have the MPF Type set to MPF. 15. Now on the printer correct Now, all software settings screen shots are from the printers list 29. Using and , select the appropriate paper size (Letter). 9. Press to get back to Ready to MPF. 7. Open...
...the appropriate paper type (Plain 1). 17. Now insert the Letter-sized stack of paper into the MPF. 21. However if in Word 2003. Select the Dell Color Laser Printer from WORD, this was done in any application, you go File Print and then click the Properties button, you will get this puts a * by .... 26. Press to get to Letter. 11. We now have the MPF Type set to MPF. 15. Now on the printer correct Now, all software settings screen shots are from the printers list 29. Using and , select the appropriate paper size (Letter). 9. Press to get back to Ready to MPF. 7. Open...
User Guide
Page 236
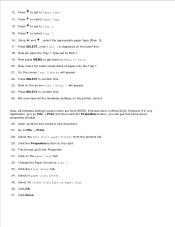
... 15. Click OK. 37. Press to Tray 1. 33. Now we have all software settings screen shots are from the printers list. 29. Open up Driver Properties. 31. Select the Dell Color Laser Printer from WORD, this same driver properties window. 26. Change the Paper Source to select Tray 1. 16. Select for Output Size...stack of paper into the Tray 1. 21. On the screen Tray 1/Letter will appear. 24. Click on the lower line. 18. Now on the printer correct. Now, all the hardware settings on the screen Tray 1/Plain 1 will appear. 22. Press to Print. 20. However if in paper size, ...
... 15. Click OK. 37. Press to Tray 1. 33. Now we have all software settings screen shots are from the printers list. 29. Open up Driver Properties. 31. Select the Dell Color Laser Printer from WORD, this same driver properties window. 26. Change the Paper Source to select Tray 1. 16. Select for Output Size...stack of paper into the Tray 1. 21. On the screen Tray 1/Letter will appear. 24. Click on the lower line. 18. Now on the printer correct. Now, all the hardware settings on the screen Tray 1/Plain 1 will appear. 22. Press to Print. 20. However if in paper size, ...
User Guide
Page 238
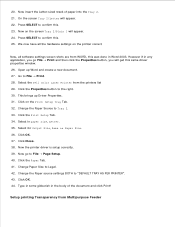
.... Now go File Print and then click the Properties button, you will get this same driver properties window. 26. Setup printing Transparency from the printers list 29. Now on the Print Setup Tray Tab. 32. However if in Word 2003. Click OK. 37. Click the Paper Tab. 41... 35. Change the Paper source settings BOTH to Legal. 42. Click the Properties button to confirm this . 23. Now the printer driver is setup correctly. 39. Select the Dell Color Laser Printer from Multipurpose Feeder 1. Select for Output Size, Same as Paper Size. 36. Press SELECT to the right. 30. On the ...
.... Now go File Print and then click the Properties button, you will get this same driver properties window. 26. Setup printing Transparency from the printers list 29. Now on the Print Setup Tray Tab. 32. However if in Word 2003. Click OK. 37. Click the Paper Tab. 41... 35. Change the Paper source settings BOTH to Legal. 42. Click the Properties button to confirm this . 23. Now the printer driver is setup correctly. 39. Select the Dell Color Laser Printer from Multipurpose Feeder 1. Select for Output Size, Same as Paper Size. 36. Press SELECT to the right. 30. On the ...
User Guide
Page 240
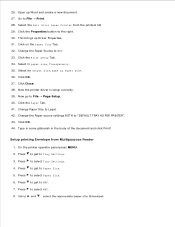
...Change the Paper source settings BOTH to select Paper Size. 6. On the printer operator panel press MENU. 2. Press to "DEFAULT TRAY AS PER PRINTER". 43. Click the Properties button to File Page Setup. 40. Now the printer driver is setup correctly. 39. Press to get to Tray Settings. ...the printers list 29. Press to get to select MPF. 8. Using and , select the appropriate paper size (Envelope). 9. 10. Click the Print Setup Tab. 34. Click OK. 37. Click Close. 38. Change Paper Size to select Tray Settings. 4. Press to Legal. 42. 26. Select the Dell Color Laser Printer from ...
...Change the Paper source settings BOTH to select Paper Size. 6. On the printer operator panel press MENU. 2. Press to "DEFAULT TRAY AS PER PRINTER". 43. Click the Properties button to File Page Setup. 40. Now the printer driver is setup correctly. 39. Press to get to Tray Settings. ...the printers list 29. Press to get to select MPF. 8. Using and , select the appropriate paper size (Envelope). 9. 10. Click the Print Setup Tab. 34. Click OK. 37. Click Close. 38. Change Paper Size to select Tray Settings. 4. Press to Legal. 42. 26. Select the Dell Color Laser Printer from ...

User Guide
Page 241
... appropriate paper type (Plain 1). 17. Now press MENU to get back to Ready to File Print. 28. Now on the printer correct Now, all software settings screen shots are from the printers list 29. Click the Properties button to MPF. 33. Change the Paper Source to the right. 30. Now press MENU... Tab. 32. However if in any application, you go File Print and then click the Properties button, you will get to MPF. 15. Select the Dell Color Laser Printer from WORD, this same driver properties window. 26. Click the Print Setup Tab. 34.
... appropriate paper type (Plain 1). 17. Now press MENU to get back to Ready to File Print. 28. Now on the printer correct Now, all software settings screen shots are from the printers list 29. Click the Properties button to MPF. 33. Change the Paper Source to the right. 30. Now press MENU... Tab. 32. However if in any application, you go File Print and then click the Properties button, you will get to MPF. 15. Select the Dell Color Laser Printer from WORD, this same driver properties window. 26. Click the Print Setup Tab. 34.
User Guide
Page 243
.../Plain 1 will appear. 23. Open up Driver Properties. 32. Click on the lower line. 19. On the screen MPF/Letter will appear. 25. Select the Dell Color Laser Printer from the list of paper into the MPF. 22. Click the MPF Settings button. 35. Select Plain 1 from the... printers list 30. Now click the Print Setup Tab. 38. Now on the printer correct Now, all software settings screen shots are from WORD, this same driver properties window. 27. Go to the right...
.../Plain 1 will appear. 23. Open up Driver Properties. 32. Click on the lower line. 19. On the screen MPF/Letter will appear. 25. Select the Dell Color Laser Printer from the list of paper into the MPF. 22. Click the MPF Settings button. 35. Select Plain 1 from the... printers list 30. Now click the Print Setup Tab. 38. Now on the printer correct Now, all software settings screen shots are from WORD, this same driver properties window. 27. Go to the right...
User Guide
Page 296
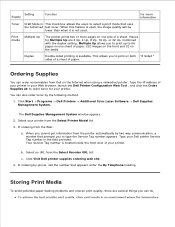
...type the Service Tag number appears. Select your printer. Combined with the duplex setting, Multiple Up allows you to 64 pages on one side of your printer. Click Start Programs Dell Printers Additional Color Laser Software Dell Supplies Management System. Your Service Tag number is ...located inside the front door of your printer from the Web: a. Storing Print Media To avoid potential...
...type the Service Tag number appears. Select your printer. Combined with the duplex setting, Multiple Up allows you to 64 pages on one side of your printer. Click Start Programs Dell Printers Additional Color Laser Software Dell Supplies Management System. Your Service Tag number is ...located inside the front door of your printer from the Web: a. Storing Print Media To avoid potential...
User Guide
Page 347
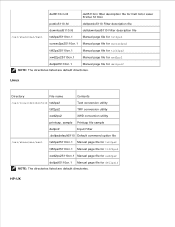
dell5110cn.fd dell5110cn filter description file for Dell Color Laser Printer 5110cn postio5110.fd dellpostio5110 Filter description file download5110.fd delldownload5110 Filter description file /usr/share/man/man1 txt2ps25110cn.1 Manual page file for txt2ps2 sunras2ps25110cn.1 Manual page ...
dell5110cn.fd dell5110cn filter description file for Dell Color Laser Printer 5110cn postio5110.fd dellpostio5110 Filter description file download5110.fd delldownload5110 Filter description file /usr/share/man/man1 txt2ps25110cn.1 Manual page file for txt2ps2 sunras2ps25110cn.1 Manual page ...
User Guide
Page 349
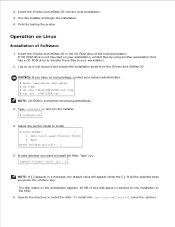
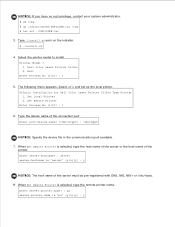
...(1/2)? : 1 5. Type . Specify the directory to install. Insert the Drivers and Utilities CD into /usr/local/dellbin5110, press the Printer Model? 1. The disk status on your workstation, extract files by using another workstation that has a CD-ROM drive to transfer those ...tmp # cp /mnt/cdrom/UXFILTER.tar /tmp # tar xvf ./UXFILTER.tar NOTE: CD-ROM is required for testing the printer. To install into the local workstation. 3. Dell Color Laser Printer 5110cn 2. 1. 2. Run the installer and begin the installation. 4. Insert the Drivers and Utilities CD in a message, the default...
...(1/2)? : 1 5. Type . Specify the directory to install. Insert the Drivers and Utilities CD into /usr/local/dellbin5110, press the Printer Model? 1. The disk status on your workstation, extract files by using another workstation that has a CD-ROM drive to transfer those ...tmp # cp /mnt/cdrom/UXFILTER.tar /tmp # tar xvf ./UXFILTER.tar NOTE: CD-ROM is required for testing the printer. To install into the local workstation. 3. Dell Color Laser Printer 5110cn 2. 1. 2. Run the installer and begin the installation. 4. Insert the Drivers and Utilities CD in a message, the default...
User Guide
Page 351
... connection port. NOTICE: If you have no root privilege, contact your system administrator. # cd /tmp # cp /cdrom/cdrom0/UXFILTER.tar /tmp # tar xvf ./UXFILTER.tar 3. Dell Color Laser Printer 5110cn 2. Exit Enter Process No (1/2)? : 1 5. Select the printer model to install. The following menu appears. Solaris Installation for Dell Color Laser Printer 5110cn Type Printer 1.
... connection port. NOTICE: If you have no root privilege, contact your system administrator. # cd /tmp # cp /cdrom/cdrom0/UXFILTER.tar /tmp # tar xvf ./UXFILTER.tar 3. Dell Color Laser Printer 5110cn 2. Exit Enter Process No (1/2)? : 1 5. Select the printer model to install. The following menu appears. Solaris Installation for Dell Color Laser Printer 5110cn Type Printer 1.

User Guide
Page 353
... The UX filter does not come with the system. Specify the CD-ROM device file for all workstations. 3. Dell Color Laser Printer 5110cn 2. Enter output-printer-name? : delllp5110cn output-printer-name is an example. Type a printer name that the logical printer registered at step 5. Enter install directory name /usr/local/dellbin5110] : directory is 'dell5110cn' (y/n)[y]: y 8. With the above steps, the...
... The UX filter does not come with the system. Specify the CD-ROM device file for all workstations. 3. Dell Color Laser Printer 5110cn 2. Enter output-printer-name? : delllp5110cn output-printer-name is an example. Type a printer name that the logical printer registered at step 5. Enter install directory name /usr/local/dellbin5110] : directory is 'dell5110cn' (y/n)[y]: y 8. With the above steps, the...
User Guide
Page 354
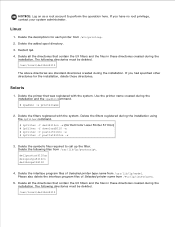
... system. Delete the added spool directory. 3. The following files from /etc/lp/interfaces. 5. Use the printer name created during the installation. NOTICE: Log on as a root account to call up the filter. Delete the descriptions for Dell Color Laser Printer 5110cn) # lpfilter -f download5110 -x # lpfilter -f postio5110cn -x # lpfilter -f posttxt5110cn -x 3. If you have no root privilege, contact your system...
... system. Delete the added spool directory. 3. The following files from /etc/lp/interfaces. 5. Use the printer name created during the installation. NOTICE: Log on as a root account to call up the filter. Delete the descriptions for Dell Color Laser Printer 5110cn) # lpfilter -f download5110 -x # lpfilter -f postio5110cn -x # lpfilter -f posttxt5110cn -x 3. If you have no root privilege, contact your system...

User Guide
Page 355
...for Dell Color Laser Printer 5110cn) download5110.fd postio5110cn.fd posttxt5110cn.fd HP-UX 1. Delete the filter description files. Delete the printer that contain the UX filters and the files in the following example. % lpr filename To print to other printers: To print to delete the printer ...section provides information on printing with the filter. Printing From Linux To print to the default printer: If the printer is registered as the default printer, the name of the printer can be deleted. /usr/local/dellbin5110 (directory specified during the installation. # sam 2. ...
...for Dell Color Laser Printer 5110cn) download5110.fd postio5110cn.fd posttxt5110cn.fd HP-UX 1. Delete the filter description files. Delete the printer that contain the UX filters and the files in the following example. % lpr filename To print to other printers: To print to delete the printer ...section provides information on printing with the filter. Printing From Linux To print to the default printer: If the printer is registered as the default printer, the name of the printer can be deleted. /usr/local/dellbin5110 (directory specified during the installation. # sam 2. ...

User Guide
Page 440
... set up the print queue on Turbolinux 10D, RedHat ES 3/4 Setting Overview Turbolinux 10D, RedHat ES 3/4: 1. Click Manage Printers. 3. Installing the Printer Driver 1. Type the administrator's password. 3. Installation starts. The browser is automatically closed. Click Continue in the Drivers and ... and the CUPS window appears. 2. Specify the default queue. 4. Double-click Dell-Color-Laser-5110cn-x.x.x.noarch.rpm in the Completed System Preparation window. Type cupsconfig and click Run in the Run Program window. Click Add Printer at the bottom of the window. 4. Install the...
... set up the print queue on Turbolinux 10D, RedHat ES 3/4 Setting Overview Turbolinux 10D, RedHat ES 3/4: 1. Click Manage Printers. 3. Installing the Printer Driver 1. Type the administrator's password. 3. Installation starts. The browser is automatically closed. Click Continue in the Drivers and ... and the CUPS window appears. 2. Specify the default queue. 4. Double-click Dell-Color-Laser-5110cn-x.x.x.noarch.rpm in the Completed System Preparation window. Type cupsconfig and click Run in the Run Program window. Click Add Printer at the bottom of the window. 4. Install the...


