User Manual
Page 4
... 43 Setting up the Printer (Printer Setup) 47 5 Preparing Printer Hardware 49 Removing Tape 49 Removing the Print Head Device (PHD) Ribbons . . . . . 50 Installing the Toner Cartridges 50 6 Installing Optional Accessories 53 Installing the Optional Memory Module 53... Contents of the Box 65 Installing the Wireless Adapter Using Video Instructions (Recommended 65 Installing the Optional Wireless Adapter . . . . . 66 Printing System Settings Report 67 Determining the Wireless Network Settings . . . 68 Configuring the Optional Wireless Adapter 69 Using Wizard Setup to Configure a Wireless...
... 43 Setting up the Printer (Printer Setup) 47 5 Preparing Printer Hardware 49 Removing Tape 49 Removing the Print Head Device (PHD) Ribbons . . . . . 50 Installing the Toner Cartridges 50 6 Installing Optional Accessories 53 Installing the Optional Memory Module 53... Contents of the Box 65 Installing the Wireless Adapter Using Video Instructions (Recommended 65 Installing the Optional Wireless Adapter . . . . . 66 Printing System Settings Report 67 Determining the Wireless Network Settings . . . 68 Configuring the Optional Wireless Adapter 69 Using Wizard Setup to Configure a Wireless...
User Manual
Page 22
...\fxstdpc-admin\Desktop\0630_UG??\Mioga_AIO_UG_FM\Mioga_AIO _UG_FM\Mioga-AIO-UGTOC.fm MIB Compatibility 606 Environment 606 Operation 606 Print Quality Guarantee 606 Storage 607 Altitude 607 Cables 607 Copier Specifications 608 Scanner Specifications 609 Facsimile Specifications 609 ... of Supplies 613 Conserving Supplies 613 Ordering Supplies 614 Storing Print Media 614 Storing Consumables 615 Replacing the Toner Cartridges 615 Removing the Toner Cartridge 616 Installing a Toner Cartridge 617 Replacing the Print Head Device (PHD) Unit 619 Removing the PHD Unit 619 Installing ...
...\fxstdpc-admin\Desktop\0630_UG??\Mioga_AIO_UG_FM\Mioga_AIO _UG_FM\Mioga-AIO-UGTOC.fm MIB Compatibility 606 Environment 606 Operation 606 Print Quality Guarantee 606 Storage 607 Altitude 607 Cables 607 Copier Specifications 608 Scanner Specifications 609 Facsimile Specifications 609 ... of Supplies 613 Conserving Supplies 613 Ordering Supplies 614 Storing Print Media 614 Storing Consumables 615 Replacing the Toner Cartridges 615 Removing the Toner Cartridge 616 Installing a Toner Cartridge 617 Replacing the Print Head Device (PHD) Unit 619 Removing the PHD Unit 619 Installing ...

User Manual
Page 52
Installing the Toner Cartridges 1 Press and slide the blue latches of the four toner cartridges to the locked position. FOR PROOF ONLY 50 Preparing Printer Hardware PRE LIMINARY 9/13/10 - FILE LOCATION: C:\Users\fxstdpcadmin\Desktop\0630_UG??\Mioga_AIO_UG_FM\Mioga_AIO_UG_FM\section05.fm Removing the Print Head Device (PHD) Ribbons 1 Open the toner access cover. 2 Completely pull out the eight yellow ribbons. DE LL CONFIDENTIAL -
Installing the Toner Cartridges 1 Press and slide the blue latches of the four toner cartridges to the locked position. FOR PROOF ONLY 50 Preparing Printer Hardware PRE LIMINARY 9/13/10 - FILE LOCATION: C:\Users\fxstdpcadmin\Desktop\0630_UG??\Mioga_AIO_UG_FM\Mioga_AIO_UG_FM\section05.fm Removing the Print Head Device (PHD) Ribbons 1 Open the toner access cover. 2 Completely pull out the eight yellow ribbons. DE LL CONFIDENTIAL -

User Manual
Page 621
If the front cover remains open for more than three minutes, print quality may reduce print quality. Scratches, dirt, or oil from the printer. Maintaining Your Printer 619 NOTICE: Ensure nothing touches or scratches the surface (black-colored film) of the ... Guide. Removing the PHD Unit 1 Ensure that the printer is turned off. 2 Pull the standard 250-sheet tray out of the belt unit. Replacing the Print Head Device (PHD) Unit CAUTION: Before performing any of the following procedures, read and follow the safety instructions in your hands on the film of the belt...
If the front cover remains open for more than three minutes, print quality may reduce print quality. Scratches, dirt, or oil from the printer. Maintaining Your Printer 619 NOTICE: Ensure nothing touches or scratches the surface (black-colored film) of the ... Guide. Removing the PHD Unit 1 Ensure that the printer is turned off. 2 Pull the standard 250-sheet tray out of the belt unit. Replacing the Print Head Device (PHD) Unit CAUTION: Before performing any of the following procedures, read and follow the safety instructions in your hands on the film of the belt...
User Manual
Page 663
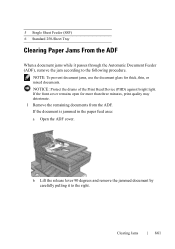
...) 6 Standard 250-Sheet Tray Clearing Paper Jams From the ADF When a document jams while it to the following procedure. NOTICE: Protect the drums of the Print Head Device (PHD) against bright light. If the front cover remains open for thick, thin, or mixed documents. F O R P R O O F O N LY Clearing Jams 661 b Lift the release lever 90...
...) 6 Standard 250-Sheet Tray Clearing Paper Jams From the ADF When a document jams while it to the following procedure. NOTICE: Protect the drums of the Print Head Device (PHD) against bright light. If the front cover remains open for thick, thin, or mixed documents. F O R P R O O F O N LY Clearing Jams 661 b Lift the release lever 90...
User Manual
Page 666
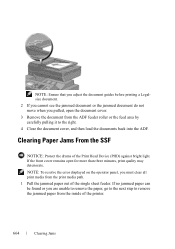
...into the ADF. FILE LOCATION: C:\Users\fxstdpcadmin\Desktop\0630_UG??\Mioga_AIO_UG_FM\Mioga_AIO_UG_FM\section30.fm NOTE: Ensure that you adjust the document guides before printing a Legalsize document. 2 If you cannot see the jammed document or the jammed document do not move when you pulled, open for... more than three minutes, print quality may deteriorate. NOTE: To resolve the error displayed on the operator panel, you must clear all print media from the print media path. 1 Pull the jammed paper out of the Print Head Device (PHD) against bright light. Clearing Paper Jams...
...into the ADF. FILE LOCATION: C:\Users\fxstdpcadmin\Desktop\0630_UG??\Mioga_AIO_UG_FM\Mioga_AIO_UG_FM\section30.fm NOTE: Ensure that you adjust the document guides before printing a Legalsize document. 2 If you cannot see the jammed document or the jammed document do not move when you pulled, open for... more than three minutes, print quality may deteriorate. NOTE: To resolve the error displayed on the operator panel, you must clear all print media from the print media path. 1 Pull the jammed paper out of the Print Head Device (PHD) against bright light. Clearing Paper Jams...

User Manual
Page 670
... may deteriorate. DE LL CONFIDENTIAL - Doing so could damage the tray or the inside of the Print Head Device (PHD) against bright light. NOTE: To resolve the error displayed on the tray. PRE LIMINARY 9/13/10 - FOR PROOF ONLY 668 Clearing Jams NOTICE: Do...FILE LOCATION: C:\Users\fxstdpcadmin\Desktop\0630_UG??\Mioga_AIO_UG_FM\Mioga_AIO_UG_FM\section30.fm 7 Insert the standard 250-sheet tray into the printer, and push until it from the print media path. 1 Pull the standard 250-sheet tray out of the printer carefully. Hold the tray with both hands, lift the front slightly, and remove...
... may deteriorate. DE LL CONFIDENTIAL - Doing so could damage the tray or the inside of the Print Head Device (PHD) against bright light. NOTE: To resolve the error displayed on the tray. PRE LIMINARY 9/13/10 - FOR PROOF ONLY 668 Clearing Jams NOTICE: Do...FILE LOCATION: C:\Users\fxstdpcadmin\Desktop\0630_UG??\Mioga_AIO_UG_FM\Mioga_AIO_UG_FM\section30.fm 7 Insert the standard 250-sheet tray into the printer, and push until it from the print media path. 1 Pull the standard 250-sheet tray out of the printer carefully. Hold the tray with both hands, lift the front slightly, and remove...
User Manual
Page 674
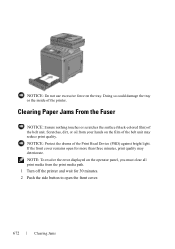
...CONFIDENTIAL - PRE LIMINARY 9/13/10 - Doing so could damage the tray or the inside of the Print Head Device (PHD) against bright light. NOTE: To resolve the error displayed on the operator panel, you must clear all print media from your hands on the tray. FOR PROOF ONLY 672 Clearing Jams Clearing Paper Jams... Fuser NOTICE: Ensure nothing touches or scratches the surface (black-colored film) of the belt unit may deteriorate. Scratches, dirt, or oil from the print media path. 1 Turn off the printer and wait for 30 minutes. 2 Push the side button to open for more than three minutes...
...CONFIDENTIAL - PRE LIMINARY 9/13/10 - Doing so could damage the tray or the inside of the Print Head Device (PHD) against bright light. NOTE: To resolve the error displayed on the operator panel, you must clear all print media from your hands on the tray. FOR PROOF ONLY 672 Clearing Jams Clearing Paper Jams... Fuser NOTICE: Ensure nothing touches or scratches the surface (black-colored film) of the belt unit may deteriorate. Scratches, dirt, or oil from the print media path. 1 Turn off the printer and wait for 30 minutes. 2 Push the side button to open for more than three minutes...
User Manual
Page 692
.... DE LL CONFIDENTIAL - PRE LIMINARY 9/13/10 - Try changing the Paper Type setting in the printer driver. See "Removing the Print Head Device (PHD) Ribbons" and "Installing a PHD Unit." Go to check the motor sound. c Click the Play of Sound button to action 7. ... for the printer. Go to action 8. Contact Dell. Does the motor function properly? The task is complete. Go to action 6. a Launch the Tool Box, and click Machine Check on the Diagnosis tab. b Select Main Motor Operation Check from the Print Head Device (PHD) unit. For example, change the Paper...
.... DE LL CONFIDENTIAL - PRE LIMINARY 9/13/10 - Try changing the Paper Type setting in the printer driver. See "Removing the Print Head Device (PHD) Ribbons" and "Installing a PHD Unit." Go to check the motor sound. c Click the Play of Sound button to action 7. ... for the printer. Go to action 8. Contact Dell. Does the motor function properly? The task is complete. Go to action 6. a Launch the Tool Box, and click Machine Check on the Diagnosis tab. b Select Main Motor Operation Check from the Print Head Device (PHD) unit. For example, change the Paper...
User Manual
Page 694
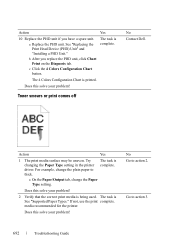
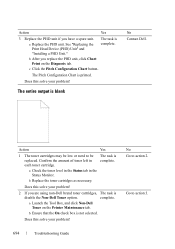
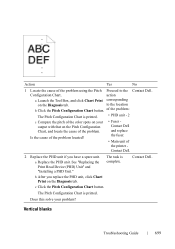
The task is printed. Toner smears or print comes off No Contact Dell. For example, change the Paper Type setting. media recommended for the printer. The 4 Colors Configuration Chart is complete. If not, use the print complete. No Go to action 3. a Replace the PHD unit. See "Replacing the Print Head Device (PHD) Unit" and "Installing a PHD Unit." Action...
The task is printed. Toner smears or print comes off No Contact Dell. For example, change the Paper Type setting. media recommended for the printer. The 4 Colors Configuration Chart is complete. If not, use the print complete. No Go to action 3. a Replace the PHD unit. See "Replacing the Print Head Device (PHD) Unit" and "Installing a PHD Unit." Action...

User Manual
Page 695
Yes The task is complete. Action Yes 1 Ensure that the PHD unit is See "Replacing the Print Head Device (PHD) Unit" complete. The task is complete. Does this solve your problem? See "Installing a Toner Cartridge." The task is installed correctly....: C:\Users\fxstdpcadmin\Desktop\0630_UG??\Mioga_AIO_UG_FM\Mioga_AIO_UG_FM\section31.fm Action 3 Replace the PHD unit if you replace the PHD unit, test print your document again. See "Replacing the Print Head Device (PHD) Unit" and "Installing a PHD Unit." Random spots/Blurred images No Contact Dell. No Go to action 3.
Yes The task is complete. Action Yes 1 Ensure that the PHD unit is See "Replacing the Print Head Device (PHD) Unit" complete. The task is complete. Does this solve your problem? See "Installing a Toner Cartridge." The task is installed correctly....: C:\Users\fxstdpcadmin\Desktop\0630_UG??\Mioga_AIO_UG_FM\Mioga_AIO_UG_FM\section31.fm Action 3 Replace the PHD unit if you replace the PHD unit, test print your document again. See "Replacing the Print Head Device (PHD) Unit" and "Installing a PHD Unit." Random spots/Blurred images No Contact Dell. No Go to action 3.
User Manual
Page 696
...solve your problem? a Check the toner level in the Status tab in each toner cartridge. a Launch the Tool Box, and click Non-Dell Toner on the Diagnosis tab. Go to be low or need to action 3. Action Yes 1 The toner cartridges may be replaced. The ...task is disable the Non-Dell Toner option. b Ensure that the On check box is printed. b Replace the toner cartridges as necessary. No Go to action 2. FOR PROOF ONLY 694 Troubleshooting Guide See "Replacing the Print Head Device (PHD) Unit" and "Installing a PHD Unit." ...
...solve your problem? a Check the toner level in the Status tab in each toner cartridge. a Launch the Tool Box, and click Non-Dell Toner on the Diagnosis tab. Go to be low or need to action 3. Action Yes 1 The toner cartridges may be replaced. The ...task is disable the Non-Dell Toner option. b Ensure that the On check box is printed. b Replace the toner cartridges as necessary. No Go to action 2. FOR PROOF ONLY 694 Troubleshooting Guide See "Replacing the Print Head Device (PHD) Unit" and "Installing a PHD Unit." ...
User Manual
Page 697
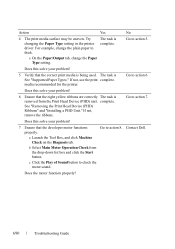
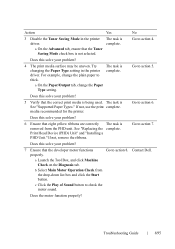
.... See "Replacing the complete. If not, remove the ribbons. Go to action 8. Contact Dell. Does this solve your problem? 5 Verify that the developer motor functions properly. F O R P R O O F O N LY Troubleshooting Guide 695 Print Head Device (PHD) Unit" and "Installing a PHD Unit." Does the motor function properly? FILE LOCATION: C:\Users\fxstdpcadmin\Desktop\0630_UG??\Mioga_AIO_UG_FM\Mioga_AIO_UG_FM\section31.fm...
.... See "Replacing the complete. If not, remove the ribbons. Go to action 8. Contact Dell. Does this solve your problem? 5 Verify that the developer motor functions properly. F O R P R O O F O N LY Troubleshooting Guide 695 Print Head Device (PHD) Unit" and "Installing a PHD Unit." Does the motor function properly? FILE LOCATION: C:\Users\fxstdpcadmin\Desktop\0630_UG??\Mioga_AIO_UG_FM\Mioga_AIO_UG_FM\section31.fm...
User Manual
Page 698
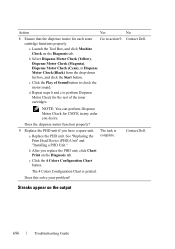
... or Dispense Motor Check (Black) from the drop-down list box, and click the Start button. "Installing a PHD Unit." Contact Dell. c Click the 4 Colors Configuration Chart button. Streaks appear on the Diagnosis tab. FILE LOCATION: C:\Users\fxstdpcadmin\Desktop\0630_UG??\Mioga_AIO_UG_FM\Mioga_AIO_UG_FM\...CMYK in any order you desire. NOTE: You can perform Dispense Motor Check for each toner cartridge functions properly. See "Replacing the Print Head Device (PHD) Unit" and complete. The 4 Colors Configuration Chart is a Replace the PHD unit. Does the dispense motor function properly...
... or Dispense Motor Check (Black) from the drop-down list box, and click the Start button. "Installing a PHD Unit." Contact Dell. c Click the 4 Colors Configuration Chart button. Streaks appear on the Diagnosis tab. FILE LOCATION: C:\Users\fxstdpcadmin\Desktop\0630_UG??\Mioga_AIO_UG_FM\Mioga_AIO_UG_FM\...CMYK in any order you desire. NOTE: You can perform Dispense Motor Check for each toner cartridge functions properly. See "Replacing the Print Head Device (PHD) Unit" and complete. The 4 Colors Configuration Chart is a Replace the PHD unit. Does the dispense motor function properly...
User Manual
Page 699
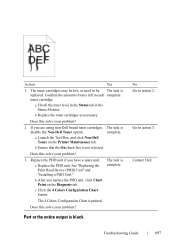
... may be low or need to be The task is black No Go to action 3. toner cartridge. complete. a Replace the PHD unit. See "Replacing the Print Head Device (PHD) Unit" and "Installing a PHD Unit." c Click the 4 Colors Configuration Chart button. F O R P R O O F O N LY Troubleshooting Guide 697 a Check ...in each complete. Does this solve your problem? 2 If you replace the PHD unit, click Chart Print on the Printer Maintenance tab. b After you are using non-Dell brand toner cartridges, The task is complete. Confirm the amount of toner left in the Status Monitor....
... may be low or need to be The task is black No Go to action 3. toner cartridge. complete. a Replace the PHD unit. See "Replacing the Print Head Device (PHD) Unit" and "Installing a PHD Unit." c Click the 4 Colors Configuration Chart button. F O R P R O O F O N LY Troubleshooting Guide 697 a Check ...in each complete. Does this solve your problem? 2 If you replace the PHD unit, click Chart Print on the Printer Maintenance tab. b After you are using non-Dell brand toner cartridges, The task is complete. Confirm the amount of toner left in the Status Monitor....
User Manual
Page 700
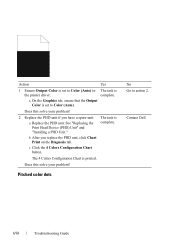
... task is the printer driver. a Replace the PHD unit. Contact Dell. Pitched color dots No Go to action 2. Does this solve your problem? 2 Replace the PHD unit if you replace the PHD unit, click Chart Print on the Diagnosis tab. b After you have a spare unit.... c Click the 4 Colors Configuration Chart button. complete. The task is printed. Does this solve your problem? See "Replacing the Print Head Device (PHD) Unit" and "Installing a PHD Unit." DE LL CONFIDENTIAL - PRE LIMINARY 9/13/10 - FILE LOCATION: C:\...
... task is the printer driver. a Replace the PHD unit. Contact Dell. Pitched color dots No Go to action 2. Does this solve your problem? 2 Replace the PHD unit if you replace the PHD unit, click Chart Print on the Diagnosis tab. b After you have a spare unit.... c Click the 4 Colors Configuration Chart button. complete. The task is printed. Does this solve your problem? See "Replacing the Print Head Device (PHD) Unit" and "Installing a PHD Unit." DE LL CONFIDENTIAL - PRE LIMINARY 9/13/10 - FILE LOCATION: C:\...
User Manual
Page 701
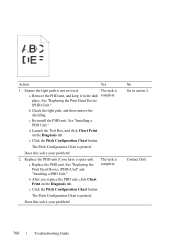
Is the cause of the problem located? • Fuser Contact Dell and replace the fuser. • Main unit of the printer - The task is printed. Contact Dell. 2 Replace the PHD unit if you replace the PHD unit, click Chart Print on the Diagnosis tab. The Pitch Configuration Chart is complete. Does... b Click the Pitch Configuration Chart button. Configuration Chart. c Click the Pitch Configuration Chart button. a Replace the PHD unit. to the Contact Dell. See "Replacing the Print Head Device (PHD) Unit" and "Installing a PHD Unit." P R E L I M I A L -
Is the cause of the problem located? • Fuser Contact Dell and replace the fuser. • Main unit of the printer - The task is printed. Contact Dell. 2 Replace the PHD unit if you replace the PHD unit, click Chart Print on the Diagnosis tab. The Pitch Configuration Chart is complete. Does... b Click the Pitch Configuration Chart button. Configuration Chart. c Click the Pitch Configuration Chart button. a Replace the PHD unit. to the Contact Dell. See "Replacing the Print Head Device (PHD) Unit" and "Installing a PHD Unit." P R E L I M I A L -
User Manual
Page 702
...your problem? e Click the Pitch Configuration Chart button. c Click the Pitch Configuration Chart button. place. See "Replacing the Print Head Device (PHD) Unit." No Go to action 2. b Check the light path, and then remove the shielding. c Re-...unit. Contact Dell. FILE LOCATION: C:\Users\fxstdpcadmin\Desktop\0630_UG??\Mioga_AIO_UG_FM\Mioga_AIO_UG_FM\section31.fm Action Yes 1 Ensure the light path is printed. b After you have a spare unit. FOR PROOF ONLY 700 Troubleshooting Guide PRE LIMINARY 9/13/10 - See "Replacing the Print Head Device (PHD)...
...your problem? e Click the Pitch Configuration Chart button. c Click the Pitch Configuration Chart button. place. See "Replacing the Print Head Device (PHD) Unit." No Go to action 2. b Check the light path, and then remove the shielding. c Re-...unit. Contact Dell. FILE LOCATION: C:\Users\fxstdpcadmin\Desktop\0630_UG??\Mioga_AIO_UG_FM\Mioga_AIO_UG_FM\section31.fm Action Yes 1 Ensure the light path is printed. b After you have a spare unit. FOR PROOF ONLY 700 Troubleshooting Guide PRE LIMINARY 9/13/10 - See "Replacing the Print Head Device (PHD)...

User Manual
Page 703
... Configuration Chart is complete. Go to the type of b Click the Ghost Configuration Chart ghosting. Does this solve your problem? Contact Dell. button. The task is printed. F O R P R O O F O N LY Troubleshooting Guide 701 Negative ghost - 2b 2a Replace the PHD unit if... Is the type of the problem identified? a Replace the PHD unit. See "Replacing the Print Head Device (PHD) Unit" and "Installing a PHD Unit." action a Launch the Tool Box, and click Chart Print corresponding on the Diagnosis tab. P R E L I M I A L - c Click the Ghost Configuration Chart ...
... Configuration Chart is complete. Go to the type of b Click the Ghost Configuration Chart ghosting. Does this solve your problem? Contact Dell. button. The task is printed. F O R P R O O F O N LY Troubleshooting Guide 701 Negative ghost - 2b 2a Replace the PHD unit if... Is the type of the problem identified? a Replace the PHD unit. See "Replacing the Print Head Device (PHD) Unit" and "Installing a PHD Unit." action a Launch the Tool Box, and click Chart Print corresponding on the Diagnosis tab. P R E L I M I A L - c Click the Ghost Configuration Chart ...

User Manual
Page 705
The 4 Colors Configuration Chart is complete. Yes The task is printed. Action 1 Execute the PHD Refresh Mode. a Launch the Tool...R E L I M I A L - a Launch the Tool Box, and click Refresh Mode on the Diagnosis tab. See "Replacing the Print Head Device (PHD) Unit" and "Installing a PHD Unit." b After you have a spare unit. Does this solve your problem? 3 Replace the PHD... unit if you start the Drum Refresh Mode, click Chart Print on the Diagnosis tab. Fog No Go to action 2. Does this solve your problem? c Click the 4 Colors...
The 4 Colors Configuration Chart is complete. Yes The task is printed. Action 1 Execute the PHD Refresh Mode. a Launch the Tool...R E L I M I A L - a Launch the Tool Box, and click Refresh Mode on the Diagnosis tab. See "Replacing the Print Head Device (PHD) Unit" and "Installing a PHD Unit." b After you have a spare unit. Does this solve your problem? 3 Replace the PHD... unit if you start the Drum Refresh Mode, click Chart Print on the Diagnosis tab. Fog No Go to action 2. Does this solve your problem? c Click the 4 Colors...


