User Guide
Page 4
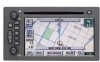
... page 2-1. L. See "Touch Sensitive Screen Buttons" on page 3-10. O. NAV (Navigation) Key. SEEK Key. See "Playing a CD" on page 2-5. H. See "Hard Keys" on page 3-4. Tuning Knob. B. Overview A. NAV RPT (Navigation Repeat) Key. G. Nav (Navigation) Options Screen Button. Dest (Destination) Screen Button. D. CONFIG (Configure) Key. Clock. Power/Volume Knob. C. See Navigation Audio System on page 2-1. Nav (Navigation Menu) Screen Button. P.
... page 2-1. L. See "Touch Sensitive Screen Buttons" on page 3-10. O. NAV (Navigation) Key. SEEK Key. See "Playing a CD" on page 2-5. H. See "Hard Keys" on page 3-4. Tuning Knob. B. Overview A. NAV RPT (Navigation Repeat) Key. G. Nav (Navigation) Options Screen Button. Dest (Destination) Screen Button. D. CONFIG (Configure) Key. Clock. Power/Volume Knob. C. See Navigation Audio System on page 2-1. Nav (Navigation Menu) Screen Button. P.
User Guide
Page 7
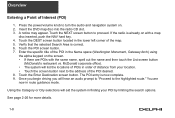
Setting the Search Area 1. Touch the NEXT screen button to turn the audio and navigation system on with a map disc inserted, push the NAV hard key. 4. Insert the DVD map disc into the radio CD slot. 3. If the radio is already on . 2. Touch the Change screen button. 6. A notice may appear. Touch the DEST screen button. 5. See page 2-21 for more details. 1-6 You...
Setting the Search Area 1. Touch the NEXT screen button to turn the audio and navigation system on with a map disc inserted, push the NAV hard key. 4. Insert the DVD map disc into the radio CD slot. 3. If the radio is already on . 2. Touch the Change screen button. 6. A notice may appear. Touch the DEST screen button. 5. See page 2-21 for more details. 1-6 You...
User Guide
Page 8
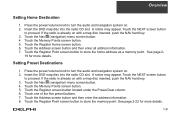
...Address 1. Insert the DVD map disc into the radio CD slot. 3. Do not enter directional information or street type, and be entered as royal oak. Select the street name from the list by touching the screen button beside the correct street name. 9. Touch the Enter Destination screen button. You are...first have to select the correct range for the address number, then enter the desired address and touch the OK screen button. 10. should be sure to turn the audio and navigation system on with a map disc inserted, push the NAV hard key. 4. You may appear. See page 2-...
...Address 1. Insert the DVD map disc into the radio CD slot. 3. Do not enter directional information or street type, and be entered as royal oak. Select the street name from the list by touching the screen button beside the correct street name. 9. Touch the Enter Destination screen button. You are...first have to select the correct range for the address number, then enter the desired address and touch the OK screen button. 10. should be sure to turn the audio and navigation system on with a map disc inserted, push the NAV hard key. 4. You may appear. See page 2-...
User Guide
Page 9
... power/volume knob to the highlighted route." Insert the DVD map disc into the radio CD slot. 3. Touch the DEST screen button located in the Name space (Washington Monument, Gateway Arch) using the alpha keypad on the screen. • If there are now in order of ...audio and navigation system on with the same name, spell out the name and then touch the List screen button (McDonald's restaurant vs. A notice may appear. Touch the Enter Destination screen button. Once you begin driving you will aid the system in finding your location. • Touch the screen button next...
... power/volume knob to the highlighted route." Insert the DVD map disc into the radio CD slot. 3. Touch the DEST screen button located in the Name space (Washington Monument, Gateway Arch) using the alpha keypad on the screen. • If there are now in order of ...audio and navigation system on with the same name, spell out the name and then touch the List screen button (McDonald's restaurant vs. A notice may appear. Touch the Enter Destination screen button. Once you begin driving you will aid the system in finding your location. • Touch the screen button next...
User Guide
Page 10
... the audio and navigation system on . 2. If the radio is already on with a map disc inserted, push the NAV hard key. 3. Touch the Memory Points screen button. 5. Touch the Register Point screen button to proceed. Insert the DVD map disc into the radio CD slot. Touch the Address screen button and then enter all address information. 7. Touch the Register screen button located under...
... the audio and navigation system on . 2. If the radio is already on with a map disc inserted, push the NAV hard key. 3. Touch the Memory Points screen button. 5. Touch the Register Point screen button to proceed. Insert the DVD map disc into the radio CD slot. Touch the Address screen button and then enter all address information. 7. Touch the Register screen button located under...
User Guide
Page 11
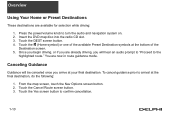
Touch the DEST screen button. 4. Touch the Yes screen button to turn the audio and navigation system on. 2. Press the power/volume knob to confirm cancellation. 1-10 Touch the (Home symbol) or one of the Destination screen. 5. Once you begin driving, or if you arrive at your final destination. Canceling ... destinations are already driving, you will be canceled once you are available for selection while driving: 1. From the map screen, touch the Nav Options screen button. 2. You are now in route guidance mode. Insert the DVD map disc into the radio CD slot. 3.
Touch the DEST screen button. 4. Touch the Yes screen button to turn the audio and navigation system on. 2. Press the power/volume knob to confirm cancellation. 1-10 Touch the (Home symbol) or one of the Destination screen. 5. Once you begin driving, or if you arrive at your final destination. Canceling ... destinations are already driving, you will be canceled once you are available for selection while driving: 1. From the map screen, touch the Nav Options screen button. 2. You are now in route guidance mode. Insert the DVD map disc into the radio CD slot. 3.
User Guide
Page 67
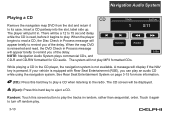
...DVD is pressed. See Rear Seat Entertainment System on page 3-15 for CD audio. The player will appear briefly to remind you can play an audio CD while using the navigation system. NOTE: Navigation Audio System plays commercial CDs, and CD-R and CD-RW formatted for more information. (CD): Press this screen... CD, the Disc Check in random, rather than sequential, order. Navigation Audio System Playing a CD Remove the navigation map DVD from the slot and return it begins to play. If your vehicle is not available. Random: Touch this hard key to play a CD when listening to the...
...DVD is pressed. See Rear Seat Entertainment System on page 3-15 for CD audio. The player will appear briefly to remind you can play an audio CD while using the navigation system. NOTE: Navigation Audio System plays commercial CDs, and CD-R and CD-RW formatted for more information. (CD): Press this screen... CD, the Disc Check in random, rather than sequential, order. Navigation Audio System Playing a CD Remove the navigation map DVD from the slot and return it begins to play. If your vehicle is not available. Random: Touch this hard key to play a CD when listening to the...
Installation Guide
Page 1
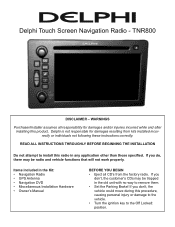
.... If you don't, the customer's CDs may be trapped in any application other than those specified. Delphi Touch Screen Navigation Radio - Items included in the Kit: • Navigation Radio • GPS Antenna • Navigation DVD • Miscellaneous Installation Hardware • Owner's Manual BEFORE YOU BEGIN • Eject all responsibility for damages resulting...following these instructions correctly. If you don't, the vehicle could move during this product. If you do, there may be radio and vehicle functions that will not work properly. TNR800 DISCLAIMER -
.... If you don't, the customer's CDs may be trapped in any application other than those specified. Delphi Touch Screen Navigation Radio - Items included in the Kit: • Navigation Radio • GPS Antenna • Navigation DVD • Miscellaneous Installation Hardware • Owner's Manual BEFORE YOU BEGIN • Eject all responsibility for damages resulting...following these instructions correctly. If you don't, the vehicle could move during this product. If you do, there may be radio and vehicle functions that will not work properly. TNR800 DISCLAIMER -


