Owners Manual
Page 3
... Menu 21 Setup Menu Overview 21 Setup Menu Screen Operations 24 Setup Menu Reference 31 Image Adjustment 31 Volume Adjustment 35 Screen Settings 36 Input Settings 42 Option Settings1 45 Option Settings2 59 Operational Info 62 Restore All Defaults 63 Appendix 64 Remote Controller Signal Range 64 Projection Distance and Screen Size 65 Connecting to a Component Video Output Device 66 Connecting a Computer to the Projector's USB Port 67 Full-screen Display of an RGB Image 68 Password Feature 69 Cleaning the Projector 70 Reattaching the Lens Cover 71 Projector Troubleshooting...
... Menu 21 Setup Menu Overview 21 Setup Menu Screen Operations 24 Setup Menu Reference 31 Image Adjustment 31 Volume Adjustment 35 Screen Settings 36 Input Settings 42 Option Settings1 45 Option Settings2 59 Operational Info 62 Restore All Defaults 63 Appendix 64 Remote Controller Signal Range 64 Projection Distance and Screen Size 65 Connecting to a Component Video Output Device 66 Connecting a Computer to the Projector's USB Port 67 Full-screen Display of an RGB Image 68 Password Feature 69 Cleaning the Projector 70 Reattaching the Lens Cover 71 Projector Troubleshooting...

Owners Manual
Page 5
... the S-VIDEO input terminal is connected to a video deck and signals are being supplied by both, for example, the projector automatically selects RGB input when it is selected for the "Option Settings1 J Auto Input Detect" (page 45) setting on the setup menu. 5 z Note that is configured on the projector's setup menu. Projection Operations Auto Input Source Selection When you turn on the projector, it checks the status of each input source (whether or not the input source is shown...
... the S-VIDEO input terminal is connected to a video deck and signals are being supplied by both, for example, the projector automatically selects RGB input when it is selected for the "Option Settings1 J Auto Input Detect" (page 45) setting on the setup menu. 5 z Note that is configured on the projector's setup menu. Projection Operations Auto Input Source Selection When you turn on the projector, it checks the status of each input source (whether or not the input source is shown...

Owners Manual
Page 9
... screen and projector setup conditions. 9 If the projected image becomes difficult to view, try moving the screen and/or projector so they are affected by the type of signal being projected, zoom, the "Resize Image To Fit" setting, the aspect ratio setting, and other factors. AF Mode: Pressing the [AF/AK] key again performs Auto Focus only. z The size of an image from a computer (Resolution: 1024 × 768; Auto Focus and Auto Keystone Correction...
... screen and projector setup conditions. 9 If the projected image becomes difficult to view, try moving the screen and/or projector so they are affected by the type of signal being projected, zoom, the "Resize Image To Fit" setting, the aspect ratio setting, and other factors. AF Mode: Pressing the [AF/AK] key again performs Auto Focus only. z The size of an image from a computer (Resolution: 1024 × 768; Auto Focus and Auto Keystone Correction...

Owners Manual
Page 10
... within the screen area. 3. z If the message "Outside of the projector as required so the projected chart fits within the auto focus range (approximately 0.8 to change the distance from step 2 under "Getting Ready" in the "User's Guide (Basic Operations)". Relocate the projector to 4 meters). When the distance is selected for "Option Settings2 J Power On AF/AK Mode" (page 60) on the setup menu, turning on screen and projector setup conditions, and...
... within the screen area. 3. z If the message "Outside of the projector as required so the projected chart fits within the auto focus range (approximately 0.8 to change the distance from step 2 under "Getting Ready" in the "User's Guide (Basic Operations)". Relocate the projector to 4 meters). When the distance is selected for "Option Settings2 J Power On AF/AK Mode" (page 60) on the setup menu, turning on screen and projector setup conditions, and...
Owners Manual
Page 20
..., or while the menu is displayed (page 21). Wireless mouse capabilities will be restored as soon as described below. Wireless mouse operation will be supported for more information. ) Connecting a Computer to the Projector (User's Guide (Basic Operation)) ) Connecting a Computer to select RGB as the input source. z You can also select the input source using the projector's [INPUT] key. 3. Use the mini D-Sub cable and USB cable that , turn on the computer screen up, down, left...
..., or while the menu is displayed (page 21). Wireless mouse capabilities will be restored as soon as described below. Wireless mouse operation will be supported for more information. ) Connecting a Computer to the Projector (User's Guide (Basic Operation)) ) Connecting a Computer to select RGB as the input source. z You can also select the input source using the projector's [INPUT] key. 3. Use the mini D-Sub cable and USB cable that , turn on the computer screen up, down, left...

Owners Manual
Page 21
...sub-menu item type. Main menu Sub-menu Brightness Sub-menu Item Type*1 Value Setting Input source*2 RCSV - The setup menu can be used to the pages noted below for each input source (R = RGB, C = Component, S = S-VIDEO, V = Video, - = No input signal). *3 This setting is 4:3. 21 Setting Screen: Numeric value specification or option selection on the projected image. See page 31 Image Adjustment Contrast Sharpness Saturation Tint Color Mode Color Balance Vertical Position Value Setting Value Setting Value Setting Value Setting Setting Screen Setting Screen Value Setting 31...
...sub-menu item type. Main menu Sub-menu Brightness Sub-menu Item Type*1 Value Setting Input source*2 RCSV - The setup menu can be used to the pages noted below for each input source (R = RGB, C = Component, S = S-VIDEO, V = Video, - = No input signal). *3 This setting is 4:3. 21 Setting Screen: Numeric value specification or option selection on the projected image. See page 31 Image Adjustment Contrast Sharpness Saturation Tint Color Mode Color Balance Vertical Position Value Setting Value Setting Value Setting Value Setting Setting Screen Setting Screen Value Setting 31...
Owners Manual
Page 22
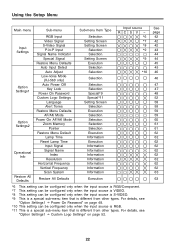
... 62 62 63 63 22 Using the Setup Menu Main menu Input Settings Option Settings1 Option Settings2 Operational Info Restore All Defaults Sub-menu RGB Input Video Signal S-Video Signal P-in-P Input Signal Name Indicator Special Signal Restore Menu Defaults Auto Input Detect Auto Adjust Low-noise Mode (XJ-560 only) Auto Power Off Key Lock Power On Password Custom Logo Settings Language Alert Tones Restore Menu Defaults AF/AK Mode Power On AF/AK Mode Zoom Memory Pointer Restore Menu Default Lamp Time Reset Lamp Time Input Signal Signal Name Index Resolution Horizontal Frequency Vertical Frequency...
... 62 62 63 63 22 Using the Setup Menu Main menu Input Settings Option Settings1 Option Settings2 Operational Info Restore All Defaults Sub-menu RGB Input Video Signal S-Video Signal P-in-P Input Signal Name Indicator Special Signal Restore Menu Defaults Auto Input Detect Auto Adjust Low-noise Mode (XJ-560 only) Auto Power Off Key Lock Power On Password Custom Logo Settings Language Alert Tones Restore Menu Defaults AF/AK Mode Power On AF/AK Mode Zoom Memory Pointer Restore Menu Default Lamp Time Reset Lamp Time Input Signal Signal Name Index Resolution Horizontal Frequency Vertical Frequency...

Owners Manual
Page 28
...-menu item provides status and setup information. Examples: Operational Info J Lamp Time; Operational Info J Reset Lamp Time ) Initializing Settings (page 29) ) Resetting the Lamp Time (User's Guide (Basic Operation)) Information Type Sub-menu Item This type of sub-menu item returns a setting to the following for details about the type of information that is available using the information type sub-menu items. ) Operational Info J Lamp Time (page 62) ) Operational Info J Input Signal (page 62) ) Operational Info J Signal Name (page 62) ) Operational...
...-menu item provides status and setup information. Examples: Operational Info J Lamp Time; Operational Info J Reset Lamp Time ) Initializing Settings (page 29) ) Resetting the Lamp Time (User's Guide (Basic Operation)) Information Type Sub-menu Item This type of sub-menu item returns a setting to the following for details about the type of information that is available using the information type sub-menu items. ) Operational Info J Lamp Time (page 62) ) Operational Info J Input Signal (page 62) ) Operational Info J Signal Name (page 62) ) Operational...

Owners Manual
Page 32
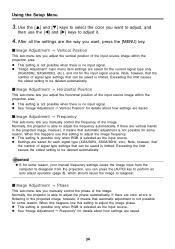
... input source. z Color balance settings cannot be configured and is no input signal. z Note that you select from among five different color settings to adjust color balance, selecting a preset color temperature value or adjusting the red, green, or blue components of the projected image. Setting Storage A different setting is stored for easy viewing when projecting onto a blackboard. Using the Setup Menu IImage Adjustment J Color Mode This sub-menu lets you can adjust the color balance either by selecting a color temperature value or by adjusting color...
... input source. z Color balance settings cannot be configured and is no input signal. z Note that you select from among five different color settings to adjust color balance, selecting a preset color temperature value or adjusting the red, green, or blue components of the projected image. Setting Storage A different setting is stored for easy viewing when projecting onto a blackboard. Using the Setup Menu IImage Adjustment J Color Mode This sub-menu lets you can adjust the color balance either by selecting a color temperature value or by adjusting color...
Owners Manual
Page 34
... projection, you can be deleted automatically. z This setting is possible only when RGB is no input signal. z "Image Adjustment" main menu item settings are saved. 34 IImage Adjustment J Frequency This sub-menu lets you adjust the horizontal position of signal type settings that can be deleted automatically. z If, for the input signal source. Using the Setup Menu 3. IImage Adjustment J Horizontal Position This sub-menu lets you manually control the frequency of the image. z This setting...
... projection, you can be deleted automatically. z This setting is possible only when RGB is no input signal. z "Image Adjustment" main menu item settings are saved. 34 IImage Adjustment J Frequency This sub-menu lets you adjust the horizontal position of signal type settings that can be deleted automatically. z If, for the input signal source. Using the Setup Menu 3. IImage Adjustment J Horizontal Position This sub-menu lets you manually control the frequency of the image. z This setting...
Owners Manual
Page 35
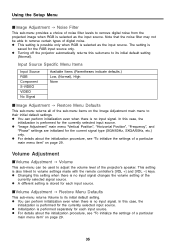
... the settings of a particular main menu item" on the Image Adjustment main menu to their initial default settings. Note that the noise filter may not be used to adjust the volume level of the projector's speaker. Input Source Specific Menu Items Input Source RGB Component S-VIDEO VIDEO No Signal Available Items (Parentheses indicate defaults.) Low, (Normal), High None IImage Adjustment J Restore Menu Defaults This sub-menu returns all of the sub-menu items on page 29. 35 z Changing this...
... the settings of a particular main menu item" on the Image Adjustment main menu to their initial default settings. Note that the noise filter may not be used to adjust the volume level of the projector's speaker. Input Source Specific Menu Items Input Source RGB Component S-VIDEO VIDEO No Signal Available Items (Parentheses indicate defaults.) Low, (Normal), High None IImage Adjustment J Restore Menu Defaults This sub-menu returns all of the sub-menu items on page 29. 35 z Changing this...

Owners Manual
Page 39
... the screen. Input Source Specific Menu Items Input Source RGB Component S-VIDEO VIDEO No Signal Available Items (Parentheses indicate defaults.) (Front), Rear Setting Explanations Front: For projection from the back of the screen. Rear: For projection from the front of the screen. Using the Setup Menu IScreen Settings J Projection Mode Use this sub-menu to configure the projector for use in an installation in which it is positioned upside down. This setting flips the front projected image horizontally. Off: Projects a normal image. Setting Storage A single setting is...
... the screen. Input Source Specific Menu Items Input Source RGB Component S-VIDEO VIDEO No Signal Available Items (Parentheses indicate defaults.) (Front), Rear Setting Explanations Front: For projection from the back of the screen. Rear: For projection from the front of the screen. Using the Setup Menu IScreen Settings J Projection Mode Use this sub-menu to configure the projector for use in an installation in which it is positioned upside down. This setting flips the front projected image horizontally. Off: Projects a normal image. Setting Storage A single setting is...
Owners Manual
Page 43
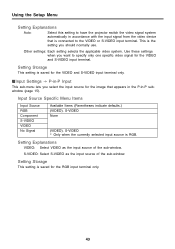
...Using the Setup Menu Setting Explanations Auto: Select this setting to have the projector switch the video signal system automatically in -P subwindow (page 15). Other settings: Each setting selects the applicable video system. Use these settings when you should normally use. Input Source Specific Menu Items Input Source RGB Component S-VIDEO VIDEO No Signal Available Items (Parentheses indicate defaults.) (VIDEO), S-VIDEO None (VIDEO), S-VIDEO * Only when the currently selected input source is saved for the image that appears in the P-in accordance with the input signal...
...Using the Setup Menu Setting Explanations Auto: Select this setting to have the projector switch the video signal system automatically in -P subwindow (page 15). Other settings: Each setting selects the applicable video system. Use these settings when you should normally use. Input Source Specific Menu Items Input Source RGB Component S-VIDEO VIDEO No Signal Available Items (Parentheses indicate defaults.) (VIDEO), S-VIDEO None (VIDEO), S-VIDEO * Only when the currently selected input source is saved for the image that appears in the P-in accordance with the input signal...

Owners Manual
Page 44
... input source is applied to the RGB input terminal, the projector automatically detects the type of RGB signal being sent from the computer and projects the image. Input Source Specific Menu Items Input Source RGB Component S-VIDEO VIDEO No Signal Available Items (Parentheses indicate defaults.) (On), Off Setting Explanations On: Turns on display of the name of the currently selected input source in the projected image. Some signals, however, cannot be displayed in the projected image. Using the Setup Menu IInput Settings J Signal Name Indicator...
... input source is applied to the RGB input terminal, the projector automatically detects the type of RGB signal being sent from the computer and projects the image. Input Source Specific Menu Items Input Source RGB Component S-VIDEO VIDEO No Signal Available Items (Parentheses indicate defaults.) (On), Off Setting Explanations On: Turns on display of the name of the currently selected input source in the projected image. Some signals, however, cannot be displayed in the projected image. Using the Setup Menu IInput Settings J Signal Name Indicator...

Owners Manual
Page 46
...: Turns off auto adjustment. Input Source Specific Menu Items Input Source RGB Component S-VIDEO VIDEO No Signal Available Items (Parentheses indicate defaults.) (On), Off None (On), Off * Only when the currently selected input source is applied to all input sources. 46 Input Source Specific Menu Items Input Source RGB Component S-VIDEO VIDEO No Signal Available Items (Parentheses indicate defaults.) On, (Off) Setting Explanations On (low-noise mode): This mode reduces luminosity and fan motor speed for the RGB input terminal only. Off (normal mode): This mode projects...
...: Turns off auto adjustment. Input Source Specific Menu Items Input Source RGB Component S-VIDEO VIDEO No Signal Available Items (Parentheses indicate defaults.) (On), Off None (On), Off * Only when the currently selected input source is applied to all input sources. 46 Input Source Specific Menu Items Input Source RGB Component S-VIDEO VIDEO No Signal Available Items (Parentheses indicate defaults.) On, (Off) Setting Explanations On (low-noise mode): This mode reduces luminosity and fan motor speed for the RGB input terminal only. Off (normal mode): This mode projects...

Owners Manual
Page 49
...of the 20 remote controller key operations shown below when inputting a password. [AF/AK], [PAGE UP], [PAGE DOWN], [MENU], [KEYSTONE], [D-ZOOM +], [D-ZOOM -], [RGB], [VIDEO], [S-VIDEO], [AUTO], [P-IN-P], [MUTE], [FREEZE], [VOL +], [VOL -], [S], [T], [W], [X] z Each time you want, press the [ENTER] key. The following occurs. Using the Setup Menu Input Source Specific Menu Items Input Source RGB Component S-VIDEO VIDEO No Signal Available Items (Parentheses indicate defaults.) On, (Off) Setting Explanation On: Turns on the power on password, which requires input of a password to select an...
...of the 20 remote controller key operations shown below when inputting a password. [AF/AK], [PAGE UP], [PAGE DOWN], [MENU], [KEYSTONE], [D-ZOOM +], [D-ZOOM -], [RGB], [VIDEO], [S-VIDEO], [AUTO], [P-IN-P], [MUTE], [FREEZE], [VOL +], [VOL -], [S], [T], [W], [X] z Each time you want, press the [ENTER] key. The following occurs. Using the Setup Menu Input Source Specific Menu Items Input Source RGB Component S-VIDEO VIDEO No Signal Available Items (Parentheses indicate defaults.) On, (Off) Setting Explanation On: Turns on the power on password, which requires input of a password to select an...
Owners Manual
Page 51
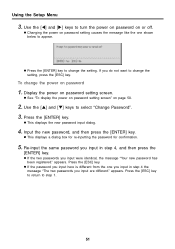
... display the power on password setting screen" on password 1. If you input here is different from the one shown below to change the setting, press the [ESC] key. Press the [ESC] key. appears. Using the Setup Menu 3. Input the new password, and then press the [ENTER] key. To change the power on page 50. 2. appears. Re-input the same password you input were identical, the message "Your new password has been registered." Use the...
... display the power on password setting screen" on password 1. If you input here is different from the one shown below to change the setting, press the [ESC] key. Press the [ESC] key. appears. Using the Setup Menu 3. Input the new password, and then press the [ENTER] key. To change the power on page 50. 2. appears. Re-input the same password you input were identical, the message "Your new password has been registered." Use the...
Owners Manual
Page 60
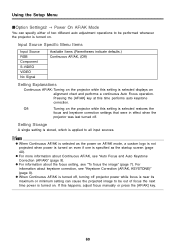
Input Source Specific Menu Items Input Source RGB Component S-VIDEO VIDEO No Signal Available Items (Parentheses indicate defaults.) Continuous AF/AK, (Off) Setting Explanations Continuous AF/AK: Turning on the projector while this time performs auto keystone correction. z When Continuous AF/AK is selected as the power on AF/AK mode, a custom logo is not projected when power is turned on . Pressing the [AF/AK] key at this setting is selected displays an alignment chart...
Input Source Specific Menu Items Input Source RGB Component S-VIDEO VIDEO No Signal Available Items (Parentheses indicate defaults.) Continuous AF/AK, (Off) Setting Explanations Continuous AF/AK: Turning on the projector while this time performs auto keystone correction. z When Continuous AF/AK is selected as the power on AF/AK mode, a custom logo is not projected when power is turned on . Pressing the [AF/AK] key at this setting is selected displays an alignment chart...

Owners Manual
Page 72
... projector does not turn on when I press the [ ] (power) key. J Make sure the AC power cord is not lit, the AC power cord may not be connected correctly. If the TEMP or LAMP indicator remains flashing or lit, it means some type of the lens cover. J See "Error Indicators" under the lens. Appendix 2. If the POWER/STANDBY indicator is connected correctly to the lens cover when performing the above step. See User's Guide (Basic Operation) User's Guide (Basic Operation...
... projector does not turn on when I press the [ ] (power) key. J Make sure the AC power cord is not lit, the AC power cord may not be connected correctly. If the TEMP or LAMP indicator remains flashing or lit, it means some type of the lens cover. J See "Error Indicators" under the lens. Appendix 2. If the POWER/STANDBY indicator is connected correctly to the lens cover when performing the above step. See User's Guide (Basic Operation) User's Guide (Basic Operation...
Owners Manual
Page 74
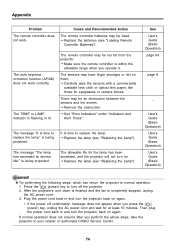
... power cord back in and turn on again. The remote controller may be dead. is being projected. See User's Guide (Basic Operation) page 64 page 8 _ User's Guide (Basic Operation) User's Guide (Basic Operation) User's Guide (Basic Operation) z Try performing the following steps, which can return the projector to replace the lamp." Press the [ ] (power) key to replace the lamp. After the projector's cool down is finished and the fan is time to normal operation. 1. Appendix Problem The remote controller does not work...
... power cord back in and turn on again. The remote controller may be dead. is being projected. See User's Guide (Basic Operation) page 64 page 8 _ User's Guide (Basic Operation) User's Guide (Basic Operation) User's Guide (Basic Operation) z Try performing the following steps, which can return the projector to replace the lamp." Press the [ ] (power) key to replace the lamp. After the projector's cool down is finished and the fan is time to normal operation. 1. Appendix Problem The remote controller does not work...

