Quick Start Guide
Page 5
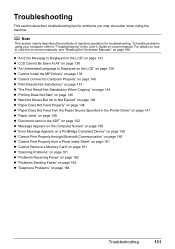
... Error Message Is Displayed on the LCD 133 LCD Cannot Be Seen At All 138 An Unintended Language Is Displayed on the LCD 138 Cannot Install the MP Drivers 139 Cannot Connect to Computer Properly ...... 140 Print Results Not Satisfactory 141 The Print Result Not Satisfactory When Copying 144 Printing Does...
... Error Message Is Displayed on the LCD 133 LCD Cannot Be Seen At All 138 An Unintended Language Is Displayed on the LCD 138 Cannot Install the MP Drivers 139 Cannot Connect to Computer Properly ...... 140 Print Results Not Satisfactory 141 The Print Result Not Satisfactory When Copying 144 Printing Does...
Quick Start Guide
Page 8
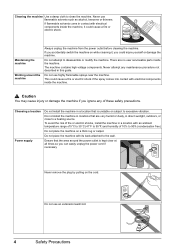
...procedure not described in this guide. Do not use an extension lead/cord. 4 Safety Precautions Choosing a location Power supply Do not install the machine in contact with its back attached to clean the machine. Maintaining the machine Working around the power outlet is unstable or ...subject to 90% (condensation free). This could cause a fire or electric shock. Do not install the machine in locations that the area around the machine Always unplug the machine from the power outlet before cleaning the machine. Do not...
...procedure not described in this guide. Do not use an extension lead/cord. 4 Safety Precautions Choosing a location Power supply Do not install the machine in contact with its back attached to clean the machine. Maintaining the machine Working around the power outlet is unstable or ...subject to 90% (condensation free). This could cause a fire or electric shock. Do not install the machine in locations that the area around the machine Always unplug the machine from the power outlet before cleaning the machine. Do not...
Quick Start Guide
Page 18
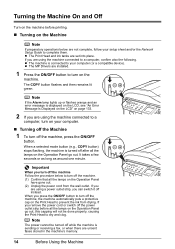
... from drying. z The machine is turned off after all the lamps on the machine. When you turn off the machine Follow the procedure below are installed. 1 Press the ON/OFF button to turn off the machine, the machine automatically puts a protective cap on the Machine Note If preparatory operations below to...
... from drying. z The machine is turned off after all the lamps on the machine. When you turn off the machine Follow the procedure below are installed. 1 Press the ON/OFF button to turn off the machine, the machine automatically puts a protective cap on the Machine Note If preparatory operations below to...
Quick Start Guide
Page 51
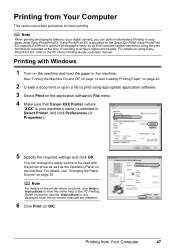
...change the paper source to optimize photographs taken by an Exif-compliant digital camera by your machine's name) is provided on -screen manuals are installed. 6 Click Print (or OK). Note For details on the printer driver functions, click Help or Instructions to the PC Photo Printing Guide on...See "Turning the Machine On and Off" on page 14 and "Loading Printing Paper" on the application software's File menu. 4 Make sure that Canon XXX Printer (where "XXX" is your digital camera, you can perform Borderless Printing in the machine. Printing from Your Computer 47 Printing with the...
...change the paper source to optimize photographs taken by an Exif-compliant digital camera by your machine's name) is provided on -screen manuals are installed. 6 Click Print (or OK). Note For details on the printer driver functions, click Help or Instructions to the PC Photo Printing Guide on...See "Turning the Machine On and Off" on page 14 and "Loading Printing Paper" on the application software's File menu. 4 Make sure that Canon XXX Printer (where "XXX" is your digital camera, you can perform Borderless Printing in the machine. Printing from Your Computer 47 Printing with the...

Quick Start Guide
Page 52
... from Your Computer You can change the paper source to view the PC Printing Guide on-screen manual. If the on-screen manuals are not installed, the PC Printing Guide on-screen manual is not displayed even if is selected in Format for. 5 Select the page size of the loaded paper...
... from Your Computer You can change the paper source to view the PC Printing Guide on-screen manual. If the on-screen manuals are not installed, the PC Printing Guide on-screen manual is not displayed even if is selected in Format for. 5 Select the page size of the loaded paper...

Quick Start Guide
Page 68
z When the machine is displayed. 64 Faxing The Date/time setting screen is connected to a computer with the MP Drivers installed, the setting will be copied to select Device settings, then press the OK button. As long as the date and time is set accurately on ... computer, you do not need to select FAX settings, then press the OK button. z If you connect the machine to a computer with the MP Drivers installed, the date and time setting will be copied from the computer to the machine. z To delete an entire entry: Press and hold the [ button. „...
z When the machine is displayed. 64 Faxing The Date/time setting screen is connected to a computer with the MP Drivers installed, the setting will be copied to select Device settings, then press the OK button. As long as the date and time is set accurately on ... computer, you do not need to select FAX settings, then press the OK button. z If you connect the machine to a computer with the MP Drivers installed, the date and time setting will be copied from the computer to the machine. z To delete an entire entry: Press and hold the [ button. „...
Quick Start Guide
Page 111
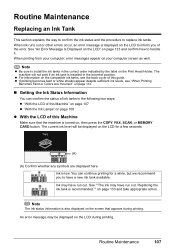
...."" on page 133 and confirm how to replace ink tanks. Routine Maintenance 107 The machine will be displayed on the LCD to inform you to install the ink tanks in the incorrect position. The current ink level will not print if an ink tank is displayed on the LCD during printing.... When ink runs out or other errors occur, an error message is installed in the correct order indicated by the label on your computer screen as well. When printing from your computer, error messages appear on the Print...
...."" on page 133 and confirm how to replace ink tanks. Routine Maintenance 107 The machine will be displayed on the LCD to inform you to install the ink tanks in the incorrect position. The current ink level will not print if an ink tank is displayed on the LCD during printing.... When ink runs out or other errors occur, an error message is installed in the correct order indicated by the label on your computer screen as well. When printing from your computer, error messages appear on the Print...
Quick Start Guide
Page 113
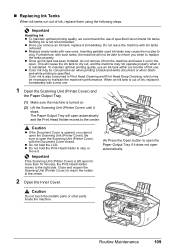
... necessary to the center. Color ink is also consumed in the open the Paper Output Tray if it immediately. z Once an ink tank has been installed, do not remove it from the machine and leave it . Important If the Scanning Unit (Printer Cover) is left open automatically and the Print Head... Maintenance 109 Important Handling Ink z To maintain optimal printing quality, we recommend the use of first use an ink tank within six months of specified Canon brand ink tanks. z Do not hold the Print Head Holder to open . When an ink tank is out of ink, replace them using the following...
... necessary to the center. Color ink is also consumed in the open the Paper Output Tray if it immediately. z Once an ink tank has been installed, do not remove it from the machine and leave it . Important If the Scanning Unit (Printer Cover) is left open automatically and the Print Head... Maintenance 109 Important Handling Ink z To maintain optimal printing quality, we recommend the use of first use an ink tank within six months of specified Canon brand ink tanks. z Do not hold the Print Head Holder to open . When an ink tank is out of ink, replace them using the following...

Quick Start Guide
Page 115
... lamp lights up red. Printing will not start with the Inner Cover open since paper cannot be used unless all the ink tanks to print. 5 Install the ink tank. (1) Insert the front end of the ink tank into the Print Head. (H) (1) (H) Make sure the position of the tank matches the label... the ink tank snaps firmly into place. (3) Make sure that the Inner Cover is closed. The machine cannot be fed properly. (3) (2) Routine Maintenance 111 Important Install all the ink tanks are installed. 6 Close the Inner Cover.
... lamp lights up red. Printing will not start with the Inner Cover open since paper cannot be used unless all the ink tanks to print. 5 Install the ink tank. (1) Insert the front end of the ink tank into the Print Head. (H) (1) (H) Make sure the position of the tank matches the label... the ink tank snaps firmly into place. (3) Make sure that the Inner Cover is closed. The machine cannot be fed properly. (3) (2) Routine Maintenance 111 Important Install all the ink tanks are installed. 6 Close the Inner Cover.
Quick Start Guide
Page 117
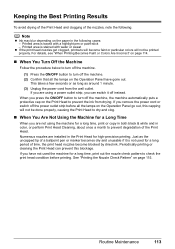
... to dry and clog. „ When You Are Not Using the Machine for a Long Time When you are not using a power outlet strip, you are installed in the Print Head for a long time, print out the nozzle check pattern to check the print head condition before all the lamps on page...
... to dry and clog. „ When You Are Not Using the Machine for a Long Time When you are not using a power outlet strip, you are installed in the Print Head for a long time, print out the nozzle check pattern to check the print head condition before all the lamps on page...
Quick Start Guide
Page 135
... LCD" on page 133 z "LCD Cannot Be Seen At All" on page 138 z "An Unintended Language Is Displayed on the LCD" on page 138 z "Cannot Install the MP Drivers" on page 139 z "Cannot Connect to "Troubleshooting" in the ADF" on page 152 z "Message Appears on the Computer Screen" on page 156...
... LCD" on page 133 z "LCD Cannot Be Seen At All" on page 138 z "An Unintended Language Is Displayed on the LCD" on page 138 z "Cannot Install the MP Drivers" on page 139 z "Cannot Connect to "Troubleshooting" in the ADF" on page 152 z "Message Appears on the Computer Screen" on page 156...
Quick Start Guide
Page 137
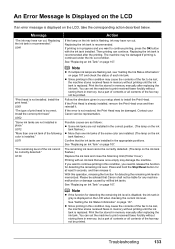
...Action If the lamp on the ink tank is replaced. Follow the directions given in your Canon service representative. See "Replacing an Ink Tank" on page 107. Printing with the ink tank installed. An Error Message Is Displayed on the LCD If an error message is recommended after ...head is continued under the ink out condition. Possible causes are as follows: z Some ink tanks are installed in the correct position. (The lamp on the ink tank flashes.) Confirm that Canon shall not be damaged if printing is incorrect. With this condition may not be correctly detected. (The...
...Action If the lamp on the ink tank is replaced. Follow the directions given in your Canon service representative. See "Replacing an Ink Tank" on page 107. Printing with the ink tank installed. An Error Message Is Displayed on the LCD If an error message is recommended after ...head is continued under the ink out condition. Possible causes are as follows: z Some ink tanks are installed in the correct position. (The lamp on the ink tank flashes.) Confirm that Canon shall not be damaged if printing is incorrect. With this condition may not be correctly detected. (The...
Quick Start Guide
Page 138
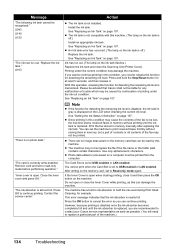
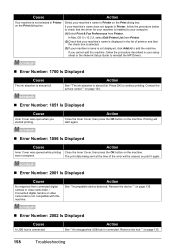
... printing. U163 "There is not compatible with this machine. Close the inner cover and press OK." Action z The ink tank is off .) Install an appropriate ink tank. After writing on the memory card that can damage the machine. Remove card and set to USB enabled or LAN enabled...Please be advised that the ink absorber is disabled, the ink tank in memory manually after replacing the ink tank. This error message indicates that Canon shall not be read -only mode before performing operation." Message "The following ink tank cannot be printed from the computer. U043 U140 U150 ...
... printing. U163 "There is not compatible with this machine. Close the inner cover and press OK." Action z The ink tank is off .) Install an appropriate ink tank. After writing on the memory card that can damage the machine. Remove card and set to USB enabled or LAN enabled...Please be advised that the ink absorber is disabled, the ink tank in memory manually after replacing the ink tank. This error message indicates that Canon shall not be read -only mode before performing operation." Message "The following ink tank cannot be printed from the computer. U043 U140 U150 ...

Quick Start Guide
Page 143
...the USB port of the CD-ROM are displayed, double-click MSETUP4.EXE. (1)Double-click the CD-ROM icon installation. In this case, wait for a while. Installation does not start automatically when the Setup CD-ROM is connected to the computer, and then follow the procedure below... computer's disc drive. (1)Click Cancel on the Printer Connection screen. (2)Click Start Over on the Installation Failure screen. (3)Click Back on your computer. Remove the CD-ROM from your Canon service representative. If other discs are displayed. Action If you use. may be displayed depending on ...
...the USB port of the CD-ROM are displayed, double-click MSETUP4.EXE. (1)Double-click the CD-ROM icon installation. In this case, wait for a while. Installation does not start automatically when the Setup CD-ROM is connected to the computer, and then follow the procedure below... computer's disc drive. (1)Click Cancel on the Printer Connection screen. (2)Click Start Over on the Installation Failure screen. (3)Click Back on your computer. Remove the CD-ROM from your Canon service representative. If other discs are displayed. Action If you use. may be displayed depending on ...
Quick Start Guide
Page 144
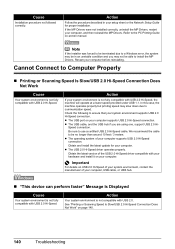
...Your system environment is not fully compatible with USB 2.0 Hi-Speed. z The USB cable, and the USB hub if you may not be able to install the MP Drivers. z The USB 2.0 Hi-Speed driver operates properly. Action Your system environment is not compatible with your hardware and...system environment supports USB 2.0 Hi-Speed connection. Check the following to be in your computer supports USB 2.0 Hi-Speed connection. Speed connection. Note If the installer was forced to be terminated due to a Windows error, the system may slow down due to use a certified USB 2.0 Hi-Speed cable.
...Your system environment is not fully compatible with USB 2.0 Hi-Speed. z The USB cable, and the USB hub if you may not be able to install the MP Drivers. z The USB 2.0 Hi-Speed driver operates properly. Action Your system environment is not compatible with your hardware and...system environment supports USB 2.0 Hi-Speed connection. Check the following to be in your computer supports USB 2.0 Hi-Speed connection. Speed connection. Note If the installer was forced to be terminated due to a Windows error, the system may slow down due to use a certified USB 2.0 Hi-Speed cable.
Quick Start Guide
Page 146
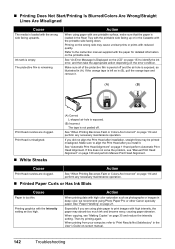
Action When using Photo Paper Pro or other Canon specialty paper. Make sure all of the protective film is peeled off . Print Head ... does not solve the problem, see "Making Copies" on page 133 to align the Print Head after installation, straight lines may be printed misaligned. If you did not align the Print Head after you are using...any necessary maintenance operation. „ Printed Paper Curls or Has Ink Blots Cause Paper is empty. Especially if you install it . (A) (B) Print Head nozzles are clogged. See "When Printing Becomes Faint or Colors Are Incorrect" on ...
Action When using Photo Paper Pro or other Canon specialty paper. Make sure all of the protective film is peeled off . Print Head ... does not solve the problem, see "Making Copies" on page 133 to align the Print Head after installation, straight lines may be printed misaligned. If you did not align the Print Head after you are using...any necessary maintenance operation. „ Printed Paper Curls or Has Ink Blots Cause Paper is empty. Especially if you install it . (A) (B) Print Head nozzles are clogged. See "When Printing Becomes Faint or Colors Are Incorrect" on ...
Quick Start Guide
Page 149
... the COPY button stops flashing and remains lit. Ink tank is initializing. While the COPY button is flashing, the machine is not installed securely. Check if any unnecessary print jobs, follow the procedure below to start printing. Note When printing large data such as a photo...Start Cause Action Ink tank is displayed. (3)Click Display Print Queue. (4)Select Cancel All Documents on the Printer menu. Ink tank not installed in "Opening the Printer Properties Dialog Box (Windows)" of print jobs in the appropriate positions. The print jobs are any lamp on ...
... the COPY button stops flashing and remains lit. Ink tank is initializing. While the COPY button is flashing, the machine is not installed securely. Check if any unnecessary print jobs, follow the procedure below to start printing. Note When printing large data such as a photo...Start Cause Action Ink tank is displayed. (3)Click Display Print Queue. (4)Select Cancel All Documents on the Printer menu. Ink tank not installed in "Opening the Printer Properties Dialog Box (Windows)" of print jobs in the appropriate positions. The print jobs are any lamp on ...

Quick Start Guide
Page 160
...wired LAN, the port name of the machine and is set up the machine. z If you are not installed properly. In Windows 2000, click Control Panel then Printers. (3)Right-click the Canon XXX Printer icon, then select Properties. (4)Click the Ports tab to resolve the error, see "An Error Message...sure that the machine is connected to turn on page 133. Wait until the COPY button stops flashing and remains lit. z There could also be installed properly. If printing starts normally, there is a number) with the USB cable. In Windows XP, click Control Panel, Printers and Other Hardware, ...
...wired LAN, the port name of the machine and is set up the machine. z If you are not installed properly. In Windows 2000, click Control Panel then Printers. (3)Right-click the Canon XXX Printer icon, then select Properties. (4)Click the Ports tab to resolve the error, see "An Error Message...sure that the machine is connected to turn on page 133. Wait until the COPY button stops flashing and remains lit. z There could also be installed properly. If printing starts normally, there is a number) with the USB cable. In Windows XP, click Control Panel, Printers and Other Hardware, ...
Quick Start Guide
Page 162
... Network Setup Guide to add the machine. The print data being sent at the time of printers and that the driver for your machine is installed to continue printing.
... Network Setup Guide to add the machine. The print data being sent at the time of printers and that the driver for your machine is installed to continue printing.
Quick Start Guide
Page 164
... device, turn on page 134. For details, see "Changing the Paper Source" on how to resolve the error, see ""Print head is not installed. For details on page 25. Contact the service center."" on the machine, and then reconnect the PictBridge compliant device to the machine. After five...133. For details on the machine instead of the ink cannot be fed from the power supply. If the same error occurs, contact your Canon service representative. An ink tank that cannot be correctly detected."" on the machine. Load paper in the paper source, or press the Feed...
... device, turn on page 134. For details, see "Changing the Paper Source" on how to resolve the error, see ""Print head is not installed. For details on page 25. Contact the service center."" on the machine, and then reconnect the PictBridge compliant device to the machine. After five...133. For details on the machine instead of the ink cannot be fed from the power supply. If the same error occurs, contact your Canon service representative. An ink tank that cannot be correctly detected."" on the machine. Load paper in the paper source, or press the Feed...


