User Guide
Page 16
... adapter 46 Charging the battery 47 Turning on the computer 48 Opening the display panel 48 Turning on the power 49 Setting up your software 50 Registering your computer with Toshiba 50 Setting up other devices 50 Turning off the computer 51 Closing the display panel 51 Chapter 3: Connecting Other External Devices 53 Using external display devices 53 Connecting the display device 54 Directing the display output when you turn on the computer 55 Adjusting the quality of the external display 57 Video...
... adapter 46 Charging the battery 47 Turning on the computer 48 Opening the display panel 48 Turning on the power 49 Setting up your software 50 Registering your computer with Toshiba 50 Setting up other devices 50 Turning off the computer 51 Closing the display panel 51 Chapter 3: Connecting Other External Devices 53 Using external display devices 53 Connecting the display device 54 Directing the display output when you turn on the computer 55 Adjusting the quality of the external display 57 Video...
User Guide
Page 30
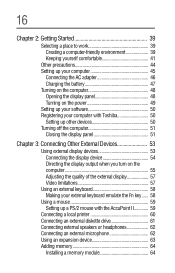
... 63 external devices to 400 mega bits per second (Mbps). Modem port-Lets you connect a serial mouse, serial printer, or other parallel device. You can connect up to this port. For more information, see "Connecting a local printer" on page 78. 30 Finding Your Way Around Finding where everything is located Back with rear panel open RGB (monitor) port Modem port i.LINK port Serial port Parallel port Network port RGB (monitor) port-Lets you connect an external monitor or...
... 63 external devices to 400 mega bits per second (Mbps). Modem port-Lets you connect a serial mouse, serial printer, or other parallel device. You can connect up to this port. For more information, see "Connecting a local printer" on page 78. 30 Finding Your Way Around Finding where everything is located Back with rear panel open RGB (monitor) port Modem port i.LINK port Serial port Parallel port Network port RGB (monitor) port-Lets you connect an external monitor or...

User Guide
Page 54
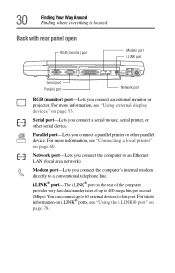
... best video quality, always use a properly shielded cable. To connect a device to the video-out port, you'll need to purchase a composite video cable. If you're connecting an SVGA monitor, skip to the external video device. 54 Connecting Other External Devices Using external display devices Connecting the display device If you're connecting a television or other end of the video cable to the video-out port on the left side of the computer. Connecting to the video-out (composite) port NOTE: Video cables are...
... best video quality, always use a properly shielded cable. To connect a device to the video-out port, you'll need to purchase a composite video cable. If you're connecting an SVGA monitor, skip to the external video device. 54 Connecting Other External Devices Using external display devices Connecting the display device If you're connecting a television or other end of the video cable to the video-out port on the left side of the computer. Connecting to the video-out (composite) port NOTE: Video cables are...
User Guide
Page 64
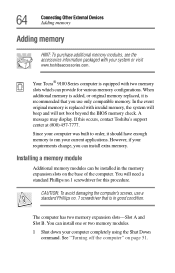
... Tecra® 9100 Series computer is replaced with invalid memory, the system will beep and will need a standard Phillips no . 1 screwdriver that you can install extra memory. However, if your computer completely using the Shut Down command. 64 Connecting Other External Devices Adding memory Adding memory HINT: To purchase additional memory modules, see the accessories information packaged with two memory slots which can provide for this occurs, contact Toshiba's support...
... Tecra® 9100 Series computer is replaced with invalid memory, the system will beep and will need a standard Phillips no . 1 screwdriver that you can install extra memory. However, if your computer completely using the Shut Down command. 64 Connecting Other External Devices Adding memory Adding memory HINT: To purchase additional memory modules, see the accessories information packaged with two memory slots which can provide for this occurs, contact Toshiba's support...
User Guide
Page 65
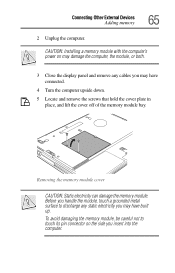
Removing the memory module cover CAUTION: Static electricity can damage the memory module. To avoid damaging the memory module, be careful not to discharge any cables you insert into the computer. Connecting Other External Devices Adding memory 65 2 Unplug the computer. CAUTION: Installing a memory module with the computer's power on the side you may have connected. 4 Turn the computer upside down. 5 Locate and remove the screws that hold the cover plate in place...
Removing the memory module cover CAUTION: Static electricity can damage the memory module. To avoid damaging the memory module, be careful not to discharge any cables you insert into the computer. Connecting Other External Devices Adding memory 65 2 Unplug the computer. CAUTION: Installing a memory module with the computer's power on the side you may have connected. 4 Turn the computer upside down. 5 Locate and remove the screws that hold the cover plate in place...
User Guide
Page 66
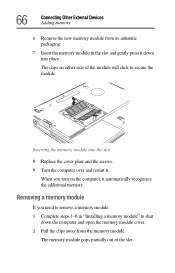
... memory. 66 Connecting Other External Devices Adding memory 6 Remove the new memory module from the memory module. Removing a memory module If you turn on either side of the slot. The clips on the computer, it . The memory module pops partially out of the module will click to shut down the computer and open the memory module cover. 2 Pull the clips away from its antistatic packaging. 7 Insert the memory module in "Installing a memory module" to secure the module. Inserting the memory module...
... memory. 66 Connecting Other External Devices Adding memory 6 Remove the new memory module from the memory module. Removing a memory module If you turn on either side of the slot. The clips on the computer, it . The memory module pops partially out of the module will click to shut down the computer and open the memory module cover. 2 Pull the clips away from its antistatic packaging. 7 Insert the memory module in "Installing a memory module" to secure the module. Inserting the memory module...
User Guide
Page 100
.... 100 Learning the Basics Using your computer at the office By connecting an external monitor, external full-size keyboard, and a mouse, you can work with your notebook as your desk. For more information on connecting these and other components, see "Connecting Other External Devices" on page 53. PORT-Noteworthy® Computer Lock Cable To secure the computer: 1 Loop the cable through or around some part of mind, you...
.... 100 Learning the Basics Using your computer at the office By connecting an external monitor, external full-size keyboard, and a mouse, you can work with your notebook as your desk. For more information on connecting these and other components, see "Connecting Other External Devices" on page 53. PORT-Noteworthy® Computer Lock Cable To secure the computer: 1 Loop the cable through or around some part of mind, you...

User Guide
Page 118
... when the battery alarm sounds WARNING: The computer drains battery power more information, see "Power Saver" on Batteries option. 4 Click the Details... button. 5 Select the Alarms tab and adjust the settings to do when the battery alarm sounds Your Tecra® 9100 Series computer can be configured to warn you of a low battery charge condition so you 're working in the Control Panel. 118 Mobile Computing What to suit your needs. Check...
... when the battery alarm sounds WARNING: The computer drains battery power more information, see "Power Saver" on Batteries option. 4 Click the Details... button. 5 Select the Alarms tab and adjust the settings to do when the battery alarm sounds Your Tecra® 9100 Series computer can be configured to warn you of a low battery charge condition so you 're working in the Control Panel. 118 Mobile Computing What to suit your needs. Check...
User Guide
Page 172
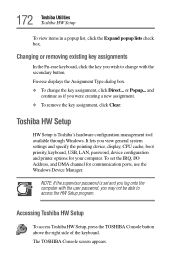
... device, display, CPU cache, boot priority, keyboard, USB, LAN, password, device configuration and printer options for communication ports, use the Windows Device Manager. 172 Toshiba Utilities Toshiba HW Setup To view items in a popup list, click the Expand popup lists check box. Accessing Toshiba HW Setup To access Toshiba HW Setup, press the TOSHIBA Console button above the right side of the keyboard. or Popup... Toshiba HW Setup HW Setup is set the IRQ, I/O Address, and DMA channel for your computer. The TOSHIBA Console screen appears. Changing or removing...
... device, display, CPU cache, boot priority, keyboard, USB, LAN, password, device configuration and printer options for communication ports, use the Windows Device Manager. 172 Toshiba Utilities Toshiba HW Setup To view items in a popup list, click the Expand popup lists check box. Accessing Toshiba HW Setup To access Toshiba HW Setup, press the TOSHIBA Console button above the right side of the keyboard. or Popup... Toshiba HW Setup HW Setup is set the IRQ, I/O Address, and DMA channel for your computer. The TOSHIBA Console screen appears. Changing or removing...
User Guide
Page 186
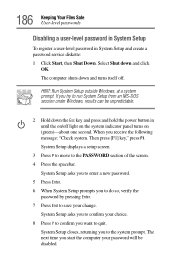
... light on the system indicator panel turns on (green)-about one second. If you start the computer your change. System Setup asks you to run System Setup from an MS-DOS session under Windows, results can be disabled. HINT: Run System Setup outside Windows, at a system prompt. System Setup displays a setup screen. 3 Press P to move to quit. The next time you try to enter a new password. 5 Press Enter. 6 When System Setup...
... light on the system indicator panel turns on (green)-about one second. If you start the computer your change. System Setup asks you to run System Setup from an MS-DOS session under Windows, results can be disabled. HINT: Run System Setup outside Windows, at a system prompt. System Setup displays a setup screen. 3 Press P to move to quit. The next time you try to enter a new password. 5 Press Enter. 6 When System Setup...
User Guide
Page 187
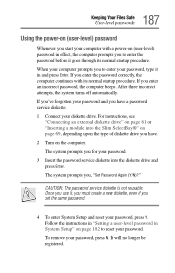
... press Enter. If you set the same password. 4 To enter System Setup and reset your password, press Y. After three incorrect attempts, the system turns off automatically. For instructions, see "Connecting an external diskette drive" on page 61 or "Inserting a module into the diskette drive and press Enter. Once you use it goes through its normal startup procedure. 187 Keeping Your Files Safe User-level passwords Using the power-on (user-level) password Whenever you start...
... press Enter. If you set the same password. 4 To enter System Setup and reset your password, press Y. After three incorrect attempts, the system turns off automatically. For instructions, see "Connecting an external diskette drive" on page 61 or "Inserting a module into the diskette drive and press Enter. Once you use it goes through its normal startup procedure. 187 Keeping Your Files Safe User-level passwords Using the power-on (user-level) password Whenever you start...
User Guide
Page 203
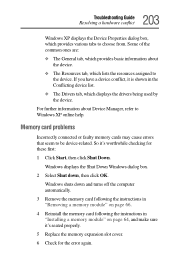
... about Device Manager, refer to the device. Memory card problems Incorrectly connected or faulty memory cards may cause errors that seem to choose from. Windows displays the Shut Down Windows dialog box. 2 Select Shut down and turns off the computer automatically. 3 Remove the memory card following the instructions in "Removing a memory module" on page 66. 4 Reinstall the memory card following the instructions in the Conflicting device list. ❖ The Drivers tab, which displays the drivers being used by the device. If...
... about Device Manager, refer to the device. Memory card problems Incorrectly connected or faulty memory cards may cause errors that seem to choose from. Windows displays the Shut Down Windows dialog box. 2 Select Shut down and turns off the computer automatically. 3 Remove the memory card following the instructions in "Removing a memory module" on page 66. 4 Reinstall the memory card following the instructions in the Conflicting device list. ❖ The Drivers tab, which displays the drivers being used by the device. If...
User Guide
Page 219
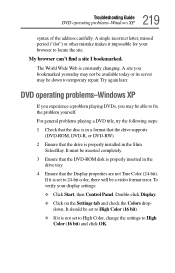
.... 3 Ensure that the DVD-ROM disk is properly inserted in the drive tray. 4 Ensure that the drive is constantly changing. A single incorrect letter, missed period ("dot") or other mistake makes it is set to 24-bit color, there will be down to locate the site. It should be set to High Color, change the settings to fix the problem yourself. 219 Troubleshooting Guide DVD operating problems-Windows XP syntax of...
.... 3 Ensure that the DVD-ROM disk is properly inserted in the drive tray. 4 Ensure that the drive is constantly changing. A single incorrect letter, missed period ("dot") or other mistake makes it is set to 24-bit color, there will be down to locate the site. It should be set to High Color, change the settings to fix the problem yourself. 219 Troubleshooting Guide DVD operating problems-Windows XP syntax of...
User Guide
Page 236
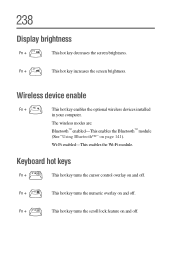
... optional wireless devices installed in your computer. Keyboard hot keys Fn + F10 This hot key turns the cursor control overlay on and off. Wi-Fi enabled-This enables the Wi-Fi module. Fn + F11 This hot key turns the numeric overlay on and off . The wireless modes are: Bluetooth™ enabled-This enables the Bluetooth™ module (See "Using Bluetooth™" on and off . Fn + F12 This hot key turns the scroll lock feature on page 141). Fn + This hot key increases the screen brightness...
... optional wireless devices installed in your computer. Keyboard hot keys Fn + F10 This hot key turns the cursor control overlay on and off. Wi-Fi enabled-This enables the Wi-Fi module. Fn + F11 This hot key turns the numeric overlay on and off . The wireless modes are: Bluetooth™ enabled-This enables the Bluetooth™ module (See "Using Bluetooth™" on and off . Fn + F12 This hot key turns the scroll lock feature on page 141). Fn + This hot key increases the screen brightness...
User Guide
Page 251
... speed. Hibernation-A feature of many Toshiba notebook computers that represents a function, file, or program. K keyboard shortcut-A key or combination of keys that you use to perform a task instead of your work , including all open files and programs, when you turn the computer off . hot swapping-The ability to create a complete screen image. Interlaced monitors take two passes to add or remove devices from a computer while the...
... speed. Hibernation-A feature of many Toshiba notebook computers that represents a function, file, or program. K keyboard shortcut-A key or combination of keys that you use to perform a task instead of your work , including all open files and programs, when you turn the computer off . hot swapping-The ability to create a complete screen image. Interlaced monitors take two passes to add or remove devices from a computer while the...
User Guide
Page 259
... Mode CPU 174 function keys 82 H hard disk drive light 37 Master password 191 261 Index password 180 passwords 191 troubleshooting 210 User password 191 hardware conflicts DMA assignments 201 Interrupt ReQuest (IRQ) channel 201 headphones 62, 132 jack 28 problems 214 Hibernation mode 51, 103, 106 configuring 107 starting again from 108 hot key alarm volume 236 display modes 237 display output settings 55 instant password 188, 233 keyboard 238 keyboard overlays 238 power usage mode 235 Shutdown mode 236 sound 236 hot key power usage mode...
... Mode CPU 174 function keys 82 H hard disk drive light 37 Master password 191 261 Index password 180 passwords 191 troubleshooting 210 User password 191 hardware conflicts DMA assignments 201 Interrupt ReQuest (IRQ) channel 201 headphones 62, 132 jack 28 problems 214 Hibernation mode 51, 103, 106 configuring 107 starting again from 108 hot key alarm volume 236 display modes 237 display output settings 55 instant password 188, 233 keyboard 238 keyboard overlays 238 power usage mode 235 Shutdown mode 236 sound 236 hot key power usage mode...
User Guide
Page 260
... function keys 82 hot keys 238 indicator panel 34, 38 overlays 83 troubleshooting 206 Windows special keys 83 L latch, display 29 LCD display 34 LCD power-saver 51 lighting 43 lights AC power 36 hard disk drive 37 main battery 37 numlock 38 on/off 36 Slim SelectBay battery 37 line-in jack 132 M main battery 37 status 37 Master password 191 memory adding 64 expansion slots 64 memory module 35 removing 67 removing screws 65 microphone external 62 jack 28, 132 problems 214 modem connecting...
... function keys 82 hot keys 238 indicator panel 34, 38 overlays 83 troubleshooting 206 Windows special keys 83 L latch, display 29 LCD display 34 LCD power-saver 51 lighting 43 lights AC power 36 hard disk drive 37 main battery 37 numlock 38 on/off 36 Slim SelectBay battery 37 line-in jack 132 M main battery 37 status 37 Master password 191 memory adding 64 expansion slots 64 memory module 35 removing 67 removing screws 65 microphone external 62 jack 28, 132 problems 214 modem connecting...

User Guide
Page 261
... Index port 30 resetting port to default settings 137 troubleshooting 212 upgrading 137 monitor connecting 54, 55 monitor port 30 mouse installing 59 serial 30, 59 N network accessing 139 Dial-Up Networking Wizard 139 networking wireless 139 numeric overlay 38 numlock light 38 O on/off light 36 optional devices LapLink cable 136 overlay cursor control 38 numeric 38 P parallel port 30 printer 30 password 179 creating 180 deleting a supervisor 189 disabling a user 185 forgetting 182 hard disk drive 180 instant 188 power-on 179 service...
... Index port 30 resetting port to default settings 137 troubleshooting 212 upgrading 137 monitor connecting 54, 55 monitor port 30 mouse installing 59 serial 30, 59 N network accessing 139 Dial-Up Networking Wizard 139 networking wireless 139 numeric overlay 38 numlock light 38 O on/off light 36 optional devices LapLink cable 136 overlay cursor control 38 numeric 38 P parallel port 30 printer 30 password 179 creating 180 deleting a supervisor 189 disabling a user 185 forgetting 182 hard disk drive 180 instant 188 power-on 179 service...
User Guide
Page 262
.../2 mouse/keyboard 29 serial 30 television 32 USB (Universal Serial Bus) 29 video-out, connecting to 54 PORT-Noteworthy® Computer Lock Cable 31 power alarms 118 conserving 124 monitoring 115 options 126 Power Saver settings 176 taking care of your battery 121 universal power supply 239 power button 33, 49, 183, 186 cover 33 power cable connectors 239 power off Shut down command 103 power off guidelines 51 power usage mode hot key 125 power usage modes 124 powering down using...
.../2 mouse/keyboard 29 serial 30 television 32 USB (Universal Serial Bus) 29 video-out, connecting to 54 PORT-Noteworthy® Computer Lock Cable 31 power alarms 118 conserving 124 monitoring 115 options 126 Power Saver settings 176 taking care of your battery 121 universal power supply 239 power button 33, 49, 183, 186 cover 33 power cable connectors 239 power off Shut down command 103 power off guidelines 51 power usage mode hot key 125 power usage modes 124 powering down using...
User Guide
Page 264
... USB (Universal Serial Bus) hot swapping 29 ports 29 User password 191 user password, disabling 185 using a file extension 92 using the AccuPoint II pointing device 85 utilities HW Setup 172 Power Saver 175 V video modes 241 supported 241 video projector adjusting display 57 connecting 54 video window 153 volume control dial 28 W Web sites 228 Web sites, Toshiba 229 Wi-Fi antenna on/off switch 28 wireless networking 139 Windows Explorer 89 Windows Media Player 134 Windows Standby 51 Windows Start menu 88 Windows XP troubleshooting feature 200 Windows...
... USB (Universal Serial Bus) hot swapping 29 ports 29 User password 191 user password, disabling 185 using a file extension 92 using the AccuPoint II pointing device 85 utilities HW Setup 172 Power Saver 175 V video modes 241 supported 241 video projector adjusting display 57 connecting 54 video window 153 volume control dial 28 W Web sites 228 Web sites, Toshiba 229 Wi-Fi antenna on/off switch 28 wireless networking 139 Windows Explorer 89 Windows Media Player 134 Windows Standby 51 Windows Start menu 88 Windows XP troubleshooting feature 200 Windows...


