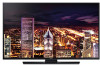
User Manual Ver.1.0 (English)
Page 2
...Using Voice Control Using Motion Control Using the Samsung Smart Control Using Multi-Link Screen Connecting Antenna and External devices Antenna Connection Video Device Connections 9 HDMI Connection 10 Component Connection 11 Composite (A/V) Connection Audio Input and Output Connections 12 HDMI (ARC) Connection 13 Digital Audio (Optical) Connection 14 Audio Output Connection Connecting to a Computer 16 Connecting Through the HDMI Port 17 Connecting With a DVI to HDMI Cable 18 Connecting Through Samsung Link 18 Connecting Through DLNA Using Your Home Network 19 Connecting via Samsung Smart View...
...Using Voice Control Using Motion Control Using the Samsung Smart Control Using Multi-Link Screen Connecting Antenna and External devices Antenna Connection Video Device Connections 9 HDMI Connection 10 Component Connection 11 Composite (A/V) Connection Audio Input and Output Connections 12 HDMI (ARC) Connection 13 Digital Audio (Optical) Connection 14 Audio Output Connection Connecting to a Computer 16 Connecting Through the HDMI Port 17 Connecting With a DVI to HDMI Cable 18 Connecting Through Samsung Link 18 Connecting Through DLNA Using Your Home Network 19 Connecting via Samsung Smart View...
User Manual Ver.1.0 (English)
Page 3
... to a Wireless Internet Network with a Samsung Account 60 Creating a Samsung Account 62 Signing in to a Samsung Account 63 Linking Your Samsung Account to External Service Accounts 64 Changing and Adding Information to the Panel Screen 59 Using the Smart Hub Tutorial 59 Resetting Smart Hub Using Smart Hub with WPS Troubleshooting Internet Connectivity Issues 51 Troubleshooting Wired Internet Connectivity Issues 52 Troubleshooting Wireless Internet Connectivity Issues Checking the Internet Connection Status Smart Features Using Multiple Functions on the Media Content List Screen Using the...
... to a Wireless Internet Network with a Samsung Account 60 Creating a Samsung Account 62 Signing in to a Samsung Account 63 Linking Your Samsung Account to External Service Accounts 64 Changing and Adding Information to the Panel Screen 59 Using the Smart Hub Tutorial 59 Resetting Smart Hub Using Smart Hub with WPS Troubleshooting Internet Connectivity Issues 51 Troubleshooting Wired Internet Connectivity Issues 52 Troubleshooting Wireless Internet Connectivity Issues Checking the Internet Connection Status Smart Features Using Multiple Functions on the Media Content List Screen Using the...
User Manual Ver.1.0 (English)
Page 5
... Sound through Samsung Multiroom Link compatible Speakers 164 Listening to the TV through Bluetooth Headphones 164 Enabling Digital Audio Output 165 Listening to 3D Audio in 3D Mode 165 Resetting All Sound Settings General Setting the Time and Using the Timer 166 Setting the Current Time 168 Using the Timers Using the Screen Burn Protection and Energy Saving Features 170 Preventing Screen Burn 170 Using Energy Saving Features Updating the TV's Software 173 Update now 173 Online 174 Manually, Using a USB Flash...
... Sound through Samsung Multiroom Link compatible Speakers 164 Listening to the TV through Bluetooth Headphones 164 Enabling Digital Audio Output 165 Listening to 3D Audio in 3D Mode 165 Resetting All Sound Settings General Setting the Time and Using the Timer 166 Setting the Current Time 168 Using the Timers Using the Screen Burn Protection and Energy Saving Features 170 Preventing Screen Burn 170 Using Energy Saving Features Updating the TV's Software 173 Update now 173 Online 174 Manually, Using a USB Flash...
User Manual Ver.1.0 (English)
Page 6
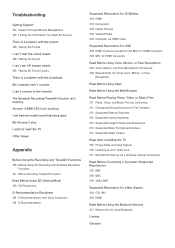
... Formats and Codecs 214 Supported Video Codecs Read After Installing the TV 216 Picture Sizes and Input Signals 216 Installing an Anti-Theft Lock 217 Read Before Setting Up a Wireless Internet Connection Read Before Connecting a Computer (Supported Resolutions) 218 IBM 218 MAC 219 VESA DMT Supported Resolutions for Video Signals 220 CEA-861 220 HDMI Read Before Using the Bluetooth Devices 221 Restrictions for Service There is a problem with the picture 186 Testing the Picture I can't hear the sound...
... Formats and Codecs 214 Supported Video Codecs Read After Installing the TV 216 Picture Sizes and Input Signals 216 Installing an Anti-Theft Lock 217 Read Before Setting Up a Wireless Internet Connection Read Before Connecting a Computer (Supported Resolutions) 218 IBM 218 MAC 219 VESA DMT Supported Resolutions for Video Signals 220 CEA-861 220 HDMI Read Before Using the Bluetooth Devices 221 Restrictions for Service There is a problem with the picture 186 Testing the Picture I can't hear the sound...

User Manual Ver.1.0 (English)
Page 18
... receiver. ARC is only available through one HDMI cable. The connections are listed below. ●● HDMI/ARC (Audio Return Channel) ●● Digital Audio (Optical) ●● Audio (Analog) "" For better audio quality, it to such devices as Smart Hub may vary depending on the model. "" The number of connectors and their names and locations may not be available if the Source is set to HDMI and 3D Auto View is the case, set...
... receiver. ARC is only available through one HDMI cable. The connections are listed below. ●● HDMI/ARC (Audio Return Channel) ●● Digital Audio (Optical) ●● Audio (Analog) "" For better audio quality, it to such devices as Smart Hub may vary depending on the model. "" The number of connectors and their names and locations may not be available if the Source is set to HDMI and 3D Auto View is the case, set...
User Manual Ver.1.0 (English)
Page 43
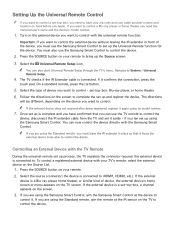
...-box, a channel appears on the screen. 333 If you are using the Standard remote, aim the remote at the device to control it confirms the connection, press the touch pad. If it . Setting Up the Universal Remote Control "" If you want to control a set-top-box, you need the manufacturer's name and the device's model number. 111 Turn on the external device you want to control with your TV's remote, select the external...
...-box, a channel appears on the screen. 333 If you are using the Standard remote, aim the remote at the device to control it confirms the connection, press the touch pad. If it . Setting Up the Universal Remote Control "" If you want to control a set-top-box, you need the manufacturer's name and the device's model number. 111 Turn on the external device you want to control with your TV's remote, select the external...
User Manual Ver.1.0 (English)
Page 55
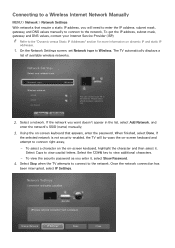
... to the network. Network Settings Connection verification cancelled. Network type Wireless Wireless network AP0000 AP0001 Add Network You can connect your TV to view additional characters. -- If the selected network is stopped. To select a character on the on -screen keyboard and attempt to connect right away. -- Connecting to a Wireless Internet Network Manually MENU > Network > Network Settings With networks that appears, enter the password. "" Refer to the network. The TV automatically displays a list of available wireless networks. Change Network IP Settings Retry Close...
... to the network. Network Settings Connection verification cancelled. Network type Wireless Wireless network AP0000 AP0001 Add Network You can connect your TV to view additional characters. -- If the selected network is stopped. To select a character on the on -screen keyboard and attempt to connect right away. -- Connecting to a Wireless Internet Network Manually MENU > Network > Network Settings With networks that appears, enter the password. "" Refer to the network. The TV automatically displays a list of available wireless networks. Change Network IP Settings Retry Close...

User Manual Ver.1.0 (English)
Page 60
... remote, press the KEYPAD button and then select M.SCREEN to launch Multi-Link Screen. Using Multi-Link Screen requires an Internet connection. Launching Multi-Link Screen On the Samsung Smart Control, press the M.SCREEN button to launch Multi-Link Screen. Changing the Channel/Volume 111 Place the pointer or focus over the screen on your country. "" (For other countries) If you want to change the channel or adjust the volume. 222 Use the channel buttons...
... remote, press the KEYPAD button and then select M.SCREEN to launch Multi-Link Screen. Using Multi-Link Screen requires an Internet connection. Launching Multi-Link Screen On the Samsung Smart Control, press the M.SCREEN button to launch Multi-Link Screen. Changing the Channel/Volume 111 Place the pointer or focus over the screen on your country. "" (For other countries) If you want to change the channel or adjust the volume. 222 Use the channel buttons...
User Manual Ver.1.0 (English)
Page 86
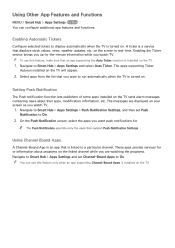
... some apps installed on the screen in real-time. The messages are watching the programs. Navigate to Smart Hub > Apps Settings and set Push Notification to display automatically when the TV is turned on the TV will appear. 222 Select apps from the list that is linked to Smart Hub > Apps Settings and select Auto Ticker. A Channel-Bound App is turned on the...
... some apps installed on the screen in real-time. The messages are watching the programs. Navigate to Smart Hub > Apps Settings and set Push Notification to display automatically when the TV is turned on the TV will appear. 222 Select apps from the list that is linked to Smart Hub > Apps Settings and select Auto Ticker. A Channel-Bound App is turned on the...

User Manual Ver.1.0 (English)
Page 101
...-track sound. Set the repeat mode. Encoding: If the subtitles are not working, you can use the ¡ and £ buttons to scan through . Repeat All repeats all videos contained in the same folder. The supported video sizes are determined by the video content. Change the picture size. Change the Picture Mode setting. Change the Sound Mode setting. Choose the speakers to that point in 10-second intervals or enter a specific time value to jump to play time...
...-track sound. Set the repeat mode. Encoding: If the subtitles are not working, you can use the ¡ and £ buttons to scan through . Repeat All repeats all videos contained in the same folder. The supported video sizes are determined by the video content. Change the picture size. Change the Picture Mode setting. Change the Sound Mode setting. Choose the speakers to that point in 10-second intervals or enter a specific time value to jump to play time...

User Manual Ver.1.0 (English)
Page 151
... > Accessibility > Video Description. "" Playing a game or using Smart Hub or the 3D function. Availability depends on the main screen. Choose a broadcast. Select Picture > PIP to work, the main screen's source must be Component or HDMI and the input resolution must be less Full HD (FHD - 1080p). The PIP sub-screen supports digital channels only. Enabling the Audio Guide for the visually impaired. "" Turning off . "" For PIP to display the PIP settings screen. PIP Broadcast Viewing MENU > Picture > PIP Try Now Use the PIP ("Picture-In-Picture") function...
... > Accessibility > Video Description. "" Playing a game or using Smart Hub or the 3D function. Availability depends on the main screen. Choose a broadcast. Select Picture > PIP to work, the main screen's source must be Component or HDMI and the input resolution must be less Full HD (FHD - 1080p). The PIP sub-screen supports digital channels only. Enabling the Audio Guide for the visually impaired. "" Turning off . "" For PIP to display the PIP settings screen. PIP Broadcast Viewing MENU > Picture > PIP Try Now Use the PIP ("Picture-In-Picture") function...

User Manual Ver.1.0 (English)
Page 156
... input only, select Current Source. To apply the setting to all external devices connected to the TV or to the current source only. To apply the setting to achieve the optimal contrast setting. ●● Black Tone Try Now Adjusts the black color depth. ●● Flesh Tone Try Now Darkens or lightens skin tones. ●● RGB Only Mode Try Now Adjusts the red, green...
... input only, select Current Source. To apply the setting to all external devices connected to the TV or to the current source only. To apply the setting to achieve the optimal contrast setting. ●● Black Tone Try Now Adjusts the black color depth. ●● Flesh Tone Try Now Darkens or lightens skin tones. ●● RGB Only Mode Try Now Adjusts the red, green...

User Manual Ver.1.0 (English)
Page 159
... is On at 60Hz video signal, the screen may not operate properly. If this mode for movies. "" The HDMI connector with HDMI UHD Color set the selected HDMI connector to the HDMI connector. 555 When the settings are watching a TV broadcast or when the input signal is not connected to HDMI UHD Color. Select OK. 666 Connect the TV to the external UHD player using the HDMI cable, and then turn on , and then...
... is On at 60Hz video signal, the screen may not operate properly. If this mode for movies. "" The HDMI connector with HDMI UHD Color set the selected HDMI connector to the HDMI connector. 555 When the settings are watching a TV broadcast or when the input signal is not connected to HDMI UHD Color. Select OK. 666 Connect the TV to the external UHD player using the HDMI cable, and then turn on , and then...

User Manual Ver.1.0 (English)
Page 165
... a digital channel, the screen position cannot be changed. 111 To adjust the screen's position, select Picture > Picture Size > Position. "" The Picture Size option is not available for images displayed in the 3840 x 2160p resolution because the 3840 x 2160p screen size is fixed and cannot be adjusted if the Picture Size is tuned to reset the screen position. Adjusting the Screen Position Try Now MENU > Picture > Picture Size > Position Adjusts the screen position. To turn the screen back on, press any button other Picture Modes.
... a digital channel, the screen position cannot be changed. 111 To adjust the screen's position, select Picture > Picture Size > Position. "" The Picture Size option is not available for images displayed in the 3840 x 2160p resolution because the 3840 x 2160p screen size is fixed and cannot be adjusted if the Picture Size is tuned to reset the screen position. Adjusting the Screen Position Try Now MENU > Picture > Picture Size > Position Adjusts the screen position. To turn the screen back on, press any button other Picture Modes.

User Manual Ver.1.0 (English)
Page 172
... downloads the correct time from a digital channel. To enable this option, the TV's Antenna jack must be reset every time the power is set the time manually. To view the time after the clock is disconnected. Setting the Clock using HDMI or Component connections, you must be connected to Auto. If your TV is connected to a set-top-box or satellite box using Digital Broadcast Info MENU > System > Time > Clock > Clock Mode Try Now Set Clock Mode to either an antenna or a cable output...
... downloads the correct time from a digital channel. To enable this option, the TV's Antenna jack must be reset every time the power is set the time manually. To view the time after the clock is disconnected. Setting the Clock using HDMI or Component connections, you must be connected to Auto. If your TV is connected to a set-top-box or satellite box using Digital Broadcast Info MENU > System > Time > Clock > Clock Mode Try Now Set Clock Mode to either an antenna or a cable output...

User Manual Ver.1.0 (English)
Page 176
... on the screen for four hours without any user input, the TV will automatically turn off the power to reduce power consumption. ●● Auto Power Off Try Now If the TV remains on the screen for a long period of time. Backlight or Min Cell Light (in after -images. Changing the Backlight or Min Cell Light setting (in applicable models) while Eco Sensor is received for the...
... on the screen for four hours without any user input, the TV will automatically turn off the power to reduce power consumption. ●● Auto Power Off Try Now If the TV remains on the screen for a long period of time. Backlight or Min Cell Light (in after -images. Changing the Backlight or Min Cell Light setting (in applicable models) while Eco Sensor is received for the...

User Manual Ver.1.0 (English)
Page 189
... to the factory defaults. 111 Select Support > Self Diagnosis > Reset. "" For all TV settings (excluding the Internet and network settings) to the user manual that came with the TV. All settings are disabled and the TV automatically resets itself after a certain amount of time. Using the TV as a Display Model (exclusively for use in retail environments only. This turns the TV into a display model for retail stores) MENU > Support > Use Mode Try Now Select Support > Use Mode > Store Demo.
... to the factory defaults. 111 Select Support > Self Diagnosis > Reset. "" For all TV settings (excluding the Internet and network settings) to the user manual that came with the TV. All settings are disabled and the TV automatically resets itself after a certain amount of time. Using the TV as a Display Model (exclusively for use in retail environments only. This turns the TV into a display model for retail stores) MENU > Support > Use Mode Try Now Select Support > Use Mode > Store Demo.

User Manual Ver.1.0 (English)
Page 193
...;● Air/Cable Antenna Connection: Try HD channels after running the Auto Program function. Use HDMI or Component cables to 1080i or 720p. Look for a channel that the remote control is firmly connected. Try resetting the picture. (Picture > Picture Reset) There is turned on, the remote control receiver flashes 5 times before calling the service department. Change the cable/satellite box resolution. Adjust the cable/satellite box's video output resolution to deliver HD (high definition) picture quality. The compression of the screen. The color is not an issue with the TV...
...;● Air/Cable Antenna Connection: Try HD channels after running the Auto Program function. Use HDMI or Component cables to 1080i or 720p. Look for a channel that the remote control is firmly connected. Try resetting the picture. (Picture > Picture Reset) There is turned on, the remote control receiver flashes 5 times before calling the service department. Change the cable/satellite box resolution. Adjust the cable/satellite box's video output resolution to deliver HD (high definition) picture quality. The compression of the screen. The color is not an issue with the TV...

User Manual Ver.1.0 (English)
Page 194
... device's power cable. Run Sound Test (Support > Self Diagnosis > Sound Test). Try this case, navigate Picture > Picture Options > HDMI UHD Color menu, and then set to TV Speaker, and then listen to the speakers again. Check the volume control of problems and solutions below, make sure there is no sound. The speakers are using an HDMI cable.) To listen to the computer sound, connect the external speaker to the computer' s audio output connector. In HDMI mode, an audio is intermittently...
... device's power cable. Run Sound Test (Support > Self Diagnosis > Sound Test). Try this case, navigate Picture > Picture Options > HDMI UHD Color menu, and then set to TV Speaker, and then listen to the speakers again. Check the volume control of problems and solutions below, make sure there is no sound. The speakers are using an HDMI cable.) To listen to the computer sound, connect the external speaker to the computer' s audio output connector. In HDMI mode, an audio is intermittently...

User Manual Ver.1.0 (English)
Page 196
... > Setup) or Auto Program (Broadcasting > Auto Program). A weak signal can 't connect to the Internet. Set your PC's output resolution so it matches a resolution supported by turning it off, waiting for 15 seconds, and then turning it is securely connected to Caption (System > Accessibility > Caption) and change the Caption Mode. The Problem The wireless network connection failed. If your wireless modem/router is required. Go to the TV. ●● If you are using an HDMI connection, check the audio output setting on your wireless...
... > Setup) or Auto Program (Broadcasting > Auto Program). A weak signal can 't connect to the Internet. Set your PC's output resolution so it matches a resolution supported by turning it off, waiting for 15 seconds, and then turning it is securely connected to Caption (System > Accessibility > Caption) and change the Caption Mode. The Problem The wireless network connection failed. If your wireless modem/router is required. Go to the TV. ●● If you are using an HDMI connection, check the audio output setting on your wireless...


