
General Settings Guide
Page 19
Goes off when 10 BASE-T is in operation. Note ❒ For details about installing the printer driver, see "Preparing the Machine", Printer Reference. Reference "Turning On the Power" About This Machine "Preparing the Machine", Printer Reference 9 B Indicator (yellow) Lights up green when the machine is connected correctly to the Interfaces 1 AME005S A Indicator (green) Lights up yellow when 100 BASE-TX is in operation. E Turn on the main power switch of the machine. Connecting to the network.
Goes off when 10 BASE-T is in operation. Note ❒ For details about installing the printer driver, see "Preparing the Machine", Printer Reference. Reference "Turning On the Power" About This Machine "Preparing the Machine", Printer Reference 9 B Indicator (yellow) Lights up green when the machine is connected correctly to the Interfaces 1 AME005S A Indicator (green) Lights up yellow when 100 BASE-TX is in operation. E Turn on the main power switch of the machine. Connecting to the network.

General Settings Guide
Page 20
... cable for the machine and your computer. ❒ The USB 2.0 interface board is supported. ❒ For details about installing the printer driver, see "Preparing the Machine", Printer Reference. When used with Windows Me, only a speed equal to that of USB 2.0 is supported by Windows Me / 2000 / XP...is possible. • For Mac OS: To use Macintosh, the machine must be equipped with a USB interface cable. Reference "Preparing the Machine", Printer Reference 10 A Connect the USB 2.0 interface cable to the USB port on the host computer. Note ❒ This machine does not come with...
... cable for the machine and your computer. ❒ The USB 2.0 interface board is supported. ❒ For details about installing the printer driver, see "Preparing the Machine", Printer Reference. When used with Windows Me, only a speed equal to that of USB 2.0 is supported by Windows Me / 2000 / XP...is possible. • For Mac OS: To use Macintosh, the machine must be equipped with a USB interface cable. Reference "Preparing the Machine", Printer Reference 10 A Connect the USB 2.0 interface cable to the USB port on the host computer. Note ❒ This machine does not come with...

General Settings Guide
Page 21
B Turn off . When using Windows 95/98/Me/2000/XP and Windows Server 2003, a printer driver installation screen might appear when the computer is turned on the machine is on, turn it off the main power switch of the host computer. ... 1284 port. E Turn on the host computer. Reference "Turning On the Power" About This Machine "Preparing the Machine", Printer Reference 11 Note ❒ For details about installing the printer driver, see "Preparing the Machine", Printer Reference. F Turn on the screen. Connect the cable firmly. If this happens, click [Cancel] on the host computer...
B Turn off . When using Windows 95/98/Me/2000/XP and Windows Server 2003, a printer driver installation screen might appear when the computer is turned on the machine is on, turn it off the main power switch of the host computer. ... 1284 port. E Turn on the host computer. Reference "Turning On the Power" About This Machine "Preparing the Machine", Printer Reference 11 Note ❒ For details about installing the printer driver, see "Preparing the Machine", Printer Reference. F Turn on the screen. Connect the cable firmly. If this happens, click [Cancel] on the host computer...

General Settings Guide
Page 62
... level for the select signal of the parallel interface. When set to [Off], bidirectional communication function will be disabled, and the printer driver will not be dealt with the IEEE 1284 interface board. ❖ Parallel Timing 2 Sets the timing for the parallel interface. ...under Interface Settings. [Parallel Interface] is displayed when this machine is ACK outside. ❖ Parallel Comm. Sets the printer's response mode to a status acquisition request when using a parallel interface. Reference p.4 "Accessing User Tools" 52 The default setting is installed with ....
... level for the select signal of the parallel interface. When set to [Off], bidirectional communication function will be disabled, and the printer driver will not be dealt with the IEEE 1284 interface board. ❖ Parallel Timing 2 Sets the timing for the parallel interface. ...under Interface Settings. [Parallel Interface] is displayed when this machine is ACK outside. ❖ Parallel Comm. Sets the printer's response mode to a status acquisition request when using a parallel interface. Reference p.4 "Accessing User Tools" 52 The default setting is installed with ....

General Settings Guide
Page 71
When using the printer driver. Using the Printer PC Control function, you can limit the available functions (Copier / Printer / Others: Fax/Scanner) and supervise their use. Auth. For details about this function, consult your administrator. • Basic Auth. •...❖ Admin. Administrator Tools ❖ Disp./Print User Counter Allows you to view and print the numbers of prints. • Copier Counter 2 • Printer Counter • Facsimile Print • Fax TX Page Counter • Scanner Send Counter: F.Clr • Scanner Send Counter: B&W • Print •...
When using the printer driver. Using the Printer PC Control function, you can limit the available functions (Copier / Printer / Others: Fax/Scanner) and supervise their use. Auth. For details about this function, consult your administrator. • Basic Auth. •...❖ Admin. Administrator Tools ❖ Disp./Print User Counter Allows you to view and print the numbers of prints. • Copier Counter 2 • Printer Counter • Facsimile Print • Fax TX Page Counter • Scanner Send Counter: F.Clr • Scanner Send Counter: B&W • Print •...

General Settings Guide
Page 143
... This function reduces printing speed. ❖ Bypass Tray Priority Specify whether (Printer) Driver / Command or Machine Settings, has priority for determining the paper size for the bypass tray. The default setting is Driver/Command. ❖ Edge to Edge Print Specify whether to print on the... paper as fully as expected when printing onto letterhead or preprinted paper requiring orientation. The default setting is Off. ❖ Printer Language Specify the printer language. If Toner ...
... This function reduces printing speed. ❖ Bypass Tray Priority Specify whether (Printer) Driver / Command or Machine Settings, has priority for determining the paper size for the bypass tray. The default setting is Driver/Command. ❖ Edge to Edge Print Specify whether to print on the... paper as fully as expected when printing onto letterhead or preprinted paper requiring orientation. The default setting is Off. ❖ Printer Language Specify the printer language. If Toner ...

General Settings Guide
Page 148
...dots per inch. When operating the machine with a parallel connection, and also if the binary data is sent from the printer driver, the print job is canceled under Printer Features. The default setting is 600 dpi. The default setting is TBCP. Reference p.4 "Accessing User Tools" 138 When ... are shown in the PS Menu under the following conditions; 5 • The printer driver data format is TBCP, and the data format selected on the display panel is Binary Data. • The printer driver data format is binary, and the data format selected on the display panel is not...
...dots per inch. When operating the machine with a parallel connection, and also if the binary data is sent from the printer driver, the print job is canceled under Printer Features. The default setting is 600 dpi. The default setting is TBCP. Reference p.4 "Accessing User Tools" 138 When ... are shown in the PS Menu under the following conditions; 5 • The printer driver data format is TBCP, and the data format selected on the display panel is Binary Data. • The printer driver data format is binary, and the data format selected on the display panel is not...

General Settings Guide
Page 168
... number of copies scanned using the scanner function is counted for each user's usage. ❒ To automatically register the printer driver user code, select [Auto Program] for the printer in User Tools for the printer driver. 7 ❒ For details about setting user codes for authenticating a user code. A Select [System Settings] using {U} or {T}, and ... using {U} or {T}, and then press the {OK} key. Registering Addresses and Users for Facsimile/Scanner Functions Authentication Information Following describes the procedure for the printer driver, see Printer Driver Help.
... number of copies scanned using the scanner function is counted for each user's usage. ❒ To automatically register the printer driver user code, select [Auto Program] for the printer in User Tools for the printer driver. 7 ❒ For details about setting user codes for authenticating a user code. A Select [System Settings] using {U} or {T}, and ... using {U} or {T}, and then press the {OK} key. Registering Addresses and Users for Facsimile/Scanner Functions Authentication Information Following describes the procedure for the printer driver, see Printer Driver Help.

Operating Instructions
Page 1
For safe and correct use this manual carefully before you use , be sure to read the Safety Information in "About This Machine" before using the machine. Operating Instructions Printer Reference 1 Preparing the Machine 2 Setting Up the Printer Driver 3 Other Print Operations 4 The Functions and Settings of the Machine 5 Appendix Read this machine and keep it handy for future reference.
For safe and correct use this manual carefully before you use , be sure to read the Safety Information in "About This Machine" before using the machine. Operating Instructions Printer Reference 1 Preparing the Machine 2 Setting Up the Printer Driver 3 Other Print Operations 4 The Functions and Settings of the Machine 5 Appendix Read this machine and keep it handy for future reference.
Operating Instructions
Page 5
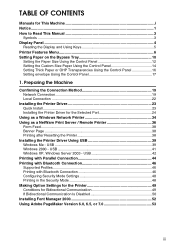
...Connection 46 Configuring Security Mode Settings 48 Printing in the Security Mode 48 Making Option Settings for the Printer 49 Conditions for This Machine i Notice ...1 How to Read This Manual 3 Symbols ...3 Display Panel...4 Reading the Display and Using... ...22 Installing the Printer Driver 23 Quick Install...23 Installing the Printer Driver for the Selected Port 24 Using as a Windows Network Printer 34 Using as a NetWare Print Server / Remote Printer 36 Form Feed...38 Banner Page ...38 Printing after Resetting the Printer 38 Installing the Printer Driver Using USB 39 Windows...
...Connection 46 Configuring Security Mode Settings 48 Printing in the Security Mode 48 Making Option Settings for the Printer 49 Conditions for This Machine i Notice ...1 How to Read This Manual 3 Symbols ...3 Display Panel...4 Reading the Display and Using... ...22 Installing the Printer Driver 23 Quick Install...23 Installing the Printer Driver for the Selected Port 24 Using as a Windows Network Printer 34 Using as a NetWare Print Server / Remote Printer 36 Form Feed...38 Banner Page ...38 Printing after Resetting the Printer 38 Installing the Printer Driver Using USB 39 Windows...

Operating Instructions
Page 6
... 95 / 98 / Me - Accessing the Printer Properties 62 Windows 2000 - Setting Up the Printer Driver PCL - Accessing the Printer Properties 58 Windows NT 4.0 - Accessing the Printer Properties 64 Windows XP, Windows Server 2003 - Accessing the Printer Properties 66 Windows NT 4.0 - 2. Accessing the Printer Properties 56 Windows XP, Windows Server 2003 - Accessing the Printer Properties 59 RPCS - Canceling a Print...
... 95 / 98 / Me - Accessing the Printer Properties 62 Windows 2000 - Setting Up the Printer Driver PCL - Accessing the Printer Properties 58 Windows NT 4.0 - Accessing the Printer Properties 64 Windows XP, Windows Server 2003 - Accessing the Printer Properties 66 Windows NT 4.0 - 2. Accessing the Printer Properties 56 Windows XP, Windows Server 2003 - Accessing the Printer Properties 59 RPCS - Canceling a Print...

Operating Instructions
Page 13
...You can select to enable Toner Saving. • On (Default) • Off You can specify the printer language. This setting is disabled if the number of the two options, (Printer) Driver / Command or Machine Settings, has priority for determining the paper size for the bypass tray. Set this ...print sets. Tray Switching RAM Disk Description You can select whether or not to print has been specified with the printer driver or another command. You can set to Edge Print Default Printer Lang. Set this to enable Edge Smoothing. • On (Default) • Off Note ❒ If...
...You can select to enable Toner Saving. • On (Default) • Off You can specify the printer language. This setting is disabled if the number of the two options, (Printer) Driver / Command or Machine Settings, has priority for determining the paper size for the bypass tray. Set this ...print sets. Tray Switching RAM Disk Description You can select whether or not to print has been specified with the printer driver or another command. You can set to Edge Print Default Printer Lang. Set this to enable Edge Smoothing. • On (Default) • Off Note ❒ If...

Operating Instructions
Page 16
...This section gives instructions for setting paper on the bypass tray. The paper size set using the printer driver has priority over the one set the paper size using the printer function, original images are always rotated by 180 degrees (the orientation of images to be printed... from the bypass tray: • Duplex printing • Auto Tray Select • Auto Tray Switching ❒ When printing using the printer driver when printing data from the bypass tray. ARL009S 10 When printing onto paper with specific orientation requirements, such as envelopes and letterheads, be ...
...This section gives instructions for setting paper on the bypass tray. The paper size set using the printer driver has priority over the one set the paper size using the printer function, original images are always rotated by 180 degrees (the orientation of images to be printed... from the bypass tray: • Duplex printing • Auto Tray Select • Auto Tray Switching ❒ When printing using the printer driver when printing data from the bypass tray. ARL009S 10 When printing onto paper with specific orientation requirements, such as envelopes and letterheads, be ...

Operating Instructions
Page 17
... to support paper sizes larger than A4 L, 81/2 ×11 L. • If the paper guides are properly positioned. ASP003S D Set the paper size using the printer driver or the control panel. 11 C Push down into the bypass tray. Extender 2.
... to support paper sizes larger than A4 L, 81/2 ×11 L. • If the paper guides are properly positioned. ASP003S D Set the paper size using the printer driver or the control panel. 11 C Push down into the bypass tray. Extender 2.

Operating Instructions
Page 18
...mm (3.55 - 8.5 in.) • Horizontal: 139 - 600 mm (5.48 - 23.62 in.) ❒ Be sure to set the paper with the side you select the printer driver to set paper size of sheets that can be loaded in the bypass tray depends on the paper type. ❒ When loading OHP transparencies or... its orientation. If you want to print facing down in the bypass tray. ❒ The number of the bypass tray using the control panel or printer driver. Select paper type when printing onto OHP transparencies or thick paper (over 90.2 g/m2, 24 lb.). For details, see p.14 "Setting the Custom Size ...
...mm (3.55 - 8.5 in.) • Horizontal: 139 - 600 mm (5.48 - 23.62 in.) ❒ Be sure to set the paper with the side you select the printer driver to set paper size of sheets that can be loaded in the bypass tray depends on the paper type. ❒ When loading OHP transparencies or... its orientation. If you want to print facing down in the bypass tray. ❒ The number of the bypass tray using the control panel or printer driver. Select paper type when printing onto OHP transparencies or thick paper (over 90.2 g/m2, 24 lb.). For details, see p.14 "Setting the Custom Size ...

Operating Instructions
Page 19
... Control Panel". C Select [Tray Paper Settings] using {T} or {U}, and then press the {OK} key. D Select [Printer Bypass Paper Size] using {T} or {U}, and then press the {OK} key. Reference See the printer driver Help about the settings from the printer drivers. Select paper type when printing onto OHP transparencies or thick paper. Select paper type when...
... Control Panel". C Select [Tray Paper Settings] using {T} or {U}, and then press the {OK} key. D Select [Printer Bypass Paper Size] using {T} or {U}, and then press the {OK} key. Reference See the printer driver Help about the settings from the printer drivers. Select paper type when printing onto OHP transparencies or thick paper. Select paper type when...

Operating Instructions
Page 20
... Paper Size] using {T} or {U}, and then press the {OK} key. Important ❒ Custom size settings set using the printer driver have priority over those set the paper size using {T} or {U}, and then press the {OK} key. ASP004S B Select [System Settings] using {T} or {U}, and then press ...the {OK} key. 14 Setting the Custom Size Paper Using the Control Panel The following procedures are not required if you select the printer driver for the settings. C Select [Tray Paper Settings] using the printer driver. A Press the {User Tools/Counter} key.
... Paper Size] using {T} or {U}, and then press the {OK} key. Important ❒ Custom size settings set using the printer driver have priority over those set the paper size using {T} or {U}, and then press the {OK} key. ASP004S B Select [System Settings] using {T} or {U}, and then press ...the {OK} key. 14 Setting the Custom Size Paper Using the Control Panel The following procedures are not required if you select the printer driver for the settings. C Select [Tray Paper Settings] using the printer driver. A Press the {User Tools/Counter} key.

Operating Instructions
Page 21
... not used, select [Machine Settings] from [Bypass Tray Priority] in [System] of [Printer Features] (see the printer driver Help. 15 Available size: 90 - 216 mm (3.55 - 8.5 in .) G Enter the vertical size of the paper using the control panel. Set paper size ...{q}. Available size: 139 - 600 mm (5.48 - 23.62 in .) H Press the {User Tools/Counter} key to return to the default screen. Reference For printer driver settings, see "Printer Features", General Settings Guide). F Enter the horizontal size of the paper using the scroll keys, and then press the {OK} key. E Select [Custom Size...
... not used, select [Machine Settings] from [Bypass Tray Priority] in [System] of [Printer Features] (see the printer driver Help. 15 Available size: 90 - 216 mm (3.55 - 8.5 in .) G Enter the vertical size of the paper using the control panel. Set paper size ...{q}. Available size: 139 - 600 mm (5.48 - 23.62 in .) H Press the {User Tools/Counter} key to return to the default screen. Reference For printer driver settings, see "Printer Features", General Settings Guide). F Enter the horizontal size of the paper using the scroll keys, and then press the {OK} key. E Select [Custom Size...

Operating Instructions
Page 22
ing the machine's control panel. ❒ When the printer driver is not used, make settings using {T} or {U}, and then press the {OK} key. C Select [Tray Paper Settings] using the control panel. In that case, set ... {U}, and then press the {OK} key. A Press the {User Tools/Counter} key. Important ❒ Paper size settings set using the printer driver have priority over those set the paper size using the printer driver. ASP004S B Select [System Settings] using {T} or {U}, and then press the {OK} key. 16 Setting Thick Paper or OHP Transparencies Using...
ing the machine's control panel. ❒ When the printer driver is not used, make settings using {T} or {U}, and then press the {OK} key. C Select [Tray Paper Settings] using the control panel. In that case, set ... {U}, and then press the {OK} key. A Press the {User Tools/Counter} key. Important ❒ Paper size settings set using the printer driver have priority over those set the paper size using the printer driver. ASP004S B Select [System Settings] using {T} or {U}, and then press the {OK} key. 16 Setting Thick Paper or OHP Transparencies Using...

Operating Instructions
Page 23
After print- Reference For the printer driver settings, see p.17 "Setting envelope Using the Control Panel". Setting envelope Using the Control Panel A Press the {User Tools/Counter} key. C Select [Tray Paper Settings] ... next user. D Select [Paper Type:Bypass Tray] using the {U} or {T} key, and then press the {OK} key. For details about printing onto envelopes, see the printer driver Help. B Select [System Settings] using the {U} or {T} key, and then press the {OK} key. 17 Note ❒ The settings made will remain valid until they...
After print- Reference For the printer driver settings, see p.17 "Setting envelope Using the Control Panel". Setting envelope Using the Control Panel A Press the {User Tools/Counter} key. C Select [Tray Paper Settings] ... next user. D Select [Paper Type:Bypass Tray] using the {U} or {T} key, and then press the {OK} key. For details about printing onto envelopes, see the printer driver Help. B Select [System Settings] using the {U} or {T} key, and then press the {OK} key. 17 Note ❒ The settings made will remain valid until they...


