Ricoh Aficio MP C2551 Support and Manuals

Get Help and Manuals for this Ricoh item

View All Support Options Below
Free Ricoh Aficio MP C2551 manuals!
Problems with Ricoh Aficio MP C2551?

Ask a Question

Most Recent Ricoh Aficio MP C2551 Questions

Changing The Control Panel Language Ricoh C2051
I have a Ricoh MP C2051 and it's just in french and doutch language and I want to put it in English ...
(Posted by kellygcybercafe 1 year ago)
What Is The Default Ricoh Admin Password
what is the default Ricoh admin password
(Posted by njmarch 2 years ago)
Ricoh Mp C2251
Where is the waste toner bottle located on the Ricoh MP C2251
(Posted by genestiek 9 years ago)

Ricoh Aficio MP C2551 Videos

Ricoh Aficio MP C2551
Duration: :57
Total Views: 177

Popular Ricoh Aficio MP C2551 Manual Pages

Quick Use Guide - Page 3

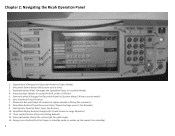
... 2: Navigating the Ricoh Operation Panel 1. Facsimile button (Fax) (Changes the Operation Panel to Copier Mode) 2. Clear modes button (Clears all setting default) 12. User Interface (Touch Screen) 7. Copy button (Changes the Operation Panel to Facsimile Mode) 4. Document Server button (Not active at this time) 3. Scanner button (Changes the Operation Panel to Scanner Mode / Allows...
Quick Use Guide - Page 5

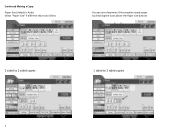
Continued Making a Copy: Paper Size (default is Auto) Select "Paper Size" if different than Auto Select You can also determine if the machine needs paper by checking the icons above the Paper size buttons 2 sided to 2 sided copies 1 sided to 2 sided copies 5
Quick Use Guide - Page 8

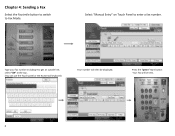
Select "Manual Entry" on Touch Panel to Fax Mode. Press the "green" Start button Your Fax will then be Sent. 8 Chapter 4: Sending a Fax Select the Facsimile button to switch to enter a fax number. Type your fax number including 9 to get an outside line, select "OK" at the top . (You can use the Touch panel or the Numerical keyboard) Your number will be displayed.
Quick Use Guide - Page 11

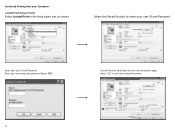
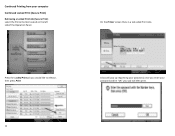
Continued Printing from your Computer Locked Print (Secure Print) Select Locked Print in the drop down box as shown Select the Details button to enter your user ID and Password Enter your user ID and Password Enter your user name and password Select "OK" You will then be taken back to print you locked document. 11 Select "OK" to your main properties page.
Quick Use Guide - Page 12

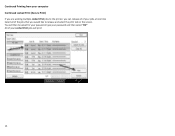
... press Print 12 A box will then print. On the Printer screen there is a tab called Print Jobs Press the Locked Print job you enter your password and hit "OK" your computer Continued Locked Print (Secure Print) Retrieving a Locked Print Job (Secure Print) select the Printer button located on the left sideof...
Quick Use Guide - Page 13

You will then be asked for your password, type your password and then select "OK" All of your jobs at one time Select all of the jobs that you would like to release and select the ...
Quick Use Guide - Page 14

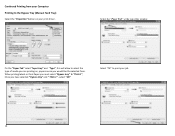
... selected from your Computer Printing to print your print driver. Select the "Paper Tab" at the top of the window On the "Paper Tab" select "Input tray" and... "Type", this will allow to select the type of media you are printing on, paper source you have selected " Bypass tray" and " Thick 1" , select "OK" Select "OK" to the Bypass Tray (Manual...
Quick Use Guide - Page 15

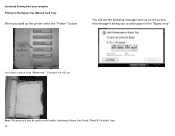
Continued Printing from your computer Printing to the Bypass Tray (Manual Feed Tray) When you walk up the printer select the "Printer" button You will see the following message come up on the screen, this message ...
Quick Use Guide - Page 16

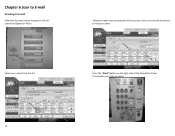
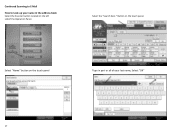
Select the letter that corresponds with your last name, next use the arrow key to email. 16 Chapter 6 Scan to E‐mail Scanning to E‐mail Select the Scanner button located on the right side of the Operations Panel To complete your scan to find your name Select your name from the list Press the "Start" Button on the left sideof the Operation Panel.
Quick Use Guide - Page 17

Button on the touch panel Type in the address book Select the Scanner button located on the left sideof the Operation Panel. Select "Name" button on the touch panel. Select the "Search Dest." Continued Scanning to E‐Mail How to Look up your name in part or all of your last name, Select "OK" 17
Quick Use Guide - Page 19

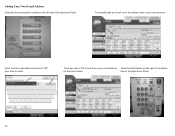
..."OK' you will see your scan to email. To manually add an e‐mail not in the address book, select manual entry Enter the full e‐mail address and press ..."OK" your e‐mail address Press the Start Button on the right To complete on the left sideof the Operation Panel. Adding Your Own E-mail Address Select the Scanner...

Ricoh Aficio MP C2551 Reviews

Do you have an experience with the Ricoh Aficio MP C2551 that you would like to share?
Earn 750 points for your review!
We have not received any reviews for Ricoh yet.

Popular Ricoh Aficio MP C2551 Search Terms

The following terms are frequently used to search for Ricoh Aficio MP C2551 support:

Ask a New Question
Use the box below to post a new question about Ricoh Aficio MP C2551.
Manuals / Documents
Download any of our Ricoh Aficio MP C2551 manuals for free!

We have the following 1 documents available for the Ricoh Aficio MP C2551:
  • Quick Use Guide

Points & Prizes
  • You can earn points for nearly everything you do on HelpOwl.com
  • You can trade in those points for gift cards at leading retailers such as Amazon.com and Walmart
  • It's that simple!
See How it Works
Create a Free Account

Ricoh Manuals

Find free Ricoh Aficio MP C2551 manuals and user guides available at ManualOwl.com. Try out our unique manual viewer allowing you to interact with manuals from directly within your browser!

Ricoh Reviews

View thousands of Ricoh Aficio MP C2551 user reviews and customer ratings available at ReviewOwl.com.

Contact Information

Complete Ricoh customer service contact information including steps to reach representatives, hours of operation, customer support links and more from ContactHelp.com.

Scoreboard Ratings

See detailed Ricoh customer service rankings, employee comments and much more from our sister site.