
Operation Manual
Page 1
Digital Camera Operating Manual To ensure the best performance from your camera, please read the Operating Manual before using the camera.
Digital Camera Operating Manual To ensure the best performance from your camera, please read the Operating Manual before using the camera.

Operation Manual
Page 2
...PENTAX and Optio are trademarks of PENTAX Corporation. • SDHC logo is trademark. • ImageLink and the ImageLink print system logo are for the direct printout of images. PRINT Image Matching enabled digital still cameras, printers and software help photographers to produce images more information. All Rights Reserved. To users of this camera... Kodak Company used outside the scope of use of the copyright as specified in this PENTAX Digital Camera. However, this PENTAX Digital Camera that 0.01% or fewer of the pixels may not illuminate or may not function ...
...PENTAX and Optio are trademarks of PENTAX Corporation. • SDHC logo is trademark. • ImageLink and the ImageLink print system logo are for the direct printout of images. PRINT Image Matching enabled digital still cameras, printers and software help photographers to produce images more information. All Rights Reserved. To users of this camera... Kodak Company used outside the scope of use of the copyright as specified in this PENTAX Digital Camera. However, this PENTAX Digital Camera that 0.01% or fewer of the pixels may not illuminate or may not function ...
Operation Manual
Page 3
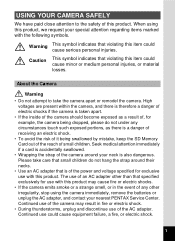
... • During thunderstorms, unplug and discontinue use could cause serious personal injuries. When using the camera immediately, remove the batteries or unplug the AC adapter, and contact your nearest PENTAX Service Center. Continued use of any circumstances touch such exposed portions, as a result of, for... exclusive use with this product may result in the event of the AC adapter. USING YOUR CAMERA SAFELY We have paid close attention...
... • During thunderstorms, unplug and discontinue use could cause serious personal injuries. When using the camera immediately, remove the batteries or unplug the AC adapter, and contact your nearest PENTAX Service Center. Continued use of any circumstances touch such exposed portions, as a result of, for... exclusive use with this product may result in the event of the AC adapter. USING YOUR CAMERA SAFELY We have paid close attention...
Operation Manual
Page 4
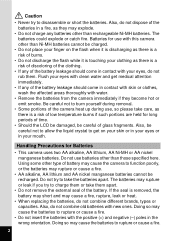
... during use batteries other type of the battery leakage should come in your eyes or in contact with water. • Remove the batteries from the camera immediately if they may explode. • Do not charge any of glass fragments. Doing so may cause a fire, rupture, leak or heat. •...to disassemble or short the batteries. If the seal is a risk of low temperature burns if such portions are held for Batteries • This camera uses two AA alkaline, AA lithium, AA Ni-MH or AA nickel manganese batteries. The batteries could explode or catch fire. The batteries may...
... during use batteries other type of the battery leakage should come in your eyes or in contact with water. • Remove the batteries from the camera immediately if they may explode. • Do not charge any of glass fragments. Doing so may cause a fire, rupture, leak or heat. •...to disassemble or short the batteries. If the seal is a risk of low temperature burns if such portions are held for Batteries • This camera uses two AA alkaline, AA lithium, AA Ni-MH or AA nickel manganese batteries. The batteries could explode or catch fire. The batteries may...
Operation Manual
Page 5
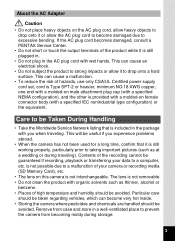
... media (SD Memory Card), etc. • The lens on this camera is not removable. • Do not clean the product with wet hands. The lens is not interchangeable. If the AC plug cord becomes damaged, consult a PENTAX Service Center. • Do not short or touch the output terminals ...configuration) or the equivalent. is not possible due to a malfunction of the product while it is included in a well-ventilated place to prevent the camera from becoming moldy during traveling). This can cause a malfunction. • To reduce the risk of the recording cannot be avoided. About the AC...
... media (SD Memory Card), etc. • The lens on this camera is not removable. • Do not clean the product with wet hands. The lens is not interchangeable. If the AC plug cord becomes damaged, consult a PENTAX Service Center. • Do not short or touch the output terminals ...configuration) or the equivalent. is not possible due to a malfunction of the product while it is included in a well-ventilated place to prevent the camera from becoming moldy during traveling). This can cause a malfunction. • To reduce the risk of the recording cannot be avoided. About the AC...
Operation Manual
Page 6
... the SD Memory Card. • Please note that formatting an SD Memory Card or built-in order to maintain high performance. • If the camera is not a fault. • Periodic checks are returned to. • The response speed of the LCD monitor becomes slow at a high temperature but...return to normal when normal temperatures are recommended every 1 to 104°F). • The LCD monitor will delete all data; Please manage your camera's memory at your back pocket as this may damage the exterior of the liquid crystal and is subjected to rapid temperature changes, condensation may ...
... the SD Memory Card. • Please note that formatting an SD Memory Card or built-in order to maintain high performance. • If the camera is not a fault. • Periodic checks are returned to. • The response speed of the LCD monitor becomes slow at a high temperature but...return to normal when normal temperatures are recommended every 1 to 104°F). • The LCD monitor will delete all data; Please manage your camera's memory at your back pocket as this may damage the exterior of the liquid crystal and is subjected to rapid temperature changes, condensation may ...
Operation Manual
Page 7
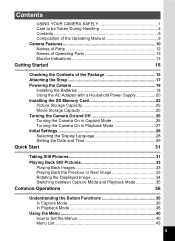
...Names of Operating Parts 13 Monitor Indications 13 Getting Started 16 Checking the Contents of the Package 16 Attaching the Strap 17 Powering the Camera 18 Installing the Batteries 18 Using the AC Adapter with a Household Power Supply 20 Installing the SD Memory Card 22 Picture Storage Capacity... 25 Movie Storage Capacity 25 Turning the Camera On and Off 26 Turning the Camera On in Capture Mode 26 Turning the Camera On in Playback Mode 27 Initial Settings 28 Selecting the Display Language 28 Setting the Date and...
...Names of Operating Parts 13 Monitor Indications 13 Getting Started 16 Checking the Contents of the Package 16 Attaching the Strap 17 Powering the Camera 18 Installing the Batteries 18 Using the AC Adapter with a Household Power Supply 20 Installing the SD Memory Card 22 Picture Storage Capacity... 25 Movie Storage Capacity 25 Turning the Camera On and Off 26 Turning the Camera On in Capture Mode 26 Turning the Camera On in Playback Mode 27 Initial Settings 28 Selecting the Display Language 28 Setting the Date and...
Operation Manual
Page 8
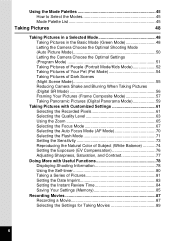
...Pictures in a Selected Mode 48 Taking Pictures in the Basic Mode (Green Mode 48 Letting the Camera Choose the Optimal Shooting Mode (Auto Picture Mode 50 Letting the Camera Choose the Optimal Settings (Program Mode 51 Taking Pictures of People (Portrait Mode/Kids Mode 52 Taking... Mode 54 Taking Pictures of Dark Scenes (Night Scene Mode 55 Reducing Camera Shake and Blurring When Taking Pictures (Digital SR Mode 56 Framing Your Pictures (Frame Composite Mode 57 Taking Panoramic Pictures (Digital Panorama Mode 59 Taking Pictures with Customized Settings 61 Selecting the Recorded Pixels...
...Pictures in a Selected Mode 48 Taking Pictures in the Basic Mode (Green Mode 48 Letting the Camera Choose the Optimal Shooting Mode (Auto Picture Mode 50 Letting the Camera Choose the Optimal Settings (Program Mode 51 Taking Pictures of People (Portrait Mode/Kids Mode 52 Taking... Mode 54 Taking Pictures of Dark Scenes (Night Scene Mode 55 Reducing Camera Shake and Blurring When Taking Pictures (Digital SR Mode 56 Framing Your Pictures (Frame Composite Mode 57 Taking Panoramic Pictures (Digital Panorama Mode 59 Taking Pictures with Customized Settings 61 Selecting the Recorded Pixels...
Operation Manual
Page 9
...107 Editing Images 107 Changing the Image Size and Quality (Resize 107 Cropping Images 109 Copying Images and Sound Files 110 Using the Digital Filter 112 Using the Brightness Filter 113 Adding a Frame (Frame Composite 114 Red-eye Compensation 116 Setting the Printing Service (DPOF 117... Printing Single Images 117 Printing All Images 119 Printing Using PictBridge 120 Connecting the Camera to the Printer 120 Printing Single Images 121 Printing All Images 123 Printing Using the DPOF Settings 124 Disconnecting the Cable from ...
...107 Editing Images 107 Changing the Image Size and Quality (Resize 107 Cropping Images 109 Copying Images and Sound Files 110 Using the Digital Filter 112 Using the Brightness Filter 113 Adding a Frame (Frame Composite 114 Red-eye Compensation 116 Setting the Printing Service (DPOF 117... Printing Single Images 117 Printing All Images 119 Printing Using PictBridge 120 Connecting the Camera to the Printer 120 Printing Single Images 121 Printing All Images 123 Printing Using the DPOF Settings 124 Disconnecting the Cable from ...
Operation Manual
Page 10
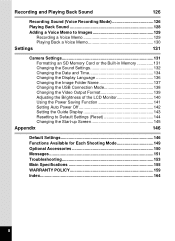
... (Voice Recording Mode 126 Playing Back Sound 128 Adding a Voice Memo to Images 129 Recording a Voice Memo 129 Playing Back a Voice Memo 130 Settings 131 Camera Settings 131 Formatting an SD Memory Card or the Built-in Memory 131 Changing the Sound Settings 132 Changing the Date and Time 134 Changing...
... (Voice Recording Mode 126 Playing Back Sound 128 Adding a Voice Memo to Images 129 Recording a Voice Memo 129 Playing Back a Voice Memo 130 Settings 131 Camera Settings 131 Formatting an SD Memory Card or the Built-in Memory 131 Changing the Sound Settings 132 Changing the Date and Time 134 Changing...
Operation Manual
Page 11
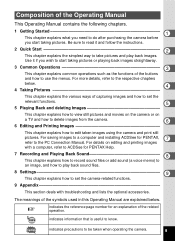
... This chapter explains how to edit taken images using the camera and print still pictures. indicates information that is useful to be taken when operating the camera. 9 For saving images to a computer and installing ACDSee for PENTAX, 7 refer to read it if you start taking pictures.... Composition of the Operating Manual This Operating Manual contains the following chapters. 1 Getting Started 1 This chapter explains what you need to do after purchasing the camera before you wish to ...
... This chapter explains how to edit taken images using the camera and print still pictures. indicates information that is useful to be taken when operating the camera. 9 For saving images to a computer and installing ACDSee for PENTAX, 7 refer to read it if you start taking pictures.... Composition of the Operating Manual This Operating Manual contains the following chapters. 1 Getting Started 1 This chapter explains what you need to do after purchasing the camera before you wish to ...
Operation Manual
Page 12
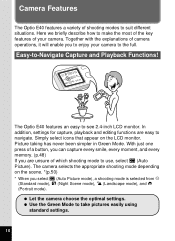
...), A (Night Scene mode), q (Landscape mode), and I (Portrait mode). Here we briefly describe how to the full. The Optio E40 features an easy-to take pictures easily using standard settings. 10 Picture taking has never been simpler in Green Mode. Use the Green ...you are easy to use, select b (Auto Picture). Let the camera choose the optimal settings. Easy-to suit different situations. The camera selects the appropriate shooting mode depending on the LCD monitor. Camera Features The Optio E40 features a variety of shooting modes to -Navigate Capture and Playback Functions...
...), A (Night Scene mode), q (Landscape mode), and I (Portrait mode). Here we briefly describe how to the full. The Optio E40 features an easy-to take pictures easily using standard settings. 10 Picture taking has never been simpler in Green Mode. Use the Green ...you are easy to use, select b (Auto Picture). Let the camera choose the optimal settings. Easy-to suit different situations. The camera selects the appropriate shooting mode depending on the LCD monitor. Camera Features The Optio E40 features a variety of shooting modes to -Navigate Capture and Playback Functions...
Operation Manual
Page 13
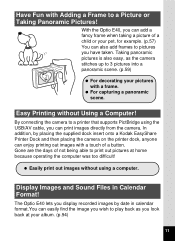
Have Fun with a frame. For capturing a panoramic scene. The Optio E40 lets you display recorded images by placing the supplied dock insert onto a Kodak EasyShare Printer Dock and then placing the camera on the printer dock, anyone can also add frames to pictures you have taken. Easy... Panoramic Pictures! Taking panoramic pictures is also easy, as you can print images directly from the camera. Easily print out images without Using a Computer! In addition, by date in Calendar Format! With the Optio E40, you can add a fancy frame when taking a picture of a child or your album. ...
Have Fun with a frame. For capturing a panoramic scene. The Optio E40 lets you display recorded images by placing the supplied dock insert onto a Kodak EasyShare Printer Dock and then placing the camera on the printer dock, anyone can also add frames to pictures you have taken. Easy... Panoramic Pictures! Taking panoramic pictures is also easy, as you can print images directly from the camera. Easily print out images without Using a Computer! In addition, by date in Calendar Format! With the Optio E40, you can add a fancy frame when taking a picture of a child or your album. ...
Operation Manual
Page 16
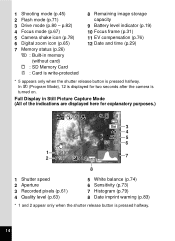
...) 11 EV compensation (p.76) 12 Date and time (p.29) * 5 appears only when the shutter release button is turned on. p.82) 4 Focus mode (p.67) 5 Camera shake icon (p.78) 6 Digital zoom icon (p.65) 7 Memory status (p.26) + : Built-in Still Picture Capture Mode (All of the indications are displayed here for two seconds after the...
...) 11 EV compensation (p.76) 12 Date and time (p.29) * 5 appears only when the shutter release button is turned on. p.82) 4 Focus mode (p.67) 5 Camera shake icon (p.78) 6 Digital zoom icon (p.65) 7 Memory status (p.26) + : Built-in Still Picture Capture Mode (All of the indications are displayed here for two seconds after the...
Operation Manual
Page 18
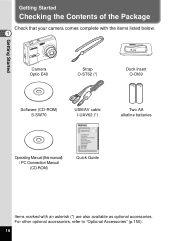
Getting Started Getting Started Checking the Contents of the Package Check that your camera comes complete with the items listed below. 1 Camera Optio E40 Strap O-ST62 (*) Dock insert O-DI69 Software (CD-ROM) S-SW70 USB/AV cable I-UAV62 (*) Two AA alkaline batteries Operating Manual (this manual) / PC Connection Manual (CD-ROM) Quick Guide Items marked with an asterisk (*) are also available as optional accessories. For other optional accessories, refer to "Optional Accessories" (p.150). 16
Getting Started Getting Started Checking the Contents of the Package Check that your camera comes complete with the items listed below. 1 Camera Optio E40 Strap O-ST62 (*) Dock insert O-DI69 Software (CD-ROM) S-SW70 USB/AV cable I-UAV62 (*) Two AA alkaline batteries Operating Manual (this manual) / PC Connection Manual (CD-ROM) Quick Guide Items marked with an asterisk (*) are also available as optional accessories. For other optional accessories, refer to "Optional Accessories" (p.150). 16
Operation Manual
Page 19
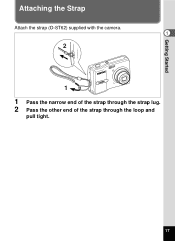
Getting Started Attaching the Strap Attach the strap (O-ST62) supplied with the camera. 1 2 1 1 Pass the narrow end of the strap through the strap lug. 2 Pass the other end of the strap through the loop and pull tight. 17
Getting Started Attaching the Strap Attach the strap (O-ST62) supplied with the camera. 1 2 1 1 Pass the narrow end of the strap through the strap lug. 2 Pass the other end of the strap through the loop and pull tight. 17
Operation Manual
Page 20
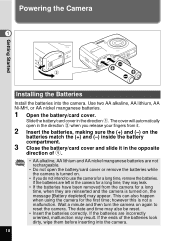
...the batteries look dirty, wipe them before inserting into the camera. The date and time may result. Getting Started Powering the Camera 1 Installing the Batteries Install the batteries into the camera. 18 If the batteries are reinserted and the camera is not a malfunction. however this is turned on again... direction 2 when you do not intend to reset the camera. The cover will automatically open the battery/card cover or remove the batteries while the camera is turned on. • If you release your fingers from the camera for the first time; Use two AA alkaline, AA ...
...the batteries look dirty, wipe them before inserting into the camera. The date and time may result. Getting Started Powering the Camera 1 Installing the Batteries Install the batteries into the camera. 18 If the batteries are reinserted and the camera is not a malfunction. however this is turned on again... direction 2 when you do not intend to reset the camera. The cover will automatically open the battery/card cover or remove the batteries while the camera is turned on. • If you release your fingers from the camera for the first time; Use two AA alkaline, AA ...
Operation Manual
Page 21
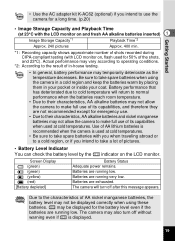
... Display w (green) x (green) y (yellow) z (red) [Battery depleted] Battery Status Adequate power remains. Batteries are running very low. The camera will return to normal performance when the batteries reach room temperature. • Due to their characteristics, AA alkaline batteries and nickel manganese batteries may vary...when using these batteries. Due to the characteristics of AA nickel manganese batteries, the battery level may be displayed correctly when using the camera in a cold region and keep the batteries warm by the w indicator on , flash used for 50% of the shots, and...
... Display w (green) x (green) y (yellow) z (red) [Battery depleted] Battery Status Adequate power remains. Batteries are running very low. The camera will return to normal performance when the batteries reach room temperature. • Due to their characteristics, AA alkaline batteries and nickel manganese batteries may vary...when using these batteries. Due to the characteristics of AA nickel manganese batteries, the battery level may be displayed correctly when using the camera in a cold region and keep the batteries warm by the w indicator on , flash used for 50% of the shots, and...
Operation Manual
Page 22
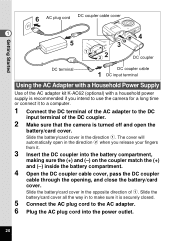
... to make sure it is securely closed. 5 Connect the AC plug cord to the DC input terminal of the DC coupler. 2 Make sure that the camera is recommended if you release your fingers from it to a computer. 1 Connect the DC terminal of the AC adapter to the AC adapter. 6 Plug the... of the AC adapter kit K-AC62 (optional) with a household power supply is turned off and open in the direction 2 when you intend to use the camera for a long time or connect it . 3 Insert the DC coupler into the power outlet. 20
... to make sure it is securely closed. 5 Connect the AC plug cord to the DC input terminal of the DC coupler. 2 Make sure that the camera is recommended if you release your fingers from it to a computer. 1 Connect the DC terminal of the AC adapter to the AC adapter. 6 Plug the... of the AC adapter kit K-AC62 (optional) with a household power supply is turned off and open in the direction 2 when you intend to use the camera for a long time or connect it . 3 Insert the DC coupler into the power outlet. 20

Operation Manual
Page 23
... become lost if either cord becomes disconnected while data is turned off before using the adapter. Getting Started 21 Be sure to read "USING YOUR CAMERA SAFELY" (p.1) before using the AC adapter. • Be sure to read the operation manual accompanying the AC adapter kit K-AC62 before connecting or disconnecting the... sure that the AC plug cord and the power cord connecting the AC adapter to avoid fire or electric shock. • Make sure that the camera is 1 being recorded. • Use the AC adapter with due care to the...
... become lost if either cord becomes disconnected while data is turned off before using the adapter. Getting Started 21 Be sure to read "USING YOUR CAMERA SAFELY" (p.1) before using the AC adapter. • Be sure to read the operation manual accompanying the AC adapter kit K-AC62 before connecting or disconnecting the... sure that the AC plug cord and the power cord connecting the AC adapter to avoid fire or electric shock. • Make sure that the camera is 1 being recorded. • Use the AC adapter with due care to the...


