M20 Operating Manual
Page 2
... users of this manual safe, as installations generating strong electromagnetic radiation or magnetic fields. • The liquid crystal panel used in order to better service you, we request that are for anything other brands or product names are not available on display. This product supports PRINT Image Matching III, PRINT Image Matching enabled digital still cameras, printers and software help photographers to produce images more information. Some functions...
... users of this manual safe, as installations generating strong electromagnetic radiation or magnetic fields. • The liquid crystal panel used in order to better service you, we request that are for anything other brands or product names are not available on display. This product supports PRINT Image Matching III, PRINT Image Matching enabled digital still cameras, printers and software help photographers to produce images more information. Some functions...
M20 Operating Manual
Page 8
... Pictures 73 Using the Zoom 74 Setting the Exposure (EV Compensation 76 Displaying Shooting Information 77 Setting the Shooting Functions 79 Selecting the Focus Mode 79 Selecting the Flash Mode 81 Selecting the Recorded Pixels 83 Selecting the Quality Level 85 Adjusting the White Balance 87 Changing the Focusing Area 89 Setting the Sensitivity 90 Setting the Instant Review Time (Instant Review 92 Setting the Image Sharpness (Sharpness 93 Setting the Color Saturation (Saturation 94 Setting the Image Contrast (Contrast 95 Saving...
... Pictures 73 Using the Zoom 74 Setting the Exposure (EV Compensation 76 Displaying Shooting Information 77 Setting the Shooting Functions 79 Selecting the Focus Mode 79 Selecting the Flash Mode 81 Selecting the Recorded Pixels 83 Selecting the Quality Level 85 Adjusting the White Balance 87 Changing the Focusing Area 89 Setting the Sensitivity 90 Setting the Instant Review Time (Instant Review 92 Setting the Image Sharpness (Sharpness 93 Setting the Color Saturation (Saturation 94 Setting the Image Contrast (Contrast 95 Saving...
M20 Operating Manual
Page 9
...Recording Movies in Black and White or Sepia Tones (Color Mode 104 Setting the Movie Anti-Shake Function 105 Playing Back and Deleting Images 106 Playing Back Images 106 Switching Between A Mode and Q Mode 106 Playing Back Still Pictures 107 Nine-Image Display, Folder Display and Calendar Display.......... 108 Zoom Playback 110 Displaying Shooting Information in Playback Mode 112 Slideshow 113 Playing Back Movies 115 Playing Back a Movie 115 Connecting the Camera to AV Equipment 116 Deleting Images 117 Deleting Single Images/Sound Files 117 Deleting Selected Images and Sound...
...Recording Movies in Black and White or Sepia Tones (Color Mode 104 Setting the Movie Anti-Shake Function 105 Playing Back and Deleting Images 106 Playing Back Images 106 Switching Between A Mode and Q Mode 106 Playing Back Still Pictures 107 Nine-Image Display, Folder Display and Calendar Display.......... 108 Zoom Playback 110 Displaying Shooting Information in Playback Mode 112 Slideshow 113 Playing Back Movies 115 Playing Back a Movie 115 Connecting the Camera to AV Equipment 116 Deleting Images 117 Deleting Single Images/Sound Files 117 Deleting Selected Images and Sound...

M20 Operating Manual
Page 10
... Cable from the Printer 141 Printing Using ImageLink 141 Recording and Playing Back Sound 143 Recording Sound (Voice Recording Mode 143 Playing Back Sound 145 Adding a Voice Memo to Images 146 Recording a Voice Memo 146 Playing Back a Voice Memo 147 Settings 148 Camera Settings 148 Formatting an SD Memory Card or the Built-in Memory 148 Changing the Sound Settings 149 Changing the Date and Time 151 Setting the World Time 153 Changing the Display Language 155 Changing the Image Folder Name 156 Changing the USB Connection Mode 157 Changing the Video Output Format...
... Cable from the Printer 141 Printing Using ImageLink 141 Recording and Playing Back Sound 143 Recording Sound (Voice Recording Mode 143 Playing Back Sound 145 Adding a Voice Memo to Images 146 Recording a Voice Memo 146 Playing Back a Voice Memo 147 Settings 148 Camera Settings 148 Formatting an SD Memory Card or the Built-in Memory 148 Changing the Sound Settings 149 Changing the Date and Time 151 Setting the World Time 153 Changing the Display Language 155 Changing the Image Folder Name 156 Changing the USB Connection Mode 157 Changing the Video Output Format...
M20 Operating Manual
Page 15
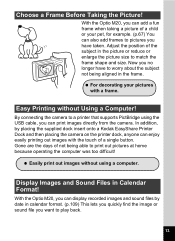
... print images directly from the camera. By connecting the camera to a printer that supports PictBridge using a computer. Display Images and Sound Files in the picture or reduce or enlarge the picture size to print out pictures at home because operating the computer was too difficult! With the Optio M20, you can add a fun frame when taking a picture of a child or your pictures with the touch of the subject in Calendar Format! With the Optio M20, you can display recorded images...
... print images directly from the camera. By connecting the camera to a printer that supports PictBridge using a computer. Display Images and Sound Files in the picture or reduce or enlarge the picture size to print out pictures at home because operating the computer was too difficult! With the Optio M20, you can add a fun frame when taking a picture of a child or your pictures with the touch of the subject in Calendar Format! With the Optio M20, you can display recorded images...

M20 Operating Manual
Page 19
1 Shooting mode (p.52) 2 Flash mode (p.81) 3 Drive mode (p.72, p.73) 4 Focus mode (p.79) 5 Camera shake icon (p.77) 6 Digital zoom icon (p.74) 7 Memory status (p.32) + : Built-in memory (without card) a : SD Memory Card r : Card is write-protected 8 Remaining image storage capacity 9 Battery indicator (p.22) 10 Focus frame (p.39) 11 EV compensation (p.76) 12 Date and time (p.37) 13 World Time (p.154) No icon : Hometown X : Destination Full Display in the frame that is so dark it appears white, the indicated area blinks red as a warning. 17...
1 Shooting mode (p.52) 2 Flash mode (p.81) 3 Drive mode (p.72, p.73) 4 Focus mode (p.79) 5 Camera shake icon (p.77) 6 Digital zoom icon (p.74) 7 Memory status (p.32) + : Built-in memory (without card) a : SD Memory Card r : Card is write-protected 8 Remaining image storage capacity 9 Battery indicator (p.22) 10 Focus frame (p.39) 11 EV compensation (p.76) 12 Date and time (p.37) 13 World Time (p.154) No icon : Hometown X : Destination Full Display in the frame that is so dark it appears white, the indicated area blinks red as a warning. 17...

M20 Operating Manual
Page 20
...:25 A9 A10 A1 Playback mode (p.58) A2 Folder number (p.156) A3 File number A4 Protect icon (p.122) A5 Voice memo icon (p.147) A6 Battery indicator (p.22) A7 Volume icon (p.147) A8 Memory status (p.32) + : Built-in memory (without card) a : SD Memory Card r : Card is write-protected A9 Captured date and time (p.37) A10 Four-way controller guide A11 Key lock icon (p.64) B1 Bright portion (blinks red) (p.17) B2 Recorded pixels (p.83) B3 Quality (p.85) B4 White balance (p.87) B5 Sensitivity...
...:25 A9 A10 A1 Playback mode (p.58) A2 Folder number (p.156) A3 File number A4 Protect icon (p.122) A5 Voice memo icon (p.147) A6 Battery indicator (p.22) A7 Volume icon (p.147) A8 Memory status (p.32) + : Built-in memory (without card) a : SD Memory Card r : Card is write-protected A9 Captured date and time (p.37) A10 Four-way controller guide A11 Key lock icon (p.64) B1 Bright portion (blinks red) (p.17) B2 Recorded pixels (p.83) B3 Quality (p.85) B4 White balance (p.87) B5 Sensitivity...

M20 Operating Manual
Page 28
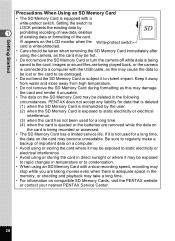
... recorded pixels and quality level. (p.29) Backing Up Data The camera may not be able to "Formatting an SD Memory Card or the Built-in Memory" (p.148) for instructions on formatting. • Make sure that is turned off before inserting or removing the SD Memory Card. Refer to access data in the built-in memory in the camera. Getting Started Installing the SD Memory Card SD Memory 1 Card socket 1 SD Memory 2 Card This camera uses an SD Memory Card...
... recorded pixels and quality level. (p.29) Backing Up Data The camera may not be able to "Formatting an SD Memory Card or the Built-in Memory" (p.148) for instructions on formatting. • Make sure that is turned off before inserting or removing the SD Memory Card. Refer to access data in the built-in memory in the camera. Getting Started Installing the SD Memory Card SD Memory 1 Card socket 1 SD Memory 2 Card This camera uses an SD Memory Card...
M20 Operating Manual
Page 30
... time, the data on the LCD monitor when the Write-protect switch card is write-protected. • Care should be taken when removing the SD Memory Card immediately after using an SD Memory Card with a write-protect switch. Getting Started Precautions When Using an SD Memory Card • The SD Memory Card is equipped with a slow recording speed, recording may stop while you are taking movies even when there is adequate space in the memory, or shooting and playback may be deleted in...
... time, the data on the LCD monitor when the Write-protect switch card is write-protected. • Care should be taken when removing the SD Memory Card immediately after using an SD Memory Card with a write-protect switch. Getting Started Precautions When Using an SD Memory Card • The SD Memory Card is equipped with a slow recording speed, recording may stop while you are taking movies even when there is adequate space in the memory, or shooting and playback may be deleted in...

M20 Operating Manual
Page 41
In this manual, this is called Still Picture Capture Mode. 2 Confirm the subject and shooting information on and is in focus. 4 Press the shutter release button fully. The picture is described below. The flash fires automatically depending on the light conditions. 1 Press the power switch. 38 The camera turns on the LCD monitor. 10/14/2006 14:25 The focus frame in memory. (p.40) 39 Quick Start Taking Still Pictures Power switch Shutter release button Zoom/w/x button 2 Quick Start The...
In this manual, this is called Still Picture Capture Mode. 2 Confirm the subject and shooting information on and is in focus. 4 Press the shutter release button fully. The picture is described below. The flash fires automatically depending on the light conditions. 1 Press the power switch. 38 The camera turns on the LCD monitor. 10/14/2006 14:25 The focus frame in memory. (p.40) 39 Quick Start Taking Still Pictures Power switch Shutter release button Zoom/w/x button 2 Quick Start The...

M20 Operating Manual
Page 42
... to take the picture. [Poor focusing conditions] The camera may not be able to b (Auto Picture mode) in focus. Quick Start • The shooting mode is captured. The green focus frame lights on to enable taking still pictures in b mode. • Press the Green button to switch to the Green Mode and let the camera set to focus under the following conditions. Press fully Press the shutter release button all the shooting functions automatically. (p.64) 2 Using the Shutter Release Button The shutter release button works in...
... to take the picture. [Poor focusing conditions] The camera may not be able to b (Auto Picture mode) in focus. Quick Start • The shooting mode is captured. The green focus frame lights on to enable taking still pictures in b mode. • Press the Green button to switch to the Green Mode and let the camera set to focus under the following conditions. Press fully Press the shutter release button all the shooting functions automatically. (p.64) 2 Using the Shutter Release Button The shutter release button works in...

M20 Operating Manual
Page 51
... Q button. The changes are canceled and the screen returns to Step 3. 49 The setting is taken. MENU : Returns to the guide indications. The setting is saved and the camera returns to the original screen. Refer to Step 3 with the current setting. MENU Exit : Exits the menu and returns to playback status. 3 Saving the Setting and Continue with Menu Operations 6 Press the 3 button. Common Operations Saving the Setting and Start Taking Pictures 6 Press the shutter release button halfway. The 3 button function differs...
... Q button. The changes are canceled and the screen returns to Step 3. 49 The setting is taken. MENU : Returns to the guide indications. The setting is saved and the camera returns to the original screen. Refer to Step 3 with the current setting. MENU Exit : Exits the menu and returns to playback status. 3 Saving the Setting and Continue with Menu Operations 6 Press the 3 button. Common Operations Saving the Setting and Start Taking Pictures 6 Press the shutter release button halfway. The 3 button function differs...

M20 Operating Manual
Page 52
... Saturation For setting the color saturation p.94 Contrast For setting the image contrast level p.95 • Use the Green Mode to enjoy easy picture-taking still pictures and recording movies. 3 Item Description Page Recorded Pixels For choosing the number of recorded pixels of still pictures p.83 Quality Level For choosing the quality level of still pictures p.85 White Balance For adjusting the color balance according to the light conditions p.87 Focusing Area For changing the area...
... Saturation For setting the color saturation p.94 Contrast For setting the image contrast level p.95 • Use the Green Mode to enjoy easy picture-taking still pictures and recording movies. 3 Item Description Page Recorded Pixels For choosing the number of recorded pixels of still pictures p.83 Quality Level For choosing the quality level of still pictures p.85 White Balance For adjusting the color balance according to the light conditions p.87 Focusing Area For changing the area...

M20 Operating Manual
Page 89
...) to "Manual Setting" (p.88) for instructions on adjusting the white balance manually. 87 Mode 1/3 7M Recorded Pixels Quality Level AWB White Balance Focusing Area ISO AUTO Sensitivity MENU Exit R d c Y You can take pictures in A mode. The [A Rec. White Balance The White Balance screen appears. 2, 3, 4 5 1, 6 MENU Adjusting the White Balance Rec. Taking Pictures 1 Press the 3 button in natural colors by adjusting the white balance according to the light conditions at the time of shooting. 4 White Balance F Auto G Daylight The camera adjusts the white balance...
...) to "Manual Setting" (p.88) for instructions on adjusting the white balance manually. 87 Mode 1/3 7M Recorded Pixels Quality Level AWB White Balance Focusing Area ISO AUTO Sensitivity MENU Exit R d c Y You can take pictures in A mode. The [A Rec. White Balance The White Balance screen appears. 2, 3, 4 5 1, 6 MENU Adjusting the White Balance Rec. Taking Pictures 1 Press the 3 button in natural colors by adjusting the white balance according to the light conditions at the time of shooting. 4 White Balance F Auto G Daylight The camera adjusts the white balance...

M20 Operating Manual
Page 101
... the shutter release button. 99 Recording starts. • The flash will not discharge in d mode. • Focus Mode is fixed to 3 when in step 4 and blinks 5 during recording) 4 You can use the optical zoom and digital zoom before starting to the left or right. p.105) 6 Date and time display (does not appear during recording) 10/14/2006 14:25 6 4 Recording time 5 Movie anti-shake icon (appears when Movie anti-shake is set to capture status. Recording stops. Taking Pictures...
... the shutter release button. 99 Recording starts. • The flash will not discharge in d mode. • Focus Mode is fixed to 3 when in step 4 and blinks 5 during recording) 4 You can use the optical zoom and digital zoom before starting to the left or right. p.105) 6 Date and time display (does not appear during recording) 10/14/2006 14:25 6 4 Recording time 5 Movie anti-shake icon (appears when Movie anti-shake is set to capture status. Recording stops. Taking Pictures...

M20 Operating Manual
Page 135
eye Compensation). 6 4 Press the 4 button. An error message appears in Step 4. • The red-eye compensation function can correct images where the flash has caused the subject to appear with a new file name. 6 Press the 4 button. Slideshow 1, 2, 3, 5 4, 6 MENU OK OK Editing and Printing Images Red-eye Compensation You can only be detected on the camera. The image is automatically saved with red eyes. 1 Enter the Q mode and use the four-way controller (45) to choose...
eye Compensation). 6 4 Press the 4 button. An error message appears in Step 4. • The red-eye compensation function can correct images where the flash has caused the subject to appear with a new file name. 6 Press the 4 button. Slideshow 1, 2, 3, 5 4, 6 MENU OK OK Editing and Printing Images Red-eye Compensation You can only be detected on the camera. The image is automatically saved with red eyes. 1 Enter the Q mode and use the four-way controller (45) to choose...

M20 Operating Manual
Page 173
... trying to display or copy the images on another brand of recorded images and try to switch to an Image folder could not image in a format not supported by this image and sound You are exhausted. Insert a new SD Memory Card or 9 format the card. (p.148) Protected The image or sound file you try again. (p.124) Memory card error Shooting and playback are no image/sound files on the LCD monitor during camera operation. Deleting This message appears when deleting an image or sound file. The largest file number (9999...
... trying to display or copy the images on another brand of recorded images and try to switch to an Image folder could not image in a format not supported by this image and sound You are exhausted. Insert a new SD Memory Card or 9 format the card. (p.148) Protected The image or sound file you try again. (p.124) Memory card error Shooting and playback are no image/sound files on the LCD monitor during camera operation. Deleting This message appears when deleting an image or sound file. The largest file number (9999...

M20 Operating Manual
Page 176
... press shutter release button fully (p.40), or use the camera as usual. 9 Appendix 174 You can use Manual Focus mode. (p.80) Subject is not in focus Subject is not in focusing area Position subject in focus frame in these modes. Shooting mode is set to d USB connection with computer does not work properly USB connection mode Change the USB connection mode to is set to [PictBridge] [PC]. (p.157) USB connection with printer does not work properly USB connection mode Change the USB connection mode to is set to...
... press shutter release button fully (p.40), or use the camera as usual. 9 Appendix 174 You can use Manual Focus mode. (p.80) Subject is not in focus Subject is not in focusing area Position subject in focus frame in these modes. Shooting mode is set to d USB connection with computer does not work properly USB connection mode Change the USB connection mode to is set to [PictBridge] [PC]. (p.157) USB connection with printer does not work properly USB connection mode Change the USB connection mode to is set to...

M20 Operating Manual
Page 187
... DPOF printing 141 DPOF settings 134 F File 96 Flash 81 Flash Off a 81 Flash On b 81 Fluorescent Light J .......... 87 Focus Mode 79 Focusing 79 Focusing Area 89 Folder display 109 Format 148 Four-way controller ........44, 46 Frame Composite 131 Frame Rate 30, 103 G Green Button | .......44, 46, 56 Green Mode s 64 Guide Display 60, 161 H Histogram 78 I ImageLink 141 Infinity s 79 Installing batteries 20 Instant Review 40, 92 L Language 34, 155 M 3 button 44, 46 Macro q 79...
... DPOF printing 141 DPOF settings 134 F File 96 Flash 81 Flash Off a 81 Flash On b 81 Fluorescent Light J .......... 87 Focus Mode 79 Focusing 79 Focusing Area 89 Folder display 109 Format 148 Four-way controller ........44, 46 Frame Composite 131 Frame Rate 30, 103 G Green Button | .......44, 46, 56 Green Mode s 64 Guide Display 60, 161 H Histogram 78 I ImageLink 141 Infinity s 79 Installing batteries 20 Instant Review 40, 92 L Language 34, 155 M 3 button 44, 46 Macro q 79...

M20 Operating Manual
Page 188
... Memory Card 26 Select time 154 Self-timer g 72 Sensitivity 90 Sepia 104, 129 Setting the exposure ...........76 Shade H 87 Sharpness 93 Shooting information ...77, 112 Shooting mode 52 Shutter release button 40, 43, 45 Slideshow 113 Soft b 81 Soft (digital filter 129 Sound settings 149 Sound types 149 9 Standard 79 Start-up screen 163 Strap 19 Super Macro r 79 T Trimming 126 Tungsten Light I 87 TV 116 U USB connection mode ...... 157 V Video output format 158 Viewing a guide...
... Memory Card 26 Select time 154 Self-timer g 72 Sensitivity 90 Sepia 104, 129 Setting the exposure ...........76 Shade H 87 Sharpness 93 Shooting information ...77, 112 Shooting mode 52 Shutter release button 40, 43, 45 Slideshow 113 Soft b 81 Soft (digital filter 129 Sound settings 149 Sound types 149 9 Standard 79 Start-up screen 163 Strap 19 Super Macro r 79 T Trimming 126 Tungsten Light I 87 TV 116 U USB connection mode ...... 157 V Video output format 158 Viewing a guide...

