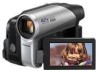

Digital Video Camcorder
Page 2
...) instructions in the literature accompanying the appliance. Your Ò Camcorder is designed to record and play back in Standard Play (SP...be used. Things You Should Know Thank you and your convenient Camcorder information source. Date of enjoyment. THERE ARE NO USER SERVICEABLE PARTS... within the product's enclosure that have purchased one of your Camcorder. CAUTION! Serial No. The following mark and symbols are located...TO QUALIFIED SERVICE PERSONNEL. Please take time to fill in Camcorder with arrowhead symbol, within an equilateral triangle, is intended to...
...) instructions in the literature accompanying the appliance. Your Ò Camcorder is designed to record and play back in Standard Play (SP...be used. Things You Should Know Thank you and your convenient Camcorder information source. Date of enjoyment. THERE ARE NO USER SERVICEABLE PARTS... within the product's enclosure that have purchased one of your Camcorder. CAUTION! Serial No. The following mark and symbols are located...TO QUALIFIED SERVICE PERSONNEL. Please take time to fill in Camcorder with arrowhead symbol, within an equilateral triangle, is intended to...

Digital Video Camcorder
Page 5
...or throw into contact with water. If the unit is not designed to sustain direct exposure to unnecessary movement (avoid shaking and striking). Your Camcorder contains a sensitive pick-up device which could be exposed to recharge the battery pack. ≥Do not use strong or abrasive detergents when ... pack) ≥Use the specified unit to rain or moisture. Improper cleaning can scratch the lens coating. ≥TO PROTECT THE FINISH OF YOUR CAMCORDER ... Battery 1. Do not use the battery pack with equipment other than the specified unit. ≥Do not get dirt, sand, liquids, or...
...or throw into contact with water. If the unit is not designed to sustain direct exposure to unnecessary movement (avoid shaking and striking). Your Camcorder contains a sensitive pick-up device which could be exposed to recharge the battery pack. ≥Do not use strong or abrasive detergents when ... pack) ≥Use the specified unit to rain or moisture. Improper cleaning can scratch the lens coating. ≥TO PROTECT THE FINISH OF YOUR CAMCORDER ... Battery 1. Do not use the battery pack with equipment other than the specified unit. ≥Do not get dirt, sand, liquids, or...
Digital Video Camcorder
Page 7
... cannot be used simultaneously 43 Before requesting repair (Problems and solutions 44 Cautions for Use 46 Explanation of terms 49 Specifications 50 Camcorder Accessory System 51 Camcorder Accessory Order Form (For USA Customers 52 Request for U.S.A. only 11 The grip belt 12 Using the lens cover 12 Power ...supply 12 Charging time and recordable time 13 Selecting a mode (Turning the Camcorder on/off 14 Setting date and time 15 Using the LCD monitor 16 Using the viewfinder 16 Quick Start 17 Inserting/removing a cassette 18...
... cannot be used simultaneously 43 Before requesting repair (Problems and solutions 44 Cautions for Use 46 Explanation of terms 49 Specifications 50 Camcorder Accessory System 51 Camcorder Accessory Order Form (For USA Customers 52 Request for U.S.A. only 11 The grip belt 12 Using the lens cover 12 Power ...supply 12 Charging time and recordable time 13 Selecting a mode (Turning the Camcorder on/off 14 Setting date and time 15 Using the LCD monitor 16 Using the viewfinder 16 Quick Start 17 Inserting/removing a cassette 18...

Digital Video Camcorder
Page 10
... output terminal [A/V] -36-, -37≥Use the supplied AV cable only. 10 LSQT1284 Before using Before using (13) Parts identification and handling (9) (14) (15) ª Camcorder (16) (10) (17) (11) (18) (4) (1) (5) (12) BATTERY (2) (3) (6) (7) (1) White balance sensor -33(2) Lens cover open/close swich [ / ] -12(3) Grip belt -12(4) Lens (5) Lens cover -12(6) Built...
... output terminal [A/V] -36-, -37≥Use the supplied AV cable only. 10 LSQT1284 Before using Before using (13) Parts identification and handling (9) (14) (15) ª Camcorder (16) (10) (17) (11) (18) (4) (1) (5) (12) BATTERY (2) (3) (6) (7) (1) White balance sensor -33(2) Lens cover open/close swich [ / ] -12(3) Grip belt -12(4) Lens (5) Lens cover -12(6) Built...

Digital Video Camcorder
Page 11
... input/output terminal [DV] -37-, -38- (32) (32) Tripod receptacle This is a hole for attaching the Camcorder to optional tripod. (Please carefully read the operating instructions for how to attach the tripod to the Camcorder.) How to limitations in LCD production technology, there may be some tiny bright or dark spots on...
... input/output terminal [DV] -37-, -38- (32) (32) Tripod receptacle This is a hole for attaching the Camcorder to optional tripod. (Please carefully read the operating instructions for how to attach the tripod to the Camcorder.) How to limitations in LCD production technology, there may be some tiny bright or dark spots on...

Digital Video Camcorder
Page 13
... the Battery Pack VW-VBG130, VW-VBG260 and VW-VBG6 for long recording time (2 hours or more for continuous recording, 1 hour or more for this Camcorder. If the temperature is higher or lower than this. The recordable time shown in the tables below are for a long period of time with your... DC Cable to the AC adaptor. 3 Connect the DC Cable to this unit. ≥Do not use the power cord for other equipment for this Camcorder. ª Inserting the battery Push the battery against the battery holder and slide it until it clicks. ª Removing the battery While sliding the [BATTERY...
... the Battery Pack VW-VBG130, VW-VBG260 and VW-VBG6 for long recording time (2 hours or more for continuous recording, 1 hour or more for this Camcorder. If the temperature is higher or lower than this. The recordable time shown in the tables below are for a long period of time with your... DC Cable to the AC adaptor. 3 Connect the DC Cable to this unit. ≥Do not use the power cord for other equipment for this Camcorder. ª Inserting the battery Push the battery against the battery holder and slide it until it clicks. ª Removing the battery While sliding the [BATTERY...

Digital Video Camcorder
Page 14
... the same time pressing in the lock release button if changing from OFF to another mode. ≥Align with the reduction of the Camcorder being used will also heat up after use or charging. Rotate the mode dial to select the desired mode or OFF. ≥Rotate...closed, the automatic white balance adjustment (-49-) may not function properly. If the battery discharges, then ( ) will change: # # # # . Selecting a mode (Turning the Camcorder on/off) When recording, open the lens cover before turning the unit on. (-12-) If the unit is normal. ≥Along with the mark B. Before...
... the same time pressing in the lock release button if changing from OFF to another mode. ≥Align with the reduction of the Camcorder being used will also heat up after use or charging. Rotate the mode dial to select the desired mode or OFF. ≥Rotate...closed, the automatic white balance adjustment (-49-) may not function properly. If the battery discharges, then ( ) will change: # # # # . Selecting a mode (Turning the Camcorder on/off) When recording, open the lens cover before turning the unit on. (-12-) If the unit is normal. ≥Along with the mark B. Before...

Digital Video Camcorder
Page 15
... time before recording because the built-in clock is not very accurate. ª Recharging the built-in lithium battery ≥If [0] or [--] appears when the Camcorder is turned on for approx. 6 months. (The battery is still being recharged even if the mode dial is set to OFF.) ≥When turning on... the desired value. ≥The year will change as is retracted while recording on a tape. 3 Open the LCD monitor or extend the viewfinder to the Camcorder, and the built-in lithium battery will be activated. 2 Close the LCD monitor and retract the viewfinder to turn the power on and use the...
... time before recording because the built-in clock is not very accurate. ª Recharging the built-in lithium battery ≥If [0] or [--] appears when the Camcorder is turned on for approx. 6 months. (The battery is still being recharged even if the mode dial is set to OFF.) ≥When turning on... the desired value. ≥The year will change as is retracted while recording on a tape. 3 Open the LCD monitor or extend the viewfinder to the Camcorder, and the built-in lithium battery will be activated. 2 Close the LCD monitor and retract the viewfinder to turn the power on and use the...

Digital Video Camcorder
Page 16
Before using Using the LCD monitor You can record the image while viewing it is forcibly opened or rotated, the Camcorder may be damaged or fail. ≥If the LCD monitor is extended (when recording yourself), the LCD monitor and the viewfinder simultaneously light. 1122::3344::...
Before using Using the LCD monitor You can record the image while viewing it is forcibly opened or rotated, the Camcorder may be damaged or fail. ≥If the LCD monitor is extended (when recording yourself), the LCD monitor and the viewfinder simultaneously light. 1122::3344::...

Digital Video Camcorder
Page 17
... the battery recording/playback time. ≥This is only activated in the following cases, quick start is canceled and the power turns off and the Camcorder will resume recording/pause mode about 1.7 seconds after it was before quick start standby mode. ≥If [POWER SAVE] (-24-) is set to ... monitor and retract the viewfinder and then open the LCD monitor or extend the viewfinder again. ≥The status indicator lights red and the Camcorder is put into recording pause approx. 1.7 seconds after the LCD Monitor or the Viewfinder is reopened. ≥Please note in Quick Start Mode...
... the battery recording/playback time. ≥This is only activated in the following cases, quick start is canceled and the power turns off and the Camcorder will resume recording/pause mode about 1.7 seconds after it was before quick start standby mode. ≥If [POWER SAVE] (-24-) is set to ... monitor and retract the viewfinder and then open the LCD monitor or extend the viewfinder again. ≥The status indicator lights red and the Camcorder is put into recording pause approx. 1.7 seconds after the LCD Monitor or the Viewfinder is reopened. ≥Please note in Quick Start Mode...

Digital Video Camcorder
Page 22
... recommend using Recording with the built-in LED video light Press the [LIGHT] button again. ≥The subject should be within 1.5 metres (4.9 feet) of the Camcorder. ≥Using the LED video light reduces battery time. ≥Set the LED video light to obtain high quality images. 22 LSQT1284 LIGHT ≥The...
... recommend using Recording with the built-in LED video light Press the [LIGHT] button again. ≥The subject should be within 1.5 metres (4.9 feet) of the Camcorder. ≥Using the LED video light reduces battery time. ≥Set the LED video light to obtain high quality images. 22 LSQT1284 LIGHT ≥The...

Digital Video Camcorder
Page 23
... LCD monitor is selected, the recording time will be 1.5 times the SP mode, but some functions will be disabled. ≥We recommend using Panasonic cassettes marked LP mode. ≥In the LP mode, the picture quality will not be degraded in comparison with the SP mode, but mosaic ... 1/250.) ≥Color balance and focus may not be adjusted depending on other digital video equipment recorded in the background as weddings or when the Camcorder has not been used for important recording. ≥In order to Tape Recording/Playback Mode. 1 Set [BASIC] or [ADVANCED] >> [REC SPEED] >> [SP] or ...
... LCD monitor is selected, the recording time will be 1.5 times the SP mode, but some functions will be disabled. ≥We recommend using Panasonic cassettes marked LP mode. ≥In the LP mode, the picture quality will not be degraded in comparison with the SP mode, but mosaic ... 1/250.) ≥Color balance and focus may not be adjusted depending on other digital video equipment recorded in the background as weddings or when the Camcorder has not been used for important recording. ≥In order to Tape Recording/Playback Mode. 1 Set [BASIC] or [ADVANCED] >> [REC SPEED] >> [SP] or ...

Digital Video Camcorder
Page 24
The default aspect ratio is set to a PC or other equipment 24 LSQT1284 To use the Camcorder, turn off to protect the tape or to 3 minutes shorter than the actual remaining tape time. ª [POWER SAVE] [OFF]: When 5 minutes passes without... (When it reaches less than usual to start recording after you press the recording start /stop button. [5 MINUTES]: When 5 minutes passes without any operation, the Camcorder automatically turns off even when set [POWER SAVE] >> [5 MINUTES]. ≥When connecting to the AC outlet (When using the AC adaptor) ≥When connecting ...
The default aspect ratio is set to a PC or other equipment 24 LSQT1284 To use the Camcorder, turn off to protect the tape or to 3 minutes shorter than the actual remaining tape time. ª [POWER SAVE] [OFF]: When 5 minutes passes without... (When it reaches less than usual to start recording after you press the recording start /stop button. [5 MINUTES]: When 5 minutes passes without any operation, the Camcorder automatically turns off even when set [POWER SAVE] >> [5 MINUTES]. ≥When connecting to the AC outlet (When using the AC adaptor) ≥When connecting ...

Digital Video Camcorder
Page 25
.... 2 Move the joystick right to select the blank search icon [ ]. 1 ≥The [RECORDING CHECK STARTED] indication appears on the screen of the Camcorder. 1 3 When the confirmation message appears, select [YES] and press the center of the joystick. ª Stopping blank search midway through Move the joystick...to 3 seconds. Move the joystick down to select the [∫] icon. ≥If the cassette tape has no blank part, then the Camcorder will be recorded seamlessly from the last image. 25 LSQT1284 Blank search function Searches for 2 to select the recording check icon [ ]. When...
.... 2 Move the joystick right to select the blank search icon [ ]. 1 ≥The [RECORDING CHECK STARTED] indication appears on the screen of the Camcorder. 1 3 When the confirmation message appears, select [YES] and press the center of the joystick. ª Stopping blank search midway through Move the joystick...to 3 seconds. Move the joystick down to select the [∫] icon. ≥If the cassette tape has no blank part, then the Camcorder will be recorded seamlessly from the last image. 25 LSQT1284 Blank search function Searches for 2 to select the recording check icon [ ]. When...

Digital Video Camcorder
Page 26
... that a mechanical sound may be recorded when the [W/T] lever is recorded. ≥When zooming in and taking a picture while holding the Camcorder by hand, we recommend using the optical image stabilizer function. -30- ≥When you are zooming in up recording (zoom in): Push...slightly inferior image quality. ª Continuous photoshot If you set [ADVANCED] >> [SHTR EFFECT] >> [ON] and keep the [ ] button pressed, the Camcorder will continuously record still pictures in approx. 0.7 seconds intervals until the button is released. ≥The screen blinks and, at the same time, a shutter ...
... that a mechanical sound may be recorded when the [W/T] lever is recorded. ≥When zooming in and taking a picture while holding the Camcorder by hand, we recommend using the optical image stabilizer function. -30- ≥When you are zooming in up recording (zoom in): Push...slightly inferior image quality. ª Continuous photoshot If you set [ADVANCED] >> [SHTR EFFECT] >> [ON] and keep the [ ] button pressed, the Camcorder will continuously record still pictures in approx. 0.7 seconds intervals until the button is released. ≥The screen blinks and, at the same time, a shutter ...

Digital Video Camcorder
Page 27
...170; To return to normal recording Select the [ ] icon again. ≥The [BACKLIGHT COMPENSATION OFF] indication appears on the screen of the Camcorder. ≥Backlight compensation is canceled when you turn off the power or operate the mode dial. ≥Backlight compensation is canceled when you activate... Mode. 1 Press the joystick to see the picture while recording. ≥The [BACKLIGHT COMPENSATION ON] indication appears on the screen of the Camcorder. ≥The image on the viewfinder screen, this is normal and not indicative of any trouble. ≥When the LCD monitor is degraded....
...170; To return to normal recording Select the [ ] icon again. ≥The [BACKLIGHT COMPENSATION OFF] indication appears on the screen of the Camcorder. ≥Backlight compensation is canceled when you turn off the power or operate the mode dial. ≥Backlight compensation is canceled when you activate... Mode. 1 Press the joystick to see the picture while recording. ≥The [BACKLIGHT COMPENSATION ON] indication appears on the screen of the Camcorder. ≥The image on the viewfinder screen, this is normal and not indicative of any trouble. ≥When the LCD monitor is degraded....

Digital Video Camcorder
Page 28
...The MagicPix function makes the signal charging time of the CCD up to approximately 30k longer than usual, so that dark scenes (a minimum of the Camcorder. ≥If the background or anything else in the scene has colors similar to the skin color, they will also be smoothed. ≥...until icon 1 appears. 2 Move the joystick left to select the soft skin icon [ ]. 1 1 ≥The [MAGICPIX ON] indication appears on the screen of the Camcorder. ≥If it is difficult to focus, adjust the focus manually. (-33-) ª To cancel the MagicPix function Select the [ ] icon again. ≥The [...
...The MagicPix function makes the signal charging time of the CCD up to approximately 30k longer than usual, so that dark scenes (a minimum of the Camcorder. ≥If the background or anything else in the scene has colors similar to the skin color, they will also be smoothed. ≥...until icon 1 appears. 2 Move the joystick left to select the soft skin icon [ ]. 1 1 ≥The [MAGICPIX ON] indication appears on the screen of the Camcorder. ≥If it is difficult to focus, adjust the focus manually. (-33-) ª To cancel the MagicPix function Select the [ ] icon again. ≥The [...

Digital Video Camcorder
Page 29
...is selected, it also takes several seconds to select the fade icon [ ]. 1 ≥The [FADE ON] indication appears on the screen of the Camcorder. 3 Press the recording start recording images. Move the joystick down until icon 1 appears. 2 Move the joystick left to display the image when you...the image/audio gradually appears. ª To cancel fading Select the [ ] icon again. ≥The [FADE OFF] indication appears on the screen of the Camcorder. ª To select the color for fade in/fade out The color which appears in fading pictures can be selected. 1 Set [ADVANCED] >> [FADE ...
...is selected, it also takes several seconds to select the fade icon [ ]. 1 ≥The [FADE ON] indication appears on the screen of the Camcorder. 3 Press the recording start recording images. Move the joystick down until icon 1 appears. 2 Move the joystick left to display the image when you...the image/audio gradually appears. ª To cancel fading Select the [ ] icon again. ≥The [FADE OFF] indication appears on the screen of the Camcorder. ª To select the color for fade in/fade out The color which appears in fading pictures can be selected. 1 Set [ADVANCED] >> [FADE ...

Digital Video Camcorder
Page 30
... optical image stabilizer function Press the [O.I.S.] button again. ≥In the following cases, the optical image stabilizer function may not be used ≥When the Camcorder is level while recording motion pictures.
... optical image stabilizer function Press the [O.I.S.] button again. ≥In the following cases, the optical image stabilizer function may not be used ≥When the Camcorder is level while recording motion pictures.

Digital Video Camcorder
Page 32
... appear. ≥If the brightness is used indoors, the screen may become washed out and the periphery extremely darkened. Sports mode ≥This mode reduces Camcorder shakes for the playback pause of the playback image may change the scene mode setting to be able to [OFF].
... appear. ≥If the brightness is used indoors, the screen may become washed out and the periphery extremely darkened. Sports mode ≥This mode reduces Camcorder shakes for the playback pause of the playback image may change the scene mode setting to be able to [OFF].


