

User Manual
Page 9
...for about one minute. The "POWER/STANDBY" LED indicator will flash amber for 30 seconds. 4. "LAMP" LED indicator will flash green. 3. The projector will lit green and stop flashing. u Powering Off the Projection Display. Turn off the lamp. Remove the lens cover 2. Make sure the computer or... video signal is well connected. Please select "Yes" to the image from the projector's On-Screen Display (OSD)menus. While the "TEMP" LED indicator turns "off the lamp? Turn on again for replacement lamp and refer to...
...for about one minute. The "POWER/STANDBY" LED indicator will flash amber for 30 seconds. 4. "LAMP" LED indicator will flash green. 3. The projector will lit green and stop flashing. u Powering Off the Projection Display. Turn off the lamp. Remove the lens cover 2. Make sure the computer or... video signal is well connected. Please select "Yes" to the image from the projector's On-Screen Display (OSD)menus. While the "TEMP" LED indicator turns "off the lamp? Turn on again for replacement lamp and refer to...
User Manual
Page 13
...image. 4When the "Zoom" icon is turned on -screen display (OSD) menus and to switch among different menus. Resync 4Automatically synchronizes the projector to choose between video and computer sources. Select "Yes" to confirm or select " No" to cancel.This function will reset all user ...adjustable parameters to exit the OSD. Keystone 4Adjust image distortion caused by tilting the projector. and use "Right"or "Left" button to change the horizontal positioning of the image. Enter 4Press "Enter" for your selection. Freeze/...
...image. 4When the "Zoom" icon is turned on -screen display (OSD) menus and to switch among different menus. Resync 4Automatically synchronizes the projector to choose between video and computer sources. Select "Yes" to confirm or select " No" to cancel.This function will reset all user ...adjustable parameters to exit the OSD. Keystone 4Adjust image distortion caused by tilting the projector. and use "Right"or "Left" button to change the horizontal positioning of the image. Enter 4Press "Enter" for your selection. Freeze/...
User Manual
Page 14
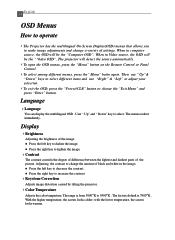
... keys to select different items and use "Right" & "Left" to increase the contrast 4Keystone Correction Adjusts image distortion caused by tilting the projector. 4Color Temperature Adjusts the color temperture. l Press the right key to adjust your selection. 4To exit the OSD, press the "Freeze/CLR" ...temperature, the screen looks warmer. Adjusting the contrast to change a variety of the image. English 14 OSD Menus How to operate 4The Projector has the multilingual On-Screen Display(OSD) menus that allows you to make image adjustments and change the amount of the picture. User...
... keys to select different items and use "Right" & "Left" to increase the contrast 4Keystone Correction Adjusts image distortion caused by tilting the projector. 4Color Temperature Adjusts the color temperture. l Press the right key to adjust your selection. 4To exit the OSD, press the "Freeze/CLR" ...temperature, the screen looks warmer. Adjusting the contrast to change a variety of the image. English 14 OSD Menus How to operate 4The Projector has the multilingual On-Screen Display(OSD) menus that allows you to make image adjustments and change the amount of the picture. User...
User Manual
Page 15
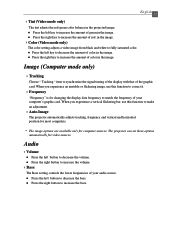
...flickering image, use this function to correct it. 4Frequency "Frequency" is for changing the display data frequency to make an adjustment. 4Auto-Image The projector automatically adjusts tracking, frequency and vertical and horizontal position for most computers. * The image options are available only for video sources. When you ... the frequency of red in the projected image. Image (Computer mode only) 4Tracking Choose " Tracking " item to decrease the bass. The projector can set these options automatically for computer sources. l Press the left button to increase the bass.
...flickering image, use this function to correct it. 4Frequency "Frequency" is for changing the display data frequency to make an adjustment. 4Auto-Image The projector automatically adjusts tracking, frequency and vertical and horizontal position for most computers. * The image options are available only for video sources. When you ... the frequency of red in the projected image. Image (Computer mode only) 4Tracking Choose " Tracking " item to decrease the bass. The projector can set these options automatically for computer sources. l Press the left button to increase the bass.

User Manual
Page 16
... icon to make the volume function ineffective. Projection 4Front-Desktop The factory default setting. 4Rear-Desktop When you select this function, the projector reverses the image so you select this function to decrease the volume. l Press the right button to increase the volume 4Mute l Choose...from behind a translucent screen. 4Front-Ceiling When you select this function, the projector truns the image upside down for ceiling-mounted projection. 4Rear-Ceiling When you can select this function, the projector reverses and truns the image upside down at same time. English 16 4Treble ...
... icon to make the volume function ineffective. Projection 4Front-Desktop The factory default setting. 4Rear-Desktop When you select this function, the projector reverses the image so you select this function to decrease the volume. l Press the right button to increase the volume 4Mute l Choose...from behind a translucent screen. 4Front-Ceiling When you select this function, the projector truns the image upside down for ceiling-mounted projection. 4Rear-Ceiling When you can select this function, the projector reverses and truns the image upside down at same time. English 16 4Treble ...
User Manual
Page 18
... following . Verify that the resolution setting is less than or equal to also change the monitor display you have removed the lens cap and the projector is less than 800 x 600. Select the "Setting" tab. 3. Problem: No image appears on . Verify that your local dealer or our service ... if the projection lamp has been securely installed. In the Windows Program Manager, click the "Windows Setup" icon in the "Installation" section. 4 If the projector is plugged into a power strip, make sure the power strip is turned on. 4 Ensure the pins of your computer is higher than or equal to...
... following . Verify that the resolution setting is less than or equal to also change the monitor display you have removed the lens cap and the projector is less than 800 x 600. Select the "Setting" tab. 3. Problem: No image appears on . Verify that your local dealer or our service ... if the projection lamp has been securely installed. In the Windows Program Manager, click the "Windows Setup" icon in the "Installation" section. 4 If the projector is plugged into a power strip, make sure the power strip is turned on. 4 Ensure the pins of your computer is higher than or equal to...
User Manual
Page 19
Click on the projector lens. 4 Make sure the projection screen is less than or equal to 800 x 600. 4 If you are using an Apple PowerBook: In Control Panels, open ... the "Change" button under the " Models" box. 7. Problem: Image has vertical flickering bar 4 Use "Frequency" to make it . 4 Change the monitor color setting from the projector. Click on " Show all the equipment and the projection display. choose the resolution mode you are using Notebook PC: Some Notebook PCs may deactivate their...
Click on the projector lens. 4 Make sure the projection screen is less than or equal to 800 x 600. 4 If you are using an Apple PowerBook: In Control Panels, open ... the "Change" button under the " Models" box. 7. Problem: Image has vertical flickering bar 4 Use "Frequency" to make it . 4 Change the monitor color setting from the projector. Click on " Show all the equipment and the projection display. choose the resolution mode you are using Notebook PC: Some Notebook PCs may deactivate their...

User Manual
Page 20
If the projection display is outstretched when displaying 16:9 DVD. The projector itself will also need to adjust the aspect ratio by digitization to the following: 4 Please select 4:3 aspect ratio type on your display. English 20 Problem : The screen is still outstretched, you can not select 4:3 aspect ratio type on your DVD player, please select 4:3 OnScreen-Display(OSD) function of the projector for your DVD player if you are playing a 16:9 DVD. 4 If you will automatically detect 16:9 DVD and adjust the aspect ratio by referring to full screen with 4:3 default setting.
If the projection display is outstretched when displaying 16:9 DVD. The projector itself will also need to adjust the aspect ratio by digitization to the following: 4 Please select 4:3 aspect ratio type on your display. English 20 Problem : The screen is still outstretched, you can not select 4:3 aspect ratio type on your DVD player, please select 4:3 OnScreen-Display(OSD) function of the projector for your DVD player if you are playing a 16:9 DVD. 4 If you will automatically detect 16:9 DVD and adjust the aspect ratio by referring to full screen with 4:3 default setting.


