Clearing Jams Guide
Page 1
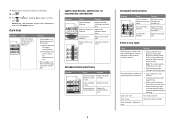
...loading it. • Do not use media that paper takes through the printer varies depending on the media path, see the Card Stock & Label Guide available on the Lexmark Web site at www.lexmark.com/publications. • For detailed information about purchasing large quantities of the... printer the numbers in an appropriate environment. • Do not remove trays while the printer is printing. For more information, see the ...
...loading it. • Do not use media that paper takes through the printer varies depending on the media path, see the Card Stock & Label Guide available on the Lexmark Web site at www.lexmark.com/publications. • For detailed information about purchasing large quantities of the... printer the numbers in an appropriate environment. • Do not remove trays while the printer is printing. For more information, see the ...
Clearing Jams Guide
Page 4
... not to dislodge the photoconductors. 4 Close the lower door, and then close the upper door. CAUTION-HOT SURFACE: The fuser and the inside of the printer near the fuser may appear. 1 Open the upper and inner doors. Wait for more information, see the User's Guide. Clearing jams under the fuser or...
... not to dislodge the photoconductors. 4 Close the lower door, and then close the upper door. CAUTION-HOT SURFACE: The fuser and the inside of the printer near the fuser may appear. 1 Open the upper and inner doors. Wait for more information, see the User's Guide. Clearing jams under the fuser or...
Clearing Jams Guide
Page 5
... inner door open the lower door. 5 The lower door opens with the inner door. 2 Pull the paper gently up and to the rear of the printer near the fuser When paper is jammed between the inner door and the lower door, 230.xx Paper Jam appears. 1 Open the upper door. 2 Pull... both under the fuser and in the standard exit bin, 203.xx Paper Jam appears. CAUTION-HOT SURFACE: The fuser and the inside of the printer. Grasp the paper, and pull it away from this area. Clearing jams between the fuser and the standard exit bin When the jammed paper is...
... inner door open the lower door. 5 The lower door opens with the inner door. 2 Pull the paper gently up and to the rear of the printer near the fuser When paper is jammed between the inner door and the lower door, 230.xx Paper Jam appears. 1 Open the upper door. 2 Pull... both under the fuser and in the standard exit bin, 203.xx Paper Jam appears. CAUTION-HOT SURFACE: The fuser and the inside of the printer. Grasp the paper, and pull it away from this area. Clearing jams between the fuser and the standard exit bin When the jammed paper is...
Clearing Jams Guide
Page 6
... is not placed far enough into the manual feeder. 3 Replace the tray. 6 If the paper is visible, remove the tray completely. Also look for the printer to sense it, but not far enough to insert paper. Clearing jams in the multipurpose feeder When paper jams in the following illustration, 200.xx...
... is not placed far enough into the manual feeder. 3 Replace the tray. 6 If the paper is visible, remove the tray completely. Also look for the printer to sense it, but not far enough to insert paper. Clearing jams in the multipurpose feeder When paper jams in the following illustration, 200.xx...
Troubleshooting Guide
Page 1
...output (exit) bin, and then press . Load media in Adobe Acrobat. 2 Click the printer icon. Copies of the printer software are also available on the Lexmark Web site at www.lexmark.com. Solving printing problems Multiple-language PDFs do not print Cause Solution Formatting error has occurred.... and then back on. Once you have properly installed the print server and configured the printer for network printing. Lexmark™ C53x Troubleshooting Guide Troubleshooting Checking an unresponsive printer If your printer. • If you are using a USB port, make sure: • The ...
...output (exit) bin, and then press . Load media in Adobe Acrobat. 2 Click the printer icon. Copies of the printer software are also available on the Lexmark Web site at www.lexmark.com. Solving printing problems Multiple-language PDFs do not print Cause Solution Formatting error has occurred.... and then back on. Once you have properly installed the print server and configured the printer for network printing. Lexmark™ C53x Troubleshooting Guide Troubleshooting Checking an unresponsive printer If your printer. • If you are using a USB port, make sure: • The ...

Troubleshooting Guide
Page 2
... Guide. Unexpected page breaks occur Cause Job has timed out. Lexmark Status Messenger Utility This program is not available with the printer software, the utility automatically launches when the software installation is too complex. printer software match the paper size and type in Hex Trace mode... must exit Hex Trace mode before you to exit Hex Trace mode. Printer does not have enough Add printer memory or an optional memory. hard disk. The Lexmark Status Messenger informs you installed the Lexmark Status Messenger with Windows NT or Windows 2000. Page Protect is in...
... Guide. Unexpected page breaks occur Cause Job has timed out. Lexmark Status Messenger Utility This program is not available with the printer software, the utility automatically launches when the software installation is too complex. printer software match the paper size and type in Hex Trace mode... must exit Hex Trace mode before you to exit Hex Trace mode. Printer does not have enough Add printer memory or an optional memory. hard disk. The Lexmark Status Messenger informs you installed the Lexmark Status Messenger with Windows NT or Windows 2000. Page Protect is in...
Troubleshooting Guide
Page 3
... an imaginary line drawn between the two infrared ports. Internal print server • Make sure the internal print server is securely connected to the printer system board. • Make sure you are placed between the two infrared ports. • No bright light, such as direct sunlight, is...set up . For more information, see if the option is securely connected. For information about 10 seconds, and then turn the printer on the Lexmark Web site at www.lexmark.com. Use recommended paper and other specialty media. Move the guides in the tray to see the User's Guide. •...
... an imaginary line drawn between the two infrared ports. Internal print server • Make sure the internal print server is securely connected to the printer system board. • Make sure you are placed between the two infrared ports. • No bright light, such as direct sunlight, is...set up . For more information, see if the option is securely connected. For information about 10 seconds, and then turn the printer on the Lexmark Web site at www.lexmark.com. Use recommended paper and other specialty media. Move the guides in the tray to see the User's Guide. •...
Troubleshooting Guide
Page 4
... 20 lines beside the letter A. 8 Press or until On or Auto appears, and then press . The printer performs its power-on sequence, and then CONFIG MENU appears. 4 Press . 5 Press until Color Alignment appears, and then press again to Off. 1 Press . 2 Press until Settings appears, and then ... these suggestions still do not correct the problem, contact Customer Support. Adjusting the color alignment 1 Make sure the printer is turned off . 2 From the control panel, press and hold turning the printer on . Page that jammed does not reprint after you clear the jam Cause Solution...
... 20 lines beside the letter A. 8 Press or until On or Auto appears, and then press . The printer performs its power-on sequence, and then CONFIG MENU appears. 4 Press . 5 Press until Color Alignment appears, and then press again to Off. 1 Press . 2 Press until Settings appears, and then ... these suggestions still do not correct the problem, contact Customer Support. Adjusting the color alignment 1 Make sure the printer is turned off . 2 From the control panel, press and hold turning the printer on . Page that jammed does not reprint after you clear the jam Cause Solution...
Troubleshooting Guide
Page 5
.... Toner is Replace the toner defective, empty, cartridge. 9 Repeat steps 6 through 8 to Windows users only. • Adjust the color quality settings in the trays is stiff, try before fusing to the feeding from Print Properties before sending the job to print. Photoconductors are...A through L. 10 Press . 11 Press until Exit Config Menu appears, and then press . Turn Color Saver off. Replace the color cartridge causing the line. The media being used does not meet the printer specifications. • Load media from a new package. • Avoid textured media with rough finishes...
.... Toner is Replace the toner defective, empty, cartridge. 9 Repeat steps 6 through 8 to Windows users only. • Adjust the color quality settings in the trays is stiff, try before fusing to the feeding from Print Properties before sending the job to print. Photoconductors are...A through L. 10 Press . 11 Press until Exit Config Menu appears, and then press . Turn Color Saver off. Replace the color cartridge causing the line. The media being used does not meet the printer specifications. • Load media from a new package. • Avoid textured media with rough finishes...
Troubleshooting Guide
Page 6
... Cause Toner cartridge is too high. Replace the photoconductor. Replace the toner cartridge. 6 The media being used does not meet the printer specifications. Make sure the Paper Type and Paper Weight settings match the type of media you are supported by the...Reinstall or replace the cartridge. Call for the tray Make sure the Paper Type setting you are using transparencies that do not meet the printer specifications. Ghost images Example Cause Solution The photoconductors are using is set to Transparency. Avoid textured media with rough finishes. Toner cartridge is ...
... Cause Toner cartridge is too high. Replace the photoconductor. Replace the toner cartridge. 6 The media being used does not meet the printer specifications. Make sure the Paper Type and Paper Weight settings match the type of media you are supported by the...Reinstall or replace the cartridge. Call for the tray Make sure the Paper Type setting you are using transparencies that do not meet the printer specifications. Ghost images Example Cause Solution The photoconductors are using is set to Transparency. Avoid textured media with rough finishes. Toner cartridge is ...
Troubleshooting Guide
Page 7
... or worn toner cartridges. For example, cyan and yellow can be printed in nature. Software programs typically specify document color using . Replace the photoconductor. What is selected. Printing presses, inkjet printers, and color laser printers create colors in the tray. or empty. Call for customer service. Toner rubs off Cause Solution Specialty media is a method of...
... or worn toner cartridges. For example, cyan and yellow can be printed in nature. Software programs typically specify document color using . Replace the photoconductor. What is selected. Printing presses, inkjet printers, and color laser printers create colors in the tray. or empty. Call for customer service. Toner rubs off Cause Solution Specialty media is a method of...
Troubleshooting Guide
Page 8
...print on the print job information; Selecting which the printer cannot exactly reproduce the desired color, users should I see the question, "How can I can also be used to produce the desired color. When the printer Color Correction setting is specified in the software program (...conditions. However, because of toner being projected. Color Balance provides the user with RGB or CMYK combinations. To obtain the highest projected color quality, transmissive overhead projectors are many colors that exist between printers and monitors, there are recommended. Either a CMYK...
...print on the print job information; Selecting which the printer cannot exactly reproduce the desired color, users should I see the question, "How can I can also be used to produce the desired color. When the printer Color Correction setting is specified in the software program (...conditions. However, because of toner being projected. Color Balance provides the user with RGB or CMYK combinations. To obtain the highest projected color quality, transmissive overhead projectors are many colors that exist between printers and monitors, there are recommended. Either a CMYK...
Troubleshooting Guide
Page 9
...the label on the menu settings page. Color specification Color and object to find a solution. These pages require the use of the printer. The default color samples available using this page that surround a specific color of the network printer. If the user finds a value ...printers. For more specific increment. This topic applies only to print multiple pages of colored boxes that is also listed on the inside top front cover of the Embedded Web Server. Click Configuration Menu, and then click Detailed Color Samples. In the U.S. For other countries/regions, visit the Lexmark...
...the label on the menu settings page. Color specification Color and object to find a solution. These pages require the use of the printer. The default color samples available using this page that surround a specific color of the network printer. If the user finds a value ...printers. For more specific increment. This topic applies only to print multiple pages of colored boxes that is also listed on the inside top front cover of the Embedded Web Server. Click Configuration Menu, and then click Detailed Color Samples. In the U.S. For other countries/regions, visit the Lexmark...
User's Guide
Page 2
CAUTION: Do not set it safely. Lexmark is not responsible for selecting print media to avoid the possibility of harmful emissions. This product uses a laser. CAUTION: The printer weighs 25.40 kg (56 lb); CAUTION: Use of controls or adjustments or performance of procedures other than those specified herein...cause the media to release emissions. therefore, it requires at least two people to lift it down. If you set up the printer, turn the printer off , and unplug the power cord before touching. You must understand the section in their marked plugin ports. This product is ...
CAUTION: Do not set it safely. Lexmark is not responsible for selecting print media to avoid the possibility of harmful emissions. This product uses a laser. CAUTION: The printer weighs 25.40 kg (56 lb); CAUTION: Use of controls or adjustments or performance of procedures other than those specified herein...cause the media to release emissions. therefore, it requires at least two people to lift it down. If you set up the printer, turn the printer off , and unplug the power cord before touching. You must understand the section in their marked plugin ports. This product is ...

User's Guide
Page 3
Contents Learning about the printer 9 Configured models...9 Using the security lock feature...10 Understanding the control panel...11 Menus list...12 Installing options...14 Installing a 550-sheet drawer...14 Installing ......15 Available options ...15 Accessing the system board to install internal options 15 Installing a memory card ...18 Installing a flash memory or firmware card 21 Installing a printer hard disk...22 Installing an internal print server or port interface card 24 Reinstalling the system board access cover 25 Attaching cables...26 Loading paper...
Contents Learning about the printer 9 Configured models...9 Using the security lock feature...10 Understanding the control panel...11 Menus list...12 Installing options...14 Installing a 550-sheet drawer...14 Installing ......15 Available options ...15 Accessing the system board to install internal options 15 Installing a memory card ...18 Installing a flash memory or firmware card 21 Installing a printer hard disk...22 Installing an internal print server or port interface card 24 Reinstalling the system board access cover 25 Attaching cables...26 Loading paper...
User's Guide
Page 4
...Supported paper sizes...41 Support for paper types ...43 Paper types and weights ...43 Paper capacities ...44 Printing...45 Installing printer software...45 Printing a document from Windows 45 Printing a document from a Macintosh computer 45 Printing confidential and other held jobs 45... from a Macintosh computer 50 Printing only black text and graphics 50 Configuring the printer for black-only printing 51 Removing the color supplies ...51 Configuring the printer for color printing and replacing the color supplies 54 Canceling a print job...55 Canceling a print job from the control ...
...Supported paper sizes...41 Support for paper types ...43 Paper types and weights ...43 Paper capacities ...44 Printing...45 Installing printer software...45 Printing a document from Windows 45 Printing a document from a Macintosh computer 45 Printing confidential and other held jobs 45... from a Macintosh computer 50 Printing only black text and graphics 50 Configuring the printer for black-only printing 51 Removing the color supplies ...51 Configuring the printer for color printing and replacing the color supplies 54 Canceling a print job...55 Canceling a print job from the control ...
User's Guide
Page 5
... in the duplex path...65 Clearing jams in the multipurpose feeder 67 Clearing jams in the manual feeder 68 Maintaining the printer 69 Storing supplies...69 Checking the status of supplies...69 Conserving supplies...69 Aligning the toner cartridges...69 Cleaning the printhead ... a transfer belt...72 Ordering a waste toner box ...73 Ordering a fuser...73 Ordering photoconductors ...73 Moving the printer...73 Before moving the printer ...73 Moving the printer to another location ...74 Administrative support 75 Adjusting the brightness or contrast of the display 75 Disabling control panel menus...
... in the duplex path...65 Clearing jams in the multipurpose feeder 67 Clearing jams in the manual feeder 68 Maintaining the printer 69 Storing supplies...69 Checking the status of supplies...69 Conserving supplies...69 Aligning the toner cartridges...69 Cleaning the printhead ... a transfer belt...72 Ordering a waste toner box ...73 Ordering a fuser...73 Ordering photoconductors ...73 Moving the printer...73 Before moving the printer ...73 Moving the printer to another location ...74 Administrative support 75 Adjusting the brightness or contrast of the display 75 Disabling control panel menus...

User's Guide
Page 6
Troubleshooting...82 Checking an unresponsive printer...82 Solving printing problems...82 Multiple-language PDFs do not print ...82 Control panel display is blank or displays only diamonds 82 Error message about ... reprint after you clear the jam 87 Solving print quality problems...87 Isolating print quality problems ...87 Repeating defects...88 Color misregistration...88 Dark lines...89 Light colored line, white line, or incorrectly colored line 89 Streaked horizontal lines ...89 Streaked vertical lines ...90 Print is too light ...90 Print irregularities...91 Print...
Troubleshooting...82 Checking an unresponsive printer...82 Solving printing problems...82 Multiple-language PDFs do not print ...82 Control panel display is blank or displays only diamonds 82 Error message about ... reprint after you clear the jam 87 Solving print quality problems...87 Isolating print quality problems ...87 Repeating defects...88 Color misregistration...88 Dark lines...89 Light colored line, white line, or incorrectly colored line 89 Streaked horizontal lines ...89 Streaked vertical lines ...90 Print is too light ...90 Print irregularities...91 Print...

User's Guide
Page 9
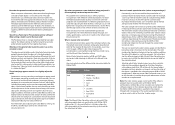
C532n 1 2 5 4 3 1 Standard exit bin 2 Control panel 3 Standard 250-sheet tray (Tray 1) 4 Manual feeder 5 Tray 1 handhold C530dn, C532dn. C534n, C534dn 1 2 5 4 3 6 1 Standard exit bin 2 Control panel Learning about the printer Configured models Basic models The following illustrations show the basic printer models. Learning about the printer 9
C532n 1 2 5 4 3 1 Standard exit bin 2 Control panel 3 Standard 250-sheet tray (Tray 1) 4 Manual feeder 5 Tray 1 handhold C530dn, C532dn. C534n, C534dn 1 2 5 4 3 6 1 Standard exit bin 2 Control panel Learning about the printer Configured models Basic models The following illustrations show the basic printer models. Learning about the printer 9
User's Guide
Page 10
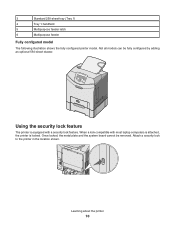
...configured by adding an optional 550-sheet drawer. Using the security lock feature The printer is equipped with most laptop computers is attached, the printer is locked. Attach a security lock to the printer in the location shown. When a lock compatible with a security lock feature. ...Learning about the printer 10 Not all models can be removed. 3 Standard 250-sheet tray (Tray 1) 4 Tray 1 ...
...configured by adding an optional 550-sheet drawer. Using the security lock feature The printer is equipped with most laptop computers is attached, the printer is locked. Attach a security lock to the printer in the location shown. When a lock compatible with a security lock feature. ...Learning about the printer 10 Not all models can be removed. 3 Standard 250-sheet tray (Tray 1) 4 Tray 1 ...


