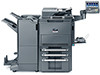
Twain/WIA Driver Operation Guide Rev-3.0
Page 4
Click the Edit button to the PC and the machine name and model name are displayed in the Scanner List field. 7 Select the checkbox beside Authentication, enter Login User Name (up to 64 characters) and Password (up to 64 characters) and then click the OK button. 8 Click the OK button. 9 The machine is registered to change names. 3 NOTE: Click the Delete button to delete the added machine.
Twain/WIA Driver Operation Guide Rev-3.0
Page 5
... you have provided. If user login administration is unknown, contact Administrator. 4 Select the checkbox beside Authentication, enter Login User Name (up to 64 characters) and Password (up to Step 5. NOTE: When the machine's IP address is invalid, go to 64 characters) and then click the OK button. 4 Continue installation. 3 Click the...
Twain/WIA Driver Operation Guide Rev-3.0
Page 7
... the Setting button to select each application software. 3 Select the Custom Box containing the document file to start scanning. 6 Enter the password and click the OK button. View Item Delete Invert Description Change the display in the same manner. 1 Activate the TWAIN compatible application.... 2 Select the machine using the TWAIN Driver. The following procedure is an example for the box, the password entry screen appears. NOTE: For selecting the machine, see the Operation Guide or Help for each item. After scanning the document data...
TASKalfa MFP Network Fax Driver Operation Guide Rev.2011.1
Page 14
... a designated time. NOTE: For more information on Subaddress-Based communication, refer to achieve highly confidential communication. When making the transmission settings, the sub-address and password of the other party (when these are set in the fax itself. (2) Subaddress-Based Communication This is a communication method that enables you to transmit documents...
TASKalfa MFP Network Fax Driver Operation Guide Rev.2011.1
Page 16
... when the Account ID matches. Transmission is only possible when the Login User Name and Password match. When the fax machine is set to User Login, the Login User Name and Password must be registered in the Network FAX driver settings. This machine can perform Internet fax ... set to Job Accounting, the Account ID must be registered in the Network FAX driver settings. Login User Name : 12345 Password: ***** Account ID: 5678 Login User Name : 12345 Password: ***** Account ID: 5678 2-4 Sending a Fax (5) Internet fax Transmission This machine supports Internet fax.
TASKalfa MFP Network Fax Driver Operation Guide Rev.2011.1
Page 22
Transmission will be displayed when attempting a transmission. Use Specific Login User Name: Enter the Login User Name and Password. NOTE: For information regarding the Cover Page registration method, refer to Cover Page Registration (Default Settings) on page 3-6. (3) Authentication Tab 1 2 2-10 1... checkbox If the fax machine is attempted. Prompt for Login User Name: A screen for Login User Name as desired. The Login User Name and Password must be entered each time a transmission is set to your transmission. Sending a Fax (2) Cover Page Tab 1 1 Attach Cover Page checkbox Check ...
TASKalfa MFP Network Fax Driver Operation Guide Rev.2011.1
Page 26
... again. (3) Cover Page Settings A Cover Page can be created and used. 2-14 The Transmit Settings dialog box will be displayed. 2 Enter the sub-address and password as it is allowed for Cover Pages, original templates can be set as the first character.)) 3 Click on the Option Settings button in the destination...
TASKalfa MFP Network Fax Driver Operation Guide Rev.2011.1
Page 42
... Account ID in the Network FAX Driver when Job Accounting, is turn ON in the fax machine. Requires the input of a Login User Name and Password in the Network FAX Driver when User Login, is turned ON in the fax machine. Appendix Specifications Operating Environment Item Hardware Interface Operating system Description...
Card Authentication Kit (B) Operation Guide Rev 2013.1
Page 2
... pre-registered on the machine. For User Login setting and user registration, refer to Management in the Operation Guide of your login user name and password and then press [Login]. Setting User Login Make the settings of user account for purchasing our Card Authentication Kit (B). For details, refer to the To...
Card Authentication Kit (B) Operation Guide Rev 2013.1
Page 4
... use the machine. Keyboard Login setting You can make the Keyboard Login permission or prohibition setting. For the setting procedure, refer to Password Login setting. For the setting procedure, refer to Keyboard Login setting. NOTE: To return to require the entry of Keyboard Login, ... login, hold the ID card over the ID card reading part. Follow the steps below . 1 Press [Keyboard Login]. 2 Enter the login user name and login password, and then press [Login]. 3 In [User Login Setting], press [Next] → [ID Card Setting], [Next] → [Keyboard Login], and then press ...
Data Security Kit (E) Operation Guide Rev-4 2013.1
Page 7
Disposal If the machine is unused and demolished, obtain directions for the procedures. The changes could be given as the method for overwriting the entire hard disk. Refer to page 7 for disposal from the dealer (from which you can change the security password as well as required, either at installation or later. After Installation After installing the security kit, you purchsed the machine) or your service representative. 6
Data Security Kit (E) Operation Guide Rev-4 2013.1
Page 8
... need to 16 alphanumeric characters and symbols. Enter new password, then re-enter it to confirm. 8 Press [Password] to enter a new security password 6 to log in with administrator privileges. Security Password Set password. Enter your login user name and password and then press [Login]. System/Network - Confirm Password Status # Keys Cancel OK 02/02/2013 10:10...
Data Security Kit (E) Operation Guide Rev-4 2013.1
Page 9
... user login is set individually. Refer to the machine's Operation Guide for details. Refer to Overwriting on page 2 for the default login user name and password. 4 Press [Next] of Data Security. 5 Press [Next] of Data Overwrite Method. 8 Press [3-time Overwrite (DoD)] (default) or [Once Overwrite]. 9 Press [OK]. System/Network - For this... Disk Change the method for overwriting and hard disk initialization, and cannot therefore be set 000000. 7 Press [Change] of Hard Disk Initialization. 6 Enter the security password. Enter your login user name and...
Data Security Kit (E) Operation Guide Rev-4 2013.1
Page 10
... 1 Press the [System Menu] key. 2 Press [System/Network]. 3 If the user authentication screen appears, enter the login user name and login password, and press [Login]. If the user authentication screen does not appear, go to Step 4. 4 Press [Next] of Data Security. 5 Press [Next] of... Hard Disk Initialization. 6 Enter the default security password, 000000. 7 Press [Execute] of the machine. Initialization starts. 9 When the screen appears to show initialization is completed, press the Power key, check that ...
Data Security Kit (E) Operation Guide Rev-4 2013.1
Page 11
... information of the machine has been lost for some reason, the screen shown here appears when the power is not the same as the security password. 2 Press the Power key and confirm that the Power key/indicator and the memory indicator are off and on . Follow the steps below. The encryption...
Fax System (W) Operation Guide Rev-2.2013.1
Page 26
...time. 1 Press the [System Menu] key. 2 Press [ ], and then [Date/Timer/Energy Saver]. The factory default settings for the login user name and password are both 'Admin'. 3 Press [Change] of Summer Time and then press [OK]. Select the location nearest you select a region that does not utilize summer ... built-in clock. The user authentication screen is conducted based on the touch panel of the operation panel regularly. Enter a login user name and password, and press [Login]. Time Zone -12:00 International Date Line West -11:00 Samoa -11:00 Universal Coordinated Time-11 -10:00 Hawaii ...
Fax System (W) Operation Guide Rev-2.2013.1
Page 29
... to 9, ' (space)', '#' and '*' characters to enter a sub address. If you dial a specific number. 10Press [Change] of the cursor. 12Press [Password] and enter the sub address password using encryption, go to step 19. 15Press [On], and select Encryption Key No. Key 01 Key 02 Key 03 Key 04 Key 05... of Encryption Key No. Use [ ] or [ ] to enter a space. Encrypted Transmission Off On Status Encryption Key No. Enter sub address and password using numeric keys. (Max. 20 digits) Status Cancel OK 02/02/2013 10:10 NOTE You can use sub address communication, go to step 14...
Fax System (W) Operation Guide Rev-2.2013.1
Page 86
... e-mail transmission. z Number of the other party to which you will forward the received originals. Enter the Host Name, Path, Login User Name, and Login Password of Copies z Enable time setting z File name registration NOTE For details on above settings, refer to [Prohibit], the numeric keys cannot be edited from the...
Fax System (W) Operation Guide Rev-2.2013.1
Page 89
... change the following keys, and press [OK] to add the other party to the list. Enter the Host Name, Path, Login User Name, and Login Password of the other party by Requirements (Memory Forwarding) 18Set the Forward Destination. z File format z E-mail Subject Add. For details, refer to be removed from the...
Fax System (W) Operation Guide Rev-2.2013.1
Page 90
... faxes that do not meet the conditions, select other settings. 29Select the checkbox beside the forwarding settings to be used to FAX Box, enter the password and press [OK]. 25You can change the settings. z Number of received faxes that do not meet the conditions will be set the...