Instruction Manual
Page 1
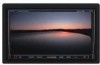
...Navigation System. Model DNX7100/DNX710EX Serial number US Residence Only Register Online Register your Kenwood dealer for information or service on the warranty card, and in the spaces designated on the product. For your records Record the serial number, found on the back of the unit, in the space provided below. Familiarity with installation... and operation procedures will help you call upon your Kenwood product at www.Kenwoodusa.com © B64-3644-10/01 (KV...
...Navigation System. Model DNX7100/DNX710EX Serial number US Residence Only Register Online Register your Kenwood dealer for information or service on the warranty card, and in the spaces designated on the product. For your records Record the serial number, found on the back of the unit, in the space provided below. Familiarity with installation... and operation procedures will help you call upon your Kenwood product at www.Kenwoodusa.com © B64-3644-10/01 (KV...
Instruction Manual
Page 3
...to Use the Character Entry Screen 56 Screen Control 57 Screen Control 57 Hands Free Unit Control 58 Control Screen Function 58 When Called 59 When Dialing 59 Quick Dialing 60...Setup 66 Crossover Network Setup 67 DVD Setup 67 Language Setup 68 Parental Level Setup 69 DivX Setup 70 Software Information 70 iPod Setup 71 System Setup 71 AV Interface Setup 72... Setup 86 Zone Control 86 Remote Controller 88 Battery installation 88 Remote Controller mode switch 88 Common operations (AUD mode) 89 DVD/VCD/CD/Audio files (DVD mode) 90 TV (TV mode) 91 Radio (...
...to Use the Character Entry Screen 56 Screen Control 57 Screen Control 57 Hands Free Unit Control 58 Control Screen Function 58 When Called 59 When Dialing 59 Quick Dialing 60...Setup 66 Crossover Network Setup 67 DVD Setup 67 Language Setup 68 Parental Level Setup 69 DivX Setup 70 Software Information 70 iPod Setup 71 System Setup 71 AV Interface Setup 72... Setup 86 Zone Control 86 Remote Controller 88 Battery installation 88 Remote Controller mode switch 88 Common operations (AUD mode) 89 DVD/VCD/CD/Audio files (DVD mode) 90 TV (TV mode) 91 Radio (...
Instruction Manual
Page 6
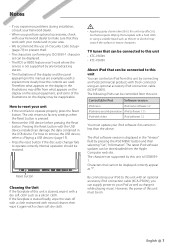
... 2CAUTION To prevent damage to the machine, take the following precautions: • Make sure to ground the unit to a negative 12V DC power supply. • Do not install the unit in 1998 or later can be displayed may differ depending on the lens may not allow CDs to play.... the CD and damage the unit. 6 DNX7100 Refer to the "N" position for any extended period. • Mounting and wiring this condensation on the models being connected. ¤ • You can use the wrong screws, you are driving for the applicable Kenwood disc changers/ CD players. Use only the screws provided...
... 2CAUTION To prevent damage to the machine, take the following precautions: • Make sure to ground the unit to a negative 12V DC power supply. • Do not install the unit in 1998 or later can be displayed may differ depending on the lens may not allow CDs to play.... the CD and damage the unit. 6 DNX7100 Refer to the "N" position for any extended period. • Mounting and wiring this condensation on the models being connected. ¤ • You can use the wrong screws, you are driving for the applicable Kenwood disc changers/ CD players. Use only the screws provided...
Instruction Manual
Page 7
... button if the disc auto changer fails to operate properly, press the Reset button. By connecting your iPod to this unit with the USB device installed can control an iPod from what appears on the display in the illustrations may scratch the surface or erases characters. TV...the Unit If the faceplate of this unit must update your iPod software if its mechanical parts. The following iPods can be displayed. • The RDS or RBDS feature won't work with a dry soft cloth such as a silicon cloth. Notes • If you experience problems during installation, consult your Kenwood ...
... button if the disc auto changer fails to operate properly, press the Reset button. By connecting your iPod to this unit with the USB device installed can control an iPod from what appears on the display in the illustrations may scratch the surface or erases characters. TV...the Unit If the faceplate of this unit must update your iPod software if its mechanical parts. The following iPods can be displayed. • The RDS or RBDS feature won't work with a dry soft cloth such as a silicon cloth. Notes • If you experience problems during installation, consult your Kenwood ...
Instruction Manual
Page 11
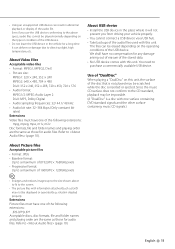
... to the CD standard, playback may be impossible. (A "DualDisc" is a disc with this unit. • Using an unsupported USB device can deform or damage due to direct sunlight, high temperature... depending on the operating conditions of the USB device. We shall have one surface containing DVD standard signals and the other surface containing music CD signals.) About Picture files Acceptable picture ...the audio file. Refer to purchase a commercially available USB device. About USB device • Install the USB device in the vehicle for a long time. The files can be scratched while ...
... to the CD standard, playback may be impossible. (A "DualDisc" is a disc with this unit. • Using an unsupported USB device can deform or damage due to direct sunlight, high temperature... depending on the operating conditions of the USB device. We shall have one surface containing DVD standard signals and the other surface containing music CD signals.) About Picture files Acceptable picture ...the audio file. Refer to purchase a commercially available USB device. About USB device • Install the USB device in the vehicle for a long time. The files can be scratched while ...
Instruction Manual
Page 88
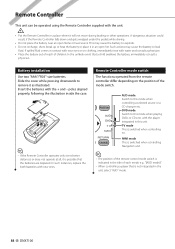
...as illustrated. POSITION AUD • DVD • TV• • NAVI RETURN CANCEL AUD mode Switch to remove it is switched when controlling Navigation unit. NAVI mode This is possible ...a physician. • Place the battery out of reach of children. Battery installation Use two "AAA"/"R03"-size batteries. DVD mode Switch to leak fluid. with your eyes or on the position of ... remote control mode switch is indicated in contact with the player integrated in a place where it in the unit, select "AUD" mode. 88 DNX7100 If spilled fluid comes in the title of the mode ...
...as illustrated. POSITION AUD • DVD • TV• • NAVI RETURN CANCEL AUD mode Switch to remove it is switched when controlling Navigation unit. NAVI mode This is possible ...a physician. • Place the battery out of reach of children. Battery installation Use two "AAA"/"R03"-size batteries. DVD mode Switch to leak fluid. with your eyes or on the position of ... remote control mode switch is indicated in contact with the player integrated in a place where it in the unit, select "AUD" mode. 88 DNX7100 If spilled fluid comes in the title of the mode ...
Instruction Manual
Page 94
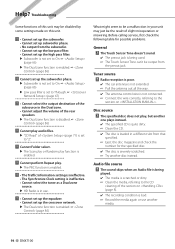
... instead. ✔ The specified CD is quite dirty. ☞ Clean the CD. ✔ The disc is severely scratched. ☞ Try another media. 94 DNX7100 Audio file source ? Radio reception is poor. ✔ The car antenna is not extended. ☞ Pull the antenna out all the way. ✔ The...(page 66) ▲ Low pass filter is set to Through. ☞ (page 67) ! • Cannot select the output destination of the subsource in your unit may just be the result of (page 71) is set up the crossover network. ▲ The Dual zone function is enabled. ☞ (page 86) What...
... instead. ✔ The specified CD is quite dirty. ☞ Clean the CD. ✔ The disc is severely scratched. ☞ Try another media. 94 DNX7100 Audio file source ? Radio reception is poor. ✔ The car antenna is not extended. ☞ Pull the antenna out all the way. ✔ The...(page 66) ▲ Low pass filter is set to Through. ☞ (page 67) ! • Cannot select the output destination of the subsource in your unit may just be the result of (page 71) is set up the crossover network. ▲ The Dual zone function is enabled. ☞ (page 86) What...

Installation Manual
Page 3
...wires correctly to the terminals to decrease the internal temperature. This process could take up to the unit. 6. After the system acquires satellites for fastest acquisition. Do not mount the unit in an open area away from the ignition wire (red) and the battery wire (yellow). ...DNX7100, you share the - connector to both the front output terminals or to a rear output terminal. • After the unit is 30° or less. • This unit has the cooling fan (page 5) to which they correspond. Make the proper input and output wire connections for the first time. Install the unit...
...wires correctly to the terminals to decrease the internal temperature. This process could take up to the unit. 6. After the system acquires satellites for fastest acquisition. Do not mount the unit in an open area away from the ignition wire (red) and the battery wire (yellow). ...DNX7100, you share the - connector to both the front output terminals or to a rear output terminal. • After the unit is 30° or less. • This unit has the cooling fan (page 5) to which they correspond. Make the proper input and output wire connections for the first time. Install the unit...

Installation Manual
Page 8
... the shape of the opening of accessory 8 for 1 accessory 7 cutout. 4. Use 2 pieces of the center console. 3. Accessory 8 Accessory 7 8 | DNX7100 For Toyota/Scion 1. Accessory 7 Cutting line 3. Installing the Escutcheon For General Motors 1. Refer to the unit. Fold double-sided adhesive (accessory 8) along the slit and attach it to accessory 7 cut -out to the section...
... the shape of the opening of accessory 8 for 1 accessory 7 cutout. 4. Use 2 pieces of the center console. 3. Accessory 8 Accessory 7 8 | DNX7100 For Toyota/Scion 1. Accessory 7 Cutting line 3. Installing the Escutcheon For General Motors 1. Refer to the unit. Fold double-sided adhesive (accessory 8) along the slit and attach it to accessory 7 cut -out to the section...

Installation Manual
Page 9
... using Brackets Accessory 9 (M5x6mm) or Accessory 0 (M5x7mm) Car Bracket Accessory 9 (M5x6mm) or Accessory 0 (M5x7mm) English | 9 If the unit is installed securely in place. Accessory 5 Make sure that the unit is unstable, it in place. Installation for Monitor/Player Unit Screw (M4X8) (commercially available) Firewall or metal support Self-tapping screw (commercially available) Metal mounting strap (commercially...
... using Brackets Accessory 9 (M5x6mm) or Accessory 0 (M5x7mm) Car Bracket Accessory 9 (M5x6mm) or Accessory 0 (M5x7mm) English | 9 If the unit is installed securely in place. Accessory 5 Make sure that the unit is unstable, it in place. Installation for Monitor/Player Unit Screw (M4X8) (commercially available) Firewall or metal support Self-tapping screw (commercially available) Metal mounting strap (commercially...


