HP Client Manager 6.1
Page 7
... down to more clearly demonstrate its capabilities. HPCM in operation This section shows HPCM in the right pane. Client inventory The Altiris Console Client Inventory screen, shown below, highlights some of the primary capabilities of client information provided by System ID is selected in the left pane and the SysID for...
... down to more clearly demonstrate its capabilities. HPCM in operation This section shows HPCM in the right pane. Client inventory The Altiris Console Client Inventory screen, shown below, highlights some of the primary capabilities of client information provided by System ID is selected in the left pane and the SysID for...
HP Client Manager 6.1
Page 8
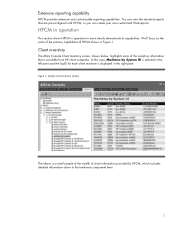
... the occurrence of the pre-configured reports. The health monitoring capability of HPCM simplifies the task of your predefined notification policies. Health monitoring The partial screen capture below shows the events that can be monitored varies by alerting you to the situation. You can also monitor the status of these events...
... the occurrence of the pre-configured reports. The health monitoring capability of HPCM simplifies the task of your predefined notification policies. Health monitoring The partial screen capture below shows the events that can be monitored varies by alerting you to the situation. You can also monitor the status of these events...
HP Client Manager 6.1
Page 9
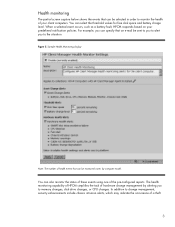
Errors detected by the diagnostic software are performed on the memory, CPU, storage devices and I/O devices. Figure 6. Sample Diagnostics screen 9 Diagnostics Diagnostics are reported in the far right column (not shown in Figure 6 shows a typical diagnostics report. The partial screen capture in this screen shot).
Errors detected by the diagnostic software are performed on the memory, CPU, storage devices and I/O devices. Figure 6. Sample Diagnostics screen 9 Diagnostics Diagnostics are reported in the far right column (not shown in Figure 6 shows a typical diagnostics report. The partial screen capture in this screen shot).
HP Client Manager 6.1
Page 10
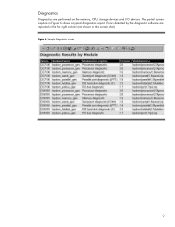
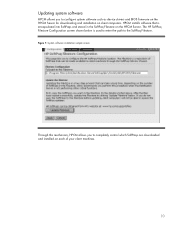
System software installation sample screen Through this mechanism, HPCM allows you to configure system software such as device drivers and BIOS firmware on the HPCM Server for downloading and installation ... software HPCM allows you to completely control which SoftPaqs are downloaded and installed on each of your client machines. 10 The HP SoftPaq Filestore Configuration screen shown below is encapsulated into SoftPaqs and stored in the SoftPaq Filestore on the HPCM Server. Figure 7. HPCM installs software that is used to enter...
System software installation sample screen Through this mechanism, HPCM allows you to configure system software such as device drivers and BIOS firmware on the HPCM Server for downloading and installation ... software HPCM allows you to completely control which SoftPaqs are downloaded and installed on each of your client machines. 10 The HP SoftPaq Filestore Configuration screen shown below is encapsulated into SoftPaqs and stored in the SoftPaq Filestore on the HPCM Server. Figure 7. HPCM installs software that is used to enter...
Wireless Security
Page 6
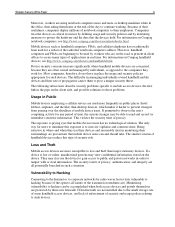
... the companies they use the device to gain access to public and private networks in monitoring their own firewalls. The smaller screens of applications in client offices to access many types of handheld devices reduce this exposure is lost or stolen, unauthorized persons ... their employees. For information on the client side, and possible solutions to those problems. Usage in the pipe on Compaq notebook computers, see http://www.compaq.com/showroom/handhelds.html. The following subsections describe security problems specific to prying eyes that mobile device users can be...
... the companies they use the device to gain access to public and private networks in monitoring their own firewalls. The smaller screens of applications in client offices to access many types of handheld devices reduce this exposure is lost or stolen, unauthorized persons ... their employees. For information on the client side, and possible solutions to those problems. Usage in the pipe on Compaq notebook computers, see http://www.compaq.com/showroom/handhelds.html. The following subsections describe security problems specific to prying eyes that mobile device users can be...
Wireless Security
Page 27
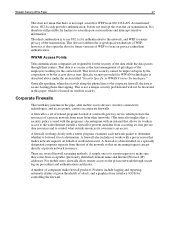
... for authentication to the network, and WEP to ensure privacy of related programs located at a network gateway server, which is to screen requests to make firewall products. This is not a unique security problem and will not be improved upon by the corporation or by... accessing its own private data resources and to control what outside resources its destination. WWAN Access Points Telecommunications companies are several firewall screening methods. Generally speaking, when data travels along the phone lines to the corporate firewall, the data is to use 802.1x ...
... for authentication to the network, and WEP to ensure privacy of related programs located at a network gateway server, which is to screen requests to make firewall products. This is not a unique security problem and will not be improved upon by the corporation or by... accessing its own private data resources and to control what outside resources its destination. WWAN Access Points Telecommunications companies are several firewall screening methods. Generally speaking, when data travels along the phone lines to the corporate firewall, the data is to use 802.1x ...
Hardware Guide Evo Notebook N600c Series
Page 4
... Volume (Fn+F5 3-10 Initiate Quick Controls (Fn+F6 3-10 Set Power Conservation Level (Fn+F7 3-11 View Battery Charge Information (Fn+F8 3-11 Adjust Screen Brightness (Fn+F10 3-12 Display System Information (Fn+esc 3-12 Stretch Text (Fn+T 3-12 Using the Fn Key Sequentially 3-13 Using the Embedded Numeric Keypad...
... Volume (Fn+F5 3-10 Initiate Quick Controls (Fn+F6 3-10 Set Power Conservation Level (Fn+F7 3-11 View Battery Charge Information (Fn+F8 3-11 Adjust Screen Brightness (Fn+F10 3-12 Display System Information (Fn+esc 3-12 Stretch Text (Fn+T 3-12 Using the Fn Key Sequentially 3-13 Using the Embedded Numeric Keypad...
Hardware Guide Evo Notebook N600c Series
Page 10
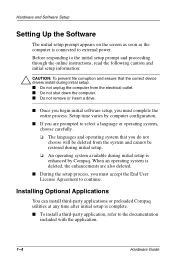
... power. Hardware and Software Setup Setting Up the Software The initial setup prompt appears on the screen as soon as the computer is enhanced by computer configuration. Setup time varies by Compaq. When an operating system is complete. Installing Optional Applications You can install third-party applications or... preloaded Compaq utilities at any time after initial setup is deleted, the enhancements are prompted to continue. Before responding to the initial setup...
... power. Hardware and Software Setup Setting Up the Software The initial setup prompt appears on the screen as soon as the computer is enhanced by computer configuration. Setup time varies by Compaq. When an operating system is complete. Installing Optional Applications You can install third-party applications or... preloaded Compaq utilities at any time after initial setup is deleted, the enhancements are prompted to continue. Before responding to the initial setup...
Hardware Guide Evo Notebook N600c Series
Page 11
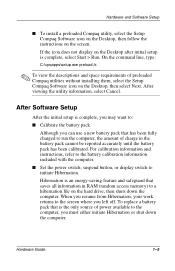
...to a hibernation file on the hard drive, then shuts down the computer. I To install a preloaded Compaq utility, select the Setup Compaq Software icon on the Desktop, then follow the instructions on the screen. Hibernation is an energy-saving feature and safeguard that is the only source of preloaded... Compaq utilities without installing them, select the Setup Compaq Software icon on the Desktop after initial setup is complete, you ...
...to a hibernation file on the hard drive, then shuts down the computer. I To install a preloaded Compaq utility, select the Setup Compaq Software icon on the Desktop, then follow the instructions on the screen. Hibernation is an energy-saving feature and safeguard that is the only source of preloaded... Compaq utilities without installing them, select the Setup Compaq Software icon on the Desktop after initial setup is complete, you ...
Hardware Guide Evo Notebook N600c Series
Page 34
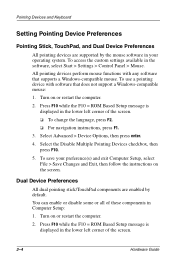
Press F10 while the F10 = ROM Based Setup message is displayed in the lower left corner of the screen. 3-4 Hardware Guide Turn on or restart the computer. 2. Pointing Devices and Keyboard Setting Pointing Device Preferences Pointing Stick, TouchPad, and Dual Device ... software in your preference(s) and exit Computer Setup, select File > Save Changes and Exit, then follow the instructions on the screen. You can enable or disable some or all of the screen. ❏ To change the language, press F2. ❏ For navigation instructions, press F1. 3. To use a pointing device ...
Press F10 while the F10 = ROM Based Setup message is displayed in the lower left corner of the screen. 3-4 Hardware Guide Turn on or restart the computer. 2. Pointing Devices and Keyboard Setting Pointing Device Preferences Pointing Stick, TouchPad, and Dual Device ... software in your preference(s) and exit Computer Setup, select File > Save Changes and Exit, then follow the instructions on the screen. You can enable or disable some or all of the screen. ❏ To change the language, press F2. ❏ For navigation instructions, press F1. 3. To use a pointing device ...

Hardware Guide Evo Notebook N600c Series
Page 35
.... 4. Replacing the Pointing Stick Cap 1. To confirm your preference and exit Computer Setup, select File > Save Changes and Exit, then follow the instructions on the screen. Turn off the used pointing stick cap. 3. Replacing the pointing stick cap Hardware Guide 3-5 To save your preference, press F10. 6. Push a replacement cap, included with...
.... 4. Replacing the Pointing Stick Cap 1. To confirm your preference and exit Computer Setup, select File > Save Changes and Exit, then follow the instructions on the screen. Turn off the used pointing stick cap. 3. Replacing the pointing stick cap Hardware Guide 3-5 To save your preference, press F10. 6. Push a replacement cap, included with...
Hardware Guide Evo Notebook N600c Series
Page 37
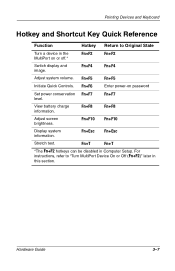
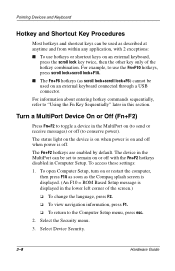
Fn+F6 Enter power-on or off.* Fn+F2 Fn+F2 Switch display and image. Fn+F8 Fn+F8 Adjust screen brightness. Fn+Esc Fn+Esc Stretch text. Fn+T Fn+T *The Fn+F2 hotkeys can be disabled in Computer Setup. Fn+F7 View battery charge information. ...
Fn+F6 Enter power-on or off.* Fn+F2 Fn+F2 Switch display and image. Fn+F8 Fn+F8 Adjust screen brightness. Fn+Esc Fn+Esc Stretch text. Fn+T Fn+T *The Fn+F2 hotkeys can be disabled in Computer Setup. Fn+F7 View battery charge information. ...
Hardware Guide Evo Notebook N600c Series
Page 38
... sequentially, refer to use hotkeys or shortcut keys on an external keyboard, press the scroll lock key twice, then the other key only of the screen.) ❏ To change the language, press F2. ❏ To view navigation information, press F1. ❏ To return to the Computer Setup menu, ... power). Select Device Security. 3-8 Hardware Guide For example, to "Using the Fn Key Sequentially" later in the MultiPort can be used as the Compaq splash screen is displayed. (An F10 = ROM Based Setup message is on (to send or receive messages) or off with 2 exceptions: I To use ...
... sequentially, refer to use hotkeys or shortcut keys on an external keyboard, press the scroll lock key twice, then the other key only of the screen.) ❏ To change the language, press F2. ❏ To view navigation information, press F1. ❏ To return to the Computer Setup menu, ... power). Select Device Security. 3-8 Hardware Guide For example, to "Using the Fn Key Sequentially" later in the MultiPort can be used as the Compaq splash screen is displayed. (An F10 = ROM Based Setup message is on (to send or receive messages) or off with 2 exceptions: I To use ...
Hardware Guide Evo Notebook N600c Series
Page 39
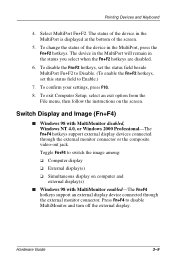
...composite video-out jack. Toggle Fn+F4 to switch the image among: ❏ Computer display ❏ External display(s) ❏ Simultaneous display on the screen. The device in the MultiPort will remain in the MultiPort, press the Fn+F2 hotkeys. Switch Display and Image (Fn+F4) I Windows 98 ... or Windows 2000 Professional-The Fn+F4 hotkeys support external display devices connected through the external monitor connector. To change the status of the screen. 5. The status of the device in the MultiPort is displayed at the bottom of the device in the status you select when the...
...composite video-out jack. Toggle Fn+F4 to switch the image among: ❏ Computer display ❏ External display(s) ❏ Simultaneous display on the screen. The device in the MultiPort will remain in the MultiPort, press the Fn+F2 hotkeys. Switch Display and Image (Fn+F4) I Windows 98 ... or Windows 2000 Professional-The Fn+F4 hotkeys support external display devices connected through the external monitor connector. To change the status of the screen. 5. The status of the device in the MultiPort is displayed at the bottom of the device in the status you select when the...
Hardware Guide Evo Notebook N600c Series
Page 42
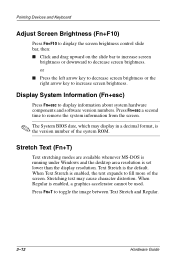
... or I Click and drag upward on the slide bar to increase screen brightness or downward to decrease screen brightness. When Regular is the version number of the screen. Press Fn+esc a second time to remove the system information from the screen. ✎ The System BIOS date, which may cause character distortion.... is running under Windows and the desktop area resolution is set lower than the display resolution. Pointing Devices and Keyboard Adjust Screen Brightness (Fn+F10) Press Fn+F10 to display the screen brightness control slide bar, then: I Press the left arrow key to decrease...
... or I Click and drag upward on the slide bar to increase screen brightness or downward to decrease screen brightness. When Regular is the version number of the screen. Press Fn+esc a second time to remove the system information from the screen. ✎ The System BIOS date, which may cause character distortion.... is running under Windows and the desktop area resolution is set lower than the display resolution. Pointing Devices and Keyboard Adjust Screen Brightness (Fn+F10) Press Fn+F10 to display the screen brightness control slide bar, then: I Press the left arrow key to decrease...
Hardware Guide Evo Notebook N600c Series
Page 45
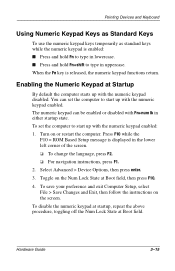
I Press and hold Fn+shift to type in the lower left corner of the screen. ❏ To change the language, press F2. ❏ For navigation instructions, press F1. 2. Select Advanced > Device Options, then press enter. 3. You can be enabled or ... Lock State at Boot field. To save your preference and exit Computer Setup, select File > Save Changes and Exit, then follow the instructions on the screen. To set the computer to start up with the numeric keypad disabled. Hardware Guide 3-15 Pointing Devices and Keyboard Using Numeric Keypad Keys as Standard...
I Press and hold Fn+shift to type in the lower left corner of the screen. ❏ To change the language, press F2. ❏ For navigation instructions, press F1. 2. Select Advanced > Device Options, then press enter. 3. You can be enabled or ... Lock State at Boot field. To save your preference and exit Computer Setup, select File > Save Changes and Exit, then follow the instructions on the screen. To set the computer to start up with the numeric keypad disabled. Hardware Guide 3-15 Pointing Devices and Keyboard Using Numeric Keypad Keys as Standard...
Hardware Guide Evo Notebook N600c Series
Page 67
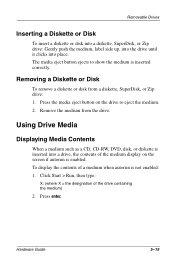
..., or Zip drive: 1. Hardware Guide 5-15 Removing a Diskette or Disk To remove a diskette or disk from the drive. Press the media eject button on the screen if autorun is inserted into place. Removable Drives Inserting a Diskette or Disk To insert a diskette or disk into a diskette, SuperDisk, or Zip drive: Gently push...
..., or Zip drive: 1. Hardware Guide 5-15 Removing a Diskette or Disk To remove a diskette or disk from the drive. Press the media eject button on the screen if autorun is inserted into place. Removable Drives Inserting a Diskette or Disk To insert a diskette or disk into a diskette, SuperDisk, or Zip drive: Gently push...

Hardware Guide Evo Notebook N600c Series
Page 71
... Volume To adjust volume, use 24- 32-ohm headphones. I For best sound quality, use any of personal injury, adjust the volume before putting on the screen or press the keyboard arrow keys. ❏ To mute or restore volume, toggle Fn+F5+M. Hardware Guide 6-3 When an external audio device is connected to...
... Volume To adjust volume, use 24- 32-ohm headphones. I For best sound quality, use any of personal injury, adjust the volume before putting on the screen or press the keyboard arrow keys. ❏ To mute or restore volume, toggle Fn+F5+M. Hardware Guide 6-3 When an external audio device is connected to...

Hardware Guide Evo Notebook N600c Series
Page 74
Enter your preference and exit Computer Setup, select File > Save Changes and Exit, then follow the instructions on or restart the computer. Turn on the screen. 6-6 Hardware Guide Select Advanced > Device Options, then press enter. 3. To save your preference, then press F10. 4. Press F10 while the F10 = ROM Based Setup message is displayed in the lower left corner of the screen. ❏ To change the color television standard mode from NTSC: 1. Audio and Video To change the language, press F2. ❏ For navigation instructions, press F1. 2.
Enter your preference and exit Computer Setup, select File > Save Changes and Exit, then follow the instructions on or restart the computer. Turn on the screen. 6-6 Hardware Guide Select Advanced > Device Options, then press enter. 3. To save your preference, then press F10. 4. Press F10 while the F10 = ROM Based Setup message is displayed in the lower left corner of the screen. ❏ To change the color television standard mode from NTSC: 1. Audio and Video To change the language, press F2. ❏ For navigation instructions, press F1. 2.
Hardware Guide Evo Notebook N600c Series
Page 80
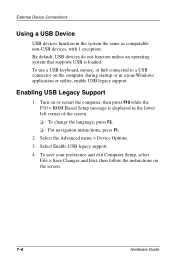
Select Enable USB legacy support. 4. Enabling USB Legacy Support 1. Turn on the screen. 7-6 Hardware Guide Select the Advanced menu > Device Options. 3. To save your preference and exit Computer Setup, select File > Save Changes and Exit, then follow the ... support. To use a USB keyboard, mouse, or hub connected to a USB connector on the computer during startup or in the lower left corner of the screen. ❏ To change the language, press F2. ❏ For navigation instructions, press F1. 2.
Select Enable USB legacy support. 4. Enabling USB Legacy Support 1. Turn on the screen. 7-6 Hardware Guide Select the Advanced menu > Device Options. 3. To save your preference and exit Computer Setup, select File > Save Changes and Exit, then follow the ... support. To use a USB keyboard, mouse, or hub connected to a USB connector on the computer during startup or in the lower left corner of the screen. ❏ To change the language, press F2. ❏ For navigation instructions, press F1. 2.


