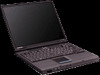
HP Client Manager 6.1
Page 3
... installation of the drivers on those client computers that match the hardware and software criteria that you to flash a single computer or a group of client-side events, such as a chassis intrusion, disk drive error, battery status, thermal changes, and "walking assets" such as new or missing PCs, memory, battery, disk drives, CPUs, and monitors. The diagnostic results are returned from a set of computers. For example, you can download a network driver or audio driver...
Configuring Compaq Evo Computers for Microsoft Windows 95
Page 3
... have custom or proprietary software images based upon Windows 95. Copy each of the first processor with Windows 95. Configuring Compaq Evo for Microsoft Windows 95 White Paper 3 Introduction Compaq does not officially support Microsoft Windows 95 Operating System (Windows 95) in safe mode. Therefore, the Windows 95 patch could not start Windows 95, boot the machine using the bootable floppy created in this document. however, Compaq recognizes that causes lockups...
Hardware Guide Evo Notebook N600c Series
Page 70
Adjust or mute system volume. Connects powered stereo speakers, headphones, a headset, or an audio/visual device such as a television or VCR. Using the Microphone Jack When connecting a microphone to the microphone jack, use a single sound channel (monaural) microphone with the expansion base. I If you connect a stereo microphone, left channel sound will record on both channels. I If you connect a dynamic microphone, the recommended sensitivity may not be achieved. Audio and Video Audio Feature 1 Speakers (2) 2 Volume buttons 3 Stereo speaker...
Hardware Guide Evo Notebook N600c Series
Page 86
.... I and Type II PC Cards can be used only in thickness. Hardware Guide 8-1 For information about obtaining and installing software updates and upgrades, refer on this section, refer to the "How to contact a Compaq authorized dealer, reseller, or service provider. If you prefer a printed version of this CD to the Maintenance, Shipping and Travel guide, "How to the standard specifications of the printed Getting Started guide, included...
Hardware Guide Evo Notebook N600c Series
Page 101
... light 2-7, 7-4 display release latch 2-9 display switch default function 2-9 identifying 2-9 setting preferences for 1-5 Hardware Guide Index-3 analog telephone lines 7-2 dimensions, computer 9-2 disk displaying contents of 5-15 inserting into Zip drive 5-15 removing from Zip drive 5-15 troubleshooting 5-16 diskette displaying contents of 3-15 changing video mode 6-6 enabling numeric keypad at startup 3-15 enabling optional non-Windows pointing device 3-4 enabling USB legacy support 7-6 connector(s) connection procedures 7-1 DC power 1-2, 2-13 docking 2-13 external monitor 2-13 keyboard...
Hardware Guide Evo Notebook N600c Series
Page 102
... planning a docking system 7-10 speakers 6-2 using during initial setup 1-1 drives adding 5-1 caring for 5-2 diskette drive light 2-7 IDE drive light 2-7 inserting or removing while installing software 1-4 replacing with weight saver 2-17, 5-10 USB 7-4 See also specific types of drives DVD displaying contents of devices external diskette drive bay (optional) connecting 7-4 device supported 5-1, 7-4 diskette drive light 2-7 external monitor connector 2-13, 7-1 F floppy disk drive. See diskette drive (optional) Index-4 Hardware Guide port; specific types of 5-15 inserting 5-12 playing to...
Windows XP SP1 on Compaq Evo Notebooks
Page 6
... on Compaq Evo Notebooks 6 UPDATES IN SP1 Summary: Service Pack 1 (SP1) is a collection of updates that improve the performance of Windows XP. Check and Upgrade BIOS Note: Upgrade your system using either: • Computer Setup • Simultaneously pressing Function + ESC after the Operating System is installed.) 2. Cross check the revision described in the previous step with the release listed in Service Pack 1, reference: http://support.microsoft.com/support/ServicePacks/Windows...
Compaq Evo Notebook N600c, N610c, N610v and N620c Notebook PCs - Maintenance and Service Guide
Page 36
... the Notebook for Disassembly," for more information). 2. Do not reinsert any battery packs at this time. 6. Turn on the notebook. Prepare the notebook for disassembly (refer to clear the password. All passwords and all CMOS settings have been cleared. 1.4 Power Management The notebook comes with power management features that provides an accurate battery power gauge ■ Battery calibration ■ Lid switch suspend/resume ■ Power/suspend button ■ Advanced Configuration and Power Management (ACP) compliance Maintenance and Service Guide 1-31...
Compaq Evo Notebook N600c, N610c, N610v and N620c Notebook PCs - Maintenance and Service Guide
Page 71
...Hard drive accessible? N Hard drive partitioned? Load OS using Restore CD (if applicable). Y N Hard drive accessible? N Go to Flowchart 2.12, No OS Loading from Diskette Drive. N CD or diskette in drive? Y 1. Y Go to Flowchart 2.12, No OS Loading from Hard Drive, Part 1. Y Format hard drive and bring to bootable C:\ prompt. Replace hard drive. 2. N Done N Boot from hard drive? Y N Create partition, then format hard drive to a bootable C:\ prompt. Maintenance and Service Guide 2-21 Remove diskette and reboot. Y Computer booted? Done Y Boot...
Compaq Evo Notebook N600c, N610c, N610v and N620c Notebook PCs - Maintenance and Service Guide
Page 125
Removal and Replacement Procedures 5.6 Disk Cell RTC Battery ✎ The disk cell RTC battery on removing the memory expansion slot cover. Prepare the notebook for the Evo Notebook N620c, N610c, N610v, and N600c. Maintenance and Service Guide 5-15 Refer to remove an RTC battery are the same for disassembly (Section 5.3). 2. The procedures used to Section 5.8 for instructions on the Compaq Evo Notebook N600c model is included in the Miscellaneous Plastics Kit (spare part number 241439-001). 1. Remove the mini PCI compartment...
Compaq Evo Notebook N600c, N610c, N610v and N620c Notebook PCs - Maintenance and Service Guide
Page 132
... location. Memory Expansion Board Spare Part Number Information 266 MHz, 2DM (for Evo Notebook N620c models only): 1024 MB 768 MB 512 MB 384 MB 256 MB 133 MHz (for Evo Notebook N610c and N610v models only): 512 MB 256 MB 128 MB 64 MB 100 MHz (for instructions on removing a mini PCI communications board. Removal and Replacement Procedures 5.8 Memory Expansion ✎ Compaq Evo Notebook N600c models contain the mini PCI communications board slot...
Compaq Evo Notebook N600c, N610c, N610v and N620c Notebook PCs - Maintenance and Service Guide
Page 211
... adapter spare part numbers 3-22 specifications 6-10 audio troubleshooting 2-25 B base enclosure, spare part numbers 3-13 battery components compartment 1-39, 1-41 light 1-32 pack, removing 5-4 pack, spare part numbers 3-13 release latch 1-39, 1-41, 5-5 spare part numbers 5-4 specifications 6-10 Bluetooth wireless communication MultiPort module, spare part number 3-22 C cables, service considerations 4-2 caps lock key 1-44 caps lock light 1-42 CD-ROM drive OS loading problems 2-24 spare part number 3-15, 3-21, 5-6 specifications 6-7 CD-RW drive spare part number 3-15, 3-21, 5-6 specifications...
Compaq Evo Notebook N610c and Evo N600c Series Maintenance and Service Guide
Page 16
... power. Connect AC power to Section 5.6, "Disk Cell RTC Battery"). 3. Turn on the notebook. Remove the RTC battery (refer to the notebook. Do not reinsert any battery packs at this time. 6. Product Description 2. All passwords and all CMOS settings have been cleared. 1.4 Power Management The notebook comes with power management features that provides an accurate battery power gauge ■ Battery calibration ■ Lid switch suspend/resume ■ Power/suspend button ■ Advanced Configuration and Power Management (ACP) compliance Maintenance and Service Guide...
Compaq Evo Notebook N610c and Evo N600c Series Maintenance and Service Guide
Page 41
... to network or modem? Troubleshooting Flowchart 2.1 - Initial Troubleshooting Begin troubleshooting. Y N All drives working ? Y N Beeps, LEDs, or error messages? Y N Connecting to Flowchart 2.18, Nonfunctioning Keyboard, or Flowchart 2.19, Nonfunctioning Pointing Device. N Is there video? (no boot) Y Go to Flowchart 2.15, No Audio. Y N Is there sound? Go to Flowchart 2.6, No Video, Part 1. End Maintenance and Service Guide 2-11 Go to Flowchart 2.20, No Network or Modem Connection. N Keyboard/ pointing device working ? Go to Flowchart 2.2, No Power, Part...
Compaq Evo Notebook N610c and Evo N600c Series Maintenance and Service Guide
Page 190
... part numbers 5-4 specifications 6-10 Bluetooth wireless communication MultiPort module, spare part number 3-20 C cables, service considerations 4-2 caps lock key 1-18 caps lock light 1-20 CD-ROM drive OS loading problems 2-24 Index spare part number 3-13, 3-19, 5-6 specifications 6-7 CD-RW drive spare part number 3-13, 3-19, 5-6 specifications 6-9 Certificate of Authenticity label 1-24 Compaq Diagnostics 2-1, 2-7 components front 1-12 keyboard 1-18 left side 1-14, 1-16 rear panel 1-14, 1-16 right side 1-12 top 1-19 Computer Setup Advanced Menu 2-5 File Menu 2-3 overview 2-1 Security Menu...
Maintenance and Service Guide Compaq Evo N600c
Page 5
... 5.3 Preparing the Computer for Disassembly 5-4 5.4 Computer Feet 5-5 5.4 Keyboard 5-6 5.5 Modem/Network Interface Card (NIC 5-10 5.6 Real Time Clock (RTC) Battery 5-12 5.7 TouchPad or Touch Button 5-13 5.8 Switch Cover 5-15 5.9 Display 5-17 5.10 Top Cover 5-20 5.11 System Board 5-23 5.12 Fan 5-27 5.13 DC-DC Converter Board 5-30 5.15 Modem Cable 5-33 6 Specifications A Connector Pin Assignments B Power Cord Set Requirements 3-Conductor Power Cord Set B-1 General Requirements B-1 Country-Specific Requirements B-2 Notes B-2 C Screw Listing Index Maintenance and Service Guide v
Maintenance and Service Guide Compaq Evo N600c
Page 25
... and Service Guide Troubleshooting Selecting from the Security Menu Table 2-2 Security Menu Select To Do This Setup Password Enter, change, or delete a setup password. (The setup password is called an administrator password in Compaq Computer Security, a program accessed from the Windows Control Panel.) Power-on Password Enter, change a DriveLock User or Master password. ✎ Drive Lock Settings are accessible only when you must first enable QuickLock. Enable/disable: I QuickLock I QuickLock on password has been set. System IDs Enter identification numbers for a DVD-ROM...
Maintenance and Service Guide Compaq Evo N600c
Page 146
... specifications 6-10 battery pack illustrated 3-6 spare part numbers 3-7, 3-14 bottom components 1-14 Index C cables, handling 4-2 caps lock key 1-11 caps lock light 1-13 CD-ROM drive illustrated 3-10 option part number 3-10 OS loading problems 2-24 spare part number 3-7, 3-10 specifications 6-7 CD-RW drive illustrated 3-10 option part number 3-10 specifications 6-9 Certificate of Authenticity label 1-15 Compaq Diagnostics 2-1, 2-7 components bottom 1-14 front 1-6 keyboard 1-10 left side 1-8 rear panel 1-8 right side 1-6 top 1-12 composite TV connector 1-9 Maintenance and Service Guide...
Evo Notebook N600c Software Overview
Page 13
... the setup password, prevents unauthorized changes to lock the keyboard. Windows 98 ! This Windows Control Panel applet provides an easy-to turn AC power conservation on password is activated. Compaq Support Software CD ! Compaq Web Site QuickRestore CD The AC Energy Saver page displays the AC Energy Power Conservation features, which are ignored until the power-on or off, utilize the energy saving features of the monitor, if available, set hard drive timeouts for setting and controlling power management...
Hard Drive White Paper
Page 5
... for system BIOS and driver enhancements. 5 HP Recommendations for Notebook Users • Install HP Notebook LidSwitch Policy, or as an alternative, place the notebook into Standby mode before transporting it from one location to another. • Upgrade to the latest system BIOS, as given in the "F10 Setup Hard Drive Self-Test" section. • Whenever possible, adjust power management settings (power schemes) in Control Panel to permit the hard drive to be turned off...