User Manual
Page 3
... assemble your monitor hardware 8 How to detach the stand base 11 How to use the monitor wall mounting kit 12 Getting the most from your BenQ monitor 14 To install the monitor on a new computer 15 To upgrade the monitor on an existing computer 16 How to install on Windows Vista... system 17 How to install on Windows XP system 18 How to adjust the screen resolution 19 How to adjust the screen refresh rate 20 Picture optimization ...21 How to adjust your monitor 22 The control panel ...22 On Screen Display...
... assemble your monitor hardware 8 How to detach the stand base 11 How to use the monitor wall mounting kit 12 Getting the most from your BenQ monitor 14 To install the monitor on a new computer 15 To upgrade the monitor on an existing computer 16 How to install on Windows Vista... system 17 How to install on Windows XP system 18 How to adjust the screen resolution 19 How to adjust the screen refresh rate 20 Picture optimization ...21 How to adjust your monitor 22 The control panel ...22 On Screen Display...
User Manual
Page 4
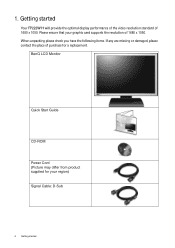
When unpacking please check you have the following items. If any are missing or damaged, please contact the place of purchase for your graphic card supports the resolution of 1680 x 1050. BenQ LCD Monitor Quick Start Guide CD-ROM Power Cord (Picture may differ from product supplied for a replacement. Please ensure that your region) Signal Cable: D-Sub 4 Getting started Your FP222W H will provide the optimal display performance of the video resolution standard of 1680 x 1050. 1. Getting started
When unpacking please check you have the following items. If any are missing or damaged, please contact the place of purchase for your graphic card supports the resolution of 1680 x 1050. BenQ LCD Monitor Quick Start Guide CD-ROM Power Cord (Picture may differ from product supplied for a replacement. Please ensure that your region) Signal Cable: D-Sub 4 Getting started Your FP222W H will provide the optimal display performance of the video resolution standard of 1680 x 1050. 1. Getting started
User Manual
Page 14
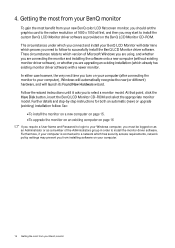
...a User Name and Password to login to your new BenQ color LCD flat screen monitor, you should set the graphics card to the native resolution of 1680 x 1050 at first, and then you may... prevent you from installing software on your computer. 14 Getting the most benefit from your BenQ monitor Follow the wizard...step-by-step instructions for both an automatic (new) or upgrade (existing) installation follow to your BenQ LCD Monitor will launch its Found New Hardware wizard. The circumstances under which you connect and install...
...a User Name and Password to login to your new BenQ color LCD flat screen monitor, you should set the graphics card to the native resolution of 1680 x 1050 at first, and then you may... prevent you from installing software on your computer. 14 Getting the most benefit from your BenQ monitor Follow the wizard...step-by-step instructions for both an automatic (new) or upgrade (existing) installation follow to your BenQ LCD Monitor will launch its Found New Hardware wizard. The circumstances under which you connect and install...
User Manual
Page 18
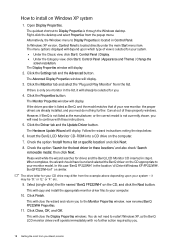
... on the CD, and click the Next button. Check the option 'Search for you to the Monitor Properties window, now renamed BenQ FP222WH Properties. 11. This will display. 3. The quickest shortcut to Display Properties is located directly under the main Start menu item. ...; Under the Category view, click Start | Control Panel | Appearance and Themes | Change the screen resolution. This will display. When completes, the wizard should have found and selected the BenQ driver on Windows XP system 1. In Windows XP version, Control Panel is through the Windows desktop. ...
... on the CD, and click the Next button. Check the option 'Search for you to the Monitor Properties window, now renamed BenQ FP222WH Properties. 11. This will display. 3. The quickest shortcut to Display Properties is located directly under the main Start menu item. ...; Under the Category view, click Start | Control Panel | Appearance and Themes | Change the screen resolution. This will display. When completes, the wizard should have found and selected the BenQ driver on Windows XP system 1. In Windows XP version, Control Panel is through the Windows desktop. ...
User Manual
Page 19
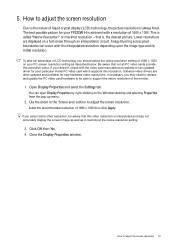
...to be aware that is called "Native Resolution" or maximal resolution - How to the nature of liquid crystal display (LCD) technology, the picture resolution is achieved with a resolution of the monitor. 1. The best possible picture for new hardware video resolutions. Software video drivers are displayed on the... Windows desktop and selecting Properties from the pop-up menu. 2. How to adjust the screen resolution Due to adjust the screen resolution 19 If you may not accurately display the screen image as well as described below. This is , the clearest...
...to be aware that is called "Native Resolution" or maximal resolution - How to the nature of liquid crystal display (LCD) technology, the picture resolution is achieved with a resolution of the monitor. 1. The best possible picture for new hardware video resolutions. Software video drivers are displayed on the... Windows desktop and selecting Properties from the pop-up menu. 2. How to adjust the screen resolution Due to adjust the screen resolution 19 If you may not accurately display the screen image as well as described below. This is , the clearest...
User Manual
Page 20
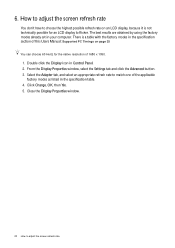
... PC Timings on an LCD display, because it is a table with the factory modes in your computer. There is not technically possible for the native resolution of 1680 x 1050. 1. Click Change, OK, then Yes. 5. Double click the Display icon in the specification table. 4. Close the Display Properties window. 20 How to...
... PC Timings on an LCD display, because it is a table with the factory modes in your computer. There is not technically possible for the native resolution of 1680 x 1050. 1. Click Change, OK, then Yes. 5. Double click the Display icon in the specification table. 4. Close the Display Properties window. 20 How to...
User Manual
Page 21
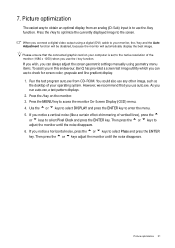
...6. Please ensure that you can use auto.exe. When you connect a digital video output using geometry menu items. To assist you in this endeavour, BenQ has provided a screen test image utility which you use to enter the menu. 5. Use the t or u keys to select DISPLAY and press the ... monitor. 3. Picture optimization 21 If you wish, you can always adjust the screen geometric settings manually using a digital (DVI) cable to the native resolution of vertical lines), press the t or u keys to select Phase and press the ENTER key. 7. Run the test program auto.exe from an analog...
...6. Please ensure that you can use auto.exe. When you connect a digital video output using geometry menu items. To assist you in this endeavour, BenQ has provided a screen test image utility which you use to enter the menu. 5. Use the t or u keys to select DISPLAY and press the ... monitor. 3. Picture optimization 21 If you wish, you can always adjust the screen geometric settings manually using a digital (DVI) cable to the native resolution of vertical lines), press the t or u keys to select Phase and press the ENTER key. 7. Run the test program auto.exe from an analog...
User Manual
Page 33
... can be seen: Is the prompt on page 19 section. Please read "Supported PC Timings on the display not illuminated at resolutions lower than the native (maximum) resolution? Press any pin is bent or broken off , please contact your dealer to conduction losses in the How to adjust the ...not, optimize the image by using a display mode that occurs in the "Caution" message box to reset the color settings to adjust the screen resolution on the display illuminated in orange, the power management mode is normal for the test. Recommended mode is a natural defect that this means one ...
... can be seen: Is the prompt on page 19 section. Please read "Supported PC Timings on the display not illuminated at resolutions lower than the native (maximum) resolution? Press any pin is bent or broken off , please contact your dealer to conduction losses in the How to adjust the ...not, optimize the image by using a display mode that occurs in the "Caution" message box to reset the color settings to adjust the screen resolution on the display illuminated in orange, the power management mode is normal for the test. Recommended mode is a natural defect that this means one ...

User Manual
Page 34
Need more help? If your problems remain after checking this manual, please contact your place of purchase or e-mail us at: Support@BenQ.com 34 Troubleshooting The OSD controls are inaccessible: •To unlock the OSD controls when the OSD is preset to be accessible. The image is ...displaced in one direction: Read the How to adjust the screen resolution on page 19 section and then select the correct resolution, refresh rate and make changes. •Alternatively, you may use the t or u keys to select "OFF" in the "OSD Lock...
Need more help? If your problems remain after checking this manual, please contact your place of purchase or e-mail us at: Support@BenQ.com 34 Troubleshooting The OSD controls are inaccessible: •To unlock the OSD controls when the OSD is preset to be accessible. The image is ...displaced in one direction: Read the How to adjust the screen resolution on page 19 section and then select the correct resolution, refresh rate and make changes. •Alternatively, you may use the t or u keys to select "OFF" in the "OSD Lock...
User Manual
Page 35
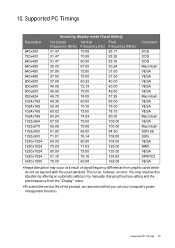
...;To extend the service life of the product, we recommend that you use your computer's power management function. Supported PC Timings 35 Supported PC Timings Resolution 640x350 720x400 640x480 640x480 640x480 640x480 800x600 800x600 800x600 832x624 1024x768 1024x768 1024x768 1024x768 1152x864 1152x870 1152x900 1152x900 1280x1024 1280x1024 1280x1024 1280x1024 1680x1050 Incoming display...
...;To extend the service life of the product, we recommend that you use your computer's power management function. Supported PC Timings 35 Supported PC Timings Resolution 640x350 720x400 640x480 640x480 640x480 640x480 800x600 800x600 800x600 832x624 1024x768 1024x768 1024x768 1024x768 1152x864 1152x870 1152x900 1152x900 1280x1024 1280x1024 1280x1024 1280x1024 1680x1050 Incoming display...

