
Owners Manual
Page 20
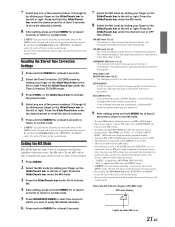
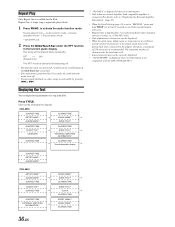
To correct this, the CDA-9855/CDA-9853 is the same as the distance to the farthest speaker. The adjustment will return to the normal mode.... This is pressed while adjusting or setting the itmes in the MENU mode, the unit will return to the previous selection secreen. • By pressing the GlideTouch bar under RETURN in the MENU mode, the...and hold MENU for at least 2 seconds to return to normal mode. • If MENU is caused by sliding your head and the various speakers. 2 Calculate the difference between the distance to the farthest speaker and the other speakers. These values are...
To correct this, the CDA-9855/CDA-9853 is the same as the distance to the farthest speaker. The adjustment will return to the normal mode.... This is pressed while adjusting or setting the itmes in the MENU mode, the unit will return to the previous selection secreen. • By pressing the GlideTouch bar under RETURN in the MENU mode, the...and hold MENU for at least 2 seconds to return to normal mode. • If MENU is caused by sliding your head and the various speakers. 2 Calculate the difference between the distance to the farthest speaker and the other speakers. These values are...
Owners Manual
Page 22
...in cars with both MP3/WMA and CD-DA, when the source changes from "MP3/WMA to CD-DA" or "CD-DA to MP3/ WMA", MX-mode switching may not match the head unit, the audio processor needs to be ... the MX Mode MX (Media Xpander) makes vocals or instruments sound distinct regardless of data such as FM radio, CD, and MP3/WMA can be adjusted. Press the GlideTouch bar under the desire preset for at least 3 ... MX indicator display (CDA-9853 only) MX Level Display Lights up when MX is performed in the MENU mode, the unit will return to the normal mode. • If no MX mode for AM radio. • If...
...in cars with both MP3/WMA and CD-DA, when the source changes from "MP3/WMA to CD-DA" or "CD-DA to MP3/ WMA", MX-mode switching may not match the head unit, the audio processor needs to be ... the MX Mode MX (Media Xpander) makes vocals or instruments sound distinct regardless of data such as FM radio, CD, and MP3/WMA can be adjusted. Press the GlideTouch bar under the desire preset for at least 3 ... MX indicator display (CDA-9853 only) MX Level Display Lights up when MX is performed in the MENU mode, the unit will return to the normal mode. • If no MX mode for AM radio. • If...
Owners Manual
Page 26
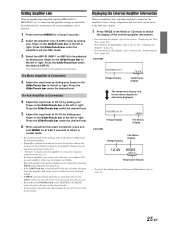
...under the desired level. The input level mode to the left or right. CDA-9855 VOLTAGE:10.1V Voltage Display 75.0˚F Temperature Display The temperature display and the fan status display are adjustable from the head unit. If a 4ch Amplifier is removed or its power cannot be turned on...Press the GlideTouch bar under RETURN in the MENU mode, the unit will return to the left or right. Displaying the External Amplifier Information When an Amplifier Link compatible amplifier is performed in the Radio or CD mode to switch the display of the external amplifier. • ...
...under the desired level. The input level mode to the left or right. CDA-9855 VOLTAGE:10.1V Voltage Display 75.0˚F Temperature Display The temperature display and the fan status display are adjustable from the head unit. If a 4ch Amplifier is removed or its power cannot be turned on...Press the GlideTouch bar under RETURN in the MENU mode, the unit will return to the left or right. Displaying the External Amplifier Information When an Amplifier Link compatible amplifier is performed in the Radio or CD mode to switch the display of the external amplifier. • ...
Owners Manual
Page 30
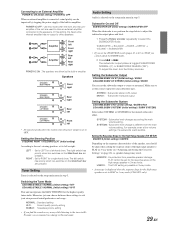
... when two switches on page 18), as speaker damage may result. Switching the Tuner Mode CDA-9855:STABLE / NORMAL (Initial setting) / HiFi CDA-9853:STABLE / NORMAL (Initial setting) / HI-FI This unit incorporates the MAX TUNE PRO for a right-hand drive. SUBWOOFER → BALANCE →...CDA-9855:SUBW SYS1 (Initial setting) / SUBW SYS2 CDA-9853:SUBW SYSTEM1 (Initial setting) / SUBW SYSTEM2 Select either SYSTEM1 or SYSTEM2 for your own personal sound preferences and usage. Amplifier Amplifier Front left Front right Rear left -hand drive. POWER-IC OFF : Use this setting, the head unit...
... when two switches on page 18), as speaker damage may result. Switching the Tuner Mode CDA-9855:STABLE / NORMAL (Initial setting) / HiFi CDA-9853:STABLE / NORMAL (Initial setting) / HI-FI This unit incorporates the MAX TUNE PRO for a right-hand drive. SUBWOOFER → BALANCE →...CDA-9855:SUBW SYS1 (Initial setting) / SUBW SYS2 CDA-9853:SUBW SYSTEM1 (Initial setting) / SUBW SYSTEM2 Select either SYSTEM1 or SYSTEM2 for your own personal sound preferences and usage. Amplifier Amplifier Front left Front right Rear left -hand drive. POWER-IC OFF : Use this setting, the head unit...

Owners Manual
Page 31
... Words hyphenated when necessary and are scrolled automatically. Scroll Setting AUTO / MANUAL (Initial setting) This CD player can be shown when the time is "0." Choose between Fahrenheit and Celsius. °F : ...Input," do not fit in step 3. Connect the DVD player to the optical digital input (Head unit) terminal of MP3/WMA files, folder names, and tags. OFF mode:This shows the standard...are connected (using an optical cable), use the OTHER setting. Opening Message ON/OFF Setting (CDA-9855 only) OPENING MSG ON / OPENING MSG OFF (Initial setting) You can switch the calendar ...
... Words hyphenated when necessary and are scrolled automatically. Scroll Setting AUTO / MANUAL (Initial setting) This CD player can be shown when the time is "0." Choose between Fahrenheit and Celsius. °F : ...Input," do not fit in step 3. Connect the DVD player to the optical digital input (Head unit) terminal of MP3/WMA files, folder names, and tags. OFF mode:This shows the standard...are connected (using an optical cable), use the OTHER setting. Opening Message ON/OFF Setting (CDA-9855 only) OPENING MSG ON / OPENING MSG OFF (Initial setting) You can switch the calendar ...
Owners Manual
Page 37
...CDA-9855 only 2 Press the GlideTouch bar under the RPT function in the iPod. Therefore, a maximum of characters is recommended. The song will be correctly displayed. • "NO SUPPORT" is displayed when text information is connected. For details, refer to the adapter. Repeat One: A single song is available for the head unit... song name is set to "MANUAL," press and hold TITLE for at least 2 seconds to activate the audio function mode. CDA-9855 ELAPSED TIME ELAPSED TIME ARTIST NAME*1 → ALBUM NAME*1 → ALBUM NAME*1 SONG TITLE*1 ELAPSED TIME SONG TITLE*1 ...
...CDA-9855 only 2 Press the GlideTouch bar under the RPT function in the iPod. Therefore, a maximum of characters is recommended. The song will be correctly displayed. • "NO SUPPORT" is displayed when text information is connected. For details, refer to the adapter. Repeat One: A single song is available for the head unit... song name is set to "MANUAL," press and hold TITLE for at least 2 seconds to activate the audio function mode. CDA-9855 ELAPSED TIME ELAPSED TIME ARTIST NAME*1 → ALBUM NAME*1 → ALBUM NAME*1 SONG TITLE*1 ELAPSED TIME SONG TITLE*1 ...
Owners Manual
Page 45
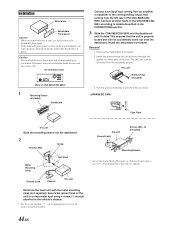
...not accidentally come out from an amplifier or equalizer to details described in the CONNECTlONS section. 3 Slide the CDA-9855/CDA-9853 into the slot and through the guides on either side of the unit to a clean metal spot using a screw (*3) already attached to the vehicle's chassis. • For ...Insert the bracket keys into the dashboard until it clicks. The unit can now be removed from the left rear of the unit to a clean metal spot using a screw (*1) already attached to the vehicle's chassis. Reinforce the head unit with the metal mounting strap (not supplied). Caution Do not block...
...not accidentally come out from an amplifier or equalizer to details described in the CONNECTlONS section. 3 Slide the CDA-9855/CDA-9853 into the slot and through the guides on either side of the unit to a clean metal spot using a screw (*3) already attached to the vehicle's chassis. • For ...Insert the bracket keys into the dashboard until it clicks. The unit can now be removed from the left rear of the unit to a clean metal spot using a screw (*1) already attached to the vehicle's chassis. Reinforce the head unit with the metal mounting strap (not supplied). Caution Do not block...


