Weider 9000 Support and Manuals
Get Help and Manuals for this Weider item

Popular Weider 9000 Manual Pages
Uk Manual - Page 1

Model No.
Save this equipment.
Serial Number Decal (under seat)
QUESTIONS? Unit 4 Revie Road Industrial Estate Revie Road Beeston Leeds LS11 8JG UK
[email protected]
CAUTION
Read all precautions and instructions in the space above for future reference. WEEMBE39221 Serial No. As a manufacturer, we are missing or damaged parts, please call:
08457 089 009...
Uk Manual - Page 2
... 16 WEIGHT RESISTANCE CHART 19 CABLE DIAGRAMS 20 TROUBLESHOOTING AND MAINTENANCE 21 EXERCISE GUIDELINES 22 ORDERING REPLACEMENT PARTS Back Cover Note: A PART IDENTIFICATION CHART and a PART LIST/EXPLODED DRAWING is missing or illegible, call our Customer Service Department to order a free replacement decal (see the back cover of this manual).
Keep hands and fingers clear of this area...
Uk Manual - Page 3
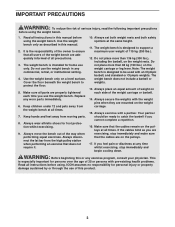
...instructions before using the weight bench.
1. The weight bench does not include a barbell or weights.
13. Your partner should be used with pre-existing health problems.
Read all times.
WARNING: Before beginning this manual.
2. Always wear athletic shoes for home.... Always set both weight rests and both safety spotters at all times.
7. Replace any exercise program, ...
Uk Manual - Page 4
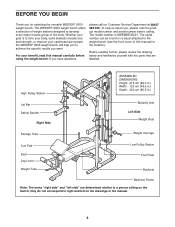
... call our Customer Service Department at 08457 089 009. The WEIDER® 9000 weight bench offers a selection of weight stations designed to achieve the specific results you , please note the product model number and serial number before using the weight bench. To help you to develop every major muscle group of this manual carefully before calling...
Uk Manual - Page 5
... help identifying small parts, use the PART IDENTIFICATION CHART in the centre of this manual.
The following information and instructions:
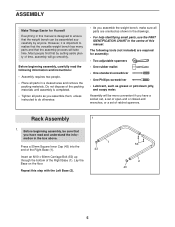
• Assembly requires two people.
• Place all parts are required for ... them, unless instructed to realize that the versatile weight bench has many parts and that the weight bench can be assembled successfully by setting aside plenty of...
Uk Manual - Page 13
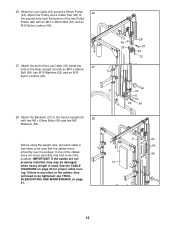
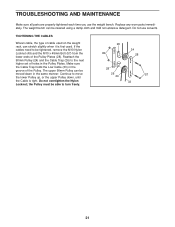
...If the cables are not properly installed, they will need to
the second hole from the bottom of the cables does not move smoothly over the pulleys. see TROUBLESHOOTING AND MAINTENANCE on page 20 for... proper cable routing. Attach the Pulley and a Cable Trap (26) to be sure that the cables move smoothly, find and correct the problem. ...
Uk Manual - Page 14
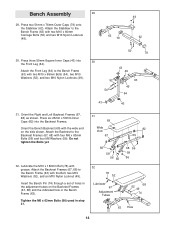
...), and two M10 Nylon Locknuts (49).
50 79
30
43 49
52 54
63 49 64
43
43
31.
Insert the Bench Pin (74) through a set of holes in the adjustment tubes on the side shown. Attach the Backrest to the Bench Frame (63) with two M10 x 60mm Carriage Bolts (50...
Uk Manual - Page 16
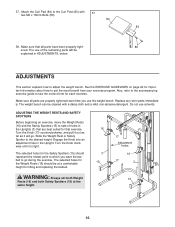
...Replace any worn parts immediately. ADJUSTING THE WEIGHT RESTS AND SAFETY SPOTTERS
Before beginning an exercise, move the Weight Rests (16) and the Safety Spotters (15) to sets of the remaining parts will go during the exercise...and a mild, non-abrasive detergent. Also, refer to the accompanying exercise guide to see the correct form for the Weight Rests (16) should represent the lowest point...
Uk Manual - Page 18
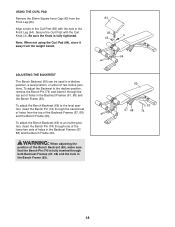
...in the Curl Post (83) with the Curl Knob (4). Be sure the Knob is fully inserted through the second set of holes in the Front Leg (64). To adjust the Bench Backrest (69) to the level position, insert ... Frame (63). Note: When not using the Curl Pad (84), store it through one of the lower two sets of the Backrest Frames (67, 68) and the Bench Frame (63).
To adjust the Bench Backrest (69) ...
Uk Manual - Page 21
Replace any worn parts immediately. If the cables need to be able to turn freely.
26
24
49
28
28
26 24
... the Nylon Locknut;
Do not use the weight bench. The weight bench can stretch slightly when it is tight. TROUBLESHOOTING AND MAINTENANCE
Make sure all parts are properly tightened each time you use solvents. Continue to the next higher set of the Pulley Plates (28).
Uk Manual - Page 22
... own pace and be sensitive to your workouts, vary the exercises from both weight training and aerobic exercise
for you perform.
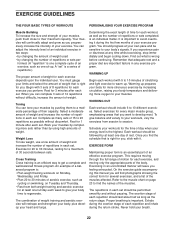
On the exercise guide accompanying this manual you want to get a complete and well-balanced fitness program. The exertion stage of each set " is the highest. EXERCISE GUIDELINES
THE FOUR BASIC TYPES OF WORKOUTS
PERSONALISING YOUR...
Uk Manual - Page 24
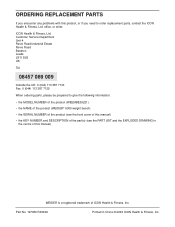
ORDERING REPLACEMENT PARTS
If you need to give the following information:
• the MODEL NUMBER of the product (WEEMBE39221)
• the NAME of the product (WEIDER® 9000 weight bench)
• the SERIAL NUMBER of the product (see the front cover of this manual)
• the KEY NUMBER and DESCRIPTION of the part(s) (see the PART LIST and the...
Uk Manual - Page 25
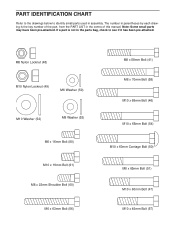
... the key number of the part, from the PART LIST in the centre of this manual. PART IDENTIFICATION CHART
Refer to the drawings below to identify small parts used in the parts bag, check to see if it has been pre-attached. Note: Some small parts may have been pre-attached. M8 Nylon Locknut (48)
M10 Nylon...
Uk Manual - Page 27
... Cap
80
6
M6 x 16mm Bolt
81
6
19mm Round Inner Cap
82
6
25mm x 50mm Inner Cap
83
1
Curl Post
84
1
Curl Pad
85
1
Row Bar
#
1
User's Manual
#
1
Exercise Guide
#
1
Retainer Tool
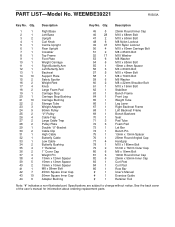
Note: "#" indicates a non-illustrated part. Specifications are subject to change without notice. PART LIST-Model No. Qty. Description
Key No. Qty.
Uk Manual - Page 28
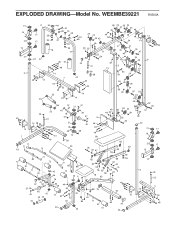
EXPLODED DRAWING-Model No. WEEMBE39221 R0303A
21 16
21 15
11
34
48
40 26 55 26
17
35
32
60 34 48
24
24
46
49
39
...
Weider 9000 Reviews
We have not received any reviews for Weider yet.