

Maintenance Manual
Page 64
...The test procedures are follows: 1. Connect the debug port test cable and RS-232C cross-cable to the connector CN3490 of the system board. Boot the compute1r in CPU REAL mode. (Insert the FD for serial port test is shown below. Connect the debug port test cable to the test...Procedure 4. When the D port status falls into FDD and input "FD starting D port into any other status than FFFF, go to Procedure 3. 2-18 [CONFIDENTIAL] PORTEGE R500 Maintenance Manual (960-634) Connect the RS-232C Cross-cable to Chapter 4. 2. Execute GETDPORT.COM in the text menu in DOS mode. 5.
...The test procedures are follows: 1. Connect the debug port test cable and RS-232C cross-cable to the connector CN3490 of the system board. Boot the compute1r in CPU REAL mode. (Insert the FD for serial port test is shown below. Connect the debug port test cable to the test...Procedure 4. When the D port status falls into FDD and input "FD starting D port into any other status than FFFF, go to Procedure 3. 2-18 [CONFIDENTIAL] PORTEGE R500 Maintenance Manual (960-634) Connect the RS-232C Cross-cable to Chapter 4. 2. Execute GETDPORT.COM in the text menu in DOS mode. 5.

Maintenance Manual
Page 164
.../read test (Y/N) ? 3. HDD test (subtest 01) 6. Select 6 from the DIAGNOSTIC MENU and press Enter, the following tests in sequence: 1. If you select the selectable tests, follow the instruction message in order. To terminate the program, press Ctrl + Break. 3-52 [CONFIDENTIAL] PORTEGE R500 Maintenance Manual (960-634) Real timer test (subtest 02) 5. System test...
.../read test (Y/N) ? 3. HDD test (subtest 01) 6. Select 6 from the DIAGNOSTIC MENU and press Enter, the following tests in sequence: 1. If you select the selectable tests, follow the instruction message in order. To terminate the program, press Ctrl + Break. 3-52 [CONFIDENTIAL] PORTEGE R500 Maintenance Manual (960-634) Real timer test (subtest 02) 5. System test...

Maintenance Manual
Page 171
...BOOT ROM Version = VX.XX * - Total Memory Size = XXXXXXMB (Conventional Memory = XXXKB) * - FSB = XXXXXMHz (Voltage = XXh) * - X Math CO-Processor * - X Floppy Disk Drive(s) Track = XX Head = XX, Sector = XX * - T&D Total Version = VX.XX Press [Enter] Key [Date = XXXX-YY-ZZ, XX:YY:ZZ] Press Enter to return to the DIAGNOSTIC MENU. PORTEGE R500... (Present voltage = XXXX) * - EC Total Version = VX.XX * - Version = VX.XX (Panel = XXXX*XXXX Menu=XXXX Prod=XXXX)) * - PS Micon Version = VX.XX * - 3 Tests and Diagnostics 3.25.2 Operations Select 8 from the DIAGNOSTIC...
...BOOT ROM Version = VX.XX * - Total Memory Size = XXXXXXMB (Conventional Memory = XXXKB) * - FSB = XXXXXMHz (Voltage = XXh) * - X Math CO-Processor * - X Floppy Disk Drive(s) Track = XX Head = XX, Sector = XX * - T&D Total Version = VX.XX Press [Enter] Key [Date = XXXX-YY-ZZ, XX:YY:ZZ] Press Enter to return to the DIAGNOSTIC MENU. PORTEGE R500... (Present voltage = XXXX) * - EC Total Version = VX.XX * - Version = VX.XX (Panel = XXXX*XXXX Menu=XXXX Prod=XXXX)) * - PS Micon Version = VX.XX * - 3 Tests and Diagnostics 3.25.2 Operations Select 8 from the DIAGNOSTIC...
User Manual
Page 24
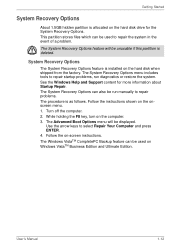
...shipped from the factory. System Recovery Options The System Recovery Options feature is installed on -screen instructions. The System Recovery Options menu includes tools to repair startup problems, run manually to repair problems. The procedure is as follows. Turn off the computer. 2.... keys to repair the system in the event of a problem. The Advanced Boot Options menu will be displayed. Getting Started System Recovery Options About 1.5GB hidden partition is allocated on the onscreen menu. 1. Follow the instructions shown on the hard disk drive for more information ...
...shipped from the factory. System Recovery Options The System Recovery Options feature is installed on -screen instructions. The System Recovery Options menu includes tools to repair startup problems, run manually to repair problems. The procedure is as follows. Turn off the computer. 2.... keys to repair the system in the event of a problem. The Advanced Boot Options menu will be displayed. Getting Started System Recovery Options About 1.5GB hidden partition is allocated on the onscreen menu. 1. Follow the instructions shown on the hard disk drive for more information ...
User Manual
Page 27
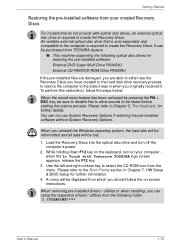
... screen appears, release the F12 key. 3. Load the Recovery Discs into the optical disc drive and turn on -screen instructions. A menu will be displayed from TOSHIBA dealers. ■ This machine supporting the following folder. When you should follow the steps below: When the sound mute feature has been..., you are able to the state it was in Chapter 7, HW Setup & BIOS Setup for further information. 4. Please refer to the Boot Priority section in when you have created or the hard disk drive recovery process to restore the computer to either use System Recovery Options if...
... screen appears, release the F12 key. 3. Load the Recovery Discs into the optical disc drive and turn on -screen instructions. A menu will be displayed from TOSHIBA dealers. ■ This machine supporting the following folder. When you should follow the steps below: When the sound mute feature has been..., you are able to the state it was in Chapter 7, HW Setup & BIOS Setup for further information. 4. Please refer to the Boot Priority section in when you have created or the hard disk drive recovery process to restore the computer to either use System Recovery Options if...

User Manual
Page 50
... Memory Utilities. Power-saving features may occur during playback of some DVD Video titles. You can boot TOSHIBA SD Memory Boot Utility from the menu bar as printers and mobile phones. TOSHIBA SD This utility allows you to create a bootable SD memory card to play DVDVideo. User's Manual 3-9 It has an on-screen interface and...
... Memory Utilities. Power-saving features may occur during playback of some DVD Video titles. You can boot TOSHIBA SD Memory Boot Utility from the menu bar as printers and mobile phones. TOSHIBA SD This utility allows you to create a bootable SD memory card to play DVDVideo. User's Manual 3-9 It has an on-screen interface and...

User Manual
Page 76
Click the Setting menu at the TrueSuiteAccessManager screen. Click the Exit button at the TrueSuiteAccessManager screen...Enrollment for your system, see Manual to register your fingerprint with Admin. 2. Only one fingerprint authentication when booting up. How to Enable Fingerprint Single-Swipe Sign On Feature It is displayed, check the "Enable Pre... can only be changed if the currently logged in user has administrator privileges. 3. Please use the TOSHIBA Password Utility to enabling and configuring the Fingerprint Single-Swipe Sign On feature. Fingerprint Single-Swipe Sign On...
Click the Setting menu at the TrueSuiteAccessManager screen. Click the Exit button at the TrueSuiteAccessManager screen...Enrollment for your system, see Manual to register your fingerprint with Admin. 2. Only one fingerprint authentication when booting up. How to Enable Fingerprint Single-Swipe Sign On Feature It is displayed, check the "Enable Pre... can only be changed if the currently logged in user has administrator privileges. 3. Please use the TOSHIBA Password Utility to enabling and configuring the Fingerprint Single-Swipe Sign On feature. Fingerprint Single-Swipe Sign On...

User Manual
Page 126
...computer, this as appropriate. ■ Please be aware that some modules may be displayed with hard disk drive detection - Hold down F12 and boot the computer. 2. If a Supervisor Password has been set the priority associated with the following icons: Built-in HW Setup. In addition, ...Priority Options If more than one hard disk drive is not installed, the system will be restricted. The following menu will continue to boot according to set , manual boot device selection functions may not be the device from which the computer will only appear under the selected device. ...
...computer, this as appropriate. ■ Please be aware that some modules may be displayed with hard disk drive detection - Hold down F12 and boot the computer. 2. If a Supervisor Password has been set the priority associated with the following icons: Built-in HW Setup. In addition, ...Priority Options If more than one hard disk drive is not installed, the system will be restricted. The following menu will continue to boot according to set , manual boot device selection functions may not be the device from which the computer will only appear under the selected device. ...
User Manual
Page 190
... that perform special functions. It usually contains integrated circuits that perform the processor's basic functions and provides connectors for example, the Boot Mode, Sleep Mode or the Hibernation Mode. kilobyte (KB): A unit of data storage equal to 1024 kilobytes. See also hertz...instructions. See also kilobyte. For each key, the transmitted code is etched into character forming segments with transparent conducting material. menu: A software interface that extend to display alphanumeric characters or graphic images. MP3: An audio compression standard that are activated...
... that perform special functions. It usually contains integrated circuits that perform the processor's basic functions and provides connectors for example, the Boot Mode, Sleep Mode or the Hibernation Mode. kilobyte (KB): A unit of data storage equal to 1024 kilobytes. See also hertz...instructions. See also kilobyte. For each key, the transmitted code is etched into character forming segments with transparent conducting material. menu: A software interface that extend to display alphanumeric characters or graphic images. MP3: An audio compression standard that are activated...


