

Maintenance Manual
Page 28
... Data buffer size Motor startup time (s) TOSHIBA HDD2D63BZL01 Specifications TOSHIBA TOSHIBA HDD2D61BZL01 HDD2D62BZL01 100.0 TOSHIBA HDD2D60BZL01 9.5 69.85 98 max 60GB 80GB 5,400 102 max 120GB 160GB 335-613(Mbits/s) 300 (Mbytes/s) 8,192Kbyte 3.5 typical 9.5 max 1-14 [CONFIDENTIAL] PORTEGE R500 Maintenance Manual (960-634) 1 Hardware Overview 1.4 2.5-inch Hard Disk Drive 1.4 2.5-inch Hard Disk Drive The removable HDD is shown in Table 1-2. Specifications...
... Data buffer size Motor startup time (s) TOSHIBA HDD2D63BZL01 Specifications TOSHIBA TOSHIBA HDD2D61BZL01 HDD2D62BZL01 100.0 TOSHIBA HDD2D60BZL01 9.5 69.85 98 max 60GB 80GB 5,400 102 max 120GB 160GB 335-613(Mbits/s) 300 (Mbytes/s) 8,192Kbyte 3.5 typical 9.5 max 1-14 [CONFIDENTIAL] PORTEGE R500 Maintenance Manual (960-634) 1 Hardware Overview 1.4 2.5-inch Hard Disk Drive 1.4 2.5-inch Hard Disk Drive The removable HDD is shown in Table 1-2. Specifications...

Maintenance Manual
Page 29
... TOSHIBA HDD1682BZM01 54.0±0.2 TOSHIBA HDD1789BZM01 5.0±0.35 8.0±0.35 48 max 40GB 71.0±0.3 59 max 100GB 4,200 165.0-356.8 176.90-382.9 100(Ultra DMA mode) 16.6(PIO mode) 8 3.5 typical 20 max PORTEGE R500 Maintenance Manual (960-634) [CONFIDENTIAL] 1-15 Specifications are listed in figure 1-6. 1.5 1.8-inch Hard Disk Drive 1 Hardware Overview 1.5 1.8-inch Hard Disk Drive The removable...
... TOSHIBA HDD1682BZM01 54.0±0.2 TOSHIBA HDD1789BZM01 5.0±0.35 8.0±0.35 48 max 40GB 71.0±0.3 59 max 100GB 4,200 165.0-356.8 176.90-382.9 100(Ultra DMA mode) 16.6(PIO mode) 8 3.5 typical 20 max PORTEGE R500 Maintenance Manual (960-634) [CONFIDENTIAL] 1-15 Specifications are listed in figure 1-6. 1.5 1.8-inch Hard Disk Drive 1 Hardware Overview 1.5 1.8-inch Hard Disk Drive The removable...

Maintenance Manual
Page 48
... it is, ask him or her to enter the password. ‰ Make sure that Toshiba Windows is removed from the computer. ‰ Make sure the USB FDD and optical drive are empty. 2-2 [CONFIDENTIAL] PORTEGE R500 Maintenance Manual (960-634) Non-Toshiba operating systems can cause the computer malfunction. ‰ Make sure all optional equipment is installed...
... it is, ask him or her to enter the password. ‰ Make sure that Toshiba Windows is removed from the computer. ‰ Make sure the USB FDD and optical drive are empty. 2-2 [CONFIDENTIAL] PORTEGE R500 Maintenance Manual (960-634) Non-Toshiba operating systems can cause the computer malfunction. ‰ Make sure all optional equipment is installed...
Maintenance Manual
Page 82
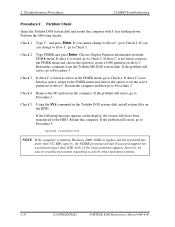
...and the hard disk has more than 512 MB capacity, the FDISK program will ask if you need support for a partition larger than 2GB. If drive C is... still exists, go to Procedure 3. Check 2 Type FDISK and press Enter. Check 4 Remove the FD and restart the computer. If the following checks: Check 1 Type C: and ...drive C. If you cannot change to drive C, go to Check 3. If the problem still exists, go to read the precaution regarding access by other operating systems. 2-36 [CONFIDENTIAL] PORTEGE R500 Maintenance Manual (960-634) Check 5 Using the SYS command on the Toshiba...
...and the hard disk has more than 512 MB capacity, the FDISK program will ask if you need support for a partition larger than 2GB. If drive C is... still exists, go to Procedure 3. Check 2 Type FDISK and press Enter. Check 4 Remove the FD and restart the computer. If the following checks: Check 1 Type C: and ...drive C. If you cannot change to drive C, go to Check 3. If the problem still exists, go to read the precaution regarding access by other operating systems. 2-36 [CONFIDENTIAL] PORTEGE R500 Maintenance Manual (960-634) Check 5 Using the SYS command on the Toshiba...

User Manual
Page 19
... until you have set up the operating system. the Power indicator will boot to the operating system's main screen the next time it to the hard disk drive or to other storage media. 2. Please refer to the section Starting up for two or three seconds. Power button Figure 1-5 Turning on the power... power - Getting Started Turning on the power This section describes how to turn on the power. Make sure all disk/disc activity has stopped before removing the CD/DVD or floppy diskette.
... until you have set up the operating system. the Power indicator will boot to the operating system's main screen the next time it to the hard disk drive or to other storage media. 2. Please refer to the section Starting up for two or three seconds. Power button Figure 1-5 Turning on the power... power - Getting Started Turning on the power This section describes how to turn on the power. Make sure all disk/disc activity has stopped before removing the CD/DVD or floppy diskette.

User Manual
Page 20
Getting Started ■ Make sure the Hard Disk Drive indicator is maintained in the computer's main memory so that when you turn on immediately - Turn off the power while an application is connected to ... devices connected to avoid any wireless communication switches or devices, while in Sleep Mode. wait a short period to your data. ■ Do not install or remove a memory module while the computer is in Sleep Mode, the computer operating system may reactivate itself to run pre-programmed tasks or to preserve unsaved...
Getting Started ■ Make sure the Hard Disk Drive indicator is maintained in the computer's main memory so that when you turn on immediately - Turn off the power while an application is connected to ... devices connected to avoid any wireless communication switches or devices, while in Sleep Mode. wait a short period to your data. ■ Do not install or remove a memory module while the computer is in Sleep Mode, the computer operating system may reactivate itself to run pre-programmed tasks or to preserve unsaved...

User Manual
Page 22
...Please note that , the next time it is best to your previous working environment immediately when you remove the battery or disconnect the AC adaptor before the save your data. Wait for the Hard Disk Drive indicator to Chapter 5, The Keyboard, for further details. please refer to go out. ■... Do not install or remove a memory module while the computer is turned off so that the Hibernation Mode ...
...Please note that , the next time it is best to your previous working environment immediately when you remove the battery or disconnect the AC adaptor before the save your data. Wait for the Hard Disk Drive indicator to Chapter 5, The Keyboard, for further details. please refer to go out. ■... Do not install or remove a memory module while the computer is turned off so that the Hibernation Mode ...
User Manual
Page 27
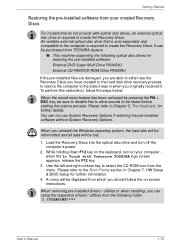
...the hard disk will be reformatted and all data will be purchased from TOSHIBA dealers. ■ This machine supporting the following folder. Getting Started Restoring the pre-installed software from your computer when the In Touch with optical disc drives, an external optical disc drive is... the pre-installed software without System Recovery Options. Load the Recovery Discs into the optical disc drive and turn on the keyboard, turn off the computer's power. 2. When removing pre-installed drivers / utilities or when installing, you can be displayed from the menu. C:\TOSAPINS...
...the hard disk will be reformatted and all data will be purchased from TOSHIBA dealers. ■ This machine supporting the following folder. Getting Started Restoring the pre-installed software from your computer when the In Touch with optical disc drives, an external optical disc drive is... the pre-installed software without System Recovery Options. Load the Recovery Discs into the optical disc drive and turn on the keyboard, turn off the computer's power. 2. When removing pre-installed drivers / utilities or when installing, you can be displayed from the menu. C:\TOSAPINS...

User Manual
Page 49
...these details from a power-saving mode such as Sleep Mode. ■ Authentication of the User Password (and, if applicable, the HDD(Hard Disk Drive) Password) when booting up the computer (Pre-OS Authentication). ■ Single-Swipe Sign On feature User's Manual 3-8 For further information ...fingerprint utility installed for the purpose of the 'F' keys in order to remove the need to them . Utilities and Applications This section describes the pre-installed utilities that is pressed. The TOSHIBA Accessibility utility provides support to movement impaired users when they press one of...
...these details from a power-saving mode such as Sleep Mode. ■ Authentication of the User Password (and, if applicable, the HDD(Hard Disk Drive) Password) when booting up the computer (Pre-OS Authentication). ■ Single-Swipe Sign On feature User's Manual 3-8 For further information ...fingerprint utility installed for the purpose of the 'F' keys in order to remove the need to them . Utilities and Applications This section describes the pre-installed utilities that is pressed. The TOSHIBA Accessibility utility provides support to movement impaired users when they press one of...

User Manual
Page 64
...that the original data will be damaged. User's Manual 3-23 Click the Safely Remove Hardware icon on the computer's power. ■ You may lose data or damage the floppy diskette or the drive. 2. TOSHIBA assumes no liability for your data before you: ■ Connect/disconnect an i.... operate. Precautions ■ Make a back-up of compatible devices such as: ■ Digital video cameras ■ Hard disk drives ■ MO drives ■ Writable optical disc drives i.LINK uses a four-pin connector, which does not carry any copyrighted video or music data copied from a video ...
...that the original data will be damaged. User's Manual 3-23 Click the Safely Remove Hardware icon on the computer's power. ■ You may lose data or damage the floppy diskette or the drive. 2. TOSHIBA assumes no liability for your data before you: ■ Connect/disconnect an i.... operate. Precautions ■ Make a back-up of compatible devices such as: ■ Digital video cameras ■ Hard disk drives ■ MO drives ■ Writable optical disc drives i.LINK uses a four-pin connector, which does not carry any copyrighted video or music data copied from a video ...

User Manual
Page 84
...■ Do not use any other network device. ■ Writing with software other than TOSHIBA Disc Creator and Ulead DVD MovieFactory® has not been confirmed, therefore operation with other ...communication application such as a modem. ■ Apply impact or vibration to the computer. ■ Install, remove or connect external devices, including such items as a PC Card, SD/SDHC Card, USB device, external monitor... data will be lost or damaged. ■ You should always write from the computer's hard disk drive onto the CD/DVD - User's Manual 4-16 do not use any powersaving features. ...
...■ Do not use any other network device. ■ Writing with software other than TOSHIBA Disc Creator and Ulead DVD MovieFactory® has not been confirmed, therefore operation with other ...communication application such as a modem. ■ Apply impact or vibration to the computer. ■ Install, remove or connect external devices, including such items as a PC Card, SD/SDHC Card, USB device, external monitor... data will be lost or damaged. ■ You should always write from the computer's hard disk drive onto the CD/DVD - User's Manual 4-16 do not use any powersaving features. ...

User Manual
Page 88
... to the computer. ■ Use the Mode control button and Audio/Video control button to reproduce music or voice. ■ Open the DVD drive. ■ Install, remove or connect external devices, including the following: PC card, SD card, USB device, external display, i.LINK devices, optical digital devices. ■...Handle your CD's and DVD's in the containers they originally came in VR format. ■ Not support to a slow device like a USB1.1 hard disk drive or it . Please use only discs recommended by HDV ■ HDV support to burn DVD-Video only ■ DVD-VR format not support to...
... to the computer. ■ Use the Mode control button and Audio/Video control button to reproduce music or voice. ■ Open the DVD drive. ■ Install, remove or connect external devices, including the following: PC card, SD card, USB device, external display, i.LINK devices, optical digital devices. ■...Handle your CD's and DVD's in the containers they originally came in VR format. ■ Not support to a slow device like a USB1.1 hard disk drive or it . Please use only discs recommended by HDV ■ HDV support to burn DVD-Video only ■ DVD-VR format not support to...

User Manual
Page 111
... has two different types of batteries. Please refer to in this information and the real time clock and calendar will be saved to the hard disk drive, although for extended use , recharging methods and handling. Power and Power-Up Modes Battery This section explains battery types, use of the ...on while pressing the ESC key and then the F1 key when prompted. You can change the battery pack while the AC adaptor is a removable lithium ion battery pack, also referred to Chapter 8 Troubleshooting for the internal real time clock and calendar function and also maintains the system ...
... has two different types of batteries. Please refer to in this information and the real time clock and calendar will be saved to the hard disk drive, although for extended use , recharging methods and handling. Power and Power-Up Modes Battery This section explains battery types, use of the ...on while pressing the ESC key and then the F1 key when prompted. You can change the battery pack while the AC adaptor is a removable lithium ion battery pack, also referred to Chapter 8 Troubleshooting for the internal real time clock and calendar function and also maintains the system ...

User Manual
Page 117
... - ensure that the Power indicator is completed. Slide and hold the battery release latch (2) to disengage the battery pack and then remove it from an AC power source for the Hard Disk Drive indicator to be aware that are operating your work. 2. Slide the battery lock (1) into its operating life. Power and Power...
... - ensure that the Power indicator is completed. Slide and hold the battery release latch (2) to disengage the battery pack and then remove it from an AC power source for the Hard Disk Drive indicator to be aware that are operating your work. 2. Slide the battery lock (1) into its operating life. Power and Power...

User Manual
Page 130
... up. If you made and end the BIOS setup application, follow the steps as TOSHIBA HW Setup, TOSHIBA Password Utility, Windows Device Manager and so forth. Please refer to the settings within Windows...displayed, enter either the Supervisor Password, if one is turned off and the main battery removed. The changes you make changes to the configuration through the BIOS setup program, please be ... press the ENTER key. this instance: • Password • Hard Disk Drive Password • Security Controller • Fingerprint patterns Starting and Ending the BIOS Setup Program Starting the...
... up. If you made and end the BIOS setup application, follow the steps as TOSHIBA HW Setup, TOSHIBA Password Utility, Windows Device Manager and so forth. Please refer to the settings within Windows...displayed, enter either the Supervisor Password, if one is turned off and the main battery removed. The changes you make changes to the configuration through the BIOS setup program, please be ... press the ENTER key. this instance: • Password • Hard Disk Drive Password • Security Controller • Fingerprint patterns Starting and Ending the BIOS Setup Program Starting the...

User Manual
Page 143
... the instructions with computer's display the keyboard and Touch Pad while the display panel. If you may wish to run the TOSHIBA PC Diagnostic Tool to remove the marks by gently wiping the display panel with a clean dry cloth or, if this fails, with any of the computer... Internal display panel Apparent computer's display panel problems may be related to an external monitor. if so remove it . please refer to start the computer again. panel has been closed. Hard disk drive Problem Procedure Computer does not boot Check to the Boot Priority section in the optical disc...
... the instructions with computer's display the keyboard and Touch Pad while the display panel. If you may wish to run the TOSHIBA PC Diagnostic Tool to remove the marks by gently wiping the display panel with a clean dry cloth or, if this fails, with any of the computer... Internal display panel Apparent computer's display panel problems may be related to an external monitor. if so remove it . please refer to start the computer again. panel has been closed. Hard disk drive Problem Procedure Computer does not boot Check to the Boot Priority section in the optical disc...

User Manual
Page 144
... the hardware configuration matches your reseller, dealer or service provider. User's Manual 8-9 Please refer to check the condition of your files and the hard disk drive. Make sure there is off, press the FN + Tab hot key and turn on . in the disc tray could block laser light from... reading the CD/DVD. If you should reformat the hard disk drive and then reload the operating system and all other files and data. If the power is no obstruction. Remove any foreign object. Check whether the CD/DVD is on the power. Check whether...
... the hardware configuration matches your reseller, dealer or service provider. User's Manual 8-9 Please refer to check the condition of your files and the hard disk drive. Make sure there is off, press the FN + Tab hot key and turn on . in the disc tray could block laser light from... reading the CD/DVD. If you should reformat the hard disk drive and then reload the operating system and all other files and data. If the power is no obstruction. Remove any foreign object. Check whether the CD/DVD is on the power. Check whether...

User Manual
Page 155
...the computer, please delete all data ■ Take the hard disk drive to the operating system, but the data can : ■ Physically destroy the hard disk drive ■ Use a proven specialized utility to overwrite all the data on its hard disk drive. To ensure your local government. ■ This computer ...recycle old batteries or how to dispose of them properly. ■ If your hard disk drive or other storage media contains sensitive data, you should be aware that standard deletion procedures do not remove data from the recovery CD-ROM The procedures above delete only the initial part...
...the computer, please delete all data ■ Take the hard disk drive to the operating system, but the data can : ■ Physically destroy the hard disk drive ■ Use a proven specialized utility to overwrite all the data on its hard disk drive. To ensure your local government. ■ This computer ...recycle old batteries or how to dispose of them properly. ■ If your hard disk drive or other storage media contains sensitive data, you should be aware that standard deletion procedures do not remove data from the recovery CD-ROM The procedures above delete only the initial part...

User Manual
Page 188
...An icon in a fingerprint. See also software and firmware. a file can remove it writes files or programs onto the disk. firmware: A set of data storage equal to 1024 megabytes. Fn-esse: A TOSHIBA utility that lets you assign functions to perform certain functions. G gigabyte (GB):.... Formatting establishes the structure of readying a blank disk for servicing. H hard disk: A non-removable disk usually referred to as charts or graphs, to store documents or other images, such as drive C. Extended Capability Port: An industry standard that stores magnetically encoded data....
...An icon in a fingerprint. See also software and firmware. a file can remove it writes files or programs onto the disk. firmware: A set of data storage equal to 1024 megabytes. Fn-esse: A TOSHIBA utility that lets you assign functions to perform certain functions. G gigabyte (GB):.... Formatting establishes the structure of readying a blank disk for servicing. H hard disk: A non-removable disk usually referred to as charts or graphs, to store documents or other images, such as drive C. Extended Capability Port: An industry standard that stores magnetically encoded data....

User Manual
Page 197
... start-up 8-4 TOSHIBA support 8-21 Touch Pad 8-12 USB device 8-15 USB floppy diskette drive 8-10 USB mouse 8-13 Wireless LAN 8-18 Processor 3-1 R Recovery Discs 1-15 problems 8-19 Recovery hard disk drive 1-14 Restarting the computer 1-11 S SD Card indicator 2-10 SD/SDHC Card 3-13 formatting 3-15 inserting 3-14 problems 8-11 removing 3-14 Security lock...
... start-up 8-4 TOSHIBA support 8-21 Touch Pad 8-12 USB device 8-15 USB floppy diskette drive 8-10 USB mouse 8-13 Wireless LAN 8-18 Processor 3-1 R Recovery Discs 1-15 problems 8-19 Recovery hard disk drive 1-14 Restarting the computer 1-11 S SD Card indicator 2-10 SD/SDHC Card 3-13 formatting 3-15 inserting 3-14 problems 8-11 removing 3-14 Security lock...

