
Operating Guide
Page 9
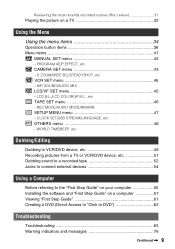
... or VCR/DVD device, etc 51 Dubbing sound to a recorded tape 52 Jacks to connect external devices 54 Using a Computer Before referring to DVD 62 Troubleshooting Troubleshooting 65 Warning indicators and messages 76 Continued , 9 VCR SET menu 45 - PROGRAM AE/P EFFECT, etc. LCD B.L./LCD COLOR/VF B.L., etc TAPE SET menu 46 - WORLD...
... or VCR/DVD device, etc 51 Dubbing sound to a recorded tape 52 Jacks to connect external devices 54 Using a Computer Before referring to DVD 62 Troubleshooting Troubleshooting 65 Warning indicators and messages 76 Continued , 9 VCR SET menu 45 - PROGRAM AE/P EFFECT, etc. LCD B.L./LCD COLOR/VF B.L., etc TAPE SET menu 46 - WORLD...
Operating Guide
Page 65
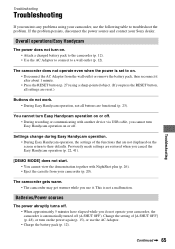
... use the following table to a wall outlet (p. 12). This is set to their defaults. Continued , 65 Troubleshooting Overall operations/Easy Handycam The power does not turn on . • Disconnect the AC Adaptor from your Sony dealer. The camcorder does not operate even when the power is not a malfunction. Change the setting of the functions...
... use the following table to a wall outlet (p. 12). This is set to their defaults. Continued , 65 Troubleshooting Overall operations/Easy Handycam The power does not turn on . • Disconnect the AC Adaptor from your Sony dealer. The camcorder does not operate even when the power is not a malfunction. Change the setting of the functions...
Operating Guide
Page 66
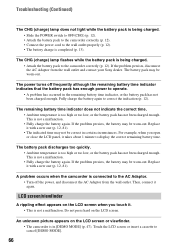
The battery pack may be worn-out. The power turns off the power, and disconnect the AC Adaptor from the wall outlet and contact your Sony dealer. Fully charge the battery again to operate. • A problem has occurred in the remaining battery time indicator, or the battery pack has... press hard on the LCD screen or viewfinder. • The camcorder is in certain circumstances. LCD screen/viewfinder A rippling effect appears on the LCD screen when you open or close the LCD panel, it with a new one (p. 12, 81). Troubleshooting (Continued) The CHG (charge) lamp does not light while the...
The battery pack may be worn-out. The power turns off the power, and disconnect the AC Adaptor from the wall outlet and contact your Sony dealer. Fully charge the battery again to operate. • A problem has occurred in the remaining battery time indicator, or the battery pack has... press hard on the LCD screen or viewfinder. • The camcorder is in certain circumstances. LCD screen/viewfinder A rippling effect appears on the LCD screen when you open or close the LCD panel, it with a new one (p. 12, 81). Troubleshooting (Continued) The CHG (charge) lamp does not light while the...
Operating Guide
Page 67
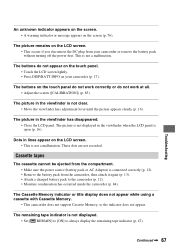
...8226; Make sure the power source (battery pack or AC Adaptor) is connected correctly (p. 12). • Remove the battery pack from your camcorder (p. 17). The picture is not displayed in the viewfinder has disappeared. • Close the LCD panel. The Cassette Memory indicator or title ...not support Cassette Memory, so the indicator does not appear. The buttons on your camcorder or remove the battery pack without turning off the power first. Dots in the viewfinder is not a malfunction. Troubleshooting An unknown indicator appears on the screen. • A warning indicator or message ...
...8226; Make sure the power source (battery pack or AC Adaptor) is connected correctly (p. 12). • Remove the battery pack from your camcorder (p. 17). The picture is not displayed in the viewfinder has disappeared. • Close the LCD panel. The Cassette Memory indicator or title ...not support Cassette Memory, so the indicator does not appear. The buttons on your camcorder or remove the battery pack without turning off the power first. Dots in the viewfinder is not a malfunction. Troubleshooting An unknown indicator appears on the screen. • A warning indicator or message ...
Operating Guide
Page 68
... not a malfunction. You cannot record a smooth transition on a tape from the last recorded scene to moisture condensation. This is not a malfunction. Troubleshooting (Continued) The cassette is stuck to the drum due to the next. • Perform END SEARCH (p. 30). • Do not remove the...using the AC Adaptor, rewind/fast forward speed increases (compared with battery operation) and therefore increases noise. Remove the cassette and leave your camcorder for auto focus. Recording Refer also to [ AUTO] (p. 36). • The recording conditions are not suitable for at least 1 ...
... not a malfunction. You cannot record a smooth transition on a tape from the last recorded scene to moisture condensation. This is not a malfunction. Troubleshooting (Continued) The cassette is stuck to the drum due to the next. • Perform END SEARCH (p. 30). • Do not remove the...using the AC Adaptor, rewind/fast forward speed increases (compared with battery operation) and therefore increases noise. Remove the cassette and leave your camcorder for auto focus. Recording Refer also to [ AUTO] (p. 36). • The recording conditions are not suitable for at least 1 ...

Operating Guide
Page 69
..., and the subject does not appear on the picture. The color of [EXPOSURE] - [SPOT METER] • The BACK LIGHT function does not work during Easy Handycam operation (p. 23). The screen picture is not a malfunction. Continued , 69 Troubleshooting [STEADYSHOT] does not function. • Set [STEADYSHOT] to reduce the anomaly (p. 42).
..., and the subject does not appear on the picture. The color of [EXPOSURE] - [SPOT METER] • The BACK LIGHT function does not work during Easy Handycam operation (p. 23). The screen picture is not a malfunction. Continued , 69 Troubleshooting [STEADYSHOT] does not function. • Set [STEADYSHOT] to reduce the anomaly (p. 42).
Operating Guide
Page 70
...until the sound is not a malfunction (p. 79). This is heard appropriately (p. 53). • If you are using the cleaning cassette (optional) (p. 84). Troubleshooting (Continued) No sound or only a low sound is heard. • Set [HiFi SOUND] to [ AUTO]. You cannot use [SPOT METER]. • ...You cannot use [SPOT METER] together with a 4ch microphone (4CH MIC REC). Your camcorder is automatically set [PROGRAM AE], [SPOT METER] is not compatible with [PROGRAM AE]. You cannot use [SPOT FOCUS]. • You cannot use [FADER...
...until the sound is not a malfunction (p. 79). This is heard appropriately (p. 53). • If you are using the cleaning cassette (optional) (p. 84). Troubleshooting (Continued) No sound or only a low sound is heard. • Set [HiFi SOUND] to [ AUTO]. You cannot use [SPOT METER]. • ...You cannot use [SPOT METER] together with a 4ch microphone (4CH MIC REC). Your camcorder is automatically set [PROGRAM AE], [SPOT METER] is not compatible with [PROGRAM AE]. You cannot use [SPOT FOCUS]. • You cannot use [FADER...

Operating Guide
Page 71
... the cable from the [ST1] (original sound) side until the sound is not heard. • Adjust [AUDIO MIX] from the computer and camcorder, restart the computer, then connect them again correctly. An error message appears when you set [PROGRAM AE], [EXPOSURE] is automatically set to a recorded... A/V connecting cable. • The A/V connecting cable is not NTSC (p. 79). Troubleshooting New sound added to [ AUTO]. Connecting to other devices Time code and other than the keyboard, the mouse, and the camcorder from the (USB) jack on the display of another device for dubbing a picture ...
... the cable from the [ST1] (original sound) side until the sound is not heard. • Adjust [AUDIO MIX] from the computer and camcorder, restart the computer, then connect them again correctly. An error message appears when you set [PROGRAM AE], [EXPOSURE] is automatically set to a recorded... A/V connecting cable. • The A/V connecting cable is not NTSC (p. 79). Troubleshooting New sound added to [ AUTO]. Connecting to other devices Time code and other than the keyboard, the mouse, and the camcorder from the (USB) jack on the display of another device for dubbing a picture ...

Operating Guide
Page 72
...tape on the Macintosh computer. • When you connect your camcorder to a Macintosh computer using a USB cable, you cannot copy pictures recorded on a tape to the computer. Troubleshooting (Continued) You cannot view the video your camcorder is connected to a computer. 2 Right-click [My Computer],... then click [Properties]. The image on tape does not appear on the screen of your camcorder, disconnect the USB cable, then ...
...tape on the Macintosh computer. • When you connect your camcorder to a Macintosh computer using a USB cable, you cannot copy pictures recorded on a tape to the computer. Troubleshooting (Continued) You cannot view the video your camcorder is connected to a computer. 2 Right-click [My Computer],... then click [Properties]. The image on tape does not appear on the screen of your camcorder, disconnect the USB cable, then ...
Operating Guide
Page 73
...in the disc drive of your computer. 8 Follow the steps below and try to a computer. 2 Right-click [My Computer], then click [Properties]. Troubleshooting 8 Follow the steps below and try to a computer. 2 Click [Start]. 3 Right-click [My Computer], then click [Properties]. x For Windows ...XP Log on as Administrator. 1 Check that your camcorder is connected to install the USB driver again. 1 Double-click [My Computer]. 2 Right-click [PICTUREPACKAGE] (Disc drive)*. * Drive names (such as ...
...in the disc drive of your computer. 8 Follow the steps below and try to a computer. 2 Right-click [My Computer], then click [Properties]. Troubleshooting 8 Follow the steps below and try to a computer. 2 Click [Start]. 3 Right-click [My Computer], then click [Properties]. x For Windows ...XP Log on as Administrator. 1 Check that your camcorder is connected to install the USB driver again. 1 Double-click [My Computer]. 2 Right-click [PICTUREPACKAGE] (Disc drive)*. * Drive names (such as ...
Operating Guide
Page 74
... Package does not function correctly. • Close Picture Package, then restart the computer. 74 There is no sound when the camcorder is connected to the Windows computer via a USB cable. • Change the settings for your computer environment as described in ...t [Programs]([All Programs] for Windows XP) t [Picture Package] t [Handycam Tools] t [USB Streaming Tool]. 2 Select another device on the [Select audio device] screen. 3 Follow the on-screen instructions, click [Next], then click [Done]. Troubleshooting (Continued) 5 If the devices below are already installed, right-click them...
... Package does not function correctly. • Close Picture Package, then restart the computer. 74 There is no sound when the camcorder is connected to the Windows computer via a USB cable. • Change the settings for your computer environment as described in ...t [Programs]([All Programs] for Windows XP) t [Picture Package] t [Handycam Tools] t [USB Streaming Tool]. 2 Select another device on the [Select audio device] screen. 3 Follow the on-screen instructions, click [Next], then click [Done]. Troubleshooting (Continued) 5 If the devices below are already installed, right-click them...
Operating Guide
Page 75
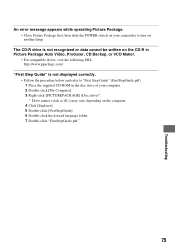
Troubleshooting An error message appears while operating Picture Package. • Close Picture Package first, then slide the POWER switch on your computer. 2 Double-click [My Computer]. 3 ... correctly. • Follow the procedure below and refer to "First Step Guide" (FirstStepGuide.pdf). 1 Place the supplied CD-ROM in the disc drive of your camcorder to turn on the computer. 4 Click [Explorer]. 5 Double-click [FirstStepGuide]. 6 Double-click the desired language folder. 7 Double-click "FirstStepGuide.pdf." 75
Troubleshooting An error message appears while operating Picture Package. • Close Picture Package first, then slide the POWER switch on your computer. 2 Double-click [My Computer]. 3 ... correctly. • Follow the procedure below and refer to "First Step Guide" (FirstStepGuide.pdf). 1 Place the supplied CD-ROM in the disc drive of your camcorder to turn on the computer. 4 Click [Explorer]. 5 Double-click [FirstStepGuide]. 6 Double-click the desired language folder. 7 Double-click "FirstStepGuide.pdf." 75

Operating Guide
Page 77
... 80) Q The tape has reached the end. (p. 20, 25) • Rewind or change the tape. Disconnect the USB cable from your camcorder first. Troubleshooting Continued , 77 x Others Cannot record due to a tape recorded on the screen, follow the instructions. Disconnect the i.LINK cable. (p. 52)...by 4CH MIC REC. Use a cleaning cassette. (p. 84) Cannot start Easy Handycam. (p. 22, 65) Cannot cancel Easy Handycam. (p. 22, 65) Cannot start Easy Handycam with USB connected. • You cannot start the Easy Handycam settings while the USB cable is low. • Change the battery (p. ...
... 80) Q The tape has reached the end. (p. 20, 25) • Rewind or change the tape. Disconnect the USB cable from your camcorder first. Troubleshooting Continued , 77 x Others Cannot record due to a tape recorded on the screen, follow the instructions. Disconnect the i.LINK cable. (p. 52)...by 4CH MIC REC. Use a cleaning cassette. (p. 84) Cannot start Easy Handycam. (p. 22, 65) Cannot cancel Easy Handycam. (p. 22, 65) Cannot start Easy Handycam with USB connected. • You cannot start the Easy Handycam settings while the USB cable is low. • Change the battery (p. ...

