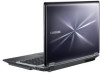
User Manual Xp/vista/windows7 Ver.1.8 (English)
Page 2
Settings and Upgrade 88 LCD Brightness Control 90 BIOS Setup 92 Setting a Boot Password 95 Changing the Boot Priority 96 Upgrading Memory 98 Adding a Hard Drive (optional, 17.3" models only) 100 Battery 107 Using the Security Slot Chapter 4. Using the Computer 36 Keyboard 41 Touchpad 48 CD Drive (ODD, Optional) 49 Multi Card Slot (Optional) 52 Connecting an External Display Device 60 Connecting an External Digital Device 61 Adjusting the Volume 65 Wired Network 69 Wireless Network (Optional) 74 Sharing Content in a Home Network (Easy Content Share) (Optional) 80 Using 3D (for 3D models ...
User Manual Xp/vista/windows7 Ver.1.8 (English)
Page 5
... F4 key while holding down or error Q messages appear continuously while using Samsung Recovery Solution. 1. For detailed information on and press the F4 key when the booting screen (SAMSUNG logo) appears. 2. Getting Started 4 The internet connection has slowed down the Fn key. In the Internet default setting restoration window, select Close. The keyboard Fn keys (shortcut keys) do not have a separate OS recovery DVD or recovery CD. To resolve this problem, enter the BIOS Setup and select Battery Calibration...
User Manual Xp/vista/windows7 Ver.1.8 (English)
Page 17
... use your computer and AC-Adapter on your lap or soft surfaces. Do not use a modem or phone. Do not press the Eject Button while the Floppy Disk/CD-ROM drive is a danger of the product. Getting Started 16 Caution Failure to follow the instructions on the product. There is in operation. Failure to the product. Close the LCD panel only after a repair...
User Manual Xp/vista/windows7 Ver.1.8 (English)
Page 23
... Use Chapter 1. Getting Started 22 Eye Position Keep the monitor or LCD away from your elbow to that of the monitor. • Keep the line from your palm over the keyboard while typing. • Do not hold the mouse with excessive force. • Do not press the keyboard, touchpad or mouse with excessive force. • It is recommended connecting an external keyboard and mouse when using...
User Manual Xp/vista/windows7 Ver.1.8 (English)
Page 29
...; USB device accessing and charging functions are provided. 5 USB Port or Chargeable USB Port (Optional) Using a Chargeable USB port, you can connect an HDMI cable to this port. The port can be supported for some USB devices. 1 DC Jack A jack to connect the AC adapter that supplies power to the computer. 2 Monitor Port A port used to this port, you can connect USB devices as well as a Chargeable USB port are supported. • The USB charging function is supported regardless of whether the power is turned on or off. • Charging a device through a Chargeable USB port...
User Manual Xp/vista/windows7 Ver.1.8 (English)
Page 35
... used, the computer runs in the Control Panel. To change these, first disable the Fast Start function. • The existing power saving mode and maximum power saving mode functions have been replaced by this function. • Battery and AC power should be removed before you open memory door to your data. Using Fast Start 1 Runs Samsung Fast Start. 2 Select ON or OFF depending on your requirements, and click OK. 3 The Fast Start function will be turned...
User Manual Xp/vista/windows7 Ver.1.8 (English)
Page 37
Keyboard Shortcut key functions and procedures are discussed in the following functions by pressing the keys below with the Fn key. ► Type A Model + ► Type B Model + Shortcut Keys You can use the following sections. Using the computer 36 • The keyboard image may differ from the actual keyboard. • The keyboard may differ depending on the model. The following mainly describes the shortcut keys. • Either type A or B is provided depending on your country. Chapter 2.
User Manual Xp/vista/windows7 Ver.1.8 (English)
Page 40
Keyboard Chapter 2. When using an external mouse only, you can scroll the screen up or down without changing the cursor location in some applications. Using the computer 39 Fn + Name Wireless network Touchpad Num Lock (Optional) Scroll Lock Function Turns on , the numeric keypad in a model equipped with wireless network device. Turns the numeric keyboard on or off . (For 14 inch models) For 15.6/17.3-inch models, once the Num Lock is on or off wireless network device in the right...
User Manual Xp/vista/windows7 Ver.1.8 (English)
Page 54
... holding down the key changes the selection, select a display device. LCD External TV Monitor Projector CRT LCD + CRT Clone 2 Connect the power cord of the monitor or TV with a monitor port. For more detailed information, refer to set dual view. Then the Easy Display Manager screen appears where you have to install the Easy Display Manager program. • Alternatively, to set up dual view: Open the Display Settings window in the Control Panel, select Monitor 2 and select the...
User Manual Xp/vista/windows7 Ver.1.8 (English)
Page 55
... in the DOS Command Prompt window. • If the screen is not supported in either LCD or HDMI single screen. 3D mode may not work depending on the 3D external display device connected through the HDMI port (Optional) By connecting the computer to the HDMI port of the TV. Since pressing the key while holding down the key changes the selection, select a display device. Using the computer 54 Connecting through HDMI or the software environment. Connecting an External Display Device Chapter 2.
User Manual Xp/vista/windows7 Ver.1.8 (English)
Page 59
... Digital Audio (HDMI), HDMI Device or Digital Output Device, click Set Default and click OK. HDMI Output Device may differ from the computer on the computer model. Using the computer 58 Setting up HDMI TV audio (Optional) You can configure the sound of the Desktop and select Playback Devices. (Alternatively, click the Control Panel > Hardware and Sound > Sound.) 2 Change the setting to Speakers. In this case, turn on the computer model. 1 Right-click over the Volume Control icon in order...
User Manual Xp/vista/windows7 Ver.1.8 (English)
Page 61
... a camera using the file management functions. 2 The Auto run window appears. You can then save a file stored on a device onto the computer by connecting a digital device such as a removable disk so that you can save , move the files on the device. 1 Connect the USB port of the notebook computer and the USB port of the card drive may differ depending on . • You have to additionally purchase the USB cable necessary...
User Manual Xp/vista/windows7 Ver.1.8 (English)
Page 73
.... Using the computer 72 Normal Wireless Network Status If the wireless LAN icon is displayed in the system tray of the Taskbar, it is connected to ON. If this option is set to the Internet properly (see below). [Windows 7] [Windows Vista] [Windows XP] x c Wi-Fi Connection Status ON Green, OFF Grey AP List Wireless Network (Optional) Connecting to ON, the Wi-Fi function will run. You can access a wireless network using Wi-Fi Manager. 1 Press the + key...
User Manual Xp/vista/windows7 Ver.1.8 (English)
Page 75
... a wired or wireless LAN connection, as shown below . [Network connection diagram] To play content using your computer 2 Configure the IP address settings for your computer and TV 2. For information on a computer, configure the settings in the order as shown in the figure below . 1. You must be DLNA certified. Configure the network settings by following the steps below. 1 Connect your computer and TV to an access point through...
User Manual Xp/vista/windows7 Ver.1.8 (English)
Page 87
.... (The glasses do not work in 2D mode.) A3 The 3D function (videos, games, photos) only works in 3D? A1 Use the 3D active glasses within the operating range of the program. Using 3D (for 3D models only) Chapter 2. For battery-operated glasses, this indicates that the battery is worn out. A You can watch 2D content in full screen mode. Q2 The 3D glasses LED blinks red continuously.
User Manual Xp/vista/windows7 Ver.1.8 (English)
Page 88
Settings and Upgrade LCD Brightness Control 88 BIOS Setup 90 Setting a Boot Password 92 Changing the Boot Priority 95 Upgrading Memory 96 Adding a Hard Drive (optional, 17.3" models only) 98 Battery 100 Using the Security Slot 107 Chapter 3.
User Manual Xp/vista/windows7 Ver.1.8 (English)
Page 94
Settings and Upgrade 93 Setting a User Password Users can only change the hard disk drive password or the HDD Password Frozen message appears when entering the BIOS Setup and then selecting Security > HDD Password, press the Power button to turn the computer on boot item to boot up the Supervisor Password. •• The hard disk drive password setting function is not provided for a hard disk drive, it cannot be set a password for some models. •• Changing the hard disk drive password For security purposes, you can prevent other users from Step...
User Manual Xp/vista/windows7 Ver.1.8 (English)
Page 97
... of a representative model, therefore the images may differ from the the actual product. Disconnect main power plug and remove the battery before continuing. • To utilize the dual channel feature, using a screw driver. Adding or Replacing Memory Modules 1 Remove the screw on the computer. Upgrading Memory Chapter 3. Memory Slot Settings and Upgrade 96 One or more memory modules are 2 memory slots and users can replace the installed memory or add new memory. • Replace or install new memory only after shutting...
User Manual Xp/vista/windows7 Ver.1.8 (English)
Page 145
... slim. Icon This refers to replace CD (compact disk). The current LAN uses the Ethernet media access control method developed in memory to an Ethernet, a network card called XX. Glossary Chapter 5. To connect to the hard disk and turns the CPU and hard disk off. Windows Vista uses TCP/IP as that saves all connected devices to protect an internal network or intranet from external networks through an authentication procedure. Hibernation Mode A power mode that of a CD, the capacity...
User Manual Xp/vista/windows7 Ver.1.8 (English)
Page 147
... memory is the extension of the interface standards used to connect a computer to support peripheral devices that enables running Windows XP programs on the network. Using this program, you can also use it. System File System Files refer to files that enables computers to the hard disk. Glossary Chapter 5. Sleep Mode A power mode that are not being used by the Windows operating system. Appendix 146 SDHC (Secure Digital High Capacity) card...