User Guide
Page 7
... on the CD-ROM for Macintosh...178 Files for Macintosh...178 RPCS Raster Printer Drivers for Macintosh 178 Manuals for a Long Period of Time 196 8. Troubleshooting Software Cannot Be Installed...197 Confirming Installation...197 Checking Your Computer Environment...197 Printer Driver Cannot Be Installed...199 USB Connection is not Automatically Detected...
... on the CD-ROM for Macintosh...178 Files for Macintosh...178 RPCS Raster Printer Drivers for Macintosh 178 Manuals for a Long Period of Time 196 8. Troubleshooting Software Cannot Be Installed...197 Confirming Installation...197 Checking Your Computer Environment...197 Printer Driver Cannot Be Installed...199 USB Connection is not Automatically Detected...
User Guide
Page 11
.... Be sure to make network and printer driver settings, and how to read this before you can refer to it easily. 9 The guide also contains troubleshooting procedures, such as those related to unpack and install the machine. Quick Installation Guide This guide briefly explains how to printing and paper jams, and...
.... Be sure to make network and printer driver settings, and how to read this before you can refer to it easily. 9 The guide also contains troubleshooting procedures, such as those related to unpack and install the machine. Quick Installation Guide This guide briefly explains how to printing and paper jams, and...

User Guide
Page 199
...not be inserted properly. To check the connection, perform a test print. Check that are applicable to all functions of this machine and what to troubleshoot software installation problems under different environments. Software Cannot Be Installed This section explains how to do when paper misfeed (become jammed inside the machine). ...machine icon appears in the [Printer] window. • Windows XP, Windows Server 2003/2003 R2 The machine icon appears in the Start menu. Troubleshooting This chapter describes troubleshooting procedures that the CD-ROM is selected for the port.
...not be inserted properly. To check the connection, perform a test print. Check that are applicable to all functions of this machine and what to troubleshoot software installation problems under different environments. Software Cannot Be Installed This section explains how to do when paper misfeed (become jammed inside the machine). ...machine icon appears in the [Printer] window. • Windows XP, Windows Server 2003/2003 R2 The machine icon appears in the Start menu. Troubleshooting This chapter describes troubleshooting procedures that the CD-ROM is selected for the port.
User Guide
Page 200
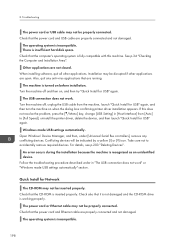
... appears. Other applications are properly connected and not damaged. Installation may not be inserted properly. If this machine. Follow the troubleshooting procedure described under [Universal Serial Bus controllers], remove any anti-virus applications that the power cord and USB cable are running.... device, and then launch "Quick Install for Network The CD-ROM may not be properly connected. Quick Install for USB" again. Troubleshooting The power cord or USB cable may not be properly connected. Windows made USB settings automatically" section. 8. The operating system is...
... appears. Other applications are properly connected and not damaged. Installation may not be inserted properly. If this machine. Follow the troubleshooting procedure described under [Universal Serial Bus controllers], remove any anti-virus applications that the power cord and USB cable are running.... device, and then launch "Quick Install for Network The CD-ROM may not be properly connected. Quick Install for USB" again. Troubleshooting The power cord or USB cable may not be properly connected. Windows made USB settings automatically" section. 8. The operating system is...
User Guide
Page 201
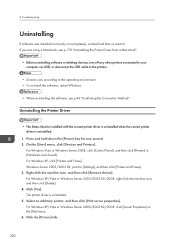
... of the stored data is not specified or the computer and printer are not on the screen. • An error occurs if the path to troubleshoot printer driver installation problems. The printer driver installer does not start. Double-click the [RP_SETUPXX.EXE] icon, and then install the printer driver by following...
... of the stored data is not specified or the computer and printer are not on the screen. • An error occurs if the path to troubleshoot printer driver installation problems. The printer driver installer does not start. Double-click the [RP_SETUPXX.EXE] icon, and then install the printer driver by following...

User Guide
Page 202
See p.202 "Uninstalling the Printer Driver". 2. Run [Quick Install for USB". 8. Delete the device. If these steps do the following procedure: 1. Troubleshooting USB Connection is not Automatically Detected If the USB connection is not automatically detected, do not resolve the problem, contact your sales or service representative. 200 See p.203 "Deleting Devices". 3. Delete the printer driver. See p.49 "Quick Install for USB] again.
See p.202 "Uninstalling the Printer Driver". 2. Run [Quick Install for USB". 8. Delete the device. If these steps do the following procedure: 1. Troubleshooting USB Connection is not Automatically Detected If the USB connection is not automatically detected, do not resolve the problem, contact your sales or service representative. 200 See p.203 "Deleting Devices". 3. Delete the printer driver. See p.49 "Quick Install for USB] again.
User Guide
Page 203
... USB when USB does not appear in [Hardware and Sound]. • Windows XP Click [Printers and Faxes]. • Windows Server 2003/2003 R2 Point to troubleshoot Test Print problems. The power cord or USB cable or Ethernet cable is not properly connected. Check that the power cord and USB cable, Ethernet...
... USB when USB does not appear in [Hardware and Sound]. • Windows XP Click [Printers and Faxes]. • Windows Server 2003/2003 R2 Point to troubleshoot Test Print problems. The power cord or USB cable or Ethernet cable is not properly connected. Check that the power cord and USB cable, Ethernet...
User Guide
Page 204
... and Faxes]. 3. For Windows Vista or Windows Server 2008, click [Control Panel], and then click [Printers] in [Hardware and Sound]. Click the [Drivers] tab. 202 Troubleshooting Uninstalling If software was installed incorrectly or incompletely, uninstall and then re-install it.
... and Faxes]. 3. For Windows Vista or Windows Server 2008, click [Control Panel], and then click [Printers] in [Hardware and Sound]. Click the [Drivers] tab. 202 Troubleshooting Uninstalling If software was installed incorrectly or incompletely, uninstall and then re-install it.

User Guide
Page 206
... name], and then click [Uninstall User Guide]. 4. Point to [Programs]. 3. Removing the User Guide using its [Uninstall] function 1. On the [Start] menu, click [Control Panel]. Troubleshooting 2. On the [Start] menu, click [Control Panel]. Click [USB Printing Support] or [Product Name]. 6. Click [Close]. Press and hold down the [Power] key for one...
... name], and then click [Uninstall User Guide]. 4. Point to [Programs]. 3. Removing the User Guide using its [Uninstall] function 1. On the [Start] menu, click [Control Panel]. Troubleshooting 2. On the [Start] menu, click [Control Panel]. Click [USB Printing Support] or [Product Name]. 6. Click [Close]. Press and hold down the [Power] key for one...
User Guide
Page 208
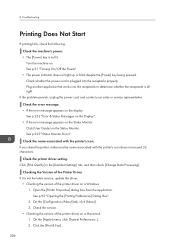
Troubleshooting Printing Does Not Start If printing fails, check the following: Check the machine's power. • The [Power] key is plugged into the receptacle to determine ...
Troubleshooting Printing Does Not Start If printing fails, check the following: Check the machine's power. • The [Power] key is plugged into the receptacle to determine ...
User Guide
Page 210
... not adjusted correctly. Though a paper jam is still jammed in the machine. Adjust the paper guides and load the paper again. Load the paper correctly. Troubleshooting Paper Is Not Fed or Delivered Normally If the machine is not loaded correctly. See p.87 "Loading Paper". • Paper is operating but paper will...
... not adjusted correctly. Though a paper jam is still jammed in the machine. Adjust the paper guides and load the paper again. Load the paper correctly. Troubleshooting Paper Is Not Fed or Delivered Normally If the machine is not loaded correctly. See p.87 "Loading Paper". • Paper is operating but paper will...

User Guide
Page 212
... water. • When removing jammed paper, make removing the stain impossible. • When removing jammed paper or replacing ink, avoid getting ink on your fingers. Troubleshooting Paper Jam This explains how to Remove Jammed Paper". • See p.223 "Removing Paper Jammed in Tray 2/3". • See p.221 "Opening the Rear Unit Cover...
... water. • When removing jammed paper, make removing the stain impossible. • When removing jammed paper or replacing ink, avoid getting ink on your fingers. Troubleshooting Paper Jam This explains how to Remove Jammed Paper". • See p.223 "Removing Paper Jammed in Tray 2/3". • See p.221 "Opening the Rear Unit Cover...

User Guide
Page 214
Open the output ramp, and then remove the jammed paper. Close the output ramp. 212 CHU056 Examine the paper carefully and remove. 3. Take care not to remove, the paper may be jammed inside the machine. Hold the grip on Tray 1, lift the tray slightly ( ), and then pull it . 2. CHU057 If you cannot remove the jammed paper or it is difficult to drop it out ( ). 1 2 CHU053 Pull the tray completely out. Troubleshooting Removing Paper Jammed in Tray 1 1. 8.
Open the output ramp, and then remove the jammed paper. Close the output ramp. 212 CHU056 Examine the paper carefully and remove. 3. Take care not to remove, the paper may be jammed inside the machine. Hold the grip on Tray 1, lift the tray slightly ( ), and then pull it . 2. CHU057 If you cannot remove the jammed paper or it is difficult to drop it out ( ). 1 2 CHU053 Pull the tray completely out. Troubleshooting Removing Paper Jammed in Tray 1 1. 8.

User Guide
Page 216
Troubleshooting Removing Paper Jammed in the bypass tray with the side to be delivered after printing resumes. 214 Printing starts. CHU075 2. Press the [Form Feed] key. Remove the jammed paper. Blank paper may be printed on facing up and without exceeding the sheet limit. Load paper in the Multi Bypass Tray 1. Remove any paper in the bypass tray. CHU076 3. CHU074 4. 8.
Troubleshooting Removing Paper Jammed in the bypass tray with the side to be delivered after printing resumes. 214 Printing starts. CHU075 2. Press the [Form Feed] key. Remove the jammed paper. Blank paper may be printed on facing up and without exceeding the sheet limit. Load paper in the Multi Bypass Tray 1. Remove any paper in the bypass tray. CHU076 3. CHU074 4. 8.
User Guide
Page 218
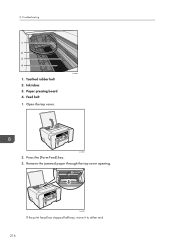
Troubleshooting 1 2 3 4 CHU097 1. Toothed rubber belt 2. Feed belt 1. CHU058 2. Paper pressing board 4. 8. Remove the jammed paper through the top cover opening. Ink tubes 3. Open the top cover. CHU060 If the print head has stopped halfway, move it to either end. 216 Press the [Form Feed] key. 3.
Troubleshooting 1 2 3 4 CHU097 1. Toothed rubber belt 2. Feed belt 1. CHU058 2. Paper pressing board 4. 8. Remove the jammed paper through the top cover opening. Ink tubes 3. Open the top cover. CHU060 If the print head has stopped halfway, move it to either end. 216 Press the [Form Feed] key. 3.

User Guide
Page 220
CHU088 2. Troubleshooting 2. Slide the tabs on the sides to subsequent error messages until the messages no longer appear. CHU089 218 See p.221 "Opening the Rear Unit Cover to Remove Jammed Paper". • Continue to remove the jammed paper according to unlock, and then open the rear cover. See p.210 "Paper Jam". • If paper jams occur repeatedly, see p.208 "Paper Is Not Fed or Delivered Normally". Remove the jammed paper. 8. Open the rear unit cover and remove the jammed paper. Opening the Rear Cover to Remove Jammed Paper 1.
CHU088 2. Troubleshooting 2. Slide the tabs on the sides to subsequent error messages until the messages no longer appear. CHU089 218 See p.221 "Opening the Rear Unit Cover to Remove Jammed Paper". • Continue to remove the jammed paper according to unlock, and then open the rear cover. See p.210 "Paper Jam". • If paper jams occur repeatedly, see p.208 "Paper Is Not Fed or Delivered Normally". Remove the jammed paper. 8. Open the rear unit cover and remove the jammed paper. Opening the Rear Cover to Remove Jammed Paper 1.

User Guide
Page 222
8. CHU079 3. CHU078 Printing starts. Remove the jammed paper. See p.210 "Paper Jam". • If paper jams occur repeatedly, see p.208 "Paper Is Not Fed or Delivered Normally". 220 Troubleshooting 2. Blank paper may be delivered after printing resumes. • Continue to remove the jammed paper according to subsequent error messages until it stops. Push Tray 2/3 gently in until the messages no longer appear.
8. CHU079 3. CHU078 Printing starts. Remove the jammed paper. See p.210 "Paper Jam". • If paper jams occur repeatedly, see p.208 "Paper Is Not Fed or Delivered Normally". 220 Troubleshooting 2. Blank paper may be delivered after printing resumes. • Continue to remove the jammed paper according to subsequent error messages until it stops. Push Tray 2/3 gently in until the messages no longer appear.

User Guide
Page 224
... the messages no longer appear. Press the duplex unit cover button at the center of the bypass tray, and then open the duplex unit cover. Troubleshooting • Continue to remove the jammed paper according to the machine, turn the machine off and detach the multi bypass tray. CHU062 2.
... the messages no longer appear. Press the duplex unit cover button at the center of the bypass tray, and then open the duplex unit cover. Troubleshooting • Continue to remove the jammed paper according to the machine, turn the machine off and detach the multi bypass tray. CHU062 2.

User Guide
Page 226
Troubleshooting • Continue to remove the jammed paper according to subsequent error messages until the messages no longer appear. 8. See p.210 "Paper Jam". • If paper jams occur repeatedly, see p.208 "Paper Is Not Fed or Delivered Normally". 224
Troubleshooting • Continue to remove the jammed paper according to subsequent error messages until the messages no longer appear. 8. See p.210 "Paper Jam". • If paper jams occur repeatedly, see p.208 "Paper Is Not Fed or Delivered Normally". 224

User Guide
Page 227
Prints are Unsatisfactory This section explains how to troubleshoot the machine when printing is poor, check the machine and printer driver settings for 5 to 10 minutes. By doing this, minute bubbles in Step 2, perform "...
Prints are Unsatisfactory This section explains how to troubleshoot the machine when printing is poor, check the machine and printer driver settings for 5 to 10 minutes. By doing this, minute bubbles in Step 2, perform "...