User Guide
Page 7
Troubleshooting Software Cannot Be Installed...197 Confirming Installation...197 Checking Your Computer Environment...197 Printer Driver Cannot Be Installed...199 USB Connection is not Automatically Detected ... the Keys...179 Unlocking the Keys...179 Replacing a Print Cartridge...180 Checking the Remaining Ink...180 Replacing a Print Cartridge...181 Handling Print Cartridges...183 Replacing an Ink Collector Unit...186 Checking the Waste Ink Level...186 Replacing an Ink Collector Unit...187 Cleaning...191 Cleaning the Power Cable Plug...191 Moving...193 Moving a Short...
Troubleshooting Software Cannot Be Installed...197 Confirming Installation...197 Checking Your Computer Environment...197 Printer Driver Cannot Be Installed...199 USB Connection is not Automatically Detected ... the Keys...179 Unlocking the Keys...179 Replacing a Print Cartridge...180 Checking the Remaining Ink...180 Replacing a Print Cartridge...181 Handling Print Cartridges...183 Replacing an Ink Collector Unit...186 Checking the Waste Ink Level...186 Replacing an Ink Collector Unit...187 Cleaning...191 Cleaning the Power Cable Plug...191 Moving...193 Moving a Short...
User Guide
Page 203
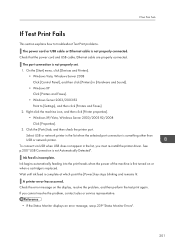
... when a cartridge is something other than USB or network printer. If you must re-install the printer driver. A printer error has occurred. Ink begins automatically feeding into the print heads when the power of the machine is not properly connected. See p.200 "USB Connection is complete at ...and then click [Printers] in [Hardware and Sound]. • Windows XP Click [Printers and Faxes]. • Windows Server 2003/2003 R2 Point to troubleshoot Test Print problems. The power cord or USB cable or Ethernet cable is first turned on the display, resolve the problem, and then perform the...
... when a cartridge is something other than USB or network printer. If you must re-install the printer driver. A printer error has occurred. Ink begins automatically feeding into the print heads when the power of the machine is not properly connected. See p.200 "USB Connection is complete at ...and then click [Printers] in [Hardware and Sound]. • Windows XP Click [Printers and Faxes]. • Windows Server 2003/2003 R2 Point to troubleshoot Test Print problems. The power cord or USB cable or Ethernet cable is first turned on the display, resolve the problem, and then perform the...
User Guide
Page 210
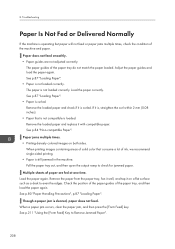
... feed or paper jams multiple times, check the condition of ink, we recommend single-sided printing. • Paper is loaded. Multiple sheets of solid color that is not compatible is still jammed in the machine. If it with compatible paper. Troubleshooting Paper Is Not Fed or Delivered Normally If the machine is...
... feed or paper jams multiple times, check the condition of ink, we recommend single-sided printing. • Paper is loaded. Multiple sheets of solid color that is not compatible is still jammed in the machine. If it with compatible paper. Troubleshooting Paper Is Not Fed or Delivered Normally If the machine is...

User Guide
Page 212
... the Duplex Unit". 210 If a paper jam error message appears on your clothing. 8. If ink comes into the fabric and make sure not to trap or injure your clothing, wash the stained area with your fingers. Troubleshooting Paper Jam This explains how to Remove Jammed Paper". • See p.223 "Removing Paper Jammed...
... the Duplex Unit". 210 If a paper jam error message appears on your clothing. 8. If ink comes into the fabric and make sure not to trap or injure your clothing, wash the stained area with your fingers. Troubleshooting Paper Jam This explains how to Remove Jammed Paper". • See p.223 "Removing Paper Jammed...
User Guide
Page 218
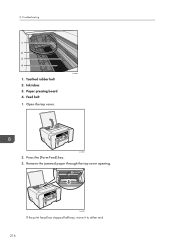
Troubleshooting 1 2 3 4 CHU097 1. Paper pressing board 4. Feed belt 1. CHU058 2. Press the [Form Feed] key. 3. Open the top cover. Ink tubes 3. CHU060 If the print head has stopped halfway, move it to either end. 216 Toothed rubber belt 2. Remove the jammed paper through the top cover opening. 8.
Troubleshooting 1 2 3 4 CHU097 1. Paper pressing board 4. Feed belt 1. CHU058 2. Press the [Form Feed] key. 3. Open the top cover. Ink tubes 3. CHU060 If the print head has stopped halfway, move it to either end. 216 Toothed rubber belt 2. Remove the jammed paper through the top cover opening. 8.

User Guide
Page 227
..., perform Steps 1 to the wrong amount of ink being used for 5 to 5 a few more thoroughly than Head Cleaning, consumes a lot of ink. Has the machine not been used ) or when prints are Unsatisfactory This section explains how to troubleshoot the machine when printing is poor, check the ...machine and printer driver settings for the clogged print head. 3. Have you printed the nozzle check test pattern? Perform Head Cleaning for problems. If no problems are all ejecting ink properly, and, if necessary...
..., perform Steps 1 to the wrong amount of ink being used for 5 to 5 a few more thoroughly than Head Cleaning, consumes a lot of ink. Has the machine not been used ) or when prints are Unsatisfactory This section explains how to troubleshoot the machine when printing is poor, check the ...machine and printer driver settings for the clogged print head. 3. Have you printed the nozzle check test pattern? Perform Head Cleaning for problems. If no problems are all ejecting ink properly, and, if necessary...
User Guide
Page 232
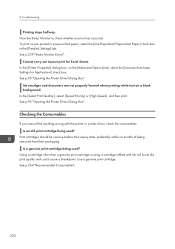
Troubleshooting Printing stops halfway. To print on a black background. See p.95 "Opening the Printer Driver Dialog Box". Is an old print cartridge being used up before their expiry date, preferably within six months of being used? Ink smudges and characters are not properly formed when ...select the [Use Preprinted/Prepunched Paper] check box in the [Detailed Settings] tab. Checking the Consumables If you cannot find anything wrong with ink will lower the print quality and could cause a breakdown. Print cartridges should be used ? See p.264 "Recommended Consumables". 230 In the ...
Troubleshooting Printing stops halfway. To print on a black background. See p.95 "Opening the Printer Driver Dialog Box". Is an old print cartridge being used up before their expiry date, preferably within six months of being used? Ink smudges and characters are not properly formed when ...select the [Use Preprinted/Prepunched Paper] check box in the [Detailed Settings] tab. Checking the Consumables If you cannot find anything wrong with ink will lower the print quality and could cause a breakdown. Print cartridges should be used ? See p.264 "Recommended Consumables". 230 In the ...
User Guide
Page 236
... Feed] key, select a different paper tray, and then print. 8. Troubleshooting Load paper of the specified size or type, and then print. To cancel the print job, press the [Job Reset] key. To cancel the print job, press the [Job Reset] key. Loading Ink... / WAIT! Maintenance failed Head cleaning, head flushing, or other...
... Feed] key, select a different paper tray, and then print. 8. Troubleshooting Load paper of the specified size or type, and then print. To cancel the print job, press the [Job Reset] key. To cancel the print job, press the [Job Reset] key. Loading Ink... / WAIT! Maintenance failed Head cleaning, head flushing, or other...

User Guide
Page 238
...the duplex unit or rear unit of the cartridge's low ink level will flash and a message informing you have a new ink collector on the display. Reposition the paper in the tray (Tray 2 or 3). Make sure you of tray 2. Troubleshooting Paper Misfeed Remove Duplex or / Tray2 Rear Cover remove ...misfeed Paper has jammed in the duplex unit. If a print cartridge starts running out of ink when the ink collector unit is almost full, the alert indicator will appear on...
...the duplex unit or rear unit of the cartridge's low ink level will flash and a message informing you have a new ink collector on the display. Reposition the paper in the tray (Tray 2 or 3). Make sure you of tray 2. Troubleshooting Paper Misfeed Remove Duplex or / Tray2 Rear Cover remove ...misfeed Paper has jammed in the duplex unit. If a print cartridge starts running out of ink when the ink collector unit is almost full, the alert indicator will appear on...
User Guide
Page 240
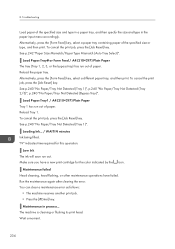
Close the rear unit cover. 8. See p.242 "Cover Open" Used Ink Collect Unit is open. Wait a moment. • If this does not eliminate the problem, contact your sales or service representative. 238 Troubleshooting Close the top cover. See p.242 "Cover Open" Tray # Rear Cover is open / Close... Tray # Rear Cover The rear unit cover of the tray (Tray 2 or 3) is set / Replace Ink Collector Unit A used print cartridge was installed. Used Ink Crtrdge / Replace Ink Crtg A used ink collector unit...
Close the rear unit cover. 8. See p.242 "Cover Open" Used Ink Collect Unit is open. Wait a moment. • If this does not eliminate the problem, contact your sales or service representative. 238 Troubleshooting Close the top cover. See p.242 "Cover Open" Tray # Rear Cover is open / Close... Tray # Rear Cover The rear unit cover of the tray (Tray 2 or 3) is set / Replace Ink Collector Unit A used print cartridge was installed. Used Ink Crtrdge / Replace Ink Crtg A used ink collector unit...

User Guide
Page 248
...is for reference only and may run out. • The amount of ink, the machine may run out. During this, the ink in the print cartridge may differ from the actual amount. Replace the cartridge. 246 Troubleshooting Duplex Unit Not Detected The duplex unit is not attached correctly or its cover... is one containing a single large area of solid color, or one made up almost entirely of such an image is closed. Check which color print cartridge will send the ink in the ...
...is for reference only and may run out. • The amount of ink, the machine may run out. During this, the ink in the print cartridge may differ from the actual amount. Replace the cartridge. 246 Troubleshooting Duplex Unit Not Detected The duplex unit is not attached correctly or its cover... is one containing a single large area of solid color, or one made up almost entirely of such an image is closed. Check which color print cartridge will send the ink in the ...
User Guide
Page 250
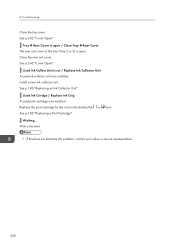
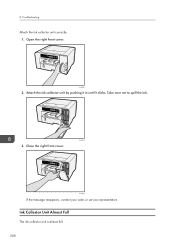
Open the right front cover. CHU041 3. Ink Collector Unit Almost Full The ink collector unit is almost full. 248 Attach the ink collector unit by pushing it in until it clicks. CHU038 If the message reappears, contact your sales or service representative. 8. Close the right front cover. CHU034 2. Troubleshooting Attach the ink collector unit correctly. 1. Take care not to spill the ink.
Open the right front cover. CHU041 3. Ink Collector Unit Almost Full The ink collector unit is almost full. 248 Attach the ink collector unit by pushing it in until it clicks. CHU038 If the message reappears, contact your sales or service representative. 8. Close the right front cover. CHU034 2. Troubleshooting Attach the ink collector unit correctly. 1. Take care not to spill the ink.
User Guide
Page 252
... , the machine may form inside the machine causing errors. Replace the ink collector unit. Place the machine in a location that is between 10 and 32 °C (50 and 89.6 °F). 3. Troubleshooting Used Ink Collector Unit A used under (ambient temperature and humidity range), see p....34 "Checking the Computer and Installation Area". See p.186 "Replacing an Ink Collector Unit". 8. Out of Printable Temperature Range Printing is not possible...
... , the machine may form inside the machine causing errors. Replace the ink collector unit. Place the machine in a location that is between 10 and 32 °C (50 and 89.6 °F). 3. Troubleshooting Used Ink Collector Unit A used under (ambient temperature and humidity range), see p....34 "Checking the Computer and Installation Area". See p.186 "Replacing an Ink Collector Unit". 8. Out of Printable Temperature Range Printing is not possible...


