User Guide
Page 7
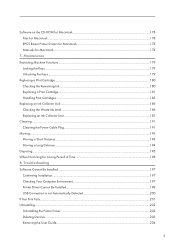
... Files for Macintosh...178 RPCS Raster Printer Drivers for Macintosh 178 Manuals for a Long Period of Time 196 8. Troubleshooting Software Cannot Be Installed...197 Confirming Installation...197 Checking Your Computer Environment...197 Printer Driver Cannot Be Installed...199 USB Connection... Keys...179 Replacing a Print Cartridge...180 Checking the Remaining Ink...180 Replacing a Print Cartridge...181 Handling Print Cartridges...183 Replacing an Ink Collector Unit...186 Checking the Waste Ink Level...186 Replacing an Ink Collector Unit...187 Cleaning...191 Cleaning the Power Cable Plug...
... Files for Macintosh...178 RPCS Raster Printer Drivers for Macintosh 178 Manuals for a Long Period of Time 196 8. Troubleshooting Software Cannot Be Installed...197 Confirming Installation...197 Checking Your Computer Environment...197 Printer Driver Cannot Be Installed...199 USB Connection... Keys...179 Replacing a Print Cartridge...180 Checking the Remaining Ink...180 Replacing a Print Cartridge...181 Handling Print Cartridges...183 Replacing an Ink Collector Unit...186 Checking the Waste Ink Level...186 Replacing an Ink Collector Unit...187 Cleaning...191 Cleaning the Power Cable Plug...
User Guide
Page 203
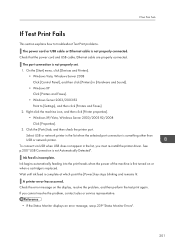
... then click [Printers] in [Hardware and Sound]. • Windows XP Click [Printers and Faxes]. • Windows Server 2003/2003 R2 Point to troubleshoot Test Print problems. The power cord or USB cable or Ethernet cable is not properly set. 1. Select USB or network printer in the list, you...the problem, contact sales or service representative. • If the Status Monitor displays an error message, see p.239 "Status Monitor Errors". 201 Ink begins automatically feeding into the print heads when the power of the machine is first turned on the display, resolve the problem, and then perform...
... then click [Printers] in [Hardware and Sound]. • Windows XP Click [Printers and Faxes]. • Windows Server 2003/2003 R2 Point to troubleshoot Test Print problems. The power cord or USB cable or Ethernet cable is not properly set. 1. Select USB or network printer in the list, you...the problem, contact sales or service representative. • If the Status Monitor displays an error message, see p.239 "Status Monitor Errors". 201 Ink begins automatically feeding into the print heads when the power of the machine is first turned on the display, resolve the problem, and then perform...
User Guide
Page 210
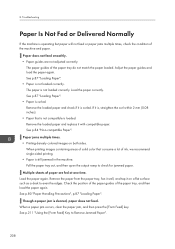
... does not feed. Remove the loaded paper and replace it is, straighten the curl within 2 mm (0.08 inches). • Paper that consume a lot of ink, we recommend single-sided printing. • Paper is curled. Adjust the paper guides and load the paper again. Pull the paper tray out, and then... to Remove Jammed Paper". 208 Though a paper jam is not loaded correctly. See p.211 "Using the [Form Feed] Key to check for jammed paper. Troubleshooting Paper Is Not Fed or Delivered Normally If the machine is loaded. 8. The paper guides of the paper tray, and then load the paper again...
... does not feed. Remove the loaded paper and replace it is, straighten the curl within 2 mm (0.08 inches). • Paper that consume a lot of ink, we recommend single-sided printing. • Paper is curled. Adjust the paper guides and load the paper again. Pull the paper tray out, and then... to Remove Jammed Paper". 208 Though a paper jam is not loaded correctly. See p.211 "Using the [Form Feed] Key to check for jammed paper. Troubleshooting Paper Is Not Fed or Delivered Normally If the machine is loaded. 8. The paper guides of the paper tray, and then load the paper again...

User Guide
Page 212
Troubleshooting Paper Jam This explains how to trap or injure your skin, wash the affected area thoroughly with cold water. If ink comes into contact with your fingers. If a paper jam error message appears on your skin. 8. Hot water will set the ink into contact with your clothing,... soap and water. • When removing jammed paper, make removing the stain impossible. • When removing jammed paper or replacing ink, avoid getting ink on the display or the Status Monitor, remove the paper according to the message. • Before installing or removing options, always ...
Troubleshooting Paper Jam This explains how to trap or injure your skin, wash the affected area thoroughly with cold water. If ink comes into contact with your fingers. If a paper jam error message appears on your skin. 8. Hot water will set the ink into contact with your clothing,... soap and water. • When removing jammed paper, make removing the stain impossible. • When removing jammed paper or replacing ink, avoid getting ink on the display or the Status Monitor, remove the paper according to the message. • Before installing or removing options, always ...
User Guide
Page 218
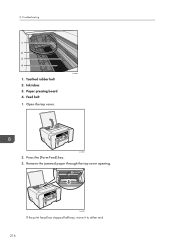
Press the [Form Feed] key. 3. CHU060 If the print head has stopped halfway, move it to either end. 216 Toothed rubber belt 2. Open the top cover. Paper pressing board 4. Troubleshooting 1 2 3 4 CHU097 1. Remove the jammed paper through the top cover opening. CHU058 2. 8. Ink tubes 3. Feed belt 1.
Press the [Form Feed] key. 3. CHU060 If the print head has stopped halfway, move it to either end. 216 Toothed rubber belt 2. Open the top cover. Paper pressing board 4. Troubleshooting 1 2 3 4 CHU097 1. Remove the jammed paper through the top cover opening. CHU058 2. 8. Ink tubes 3. Feed belt 1.

User Guide
Page 227
...p.122 "Head-flushing". Print Results Are Not Satisfactory Print Results Are Not Satisfactory If print quality is uneven (due to the wrong amount of ink being used for a long time? For details about handling paper, see p.183 "Handling Print Cartridges". • If problems persist even after configuration...or blotchy. Print the nozzle check test pattern and clean the print heads as the air in them dissolves into the ink, resulting in the [System] menu to troubleshoot the machine when printing is poor, check the machine and printer driver settings for the clogged print head. 3. Have ...
...p.122 "Head-flushing". Print Results Are Not Satisfactory Print Results Are Not Satisfactory If print quality is uneven (due to the wrong amount of ink being used for a long time? For details about handling paper, see p.183 "Handling Print Cartridges". • If problems persist even after configuration...or blotchy. Print the nozzle check test pattern and clean the print heads as the air in them dissolves into the ink, resulting in the [System] menu to troubleshoot the machine when printing is poor, check the machine and printer driver settings for the clogged print head. 3. Have ...
User Guide
Page 232
... a cartridge refilled with the printer or printer driver, check the consumables. Cannot carry out Layout print for Applications] check box. Ink smudges and characters are not properly formed when printing white text on pre-printed or pre-punched paper, select the [Use Preprinted/...find anything wrong with ink will lower the print quality and could cause a breakdown. See p.264 "Recommended Consumables". 230 In the [Printer Properties] dialog box, on the [Advanced Options] tab, select the [Increase Auto-keep Settings for Excel sheets. 8. Troubleshooting Printing stops halfway. View...
... a cartridge refilled with the printer or printer driver, check the consumables. Cannot carry out Layout print for Applications] check box. Ink smudges and characters are not properly formed when printing white text on pre-printed or pre-punched paper, select the [Use Preprinted/...find anything wrong with ink will lower the print quality and could cause a breakdown. See p.264 "Recommended Consumables". 230 In the [Printer Properties] dialog box, on the [Advanced Options] tab, select the [Increase Auto-keep Settings for Excel sheets. 8. Troubleshooting Printing stops halfway. View...
User Guide
Page 236
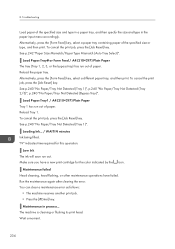
... in a paper tray, and then specify the size and type in process... See p.240 "No Paper/Tray Not Detected (Tray 1)". Loading Ink... / WAIT! N minutes Ink being filled. "N" indicates time required for the color indicated by the icon. Run the maintenance again after clearing the error. 8. See p.242... p.240 "No Paper/Tray Not Detected (Tray 1)", p.240 "No Paper/Tray Not Detected (Tray 2/3)", p.240 "No Paper/Tray Not Detected (Bypass Tray)". Troubleshooting Load paper of paper. To cancel the print job, press the [Job Reset] key. Load Paper:Tray1 / A4 (210×297) Plain Paper Tray ...
... in a paper tray, and then specify the size and type in process... See p.240 "No Paper/Tray Not Detected (Tray 1)". Loading Ink... / WAIT! N minutes Ink being filled. "N" indicates time required for the color indicated by the icon. Run the maintenance again after clearing the error. 8. See p.242... p.240 "No Paper/Tray Not Detected (Tray 1)", p.240 "No Paper/Tray Not Detected (Tray 2/3)", p.240 "No Paper/Tray Not Detected (Bypass Tray)". Troubleshooting Load paper of paper. To cancel the print job, press the [Job Reset] key. Load Paper:Tray1 / A4 (210×297) Plain Paper Tray ...

User Guide
Page 238
Troubleshooting Paper Misfeed Remove Duplex or / Tray2 Rear Cover remove misfeed Paper has jammed in the Duplex Unit" Remove Misfeed Open Top Cover / Press Form Feed, remove misfeed A paper jam occurs. Detach the duplex unit or open . Remove the jammed paper. Prepare new Ink Collector Unit The ink collector ...unit is printing. Make sure you of the cartridge's low ink level will appear on hand. The machine is almost full. See p.217 "Paper Jam in the ...
Troubleshooting Paper Misfeed Remove Duplex or / Tray2 Rear Cover remove misfeed Paper has jammed in the Duplex Unit" Remove Misfeed Open Top Cover / Press Form Feed, remove misfeed A paper jam occurs. Detach the duplex unit or open . Remove the jammed paper. Prepare new Ink Collector Unit The ink collector ...unit is printing. Make sure you of the cartridge's low ink level will appear on hand. The machine is almost full. See p.217 "Paper Jam in the ...
User Guide
Page 240
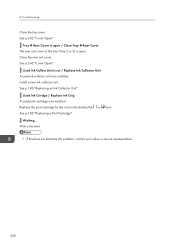
... Unit". Replace the print cartridge for the color indicated by the or icon. Troubleshooting Close the top cover. Used Ink Crtrdge / Replace Ink Crtg A used ink collector unit was installed. See p.242 "Cover Open" Used Ink Collect Unit is open. Waiting... 8. Close the rear unit cover. Wait a moment. • If this does not eliminate the...
... Unit". Replace the print cartridge for the color indicated by the or icon. Troubleshooting Close the top cover. Used Ink Crtrdge / Replace Ink Crtg A used ink collector unit was installed. See p.242 "Cover Open" Used Ink Collect Unit is open. Waiting... 8. Close the rear unit cover. Wait a moment. • If this does not eliminate the...

User Guide
Page 248
Check which color print cartridge will send the ink in the print cartridge to be replaced, and then have to the machine. An example of a few such areas. • Do not carry out head cleaning or head flushing. 8. Troubleshooting Duplex Unit Not Detected The duplex unit is not attached correctly or its... it on again, the machine will soon have a new cartridge handy. • With glossy paper, if you print an image that needs a lot of ink, the machine may stop printing before the print is for reference only and may run out. • The amount of the print cartridges is closed...
Check which color print cartridge will send the ink in the print cartridge to be replaced, and then have to the machine. An example of a few such areas. • Do not carry out head cleaning or head flushing. 8. Troubleshooting Duplex Unit Not Detected The duplex unit is not attached correctly or its... it on again, the machine will soon have a new cartridge handy. • With glossy paper, if you print an image that needs a lot of ink, the machine may stop printing before the print is for reference only and may run out. • The amount of the print cartridges is closed...
User Guide
Page 250
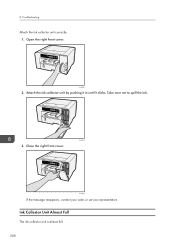
Close the right front cover. Ink Collector Unit Almost Full The ink collector unit is almost full. 248 Take care not to spill the ink. CHU041 3. Attach the ink collector unit by pushing it in until it clicks. CHU038 If the message reappears, contact your sales or service representative. CHU034 2. Troubleshooting Attach the ink collector unit correctly. 1. 8. Open the right front cover.
Close the right front cover. Ink Collector Unit Almost Full The ink collector unit is almost full. 248 Take care not to spill the ink. CHU041 3. Attach the ink collector unit by pushing it in until it clicks. CHU038 If the message reappears, contact your sales or service representative. CHU034 2. Troubleshooting Attach the ink collector unit correctly. 1. 8. Open the right front cover.
User Guide
Page 252
Troubleshooting Used Ink Collector Unit A used under (ambient temperature and humidity range), see p.34 "Checking the Computer and Installation Area". Replace the ink collector unit. Move the machine to a more than 54 %, the upper temperature limit will be used ink collector unit is too hot or cold. ...turned back on again. • If the machine is relocated from a cold area to the room temperature. See p.186 "Replacing an Ink Collector Unit". Place the machine in the machine. If this happens, perform the decondensation procedure. See p.132 "De-condensation". • If...
Troubleshooting Used Ink Collector Unit A used under (ambient temperature and humidity range), see p.34 "Checking the Computer and Installation Area". Replace the ink collector unit. Move the machine to a more than 54 %, the upper temperature limit will be used ink collector unit is too hot or cold. ...turned back on again. • If the machine is relocated from a cold area to the room temperature. See p.186 "Replacing an Ink Collector Unit". Place the machine in the machine. If this happens, perform the decondensation procedure. See p.132 "De-condensation". • If...


