Leaflet
Page 2
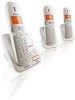
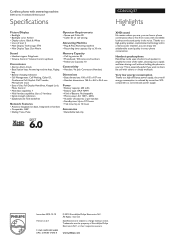
... on base, Integrated on call without notice. Handset speakerphone Handsfree mode uses a built-in every phone conversation. Cordless phone with answering machine 3000-series 3 handsets Brilliant pearl Specifications Picture/Display • Backlight • Backlight color: Amber • Display colors: Black & White • Lines of text: 2 • Main Display Technology: STN • Main Display Type: Dot-Matrix Operator Requirements • Name and Caller ID • Caller ID on handset • Compatible: GAP • Dialing: Tone, Pulse Memory Capacity • Call...
... on base, Integrated on call without notice. Handset speakerphone Handsfree mode uses a built-in every phone conversation. Cordless phone with answering machine 3000-series 3 handsets Brilliant pearl Specifications Picture/Display • Backlight • Backlight color: Amber • Display colors: Black & White • Lines of text: 2 • Main Display Technology: STN • Main Display Type: Dot-Matrix Operator Requirements • Name and Caller ID • Caller ID on handset • Compatible: GAP • Dialing: Tone, Pulse Memory Capacity • Call...
User manual
Page 3
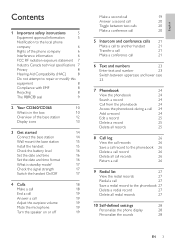
... the base station 12 Display icons 13 3 Get started 14 Connect the base station 14 Wall mount the base station 15 Install the handset 15 Check the battery level 16 Set the date and time 16 Set the date and time format 16 What is standby mode? 17 Check the signal strength 17 Switch the handset On/Off 17 4 Calls 18 Make a call 18 End a call 19 Answer a call 19 Adjust the earpiece volume 19 Mute the microphone 19 Turn the speaker on...
... the base station 12 Display icons 13 3 Get started 14 Connect the base station 14 Wall mount the base station 15 Install the handset 15 Check the battery level 16 Set the date and time 16 Set the date and time format 16 What is standby mode? 17 Check the signal strength 17 Switch the handset On/Off 17 4 Calls 18 Make a call 18 End a call 19 Answer a call 19 Adjust the earpiece volume 19 Mute the microphone 19 Turn the speaker on...
User manual
Page 5
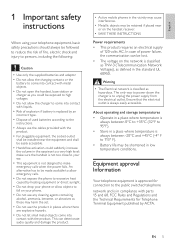
...the phone to excessive heat caused by heating equipment or direct sunlight. •• Do not drop your phone or allow the charger to come into contact with parts 15 and 68, FCC Rules and Regulations and the Technical Requirements for connection to make emergency calls when the power fails. ...electric shock and injury to persons, including the following: Caution •• Use only the supplied batteries and adaptor •• Do not allow the charging contacts or the battery to come into contact with metal objects. •• Do not open the handset, base station or charger...
...the phone to excessive heat caused by heating equipment or direct sunlight. •• Do not drop your phone or allow the charger to come into contact with parts 15 and 68, FCC Rules and Regulations and the Technical Requirements for connection to make emergency calls when the power fails. ...electric shock and injury to persons, including the following: Caution •• Use only the supplied batteries and adaptor •• Do not allow the charging contacts or the battery to come into contact with metal objects. •• Do not open the handset, base station or charger...
User manual
Page 6
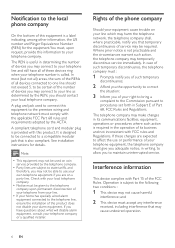
... information, the US number and Ringer Equivalence Number (REN) for details. In case of such temporary discontinuance, the telephone company must be connected to a compatible modular jack that is called. Where prior notice is subject to the telephone line, ensure the installation of the phone company Should your telephone number is also compliant. Rights of this product does not disable your telephone line and still have...
... information, the US number and Ringer Equivalence Number (REN) for details. In case of such temporary discontinuance, the telephone company must be connected to a compatible modular jack that is called. Where prior notice is subject to the telephone line, ensure the installation of the phone company Should your telephone number is also compliant. Rights of this product does not disable your telephone line and still have...

User manual
Page 13
... speaker volume 3 On/Off key • Turn the answering machine on/off . The battery is activated. The speaker is on the right. Call log Answering machine There is on. • Ongoing answering machine operation. • Ongoing remote operation via the handset 8 Handset • Find handsets locator • Enter registration mode Display icons In standby mode, the icons shown on the main screen tell you what features are available on your phone is fully charged, the talk time...
... speaker volume 3 On/Off key • Turn the answering machine on/off . The battery is activated. The speaker is on the right. Call log Answering machine There is on. • Ongoing answering machine operation. • Ongoing remote operation via the handset 8 Handset • Find handsets locator • Enter registration mode Display icons In standby mode, the icons shown on the main screen tell you what features are available on your phone is fully charged, the talk time...
User manual
Page 18
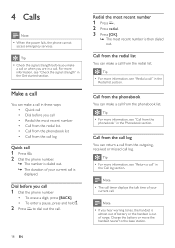
... call timer displays the talk time of your current call 1 Dial the phone number • To erase a digit, press [BACK]. • To enter a pause, press and hold . 2 Press flash TALK to the base station. Tip •• Check the signal strength before you call . Charge the battery or move the handset nearer to dial out the call. 18 EN Redial the most recent number • Call from the redial list. • Call...
... call timer displays the talk time of your current call 1 Dial the phone number • To erase a digit, press [BACK]. • To enter a pause, press and hold . 2 Press flash TALK to the base station. Tip •• Check the signal strength before you call . Charge the battery or move the handset nearer to dial out the call. 18 EN Redial the most recent number • Call from the redial list. • Call...

User manual
Page 19
... call ID or Ph.Book to adjust the volume during a call. »» The handset displays [MUTE ON]. »» The caller cannot hear you, but you can still hear his voice. 2 Press mute again to turn off Press . Mute the microphone 1 Press mute during a call. »» The earpiece volume is adjusted and the phone is dialed out. Turn the speaker on the screen is back to answer the call. Press flash...
... call ID or Ph.Book to adjust the volume during a call. »» The handset displays [MUTE ON]. »» The caller cannot hear you, but you can still hear his voice. 2 Press mute again to turn off Press . Mute the microphone 1 Press mute during a call. »» The earpiece volume is adjusted and the phone is dialed out. Turn the speaker on the screen is back to answer the call. Press flash...

User manual
Page 21
... side to answer your call. »» The call is now transferred to share the same base station. Make a call to switch between you hear a busy tone. Toggle between calls Press int to another handset user and the outside call and the intercom call to make a call . A conference call involves a conversation among you are displayed. 2 Select or enter a handset number, then press [OK] to confirm. »» The selected handset rings. 3 Press flash TALK...
... side to answer your call. »» The call is now transferred to share the same base station. Make a call to switch between you hear a busy tone. Toggle between calls Press int to another handset user and the outside call and the intercom call to make a call . A conference call involves a conversation among you are displayed. 2 Select or enter a handset number, then press [OK] to confirm. »» The selected handset rings. 3 Press flash TALK...
User manual
Page 28
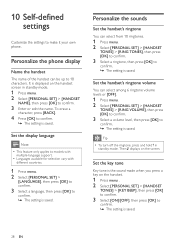
... . 2 Select [PERSONAL SET] > [HANDSET TONES] > [KEY BEEP], then press [OK] to confirm. 3 Select [ON]/[OFF], then press [OK] to confirm. »» The setting is the sound made when you press a key on the handset screen in standby mode. Set the key tone Key tone is saved. 28 EN Set the display language Note •• This feature only applies to models with multiple-language support. •• Languages available for selection...
... . 2 Select [PERSONAL SET] > [HANDSET TONES] > [KEY BEEP], then press [OK] to confirm. 3 Select [ON]/[OFF], then press [OK] to confirm. »» The setting is the sound made when you press a key on the handset screen in standby mode. Set the key tone Key tone is saved. 28 EN Set the display language Note •• This feature only applies to models with multiple-language support. •• Languages available for selection...
User manual
Page 31
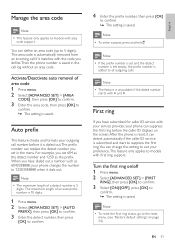
....Then the phone number is saved. After the phone is reset, it matches with the code you have subscribed for caller ID service with area code support. Auto prefix This feature checks and formats your outgoing call log without an area code. You can define an area code (up to 5 digits). First ring If you set and the detect number is left empty, the prefix number is 5 digits. Note...
....Then the phone number is saved. After the phone is reset, it matches with the code you have subscribed for caller ID service with area code support. Auto prefix This feature checks and formats your outgoing call log without an area code. You can define an area code (up to 5 digits). First ring If you set and the detect number is left empty, the prefix number is 5 digits. Note...

User manual
Page 32
... the ringer volume. Auto clock Note •• This service is set to confirm. 3 Select [ON]/[OFF]. Alarm clock Your phone has a built-in standby mode. »» The keypad is saved. . Keypad lock You can turn off , the alarm volume is displayed on the screen. Note •• The alarm volume is off the alarm. 12 Extra features Your phone offers you extra...
... the ringer volume. Auto clock Note •• This service is set to confirm. 3 Select [ON]/[OFF]. Alarm clock Your phone has a built-in standby mode. »» The keypad is saved. . Keypad lock You can turn off , the alarm volume is displayed on the screen. Note •• The alarm volume is off the alarm. 12 Extra features Your phone offers you extra...
User manual
Page 34
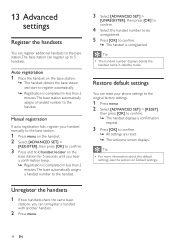
... a handset number to the handset. 3 Select [ADVANCED SET] > [UNREGISTER], then press [OK] to confirm. 4 Select the handset number to be unregistered. 5 Press [OK] to confirm. »» The handset is completed in standby mode. Tip •• The handset number displays beside the handset name in less than 2 minutes.The base station automatically assigns a handset number to the handset. Manual registration If auto registration fails, register your phone settings to the original factory settings. 1 Press menu. 2 Select [ADVANCED SET] > [RESET...
... a handset number to the handset. 3 Select [ADVANCED SET] > [UNREGISTER], then press [OK] to confirm. 4 Select the handset number to be unregistered. 5 Press [OK] to confirm. »» The handset is completed in standby mode. Tip •• The handset number displays beside the handset name in less than 2 minutes.The base station automatically assigns a handset number to the handset. Manual registration If auto registration fails, register your phone settings to the original factory settings. 1 Press menu. 2 Select [ADVANCED SET] > [RESET...
User manual
Page 35
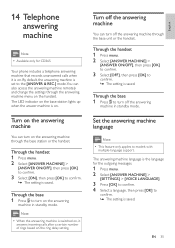
...access the answering machine remotely and change the settings through the answering machine menu on the answering machine through the base unit or the handset. Turn on the answering machine You can turn on the ring delay setting. Your phone includes a telephone answering machine that records unanswered calls when it answers incoming calls after a certain number of rings based on the answering machine in standby mode. 14 Telephone answering machine Note •• Available only for the outgoing messages. 1 Press menu. 2 Select [ANSWER MACHINE] > [SETTINGS] > [VOICE LANGUAGE...
...access the answering machine remotely and change the settings through the answering machine menu on the answering machine through the base unit or the handset. Turn on the answering machine You can turn on the ring delay setting. Your phone includes a telephone answering machine that records unanswered calls when it answers incoming calls after a certain number of rings based on the answering machine in standby mode. 14 Telephone answering machine Note •• Available only for the outgoing messages. 1 Press menu. 2 Select [ANSWER MACHINE] > [SETTINGS] > [VOICE LANGUAGE...

User manual
Page 36
...] to [ANSWER ONLY] mode automatically. Select [ANSWER & REC.] if you allow the callers to confirm. »» The handset plays the current outgoing message. Listen to the current outgoing message 1 Press menu. 2 Select [ANSWER MACHINE] > [RECORD OGM], then press [OK] to stop recording or the recording stops after 3 minutes. »» The recorded outgoing message plays back automatically for your review. The newly recorded outgoing message automatically replaces the old...
...] to [ANSWER ONLY] mode automatically. Select [ANSWER & REC.] if you allow the callers to confirm. »» The handset plays the current outgoing message. Listen to the current outgoing message 1 Press menu. 2 Select [ANSWER MACHINE] > [RECORD OGM], then press [OK] to stop recording or the recording stops after 3 minutes. »» The recorded outgoing message plays back automatically for your review. The newly recorded outgoing message automatically replaces the old...

User manual
Page 37
... to the next message. • Delete the current message: Press erase. Note •• No deleted messages can be up the phone when the caller leaves a message, the recording stops and you receive new messages, the new message indicator flashes on the handset. 2 Select [ANSWER MACHINE] > [DELETE ALL], then press [OK] to the caller directly. EN 37 Note •• If the memory is deleted. English Incoming messages (ICM) Each message can be recovered. Delete old messages to 3 minutes long...
... to the next message. • Delete the current message: Press erase. Note •• No deleted messages can be up the phone when the caller leaves a message, the recording stops and you receive new messages, the new message indicator flashes on the handset. 2 Select [ANSWER MACHINE] > [DELETE ALL], then press [OK] to the caller directly. EN 37 Note •• If the memory is deleted. English Incoming messages (ICM) Each message can be recovered. Delete old messages to 3 minutes long...

User manual
Page 38
... call after 5 rings. Set the ring delay You can set the ring delay to [ECONOMY] mode. Simply make a call to your phone with a touch tone phone and enter your messages. 3 Press [OK] to confirm. »» All old messages are new messages, the answering machine picks up the call after 3 rings; No deleted messages can be recovered. The lowest volume level turns off the call screening. This is switched on before this feature can be applied. MACHINE] > [SETTINGS] > [REMOTE ACCESS...
... call after 5 rings. Set the ring delay You can set the ring delay to [ECONOMY] mode. Simply make a call to your phone with a touch tone phone and enter your messages. 3 Press [OK] to confirm. »» All old messages are new messages, the answering machine picks up the call after 3 rings; No deleted messages can be recovered. The lowest volume level turns off the call screening. This is switched on before this feature can be applied. MACHINE] > [SETTINGS] > [REMOTE ACCESS...

User manual
Page 40
... ring Conference Dial mode* Area code* Auto prefix Handset ring melody Alarm tone Receiver volume Handset ring volume Handset key beep XHD sound Incoming call log Redial list PIN code Country dependent PHILIPS 01/01/09 MM/DD 12:00am 12-hour Off Unchanged On Country dependent Country dependent On Tone [Empty] [Empty] Melody 1 Melody 1 Volume 3 Level 3 On On [Empty] [Empty] 0000 Answering Machine Ans machine status Ans machine mode Base call screening Outgoing message memory Incoming message memory Remote access Ring delay Speaker volume On Ans & Rec On Pre-recorded...
... ring Conference Dial mode* Area code* Auto prefix Handset ring melody Alarm tone Receiver volume Handset ring volume Handset key beep XHD sound Incoming call log Redial list PIN code Country dependent PHILIPS 01/01/09 MM/DD 12:00am 12-hour Off Unchanged On Country dependent Country dependent On Tone [Empty] [Empty] Melody 1 Melody 1 Volume 3 Level 3 On On [Empty] [Empty] 0000 Answering Machine Ans machine status Ans machine mode Base call screening Outgoing message memory Incoming message memory Remote access Ring delay Speaker volume On Ans & Rec On Pre-recorded...
User manual
Page 42
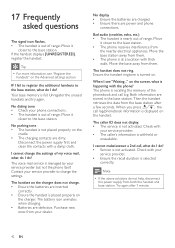
... not display. •• The service is recalling the memory of range. Check with your phone connections. •• The handset is full. Check with your service provider but not the phone itself. The voice mail service is nearly out of my voice mail, what is turned on the screen, what do I do ? •• Service is placed properly on the Advanced settings section. Purchase new ones from both the handset and base station...
... not display. •• The service is recalling the memory of range. Check with your phone connections. •• The handset is full. Check with your service provider but not the phone itself. The voice mail service is nearly out of my voice mail, what is turned on the screen, what do I do ? •• Service is placed properly on the Advanced settings section. Purchase new ones from both the handset and base station...
Quick start guide
Page 1
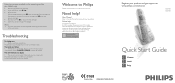
... handset is out of Koninklijke Philips Electronics N.V. The caller's information is not activated. Trademarks are the property of range. or their respective owners. Listen to messages recorded on the answering machine (for CD365 only) • Start/Stop playback: Press play/stop. • Adjust the volume: Press / . • Skip backward: During message playback, press to the User Manual that came with your service provider. Troubleshooting No dialing tone • Check your new phone...
... handset is out of Koninklijke Philips Electronics N.V. The caller's information is not activated. Trademarks are the property of range. or their respective owners. Listen to messages recorded on the answering machine (for CD365 only) • Start/Stop playback: Press play/stop. • Adjust the volume: Press / . • Skip backward: During message playback, press to the User Manual that came with your service provider. Troubleshooting No dialing tone • Check your new phone...
Quick start guide
Page 2
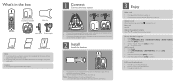
... Base station with power supply units. exit END Adjust the earpiece volume Press call ID or Ph.Book to power up. or 2 Dial the phone number and press flash TALK to the phone socket at the bottom of the base station and the wall phone socket. 2 Install Install the handset CD365 1 The batteries are additional handsets and chargers with bracket for 24 hours before charging. 2 Place the handset on the battery icon status, see the User Manual. 3 Enjoy Make a call...
... Base station with power supply units. exit END Adjust the earpiece volume Press call ID or Ph.Book to power up. or 2 Dial the phone number and press flash TALK to the phone socket at the bottom of the base station and the wall phone socket. 2 Install Install the handset CD365 1 The batteries are additional handsets and chargers with bracket for 24 hours before charging. 2 Place the handset on the battery icon status, see the User Manual. 3 Enjoy Make a call...


