Network Guide
Page 3
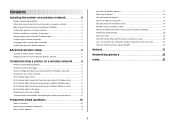
... a wireless network 4 Wireless network compatibility...4 Information you will need to set up the printer on a wireless network 4 Bypassing security warnings during software installation 4 Installing the printer on a wireless network 4 Wireless installation instructions (France only 5 Interpreting the colors of the Wi-Fi indicator light 5 Configuring an IP address manually...5 Changing wireless settings after installation 5 Installing...
... a wireless network 4 Wireless network compatibility...4 Information you will need to set up the printer on a wireless network 4 Bypassing security warnings during software installation 4 Installing the printer on a wireless network 4 Wireless installation instructions (France only 5 Interpreting the colors of the Wi-Fi indicator light 5 Configuring an IP address manually...5 Changing wireless settings after installation 5 Installing...
Network Guide
Page 4
... will need to secure your network. If your wireless access point (wireless router) is the letter of your CD or DVD drive. 3 Follow the instructions on the network if encryption was used to know the SSID of your system support person. If the Welcome screen does not appear after a minute..., click the CD icon on the desktop. 3 Double-click Install. 4 Follow the instructions on a wireless network To set up the printer. This is connected to the same wireless network where you want to set up the...
... will need to secure your network. If your wireless access point (wireless router) is the letter of your CD or DVD drive. 3 Follow the instructions on the network if encryption was used to know the SSID of your system support person. If the Welcome screen does not appear after a minute..., click the CD icon on the desktop. 3 Double-click Install. 4 Follow the instructions on a wireless network To set up the printer. This is connected to the same wireless network where you want to set up the...
Network Guide
Page 5
.... Interpreting the colors of the Wi-Fi indicator light The Wi-Fi indicator light helps you want to start using the setup instructions provided. 4 If there is an associate/registration button on the back of the printer. When the printer is turned off , the printer is in the... a specific IP address. • You moved the printer to a remote subnet. Wireless installation instructions (France only) The following instructions apply to customers using a USB cable • Orange may indicate that came with your box. 2 Before installing the printer, make sure your box is turned on and that ...
.... Interpreting the colors of the Wi-Fi indicator light The Wi-Fi indicator light helps you want to start using the setup instructions provided. 4 If there is an associate/registration button on the back of the printer. When the printer is turned off , the printer is in the... a specific IP address. • You moved the printer to a remote subnet. Wireless installation instructions (France only) The following instructions apply to customers using a USB cable • Orange may indicate that came with your box. 2 Before installing the printer, make sure your box is turned on and that ...
Network Guide
Page 6
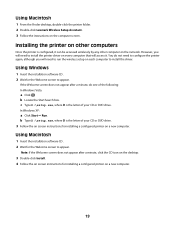
Using Macintosh 1 From the Finder desktop, double-click the printer folder. 2 Double-click Lexmark Wireless Setup Assistant. 3 Follow the instructions on each computer to configure the printer again, although you will access it when running the wireless setup. You do not need to install the ... does not appear after a minute, click the CD icon on the desktop. 3 Double-click Install. 4 Follow the on screen instructions for the network between your printer and a computer with a wireless network adapter, you should configure your network in the "Connect to appear. c Type D:\setup.exe...
Using Macintosh 1 From the Finder desktop, double-click the printer folder. 2 Double-click Lexmark Wireless Setup Assistant. 3 Follow the instructions on each computer to configure the printer again, although you will access it when running the wireless setup. You do not need to install the ... does not appear after a minute, click the CD icon on the desktop. 3 Double-click Install. 4 Follow the on screen instructions for the network between your printer and a computer with a wireless network adapter, you should configure your network in the "Connect to appear. c Type D:\setup.exe...
Network Guide
Page 7
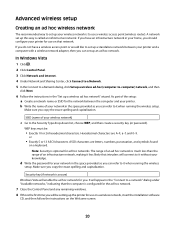
... a computer-to give your network name and security information in steps 11-16. b Click All Programs. c Select the printer program folder, and then click Tools ΠLexmark Wireless Setup Utility. 9 When the available networks are displayed, provide the network name and the security information you created in... spelling and capitalization. 8 If this is the first time you will be setting up the printer for use on a wireless network, insert the installation software CD, and then follow the instructions on the Welcome screen. a Select the network to set up menu. Make sure you copy...
... a computer-to give your network name and security information in steps 11-16. b Click All Programs. c Select the printer program folder, and then click Tools ΠLexmark Wireless Setup Utility. 9 When the available networks are displayed, provide the network name and the security information you created in... spelling and capitalization. 8 If this is the first time you will be setting up the printer for use on a wireless network, insert the installation software CD, and then follow the instructions on the Welcome screen. a Select the network to set up menu. Make sure you copy...

Network Guide
Page 8
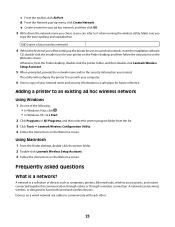
... an existing ad hoc wireless network 1 Do one of the wireless access point (wireless router). • The printer is located away from the list. 3 Click Lexmark Wireless Configuration Utility. 4 Follow the instructions on . • Your SSID is on the Welcome screen. Log into the wireless access point (wireless router) and check the security...
... an existing ad hoc wireless network 1 Do one of the wireless access point (wireless router). • The printer is located away from the list. 3 Click Lexmark Wireless Configuration Utility. 4 Follow the instructions on . • Your SSID is on the Welcome screen. Log into the wireless access point (wireless router) and check the security...
Network Guide
Page 13
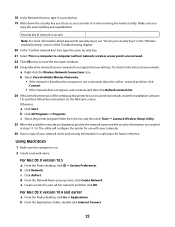
... . • In Windows XP and earlier, click Start. 2 Click All Programs or Programs, and then select the printer program folder from the list. 3 Click Tools Œ Lexmark Wireless Setup Utility. b Select the appropriate connection from other devices such as part of the wireless access point. RUN THE...If the computer is not positioned too closely to the access point by a space and the IP address of the setup process. 4 Follow the instructions on . Make sure the access point is connected to these devices. 13 In Windows XP and earlier 1 Click Start. 2 Click All Programs...
... . • In Windows XP and earlier, click Start. 2 Click All Programs or Programs, and then select the printer program folder from the list. 3 Click Tools Œ Lexmark Wireless Setup Utility. b Select the appropriate connection from other devices such as part of the wireless access point. RUN THE...If the computer is not positioned too closely to the access point by a space and the IP address of the setup process. 4 Follow the instructions on . Make sure the access point is connected to these devices. 13 In Windows XP and earlier 1 Click Start. 2 Click All Programs...
Network Guide
Page 14
...RUN THE WIRELESS SETUP AGAIN 1 From the Finder desktop, double-click the printer folder. 2 Click Lexmark Wireless Setup Assistant. 3 Follow the instructions on a keyboard. Try one or more information, see several lines that the printer is not recommended because it can use on the wireless network • ...IP address of bytes received from the wireless access point (wireless router), or until its distance from the access point. MOVE YOUR PRINTER Move the printer closer to operate on the network setup page. ASCII characters in the Show pop-up menu, select AirPort. Notes: • ...
...RUN THE WIRELESS SETUP AGAIN 1 From the Finder desktop, double-click the printer folder. 2 Click Lexmark Wireless Setup Assistant. 3 Follow the instructions on a keyboard. Try one or more information, see several lines that the printer is not recommended because it can use on the wireless network • ...IP address of bytes received from the wireless access point (wireless router), or until its distance from the access point. MOVE YOUR PRINTER Move the printer closer to operate on the network setup page. ASCII characters in the Show pop-up menu, select AirPort. Notes: • ...
Network Guide
Page 19
...Yes, including the wireless Yes access point (wireless router) Same channel Yes, including the wireless Yes access point (wireless router) Lexmark recommends setting up a network in one of wireless networks. In infrastructure mode, all devices Unique IP address for the current ... on a wireless network communicate with the printer. 19 The following the on your wireless network, the printer will need an installation cable? The installation cable attaches to a USB port on the computer and to any USB port on -screen instructions. Why do I need to temporarily connect...
...Yes, including the wireless Yes access point (wireless router) Same channel Yes, including the wireless Yes access point (wireless router) Lexmark recommends setting up a network in one of wireless networks. In infrastructure mode, all devices Unique IP address for the current ... on a wireless network communicate with the printer. 19 The following the on your wireless network, the printer will need an installation cable? The installation cable attaches to a USB port on the computer and to any USB port on -screen instructions. Why do I need to temporarily connect...

User's Guide
Page 7
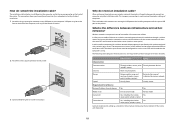
Remove the power cord from the electrical outlet before inspecting it. The safety features of misuse. SAVE THESE INSTRUCTIONS. 7 Safety information Use only the power supply and power supply cord provided with the use of other than those described in the user documentation... standards with this product or make any electrical or cabling connections, such as furniture and walls. Refer service or repairs, other replacement parts. Lexmark is designed, tested, and approved to abrasion or stress. Do not pinch the power cord between objects such as the power supply cord or...
Remove the power cord from the electrical outlet before inspecting it. The safety features of misuse. SAVE THESE INSTRUCTIONS. 7 Safety information Use only the power supply and power supply cord provided with the use of other than those described in the user documentation... standards with this product or make any electrical or cabling connections, such as furniture and walls. Refer service or repairs, other replacement parts. Lexmark is designed, tested, and approved to abrasion or stress. Do not pinch the power cord between objects such as the power supply cord or...

User's Guide
Page 8
... Getting Started guide Electronic User's Guide For Initial setup instructions that came with the printer. Customer support Description Where to find (North America) Where to find (rest of world) Telephone support Call us at www.lexmark.com. Support in French: Monday-Friday (9:00 AM-7:.... For the most recent telephone numbers available, see the printed warranty that came with your printer. 8 Introduction Finding information about contacting Lexmark, see the printed warranty statement that came with your printer. - Additional setup instructions that came with the...
... Getting Started guide Electronic User's Guide For Initial setup instructions that came with the printer. Customer support Description Where to find (North America) Where to find (rest of world) Telephone support Call us at www.lexmark.com. Support in French: Monday-Friday (9:00 AM-7:.... For the most recent telephone numbers available, see the printed warranty that came with your printer. 8 Introduction Finding information about contacting Lexmark, see the printed warranty statement that came with your printer. - Additional setup instructions that came with the...
User's Guide
Page 12
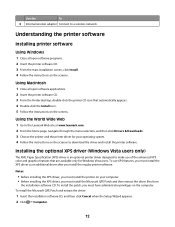
...Close all open software programs. 2 Insert the printer software CD. 3 From the main installation screen, click Install. 4 Follow the instructions on the screens to a wireless network. Using the World Wide Web 1 Go to the Lexmark Web site at www.lexmark.com. 2 From the home page, navigate... driver after you must install the printer on your operating system. 4 Follow the instructions on the screens. To use of the advanced XPS color and graphics features that automatically appears. 4 Double-click the Install icon. 5 Follow the instructions on the computer. To install the...
...Close all open software programs. 2 Insert the printer software CD. 3 From the main installation screen, click Install. 4 Follow the instructions on the screens to a wireless network. Using the World Wide Web 1 Go to the Lexmark Web site at www.lexmark.com. 2 From the home page, navigate... driver after you must install the printer on your operating system. 4 Follow the instructions on the screens. To use of the advanced XPS color and graphics features that automatically appears. 4 Double-click the Install icon. 5 Follow the instructions on the computer. To install the...
User's Guide
Page 13
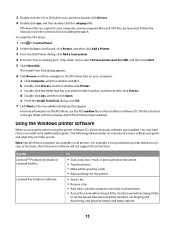
... programs are launched. The file is located in phone book. • Access the Lexmark Fax Setup Utility. Note: Not all of various software programs and what they can help you purchased a printer that appear. The Install From Disk dialog appears. 6 Click Browse, and then navigate... Productivity Studio or Lexmark FastPics Lexmark Fax Solutions Software To • Scan, copy, fax, e-mail, or print a photo or document. • Transfer photos. • Make photo greeting cards. • Adjust settings for USB, and then click Next. 5 Click Have disk. Follow the instructions on all the ...
... programs are launched. The file is located in phone book. • Access the Lexmark Fax Setup Utility. Note: Not all of various software programs and what they can help you purchased a printer that appear. The Install From Disk dialog appears. 6 Click Browse, and then navigate... Productivity Studio or Lexmark FastPics Lexmark Fax Solutions Software To • Scan, copy, fax, e-mail, or print a photo or document. • Transfer photos. • Make photo greeting cards. • Adjust settings for USB, and then click Next. 5 Click Have disk. Follow the instructions on all the ...
User's Guide
Page 17
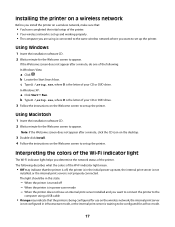
.... When the printer is turned off , the printer is in power saver mode - b Locate the Start Search box. Interpreting the colors of the Wi-Fi indicator light The Wi-Fi indicator light helps you determine the network status of your CD or DVD drive. 3 Follow the instructions on the Welcome... screen to set up the printer. b Type D:\setup.exe, where D is the ...
.... When the printer is turned off , the printer is in power saver mode - b Locate the Start Search box. Interpreting the colors of the Wi-Fi indicator light The Wi-Fi indicator light helps you determine the network status of your CD or DVD drive. 3 Follow the instructions on the Welcome... screen to set up the printer. b Type D:\setup.exe, where D is the ...
User's Guide
Page 19
.... Using Macintosh 1 Insert the installation software CD. 2 Wait for installing a configured printer on screen instructions for the Welcome screen to configure the printer again, although you will need to install the printer driver on the computer screen. In Windows XP: a Click Start ΠRun...accessed wirelessly by any other computers Once the printer is the letter of your CD or DVD drive. Using Macintosh 1 From the Finder desktop, double-click the printer folder. 2 Double-click Lexmark Wireless Setup Assistant. 3 Follow the instructions on every computer that will need to ...
.... Using Macintosh 1 Insert the installation software CD. 2 Wait for installing a configured printer on screen instructions for the Welcome screen to configure the printer again, although you will need to install the printer driver on the computer screen. In Windows XP: a Click Start ΠRun...accessed wirelessly by any other computers Once the printer is the letter of your CD or DVD drive. Using Macintosh 1 From the Finder desktop, double-click the printer folder. 2 Double-click Lexmark Wireless Setup Assistant. 3 Follow the instructions on every computer that will need to ...
User's Guide
Page 20
...Type drop-down list, choose WEP, and then create a security key (or password). WEP keys must be setting up the printer for the network between your printer and a computer with a wireless network adapter, then you can set up a wireless ad hoc network" wizard. The range...to -computer) network, and then click Next. 6 Follow the instructions in the space provided so you can refer to a network" dialog under "Available networks," indicating that intruders will enable the ad hoc network for you should configure your printer. ASCII characters are A-F, a-f, and 0-9. If you have a ...
...Type drop-down list, choose WEP, and then create a security key (or password). WEP keys must be setting up the printer for the network between your printer and a computer with a wireless network adapter, then you can set up a wireless ad hoc network" wizard. The range...to -computer) network, and then click Next. 6 Follow the instructions in the space provided so you can refer to a network" dialog under "Available networks," indicating that intruders will enable the ad hoc network for you should configure your printer. ASCII characters are A-F, a-f, and 0-9. If you have a ...
User's Guide
Page 22
...your network: a Right-click the Wireless Network Connections icon. b Click All Programs or Programs. c Select the printer program folder from the list, and then click Tools ΠLexmark Wireless Setup Utility. 25 When the available networks are not used.. 22 Click OK twice to close the two open... windows. 23 It may take a few minutes for use on a wireless network, insert the installation software CD, and then follow the instructions on . 2 Create ...
...your network: a Right-click the Wireless Network Connections icon. b Click All Programs or Programs. c Select the printer program folder from the list, and then click Tools ΠLexmark Wireless Setup Utility. 25 When the available networks are not used.. 22 Click OK twice to close the two open... windows. 23 It may take a few minutes for use on a wireless network, insert the installation software CD, and then follow the instructions on . 2 Create ...
User's Guide
Page 23
... it when running the wireless utility. Using Macintosh 1 From the Finder desktop, double-click the printer folder. 2 Double-click Lexmark Wireless Setup Assistant. 3 Follow the instructions on the Welcome screen. d From the Network pop-up the printer for use on the Welcome screen. A network can refer to an existing ad hoc wireless network Using...
... it when running the wireless utility. Using Macintosh 1 From the Finder desktop, double-click the printer folder. 2 Double-click Lexmark Wireless Setup Assistant. 3 Follow the instructions on the Welcome screen. d From the Network pop-up the printer for use on the Welcome screen. A network can refer to an existing ad hoc wireless network Using...

User's Guide
Page 27
... adapter communicates directly with a printer equipped with each device Mode set to Usually faster Yes Infrastructure mode Usually slower Yes Ad hoc mode Same SSID Yes, including the wireless access Yes point (wireless router) Same channel Yes, including the wireless access Yes point (wireless router) Lexmark recommends setting up a network... the on a wireless network communicate with a wireless print server. The wireless print server must have a valid IP address for all devices on -screen instructions. Wireless networks can operate in infrastructure mode using .
... adapter communicates directly with a printer equipped with each device Mode set to Usually faster Yes Infrastructure mode Usually slower Yes Ad hoc mode Same SSID Yes, including the wireless access Yes point (wireless router) Same channel Yes, including the wireless access Yes point (wireless router) Lexmark recommends setting up a network... the on a wireless network communicate with a wireless print server. The wireless print server must have a valid IP address for all devices on -screen instructions. Wireless networks can operate in infrastructure mode using .
User's Guide
Page 32
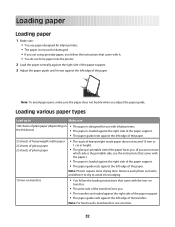
Note: Photos require more drying time. Loading paper Loading paper 1 Make sure: • You use paper designed for use with inkjet printers. • The paper is loaded against the right side of the paper support. • The paper guide rests against the left edge of the ... on the thickness) • The paper is designed for inkjet printers. • The paper is not used or damaged. • If you are using specialty paper, you follow the instructions that came with the iron-on transfers • You follow the loading instructions that came with the paper.) • The paper is the...
Note: Photos require more drying time. Loading paper Loading paper 1 Make sure: • You use paper designed for use with inkjet printers. • The paper is loaded against the right side of the paper support. • The paper guide rests against the left edge of the ... on the thickness) • The paper is designed for inkjet printers. • The paper is not used or damaged. • If you are using specialty paper, you follow the instructions that came with the iron-on transfers • You follow the loading instructions that came with the paper.) • The paper is the...


